
BBQ Bacon Cheeseburger Bombs: The Ultimate Bite-Sized Comfort Food
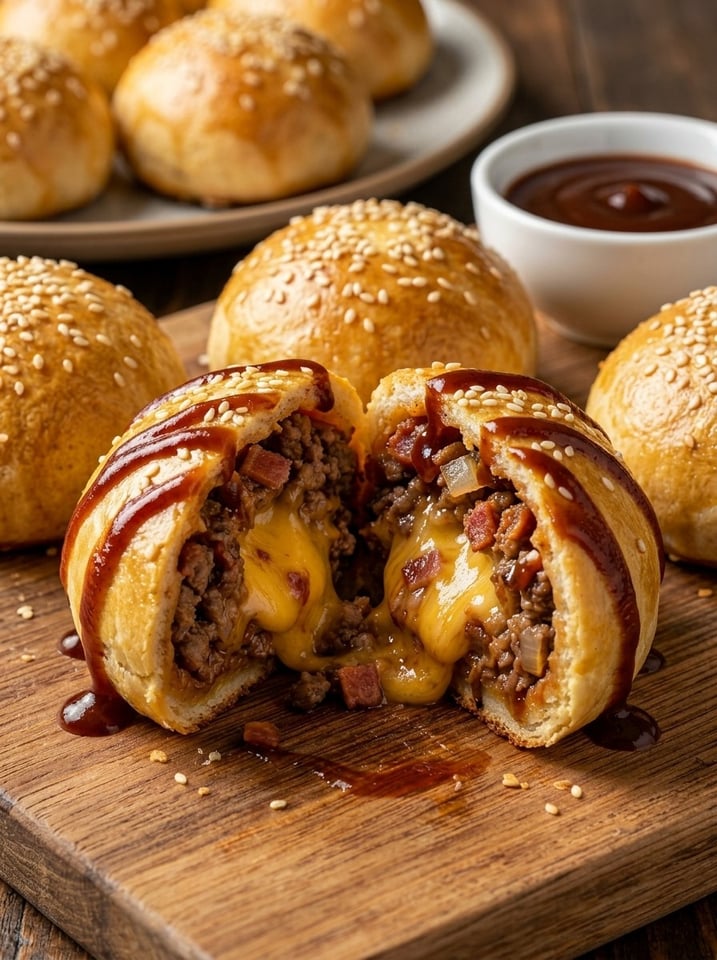
BBQ Bacon Cheeseburger Bombs: The Ultimate Bite-Sized Comfort Food
If you love the flavor of a loaded cheeseburger but want something fun, portable, and perfect for sharing, these BBQ Bacon Cheeseburger Bombs are about to become your new go-to recipe. Imagine everything you love about a classic burger — juicy seasoned beef, crispy bacon, gooey melted cheddar, and smoky-sweet barbecue sauce — all tucked inside a soft, golden pocket of biscuit dough. Each bite delivers a satisfying pop of flavor, making these the perfect handheld snack for game days, parties, potlucks, or a fun family dinner that both kids and adults will devour.
Best of all, this recipe comes together in under 40 minutes with simple, easy-to-find ingredients. No complicated techniques, no fancy equipment — just bold burger flavor wrapped up in a fun new format. In this guide, you’ll find the full recipe, step-by-step instructions, expert tips for perfect results, ingredient swaps, serving suggestions, storage tips, and answers to frequently asked questions about making cheeseburger bombs at home.
Why You’ll Love These BBQ Bacon Cheeseburger Bombs
These cheesy, bacon-packed bites check every box for an easy, crowd-pleasing recipe:
- They’re incredibly easy to make. With refrigerated biscuit dough as the base, there’s no need to make dough from scratch. The whole recipe comes together in about 38 minutes.
- They’re loaded with bold, smoky flavor. Barbecue sauce, smoked paprika, and crispy bacon give these bombs a rich, savory depth that goes beyond a standard cheeseburger.
- They’re perfectly portable. Unlike a traditional burger, these bite-sized pockets are mess-free and easy to eat with your hands — ideal for parties, tailgates, lunchboxes, and game-day spreads.
- They’re endlessly customizable. Swap the cheese, adjust the seasoning, or add your favorite burger toppings to make this recipe your own.
- They reheat beautifully. Make a big batch and enjoy leftovers throughout the week without sacrificing flavor or texture.
Whether you’re feeding a hungry family or looking for the next big hit at your next get-together, these BBQ Bacon Cheeseburger Bombs deliver serious flavor in every bite.
Ingredients You’ll Need
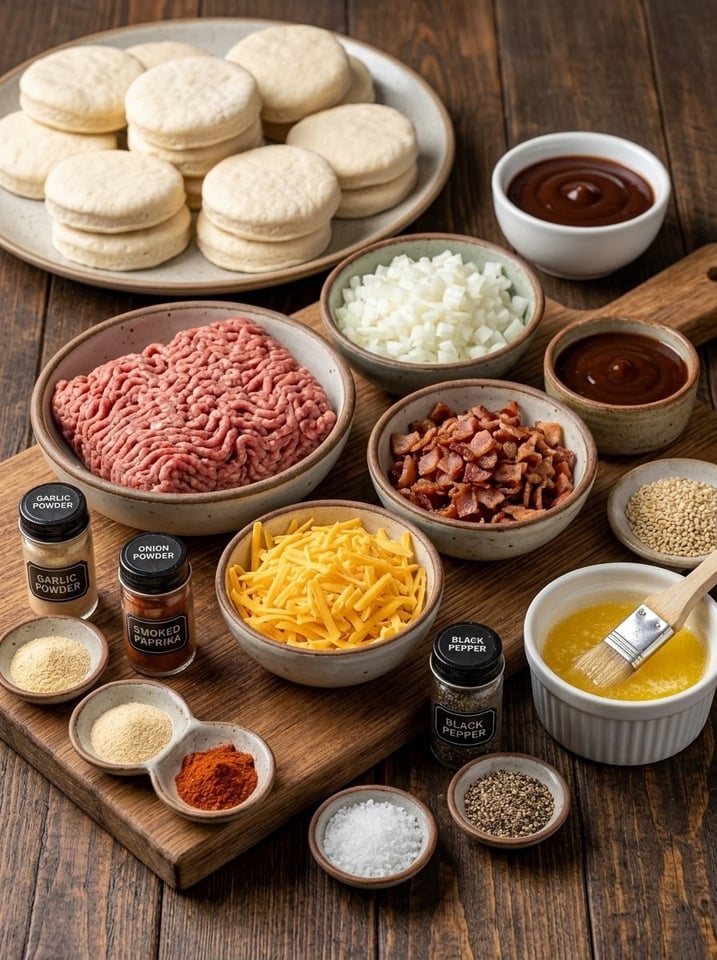
This recipe comes together with two simple components: a savory, cheesy beef filling and a soft biscuit dough wrapper.
For the Filling
- 1 lb ground beef
- 6 slices bacon, cooked and crumbled
- 1 cup shredded cheddar cheese
- ¼ cup barbecue sauce
- ½ small onion, finely diced
- 1 tsp garlic powder
- 1 tsp onion powder
- ½ tsp smoked paprika
- Salt and black pepper, to taste
For the Dough
- 1 can (16 oz) refrigerated biscuit dough
- 1 tbsp melted butter
- 1 tbsp sesame seeds (optional)
Prep Time: 20 minutes Cook Time: 18 minutes Total Time: 38 minutes Servings: 8 bombs
How to Make BBQ Bacon Cheeseburger Bombs
Follow these simple steps for perfectly golden, cheesy, flavor-packed bombs every time.
Step 1: Preheat the Oven
Preheat your oven to 375°F (190°C) and line a baking sheet with parchment paper. Having your pan prepped ahead of time makes the assembly process go much more smoothly once your filling is ready.
Step 2: Cook the Beef
In a skillet over medium heat, cook the ground beef and diced onion together until the beef is fully browned and the onion has softened, about 6–8 minutes. Break the beef apart into small crumbles as it cooks for even texture throughout the filling. Once cooked, drain any excess grease from the skillet to prevent the filling from becoming soggy.
Step 3: Prepare the Filling
With the skillet still warm (off the heat or on low), stir in the garlic powder, onion powder, smoked paprika, salt, and pepper. Add the barbecue sauce and mix until the beef is evenly coated. Fold in the crumbled bacon and shredded cheddar cheese, stirring until everything is well combined.
Let the filling cool slightly before assembling — this makes it much easier to handle and helps prevent the dough from becoming greasy or tearing during filling.
Step 4: Prepare the Dough
Open the can of refrigerated biscuit dough and separate it into individual pieces. Using your hands or a rolling pin, flatten each biscuit into a roughly 4-inch circle. Try to keep the edges slightly thinner than the center, as this makes sealing the bombs easier and prevents a thick, doughy seam.
Step 5: Fill the Bombs
Spoon a generous portion of the cheeseburger filling into the center of each dough circle. Be careful not to overfill, as too much filling can make sealing difficult and cause the bombs to burst open while baking.
Gently gather the edges of the dough up and over the filling, pinching tightly to seal. Roll the sealed bomb gently between your palms to smooth out the seams and create a uniform, round shape.
Step 6: Arrange and Top
Place the bombs seam-side down on your prepared baking sheet, spacing them a couple of inches apart to allow for even baking. Placing them seam-side down helps keep them sealed while baking and gives them a smooth, rounded top.
Brush each bomb with melted butter, which helps create a beautifully golden, glossy crust. If desired, sprinkle sesame seeds on top for added texture and a classic burger-bun look.
Step 7: Bake Until Golden
Bake for 15–18 minutes, or until the dough is deeply golden brown on top and cooked through. Baking times can vary slightly depending on your oven and the size of your dough circles, so keep an eye on them during the final few minutes.
Step 8: Cool and Serve
Allow the bombs to cool for a few minutes before serving — the cheese filling will be extremely hot straight out of the oven. Serve warm, drizzled with extra barbecue sauce or alongside your favorite dipping sauces like ranch, spicy mayo, or ketchup.
Tips for Perfect Cheeseburger Bombs
A few small details can make a big difference in how these turn out. Keep these tips in mind:
Don’t skip draining the beef. Excess grease can seep into the dough and make it soggy instead of crisp and golden.
Let the filling cool slightly before assembling. Hot filling can make the dough difficult to work with and increases the risk of tearing.
Seal the seams tightly. A well-pinched seam prevents the cheesy filling from leaking out during baking. If you’re having trouble sealing, a small dab of water on the dough’s edge can help it stick together.
Don’t overfill. It can be tempting to pack in as much filling as possible, but overfilled dough is more likely to burst open in the oven. Stick to about 2–3 tablespoons of filling per bomb.
Use a baking sheet with parchment paper. This prevents sticking and makes cleanup much easier, especially if any cheese leaks out during baking.
Check for doneness by color, not just time. Ovens vary, so rely on a deep golden-brown color as your main indicator that the dough is fully baked through.
Ingredient Substitutions and Variations
One of the best things about this recipe is how adaptable it is. Here are some ways to make it your own:
Ground meat options: Ground turkey or ground chicken can be used in place of beef for a leaner version. Ground pork or a beef-pork blend also works well for extra flavor.
Cheese swaps: Pepper jack adds a spicy kick, while mozzarella creates an extra gooey, stretchy texture. Smoked gouda pairs especially well with the barbecue and bacon flavors.
Dough alternatives: While refrigerated biscuit dough keeps this recipe quick and easy, you can also use pizza dough, crescent roll dough, or even puff pastry for a flakier texture.
Sauce variations: Swap the barbecue sauce for a spicy chipotle sauce, honey mustard, or classic burger sauce for a different flavor profile.
Add-ins: Try mixing in diced jalapeños for heat, sautéed mushrooms for an umami boost, or a spoonful of caramelized onions for extra sweetness.
Make them mini: For party-friendly bite-sized appetizers, cut the biscuit dough into smaller pieces and use about a tablespoon of filling per bomb, adjusting the baking time down to around 10–12 minutes.
What to Serve with BBQ Bacon Cheeseburger Bombs
These cheesy bombs are hearty enough to serve as a main dish, but they also shine as a party appetizer or game-day snack. Here are some great pairings:
- Crispy French fries or sweet potato fries
- A cool, crunchy coleslaw
- Fresh vegetable and dip platter
- Pickle spears or pickled onions for a tangy contrast
- A side of extra barbecue sauce, ranch, or spicy mayo for dipping
- A simple green salad to balance out the richness
For a full game-day spread, pair these bombs with other finger foods like loaded nachos, chicken wings, or a cheesy dip for a well-rounded party menu.
How to Store and Reheat Leftovers
Refrigerating: Store leftover cheeseburger bombs in an airtight container in the refrigerator for up to 4 days.
Freezing: These bombs freeze well both before and after baking. To freeze unbaked, assemble the bombs completely, then place them on a baking sheet in the freezer until firm before transferring to a freezer-safe bag. Bake from frozen, adding a few extra minutes to the cook time. To freeze after baking, let them cool completely before storing in a freezer-safe container for up to 2 months.
Reheating: For the best texture, reheat leftover bombs in the oven at 350°F (175°C) for about 10 minutes, or until warmed through and the dough is crisp again. The microwave works in a pinch, but the dough will be softer rather than crisp.
Frequently Asked Questions
Can I make these ahead of time? Yes. You can prepare the filling up to 2 days in advance and store it in the refrigerator. You can also fully assemble the bombs and refrigerate them, unbaked, for a few hours before baking.
Why did my cheeseburger bombs open up while baking? This usually happens when the dough wasn’t sealed tightly enough or when too much filling was used. Be sure to pinch the seams firmly and avoid overfilling each piece of dough.
Can I use homemade dough instead of canned biscuit dough? Absolutely. Homemade biscuit or pizza dough works well as a substitute — just make sure it’s rolled to a similar thickness so the bombs bake evenly.
What’s the best cheese for this recipe? Cheddar is classic and melts beautifully, but mozzarella, pepper jack, or smoked gouda are all excellent options depending on the flavor profile you’re after.
Can I make these gluten-free? Yes, by using a gluten-free biscuit or crescent dough alternative. Be sure to check that your barbecue sauce and other seasonings are also gluten-free.
How do I keep the filling from making the dough soggy? Make sure to thoroughly drain the cooked beef of excess grease, and let the filling cool slightly before assembling so it doesn’t create too much steam inside the dough while baking.
Can I air fry these instead of baking? Yes. Air fry at 350°F (175°C) for about 10–12 minutes, checking periodically, until the dough is golden brown and cooked through.
Final Thoughts
These BBQ Bacon Cheeseburger Bombs bring together everything people love about a classic cheeseburger — smoky bacon, melty cheese, savory beef, and tangy barbecue sauce — in a fun, easy-to-eat package that’s perfect for any occasion. They come together quickly with simple ingredients, making them a reliable go-to whether you’re hosting a party, feeding your family on a busy weeknight, or looking for a crowd-pleasing game-day snack.
Once you try this recipe, don’t be surprised if it becomes a regular request. Customize it with your favorite cheeses, sauces, and add-ins, and enjoy every cheesy, bacon-loaded bite.