
Chocolate Cherry Dream Dessert
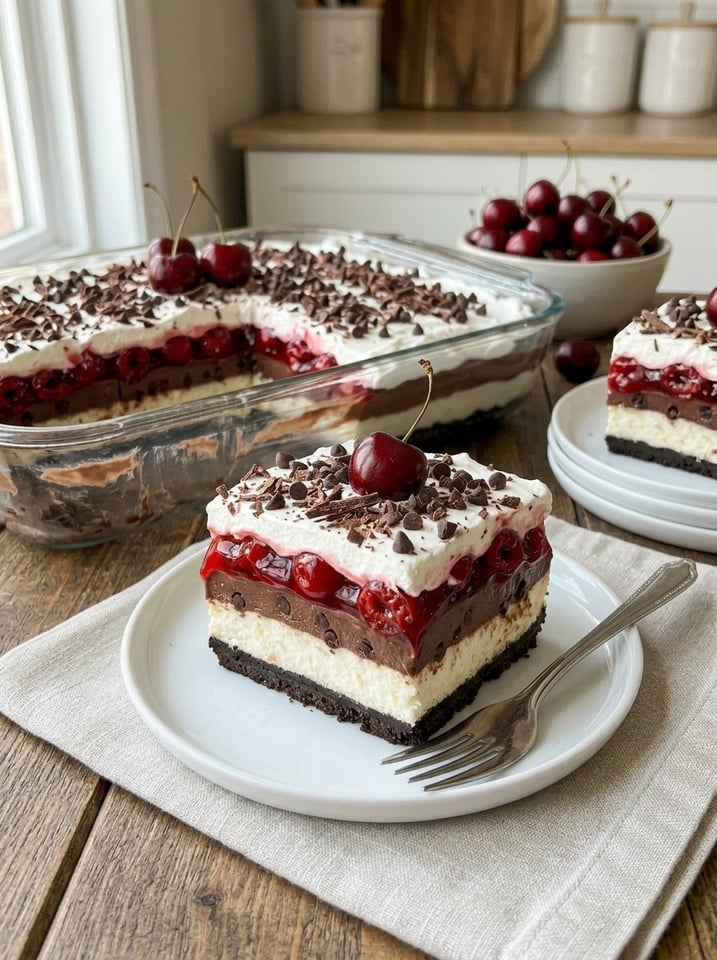
Chocolate Cherry Dream Dessert (Easy No-Bake Recipe)
If you’re looking for a show-stopping dessert that requires zero oven time, this Chocolate Cherry Dream Dessert is exactly what you need. With layers of buttery chocolate cookie crust, velvety cheesecake filling, rich chocolate pudding, sweet-tart cherry pie filling, and fluffy whipped topping, this dessert delivers every bit of indulgence you’d expect from a baked treat — without ever turning on the oven.
This no-bake chocolate cherry dessert is a favorite for potlucks, holiday gatherings, birthday parties, and busy weeknights when you want something special without a lot of effort. Each layer builds on the last, creating a dessert that’s as beautiful to look at as it is delicious to eat. Below you’ll find the full recipe, plus tips, variations, storage advice, and answers to frequently asked questions to help you make this dessert perfectly every time.
Why This Dessert Is a Must-Try
There are countless reasons this layered chocolate cherry treat has become such a popular choice for home cooks and dessert lovers alike:
- No oven required. This is a true no-bake dessert, making it perfect for hot summer days or whenever you want to skip heating up the kitchen.
- Stunning layered presentation. The distinct layers of chocolate crust, creamy cheesecake, chocolate pudding, cherries, and whipped topping create a beautiful visual that looks like it came from a bakery.
- Perfectly balanced flavors. Rich chocolate, tangy cream cheese, and sweet-tart cherries come together in a way that feels indulgent but never overly sweet.
- Make-ahead friendly. Because it needs to chill for several hours (or overnight), this dessert is ideal for preparing in advance of a party or gathering.
- Crowd-pleasing and easy to portion. Cut into neat squares, it’s simple to serve a crowd, or you can layer it into individual cups for a more elegant presentation.
- Customizable. From swapping the crust to adding extra garnishes, this recipe is easy to adapt to your taste or what you have on hand.
Ingredient Breakdown
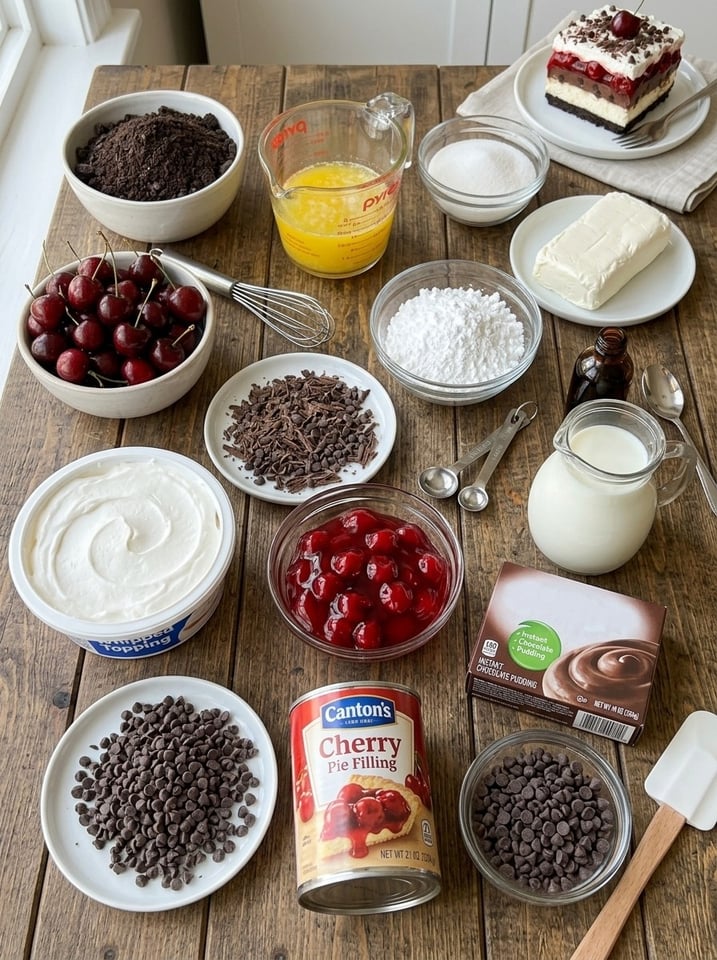
This dessert comes together in five distinct layers, each contributing its own texture and flavor. Here’s everything you’ll need.
Chocolate Cookie Crust
- 2 cups chocolate cookie crumbs
- ½ cup unsalted butter, melted
- 2 tablespoons granulated sugar
This layer forms the sturdy, buttery base of the dessert. The combination of chocolate cookie crumbs and melted butter creates a crust similar to a cheesecake base, while the sugar adds a touch of extra sweetness and helps the crust set firmly.
Cream Cheese Layer
- 8 oz (225 g) cream cheese, softened
- ½ cup powdered sugar
- 1 teaspoon vanilla extract
- 1 cup whipped topping
This layer brings a tangy, creamy contrast to the sweeter layers above and below it. Folding in whipped topping lightens the texture, giving it a mousse-like consistency rather than a dense cheesecake layer.
Chocolate Layer
- 1 package (3.9 oz / 110 g) instant chocolate pudding mix
- 2 cups cold whole milk
- ½ cup mini chocolate chips
The instant pudding layer adds rich, deep chocolate flavor and a smooth, creamy texture. The mini chocolate chips scattered throughout add little bursts of extra chocolate in every bite.
Cherry Layer
- 1 can (21 oz / 595 g) cherry pie filling
This layer provides the fruity, slightly tart contrast that balances all the rich, creamy layers surrounding it. The vibrant red color also makes for a gorgeous visual layer when the dessert is sliced.
Topping
- 2 cups whipped topping
- ¼ cup chocolate shavings or mini chocolate chips
- Fresh cherries, optional
The finishing touch. A generous layer of whipped topping adds lightness, while chocolate shavings and fresh cherries make the dessert look as impressive as it tastes.
Recipe Snapshot
- Prep Time: 25 minutes
- Chill Time: 4 hours
- Total Time: 4 hours 25 minutes
- Servings: 12
Step-by-Step Instructions
Step 1: Make the Chocolate Crust
In a medium mixing bowl, combine the chocolate cookie crumbs, melted butter, and granulated sugar. Stir until the crumbs are evenly moistened and hold together when pressed.
Transfer the mixture to a 9×13-inch baking dish and press it firmly and evenly into the bottom using the back of a spoon or the bottom of a measuring cup. Refrigerate the crust for 15 to 20 minutes to allow it to set before adding the next layer.
Step 2: Prepare the Cream Cheese Layer
In a mixing bowl, beat the softened cream cheese and powdered sugar together until completely smooth and creamy, with no lumps remaining. Add the vanilla extract and mix to combine.
Gently fold in 1 cup of whipped topping until the mixture is light and fluffy. Spread this cream cheese layer evenly over the chilled chocolate crust, smoothing it out with a spatula.
Step 3: Make the Chocolate Pudding Layer
In a separate bowl, whisk together the instant chocolate pudding mix and cold whole milk for about 2 minutes, or until the mixture has thickened to a pudding-like consistency.
Fold in the mini chocolate chips, then spread the chocolate pudding evenly over the cream cheese layer, taking care not to disturb the layer beneath it.
Step 4: Add the Cherry Layer
Spoon the cherry pie filling over the chocolate pudding layer. Gently spread it into an even layer using the back of a spoon, being careful to keep the layers distinct and avoid mixing them together.
Step 5: Add the Final Whipped Topping Layer
Spread the remaining whipped topping evenly over the cherry layer, smoothing the top with a spatula for a clean, finished look.
Step 6: Chill
Cover the dessert tightly and refrigerate for at least 4 hours. For the best texture and cleanest layers when slicing, chilling overnight is ideal.
Step 7: Garnish and Serve
Just before serving, sprinkle the top with chocolate shavings or mini chocolate chips. Add fresh cherries on top if desired for an extra pop of color and flavor. Cut into squares and serve chilled.
Tips for the Best Chocolate Cherry Dream Dessert
- Soften the cream cheese fully. Cold or partially softened cream cheese can leave lumps in your filling. Let it sit at room temperature for at least 30 minutes before mixing for the smoothest texture.
- Chill overnight when possible. While 4 hours is the minimum, letting the dessert chill overnight results in cleaner layers and improved flavor as everything has more time to set and meld together.
- Drain excess liquid from the cherries if needed. If your cherry pie filling seems especially loose or watery, spoon off a bit of the excess liquid before layering to help the dessert hold its shape when sliced.
- Try an Oreo-style crust. Swapping the chocolate cookie crumbs for crushed Oreo cookies (with or without the cream filling) adds an even richer, more intensely chocolatey base.
- Make individual portions. For a more elegant presentation at parties, layer the ingredients into small clear cups or mason jars instead of a baking dish.
- Store properly. Keep the dessert covered in the refrigerator, and consume within 4 days for the best texture and flavor.
Serving Suggestions
This dreamy, layered dessert pairs beautifully with a variety of accompaniments:
- Vanilla ice cream — a classic pairing that adds extra creaminess.
- Fresh whipped cream — for an even lighter, fluffier bite.
- Chocolate sauce — drizzle over individual servings for extra decadence.
- Maraschino cherries — a fun, colorful garnish that complements the cherry layer.
- Fresh strawberries — adds a bright, fresh contrast to the rich layers.
- Hot coffee — the bitterness of coffee balances the dessert’s sweetness beautifully.
- Chocolate espresso — for chocolate lovers who want to double down on rich, deep flavor.
Creative Variations to Try
Once you’ve made the classic version, consider these fun twists:
- White chocolate cherry version: Swap the chocolate pudding for white chocolate or vanilla pudding for a lighter flavor profile that still pairs beautifully with the cherries.
- Nutty crunch: Add a layer of chopped toasted almonds or pecans between the cherry and whipped topping layers for extra texture.
- Brownie crust: Replace the cookie crust with a baked and cooled brownie layer for an even more decadent base.
- Mixed berry version: Substitute the cherry pie filling with a mixed berry or raspberry pie filling for a different fruity twist.
- Boozy upgrade: Add a splash of cherry liqueur or amaretto to the cream cheese layer for an adults-only version of this dessert.
- Mini trifle cups: Layer all the components into individual glasses or jars for a beautiful, portion-controlled trifle-style presentation.
How to Store Leftovers
This dessert stores well, making it a great make-ahead option for parties and gatherings.
Refrigerator: Store covered tightly with plastic wrap or in an airtight container in the refrigerator for up to 4 days.
Freezing: While this dessert can technically be frozen, the texture of the whipped topping and cream cheese layers may change slightly upon thawing. If you do freeze it, thaw it slowly in the refrigerator and consume within a day or two of thawing for the best texture.
Make-ahead tip: This dessert is ideal for preparing a day in advance of a party or holiday gathering, as the extended chilling time only improves the flavor and texture.
Frequently Asked Questions
Can I use homemade whipped cream instead of whipped topping? Yes, though homemade whipped cream is softer and less stable than store-bought whipped topping, so the layers may not hold their shape quite as firmly, especially after a few days in the refrigerator.
Can I make this dessert without cherry pie filling? Absolutely. Feel free to substitute with a different fruit pie filling, such as blueberry, strawberry, or raspberry, depending on your preference.
Do I need to bake the crust? No, this crust does not require baking. Chilling it in the refrigerator is enough to help it set and hold together when sliced.
Can I make this in a different size dish? Yes, though a 9×13-inch dish is recommended for the listed ingredient quantities. If using a smaller dish, you may end up with thicker layers and could have leftover ingredients.
Why is my cream cheese layer lumpy? This usually happens when the cream cheese isn’t fully softened before mixing. Be sure to let it sit at room temperature for at least 30 minutes, and beat it thoroughly before adding the other ingredients.
Can I make this dessert dairy-free? Yes, with substitutions. Use dairy-free cream cheese, a non-dairy milk for the pudding, and a dairy-free whipped topping alternative. Be sure to check that your pudding mix and cookie crumbs are also dairy-free.
How far in advance can I make this dessert? This dessert can be made up to 2 days in advance and stored covered in the refrigerator, making it an excellent option for holidays and planned events.
Final Thoughts
This Chocolate Cherry Dream Dessert is proof that you don’t need to turn on the oven to create something truly spectacular. With its beautiful layers of chocolate crust, creamy cheesecake filling, rich chocolate pudding, sweet cherries, and fluffy whipped topping, this dessert is guaranteed to impress at any gathering. It’s simple to make, easy to customize, and always a hit with both kids and adults.
Whether you’re planning a holiday dessert table, a summer potluck, or just want a decadent treat to enjoy at home, this no-bake chocolate cherry dessert deserves a spot in your recipe rotation. Make it once, and it’s sure to become a request at every future gathering.