
Homemade Italian Bread
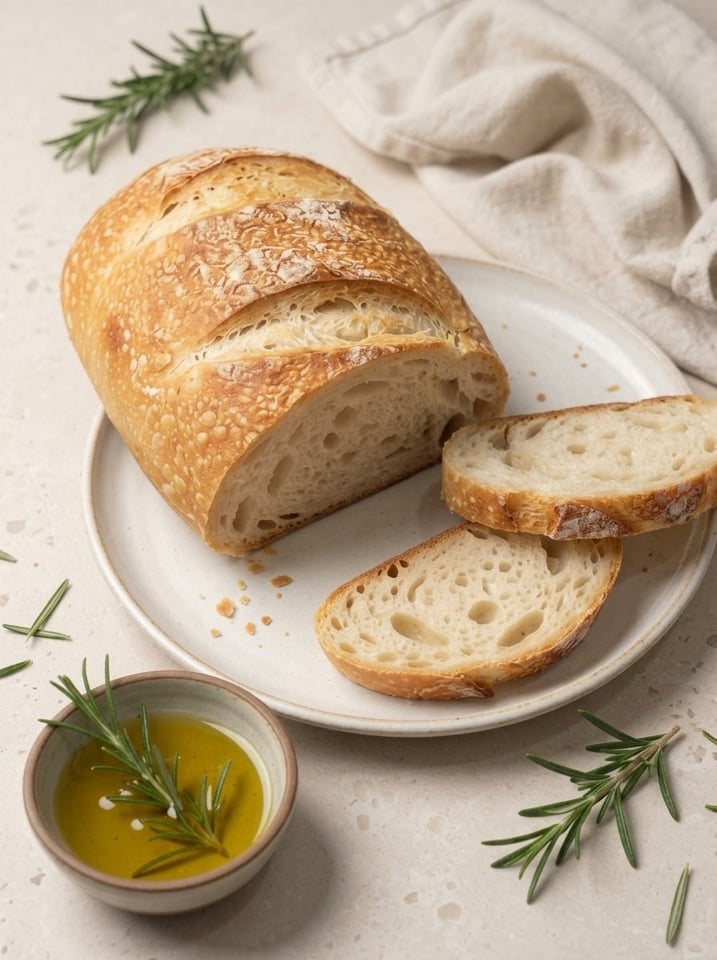
Homemade Italian Bread: Crispy on the Outside & Soft on the Inside!
Homemade Italian Bread – Easy Crusty Loaf with a Soft, Airy Crumb
Meta description: Bake crispy, golden homemade Italian bread with a soft, airy interior using simple pantry ingredients. Easy step-by-step recipe with steam tips, scoring, storage, and serving ideas.
Focus keywords: homemade Italian bread, Italian bread recipe, crusty Italian bread, easy yeast bread, homemade bread for beginners, crispy crust bread, how to bake Italian bread
There’s nothing quite like the smell of freshly baked Italian bread filling your kitchen! 😍 This Homemade Italian Bread has a beautifully golden, crispy crust and a soft, airy interior that makes every slice irresistible. Made with simple pantry ingredients, this classic bread is perfect for beginners and experienced home bakers alike!
Serve it warm with olive oil, turn it into delicious garlic bread, or use it to make your favorite sandwiches. Once you taste this homemade loaf, you’ll want to bake it again and again! 🥖✨
Italian bread is one of those recipes that feels almost magical. A handful of humble ingredients, flour, water, yeast, salt, a little sugar, and a splash of olive oil, turn into a long, golden loaf that crackles when you slice it. The crust shatters gently, the inside is tender and full of irregular holes, and the whole thing smells like a bakery. 🍞
You do not need a stand mixer, a Dutch oven, or any special equipment. A bowl, a wooden spoon, a baking sheet, and a hot oven are enough. In this complete guide, you will find the full recipe, a closer look at each ingredient, a detailed walkthrough of every step, tips for a crisp crust and soft crumb, troubleshooting advice, variations, serving ideas, storage and reheating instructions, and answers to common questions. Let’s bake! 👩🍳
⏱️ Recipe Details
- ⏱️ Prep Time: 20 minutes
- ⏳ Rise Time: 1½ to 2 hours
- 🔥 Cook Time: 25 to 30 minutes
- ⌛ Total Time: Approximately 2 hours 30 minutes
- 🍞 Yield: 1 large loaf
🤔 Why You Will Love This Homemade Italian Bread
- Crispy golden crust. Steam in the oven helps the loaf expand and develop a deep, crackly crust. 🔥
- Soft, airy interior. Proper kneading and two rises create a tender, open crumb.
- Simple ingredients. Everything in this recipe is likely already in your pantry.
- Beginner friendly. There is no complicated technique, and the dough is mixed by hand.
- Wonderfully versatile. Serve it with soup, slice it for sandwiches, or turn it into garlic bread.
- A bakery smell at home. Nothing makes a house feel cozier than a loaf in the oven. 😍
- Budget friendly. A loaf costs a fraction of artisan bread from a bakery.
- Freezer friendly. Bake once and keep slices on hand for later.
- Impressive to share. A long, scored loaf looks beautiful on a table.
- Satisfying to make. Kneading, shaping, and scoring the dough is a rewarding process. 🤲
🛒 Ingredients
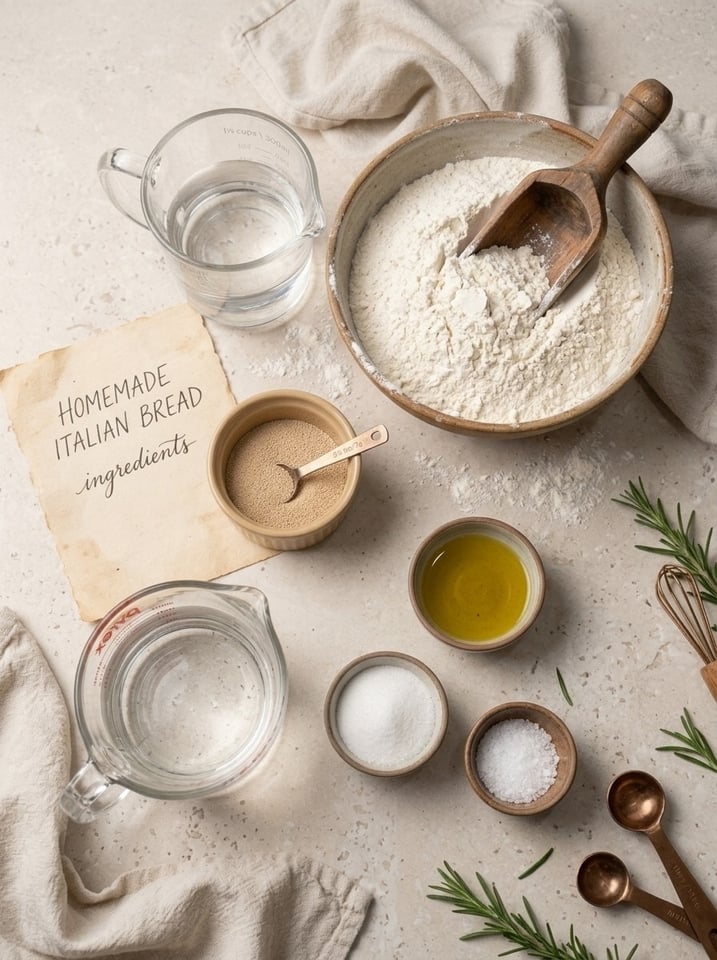
- 3½ cups (440 g) all-purpose flour or bread flour
- 1¼ cups (300 ml) warm water
- 2¼ teaspoons (7 g) active dry yeast
- 1 tablespoon olive oil
- 1 teaspoon sugar
- 1½ teaspoons salt
Optional for the Crust
- 1 tablespoon flour for dusting
- A little water for creating steam in the oven
🧐 A Closer Look at the Ingredients
Flour. All-purpose flour makes a soft, tender loaf with a slightly delicate crust. Bread flour has more protein, which builds more gluten and gives a chewier, loftier loaf. Both work well in this recipe, so use whichever you have. Measure carefully, preferably by weight. If you use cups, spoon the flour into the measuring cup and level it off rather than scooping it directly from the bag, which packs in too much flour and leads to dense bread.
Warm water. The water should feel comfortably warm, like a pleasant bath, not hot. Water that is too hot can damage the yeast, while water that is too cold slows it down. Warm water wakes the yeast gently and helps the dough rise at a steady pace.
Active dry yeast. The yeast makes the bread rise and gives it its characteristic flavor. The recipe uses 2¼ teaspoons (7 g), which is one standard packet. Make sure your yeast is fresh. Old yeast may not foam, and the bread will not rise properly.
Olive oil. A tablespoon of olive oil adds a subtle fruity flavor, softens the crumb, and makes the dough easier to handle.
Sugar. One teaspoon is just enough to feed the yeast and help it foam. It does not make the bread sweet, but it does help the crust brown.
Salt. Salt gives the bread flavor and controls the yeast, keeping the dough from rising too fast. Do not skip it. Bread without salt tastes flat.
Flour for dusting (optional). A little flour on the surface and on the baking sheet keeps the dough from sticking and gives the loaf a rustic look.
Water for steam (optional). Steam is the secret to a crisp crust. It keeps the surface of the loaf moist for the first few minutes of baking so the bread can expand fully before the crust sets.
👩🍳 Step-by-Step Instructions
1️⃣ Activate the Yeast 🫧
In a large bowl, combine the warm water, sugar, and active dry yeast. Let the mixture sit for 5 to 10 minutes until foamy. This indicates that the yeast is active. If nothing happens after 10 minutes, the yeast may be old or the water may have been too hot or too cold, and it is best to start again with fresh yeast.
2️⃣ Mix the Dough 🥣
Add the flour, salt, and olive oil. Stir with a wooden spoon until a rough dough forms and the ingredients are combined. At this stage, the dough will look shaggy and sticky, and that is exactly what you want.
3️⃣ Knead Until Smooth 🤲
Transfer the dough to a lightly floured surface and knead for 8 to 10 minutes, until smooth and elastic. If the dough is very sticky, add flour a little at a time, but avoid adding too much. Too much flour makes the bread dense and dry.
To knead, push the dough away from you with the heel of your hand, fold it back over itself, give it a quarter turn, and repeat. After several minutes, the dough will become smooth, springy, and slightly tacky rather than sticky.
4️⃣ Let the Dough Rise ⏳
Place the dough in a lightly oiled bowl and cover it with a clean kitchen towel. Let it rise in a warm place for 60 to 90 minutes, or until doubled in size. A turned-off oven with the light on, or a spot near a warm (not hot) appliance, works well.
5️⃣ Shape the Italian Loaf 🥖
Gently press the dough to release excess air. Shape it into a long oval loaf by folding the edges inward and pinching the seam closed. Place it seam-side down on parchment paper or a lightly floured baking sheet.
A good shape has a smooth, taut surface on top. If the surface looks loose, tuck the edges under a little more.
6️⃣ Let It Rise Again ✨
Cover the shaped loaf loosely and let it rise for another 30 to 45 minutes, until puffy. Meanwhile, preheat your oven to 425°F (220°C). The loaf should look visibly larger and feel soft and airy, and a gentle poke should leave a slowly springing dent.
7️⃣ Score the Top 🔪
Use a sharp knife or bread lame to make 2 to 3 shallow diagonal slashes across the top of the loaf. This allows the bread to expand as it bakes and gives it a traditional Italian bread appearance. Use a confident, quick motion, and keep the cuts shallow.
8️⃣ Bake for a Crispy Crust 🔥
Place the loaf in the oven. For a crispier crust, introduce steam during the first 10 minutes by placing a separate heatproof pan of hot water on the lower oven rack. Use oven-safe equipment and avoid pouring water directly onto the oven floor or hot glass.
Bake for 25 to 30 minutes, until the crust is deep golden brown and the loaf sounds hollow when tapped on the bottom.
9️⃣ Cool Before Slicing 🤍
Transfer the bread to a wire rack and allow it to cool for at least 30 minutes before slicing. This helps the inside finish setting while preserving the crispy crust. It is tempting to cut into the loaf right away, but slicing too early can make the crumb gummy.
💡 Tips for Perfect Crispy Italian Bread
- Measure flour carefully. Too much flour can make the bread dense.
- Use warm water, not hot. Excessively hot water can damage the yeast.
- Knead thoroughly. A smooth, elastic dough helps create a better crumb.
- Allow both rises. Proper fermentation develops flavor and texture.
- Create steam early. Steam helps the crust expand before it becomes crisp.
- Bake until deeply golden. A pale crust is usually less crisp and flavorful.
- Cool on a wire rack. Avoid covering the loaf while it cools, as trapped steam can soften the crust.
- Want an extra-crispy crust? Return sliced bread to a hot oven for a few minutes before serving.
- Use a hot oven. Make sure the oven is fully preheated to 425°F (220°C) before the loaf goes in.
- Score with a sharp blade. A dull knife drags and deflates the dough.
- Watch the dough, not just the clock. Rise times vary with room temperature, so look for the dough to double in size.
- Tap the bottom. A hollow sound is a reliable sign that the bread is done.
⚠️ Common Problems and How to Fix Them
The yeast did not foam. The yeast may be old, or the water may have been too hot or too cold. Use fresh yeast and warm water.
The dough is too sticky. Add flour a little at a time while kneading, but avoid adding too much. Slightly tacky dough is normal and gives a softer bread.
The dough is too dry or stiff. Add a teaspoon of warm water at a time and knead until smooth.
The dough is not rising. The room may be too cold. Move it to a warmer spot and give it more time.
The bread is dense. Too much flour, too little kneading, or not enough rising time may be the cause. Measure carefully, knead until elastic, and let the dough double in size.
The crust is pale and soft. Bake until deeply golden, create steam during the first 10 minutes, and cool the loaf uncovered on a wire rack.
The crust is too hard. Reduce the baking time slightly, and remove the steam pan after the first 10 minutes.
The loaf spread out flat. The dough may have risen too long, or the shaping was loose. Shape it with a tighter surface and watch the second rise.
The loaf burst on the side. The scoring may have been too shallow or the dough underproofed. Score a little deeper and let the second rise finish.
The inside is gummy. The bread was probably sliced too soon or underbaked. Cool for at least 30 minutes and bake until it sounds hollow.
🌿 Delicious Variations
- 🧄 Garlic and herb loaf. Knead in roasted garlic and a teaspoon of dried Italian herbs.
- 🧀 Cheesy Italian bread. Fold in shredded mozzarella or Parmesan before shaping.
- 🌿 Rosemary bread. Sprinkle chopped fresh rosemary and coarse salt on top.
- 🫒 Olive bread. Add chopped olives to the dough.
- 🌾 Sesame crust. Brush the loaf with water and sprinkle sesame seeds before baking.
- 🥖 Two smaller loaves. Divide the dough in half for two baguette-style loaves and shorten the baking time.
- 🍞 Rolls. Divide the dough into portions for sandwich rolls.
- 🍕 Pizza or focaccia style. Press the dough onto a pan, dimple it, and top with olive oil and herbs.
- 🧅 Onion and herb. Knead in sautéed onions for a savory bread.
- 🧈 Brushed crust. Brush the hot loaf with a little olive oil for a softer, shinier crust.
🍽️ Delicious Ways to Serve It
- 🧄 Homemade garlic bread. Spread with garlic butter, parsley, and Parmesan.
- 🫒 Olive oil dipping bread. Serve with extra virgin olive oil, black pepper, and herbs.
- 🍅 Bruschetta. Top toasted slices with chopped tomatoes, basil, garlic, and olive oil.
- 🥪 Italian sandwiches. Fill with mozzarella, tomatoes, roasted vegetables, or deli-style fillings.
- 🍝 Pasta night. Serve alongside spaghetti, lasagna, or creamy Alfredo.
- 🥣 Soup companion. Dip into tomato soup, minestrone, or hearty vegetable soup.
- 🧀 Cheesy toast. Add mozzarella and oregano, then toast until melted and bubbly.
🧊 Storage and Reheating
- Room temperature. Store in a paper bag or bread box for up to 2 days for the best crust. A sealed container keeps it softer but may reduce crispness.
- Refrigerator. Not recommended for ordinary short-term storage, as refrigeration can make bread stale faster.
- Freezer. Freeze the fully cooled loaf in a freezer-safe bag for up to 3 months for best quality.
- To refresh the crust. Lightly sprinkle the crust with water and warm in a 350°F (175°C) oven for 5 to 10 minutes.
- For individual slices. Toast briefly until warm and crisp.
For the best experience, enjoy the bread on the day it is baked, when the crust is at its crispiest.
📝 Nutrition Notes
Homemade Italian bread is made from simple ingredients with no preservatives. Each slice provides carbohydrates for energy, a little protein from the flour, and a touch of healthy fat from the olive oil. Using bread flour adds slightly more protein. Exact nutrition values depend on slice size and flour choice, so use a nutrition calculator if you need precise numbers.
❓ Frequently Asked Questions
Can I use all-purpose flour instead of bread flour? Yes. All-purpose flour gives a softer, more tender loaf, and bread flour gives a slightly chewier one. Both work.
Do I need a stand mixer? No. The dough is mixed with a wooden spoon and kneaded by hand for 8 to 10 minutes.
How do I know the yeast is active? After 5 to 10 minutes in warm water with sugar, the mixture should be foamy.
How do I know the dough has risen enough? It should have doubled in size after the first rise, and the shaped loaf should look puffy after the second.
How do I create steam without special equipment? Place a separate heatproof pan of hot water on the lower oven rack during the first 10 minutes. Do not pour water directly onto the oven floor or hot glass.
Why score the bread? Scoring allows the loaf to expand in a controlled way and gives it the classic Italian bread look.
How do I know when the bread is done? The crust should be deep golden brown, and the loaf should sound hollow when tapped on the bottom.
Why wait 30 minutes before slicing? The inside of the bread is still finishing setting, and slicing too early can make it gummy.
Can I freeze the dough or the loaf? You can freeze the fully cooled baked loaf in a freezer-safe bag for up to 3 months for best quality.
Why should I avoid refrigerating bread? Refrigeration can make bread stale faster. Store it at room temperature for short-term use or freeze it for longer storage.
🏁 Final Thoughts
This Homemade Italian Bread delivers everything you want from a bakery loaf: a golden, crispy crust, a soft, airy interior, and a wonderful aroma. 🥖 It uses just a few simple ingredients, requires no special equipment, and is forgiving enough for beginners. Once you master the basics of mixing, kneading, rising, shaping, scoring, and baking with steam, you will be able to make this loaf again and again.
Warm it up, drizzle it with olive oil, turn it into garlic bread, or build a sandwich, and enjoy the satisfaction of bread made with your own hands. 🍞✨
📌 Save this homemade Italian bread recipe for your next pasta night, soup dinner, or baking weekend! Leave a comment and tell us how your loaf turned out. 🥖😍
📋 Quick Recipe Card
Homemade Italian Bread
⏱️ Prep: 20 minutes | ⏳ Rise: 1½ to 2 hours | 🔥 Cook: 25 to 30 minutes | ⌛ Total: Approximately 2 hours 30 minutes | 🍞 Yield: 1 large loaf
Ingredients: 3½ cups (440 g) all-purpose flour or bread flour, 1¼ cups (300 ml) warm water, 2¼ teaspoons (7 g) active dry yeast, 1 tablespoon olive oil, 1 teaspoon sugar, 1½ teaspoons salt. Optional: 1 tablespoon flour for dusting, a little water for creating steam in the oven.
Instructions:
- Combine the warm water, sugar, and yeast in a large bowl and let sit 5 to 10 minutes until foamy.
- Add the flour, salt, and olive oil and stir with a wooden spoon until a rough dough forms.
- Knead on a lightly floured surface for 8 to 10 minutes until smooth and elastic, adding flour a little at a time only if very sticky.
- Place in a lightly oiled bowl, cover with a clean towel, and let rise in a warm place for 60 to 90 minutes, until doubled.
- Press out excess air, shape into a long oval loaf by folding the edges inward and pinching the seam closed, and place seam-side down on parchment or a lightly floured baking sheet.
- Cover loosely and let rise 30 to 45 minutes until puffy. Preheat the oven to 425°F (220°C).
- Score the top with 2 to 3 shallow diagonal slashes.
- Bake 25 to 30 minutes until deep golden and hollow-sounding when tapped on the bottom. For a crispier crust, place a separate heatproof pan of hot water on the lower rack for the first 10 minutes. Do not pour water directly onto the oven floor or hot glass.
- Cool on a wire rack for at least 30 minutes before slicing.

Homemade Italian Bread
Ingredients
- 3½ cups (440 g) all-purpose flour or bread flour
- 1¼ cups (300 ml) warm water
- 2¼ teaspoons (7 g) active dry yeast
- 1 tablespoon olive oil
- 1 teaspoon sugar
- 1½ teaspoons salt
Optional for the Crust
- 1 tablespoon flour for dusting
- A little water for creating steam in the oven
🧐 A Closer Look at the Ingredients
Flour. All-purpose flour makes a soft, tender loaf with a slightly delicate crust. Bread flour has more protein, which builds more gluten and gives a chewier, loftier loaf. Both work well in this recipe, so use whichever you have. Measure carefully, preferably by weight. If you use cups, spoon the flour into the measuring cup and level it off rather than scooping it directly from the bag, which packs in too much flour and leads to dense bread.
Warm water. The water should feel comfortably warm, like a pleasant bath, not hot. Water that is too hot can damage the yeast, while water that is too cold slows it down. Warm water wakes the yeast gently and helps the dough rise at a steady pace.
Active dry yeast. The yeast makes the bread rise and gives it its characteristic flavor. The recipe uses 2¼ teaspoons (7 g), which is one standard packet. Make sure your yeast is fresh. Old yeast may not foam, and the bread will not rise properly.
Olive oil. A tablespoon of olive oil adds a subtle fruity flavor, softens the crumb, and makes the dough easier to handle.
Sugar. One teaspoon is just enough to feed the yeast and help it foam. It does not make the bread sweet, but it does help the crust brown.
Salt. Salt gives the bread flavor and controls the yeast, keeping the dough from rising too fast. Do not skip it. Bread without salt tastes flat.
Flour for dusting (optional). A little flour on the surface and on the baking sheet keeps the dough from sticking and gives the loaf a rustic look.
Water for steam (optional). Steam is the secret to a crisp crust. It keeps the surface of the loaf moist for the first few minutes of baking so the bread can expand fully before the crust sets.
Instructions
1️⃣ Activate the Yeast 🫧
In a large bowl, combine the warm water, sugar, and active dry yeast. Let the mixture sit for 5 to 10 minutes until foamy. This indicates that the yeast is active. If nothing happens after 10 minutes, the yeast may be old or the water may have been too hot or too cold, and it is best to start again with fresh yeast.
2️⃣ Mix the Dough 🥣
Add the flour, salt, and olive oil. Stir with a wooden spoon until a rough dough forms and the ingredients are combined. At this stage, the dough will look shaggy and sticky, and that is exactly what you want.
3️⃣ Knead Until Smooth 🤲
Transfer the dough to a lightly floured surface and knead for 8 to 10 minutes, until smooth and elastic. If the dough is very sticky, add flour a little at a time, but avoid adding too much. Too much flour makes the bread dense and dry.
To knead, push the dough away from you with the heel of your hand, fold it back over itself, give it a quarter turn, and repeat. After several minutes, the dough will become smooth, springy, and slightly tacky rather than sticky.
4️⃣ Let the Dough Rise ⏳
Place the dough in a lightly oiled bowl and cover it with a clean kitchen towel. Let it rise in a warm place for 60 to 90 minutes, or until doubled in size. A turned-off oven with the light on, or a spot near a warm (not hot) appliance, works well.
5️⃣ Shape the Italian Loaf 🥖
Gently press the dough to release excess air. Shape it into a long oval loaf by folding the edges inward and pinching the seam closed. Place it seam-side down on parchment paper or a lightly floured baking sheet.
A good shape has a smooth, taut surface on top. If the surface looks loose, tuck the edges under a little more.
6️⃣ Let It Rise Again ✨
Cover the shaped loaf loosely and let it rise for another 30 to 45 minutes, until puffy. Meanwhile, preheat your oven to 425°F (220°C). The loaf should look visibly larger and feel soft and airy, and a gentle poke should leave a slowly springing dent.
7️⃣ Score the Top 🔪
Use a sharp knife or bread lame to make 2 to 3 shallow diagonal slashes across the top of the loaf. This allows the bread to expand as it bakes and gives it a traditional Italian bread appearance. Use a confident, quick motion, and keep the cuts shallow.
8️⃣ Bake for a Crispy Crust 🔥
Place the loaf in the oven. For a crispier crust, introduce steam during the first 10 minutes by placing a separate heatproof pan of hot water on the lower oven rack. Use oven-safe equipment and avoid pouring water directly onto the oven floor or hot glass.
Bake for 25 to 30 minutes, until the crust is deep golden brown and the loaf sounds hollow when tapped on the bottom.
9️⃣ Cool Before Slicing 🤍
Transfer the bread to a wire rack and allow it to cool for at least 30 minutes before slicing. This helps the inside finish setting while preserving the crispy crust. It is tempting to cut into the loaf right away, but slicing too early can make the crumb gummy.
💡 Tips for Perfect Crispy Italian Bread
- Measure flour carefully. Too much flour can make the bread dense.
- Use warm water, not hot. Excessively hot water can damage the yeast.
- Knead thoroughly. A smooth, elastic dough helps create a better crumb.
- Allow both rises. Proper fermentation develops flavor and texture.
- Create steam early. Steam helps the crust expand before it becomes crisp.
- Bake until deeply golden. A pale crust is usually less crisp and flavorful.
- Cool on a wire rack. Avoid covering the loaf while it cools, as trapped steam can soften the crust.
- Want an extra-crispy crust? Return sliced bread to a hot oven for a few minutes before serving.
- Use a hot oven. Make sure the oven is fully preheated to 425°F (220°C) before the loaf goes in.
- Score with a sharp blade. A dull knife drags and deflates the dough.
- Watch the dough, not just the clock. Rise times vary with room temperature, so look for the dough to double in size.
- Tap the bottom. A hollow sound is a reliable sign that the bread is done.