
No-Bake Pineapple Coconut Cream Dessert
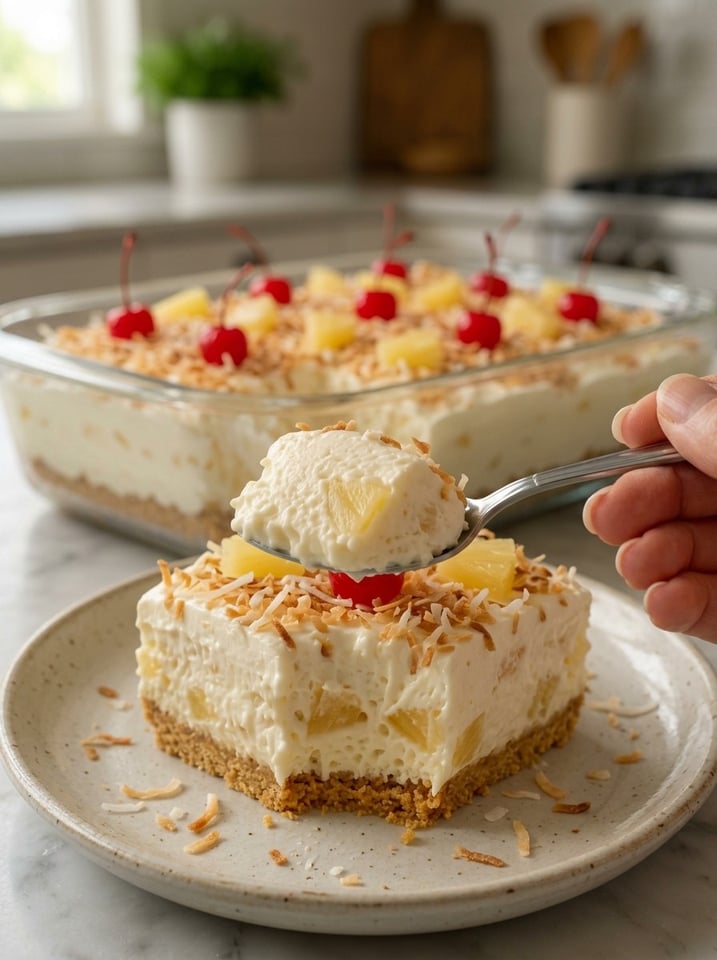
No-Bake Pineapple Coconut Cream Dessert: The Tropical Treat You’ll Crave All Summer
When the weather heats up and turning on the oven feels like the last thing you want to do, a No-Bake Pineapple Coconut Cream Dessert is exactly the kind of sweet relief you need. This dreamy, tropical treat layers a buttery graham cracker crust with a luscious pineapple cream cheese filling, fluffy whipped topping, and a generous sprinkle of toasted coconut. It’s cool, creamy, refreshing, and packed with sunny island flavor in every single bite.
Best of all, this dessert requires no baking whatsoever. With just 20 minutes of hands-on prep and a few hours of chill time, you can create a show-stopping dessert that’s perfect for summer barbecues, potlucks, holiday gatherings, or any occasion where you need a make-ahead treat that practically prepares itself.
In this article, we’ll cover everything you need to know to make the perfect No-Bake Pineapple Coconut Cream Dessert, including ingredient breakdowns, step-by-step instructions, expert tips, delicious variations, storage advice, and answers to the most common questions people have about this recipe.
Why You’ll Love This No-Bake Pineapple Coconut Dessert
It requires zero oven time. This is the ultimate warm-weather dessert because it comes together entirely without baking, keeping your kitchen cool while still delivering a decadent, crowd-pleasing treat.
It’s incredibly easy to make. With simple layering steps and no complicated techniques, this dessert is approachable for bakers of all skill levels, including complete beginners.
It’s perfect for make-ahead entertaining. Because it needs to chill for several hours (or overnight), this dessert is ideal for prepping in advance, freeing you up to focus on other parts of your gathering.
It’s bursting with tropical flavor. The combination of sweet pineapple, rich coconut, and creamy filling creates a dessert that tastes like a mini vacation in every bite.
It’s a guaranteed crowd-pleaser. With its light, refreshing texture and irresistible tropical flavor, this dessert is always one of the first to disappear at potlucks, parties, and family gatherings.
What Makes This Dessert So Special
There’s a reason no-bake desserts like this one have remained popular for generations, especially in the summer months. The combination of a buttery graham cracker crust, a rich and tangy cream cheese filling, and the natural sweetness of pineapple and coconut creates a dessert that’s indulgent yet refreshing at the same time. Unlike many baked desserts, this one has a light, mousse-like texture thanks to the whipped topping folded into the filling, making it feel less heavy than a traditional baked pie or cake.
This dessert is often compared to a cross between a classic pineapple icebox pie and a coconut cream pie, but with its own unique identity thanks to the layered presentation and the toasted coconut garnish, which adds a delightful textural contrast to the smooth, creamy filling underneath.
Ingredients You’ll Need
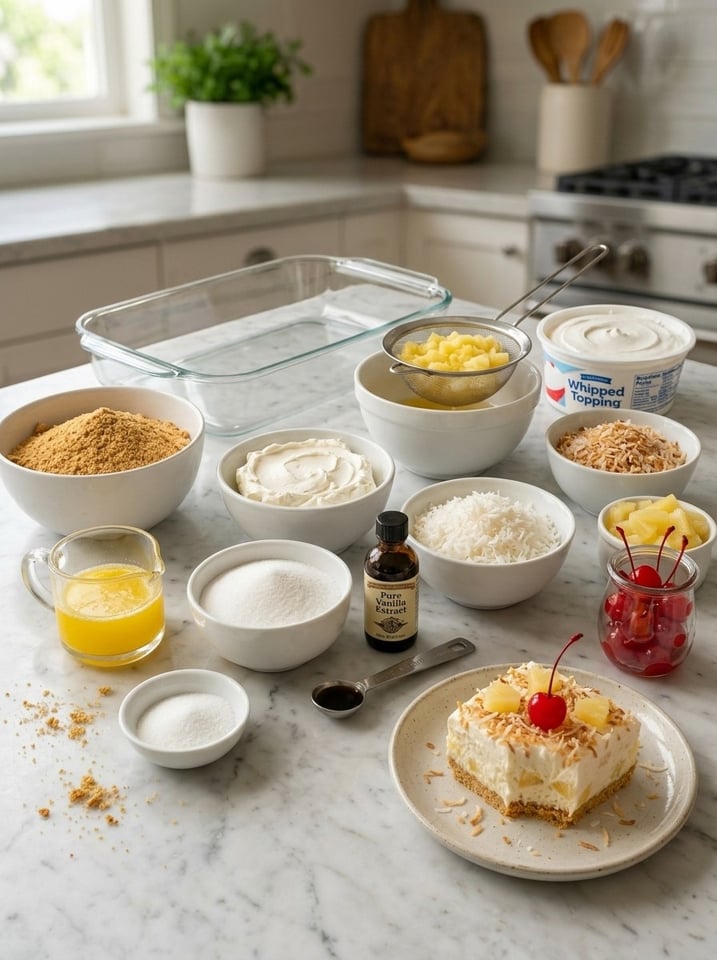
Let’s take a closer look at what goes into this recipe and why each ingredient plays an important role.
For the Graham Cracker Crust
- Graham cracker crumbs: These form the base of the crust, providing a slightly sweet, crumbly texture that pairs beautifully with the creamy filling above it.
- Unsalted butter, melted: Butter binds the graham cracker crumbs together, creating a firm, sliceable crust once chilled.
- Granulated sugar: A small amount of sugar enhances the sweetness of the crust and helps it hold together.
For the Pineapple Coconut Filling
- Cream cheese, softened: The base of the filling, cream cheese provides richness and a subtle tang that balances the sweetness of the pineapple and coconut.
- Granulated sugar: Sweetens the cream cheese mixture to create a luscious, dessert-worthy filling.
- Vanilla extract: Adds warmth and depth of flavor to the creamy filling.
- Crushed pineapple, well drained: This is the star tropical ingredient, providing natural sweetness and a juicy, fruity flavor. Draining it thoroughly is essential to prevent excess liquid from making the filling watery.
- Sweetened shredded coconut: Adds texture and reinforces the tropical flavor profile throughout the filling.
- Whipped topping, thawed: Folded into the cream cheese mixture, whipped topping lightens the filling and gives it that signature airy, mousse-like texture.
For the Topping
- Whipped topping: A final layer of whipped topping creates a smooth, elegant finish on top of the dessert.
- Toasted shredded coconut: Toasting the coconut brings out a deeper, nuttier flavor and adds a beautiful golden color and satisfying crunch to the top of the dessert.
- Pineapple tidbits or chunks: A garnish of fresh pineapple pieces adds a burst of juicy sweetness and visual appeal.
- Maraschino cherries (optional): These add a pop of color and a touch of old-fashioned charm to the finished dessert.
Step-by-Step Instructions
Step 1: Make the Crust
In a medium mixing bowl, combine the graham cracker crumbs, melted butter, and granulated sugar. Stir everything together until the mixture resembles wet sand and all the crumbs are evenly moistened by the butter. Press the mixture firmly and evenly into the bottom of a 9×13-inch baking dish, using the back of a spoon or the bottom of a measuring cup to create a compact, even layer. Once pressed, place the crust in the refrigerator to chill while you prepare the filling — this helps the crust firm up so it holds together nicely when sliced later.
Step 2: Prepare the Filling
In a large mixing bowl, beat the softened cream cheese and granulated sugar together using a hand mixer or stand mixer until the mixture is completely smooth and creamy, with no lumps remaining. This step is important, as any lumps in the cream cheese will be difficult to smooth out later once other ingredients are added. Mix in the vanilla extract until fully incorporated.
Next, gently fold in the well-drained crushed pineapple and shredded coconut using a spatula. Be sure the pineapple is thoroughly drained beforehand — pressing it through a fine mesh strainer or squeezing it in a clean kitchen towel can help remove excess liquid. Any leftover moisture can make the finished filling watery instead of thick and creamy.
Finally, gently fold in the thawed whipped topping until the mixture is fully combined and light and fluffy. Be careful not to overmix at this stage, as folding gently helps preserve the airy texture of the whipped topping, which gives the filling its signature light, mousse-like consistency.
Step 3: Assemble
Remove the chilled crust from the refrigerator and spread the pineapple coconut filling evenly over the top, using a spatula to smooth it into an even layer that reaches all the corners of the dish. Once the filling layer is smooth, spread the remaining whipped topping evenly over the top, creating a clean, finished layer.
Step 4: Chill
Cover the dish with plastic wrap or a tight-fitting lid and refrigerate for at least 4 hours. For the best texture and flavor, consider chilling the dessert overnight, which allows the layers to fully set and the flavors to meld together beautifully. This chilling time is essential, as it allows the filling to firm up enough to slice cleanly.
Step 5: Garnish
Just before serving, sprinkle the top of the dessert generously with toasted shredded coconut for added flavor, texture, and visual appeal. Top with pineapple tidbits or chunks, and add maraschino cherries if desired for a pop of color and a touch of classic charm. Slice into squares and serve chilled, straight from the refrigerator.
Recipe at a Glance
- Prep Time: 20 minutes
- Chill Time: 4 hours
- Total Time: 4 hours 20 minutes
- Servings: 12
Expert Tips for the Best No-Bake Pineapple Coconut Dessert
Drain the pineapple thoroughly. This is perhaps the most important step in the entire recipe. Excess liquid from the crushed pineapple can seep into the filling and crust, resulting in a soggy, watery dessert instead of a firm, sliceable one. Take the time to drain it well, pressing out as much liquid as possible.
Toast your coconut for maximum flavor. While you can use untoasted coconut for the topping, toasting it in a dry skillet over medium-low heat (or in the oven at 325°F/160°C) until lightly golden brings out a much richer, nuttier flavor that elevates the entire dessert. Keep a close eye on it, as coconut can go from golden to burnt very quickly.
Try a different crust for variety. For a richer, slightly different flavor profile, substitute crushed vanilla wafers for the graham cracker crumbs. This swap adds a subtle buttery sweetness that pairs beautifully with the tropical filling.
Make it a day ahead. This dessert genuinely improves with time, as the flavors meld together and the layers firm up further. Making it the day before you plan to serve it will result in cleaner slices and an even more delicious final product.
Use full-fat cream cheese for the best texture. While reduced-fat cream cheese can be used in a pinch, full-fat cream cheese creates a richer, creamier filling with better structure once chilled.
Let the crust chill before adding the filling. Skipping this step can result in a crust that doesn’t hold together as well once sliced, so be sure to give it at least 15–20 minutes in the refrigerator before assembling the rest of the dessert.
Variations to Try
This recipe is a fantastic base for experimentation. Here are a few delicious variations to consider:
Piña Colada Dessert: Add a splash of rum extract or a tablespoon of coconut rum to the filling for a grown-up, piña colada-inspired twist.
Coconut Cream Pie Version: Add a layer of vanilla or coconut pudding between the crust and the pineapple coconut filling for an even richer, more decadent dessert.
Mango Pineapple Coconut Dessert: Add diced fresh or frozen mango to the filling alongside the pineapple for an extra layer of tropical fruit flavor.
Individual Cups: Instead of assembling this dessert in a large baking dish, layer the crust, filling, and topping into individual cups or mason jars for an elegant, single-serving presentation that’s perfect for parties.
Chocolate-Coconut Crust: Use crushed chocolate graham crackers or chocolate wafer cookies instead of traditional graham crackers for a chocolate-coconut flavor combination.
Lighter Version: Substitute light cream cheese and light whipped topping to reduce the overall richness of the dessert while still maintaining a creamy, satisfying texture.
What to Serve with This Dessert
This dessert is refreshing enough to stand entirely on its own, but if you’re building out a full dessert table or tropical-themed menu, consider pairing it with:
- Fresh fruit skewers with mango, kiwi, and strawberries
- A light sorbet or coconut ice cream for an extra tropical touch
- Iced tea or a fruity mocktail to complement the sweet, tangy flavors
- Coconut macaroons for a coordinated coconut-themed dessert spread
How to Store Leftovers
Refrigerator: Store any leftover dessert covered tightly in the refrigerator for up to 4 days. The graham cracker crust may soften slightly over time as it absorbs moisture from the filling, but the flavor remains delicious.
Freezer: While this dessert is best enjoyed fresh from the refrigerator, it can be frozen for up to 1 month if needed. Keep in mind that the texture of the whipped topping and cream cheese filling may change slightly after freezing and thawing, becoming a bit softer or less fluffy. Thaw in the refrigerator overnight before serving.
Serving tip: For the cleanest slices, use a sharp knife dipped in warm water and wiped dry between cuts. This helps create neat, bakery-style squares instead of messy, uneven slices.
Frequently Asked Questions
Can I use fresh pineapple instead of canned? Yes, but you’ll need to finely chop fresh pineapple and cook it down slightly to reduce excess liquid, since fresh pineapple tends to be juicier than canned crushed pineapple. Draining thoroughly is still essential either way.
Can I make this dessert without coconut for someone with a coconut allergy or preference? Yes, you can simply omit the shredded coconut from both the filling and topping. The dessert will still be delicious with a pineapple cream cheese flavor, though it will lose some of its tropical character.
Do I have to use whipped topping, or can I use homemade whipped cream? You can substitute homemade whipped cream for the whipped topping, though keep in mind that whipped topping tends to hold its structure longer, which helps this dessert stay firm for several days. If using homemade whipped cream, it’s best enjoyed within a day or two.
Why is my filling runny? The most common cause of a runny filling is insufficiently drained crushed pineapple. Be sure to drain and even press out excess liquid from the pineapple before folding it into the cream cheese mixture.
Can I make this dessert in a springform pan or pie dish instead of a 9×13-inch dish? Yes, you can use a springform pan or a deep pie dish for a taller, more pie-like presentation. Keep in mind that a smaller dish will result in thicker layers, so you may need to adjust the chill time slightly to ensure the filling fully sets.
How do I toast coconut without burning it? Spread the shredded coconut in a single layer on a baking sheet and toast in a 325°F (160°C) oven for 5–8 minutes, stirring every couple of minutes, until golden brown. Alternatively, toast it in a dry skillet over medium-low heat, stirring frequently, for a faster stovetop method. Watch closely, as coconut can burn quickly once it starts to brown.
Can I make this dessert dairy-free? Yes, with some substitutions. Use a dairy-free cream cheese alternative and a dairy-free whipped topping to create a dairy-free version of this dessert. The overall texture and flavor may vary slightly depending on the brands used.
Final Thoughts
This No-Bake Pineapple Coconut Cream Dessert is the perfect combination of simplicity and tropical indulgence. With a buttery graham cracker crust, a rich and creamy pineapple-coconut filling, and a beautiful golden coconut garnish, it’s a dessert that looks impressive but requires almost no effort to make. Best of all, since it comes together entirely without baking, it’s the ideal treat for warm weather entertaining, potlucks, and any occasion where you want a make-ahead dessert that never fails to impress.
Whip up a batch the night before your next gathering, let it chill overnight, and watch it disappear in minutes. With its refreshing tropical flavor and irresistibly creamy texture, this dessert is bound to become a go-to recipe you return to again and again.