
Orange Raisin Scones: The Perfect Breakfast Delight!
Introduction to Orange Raisin Scones
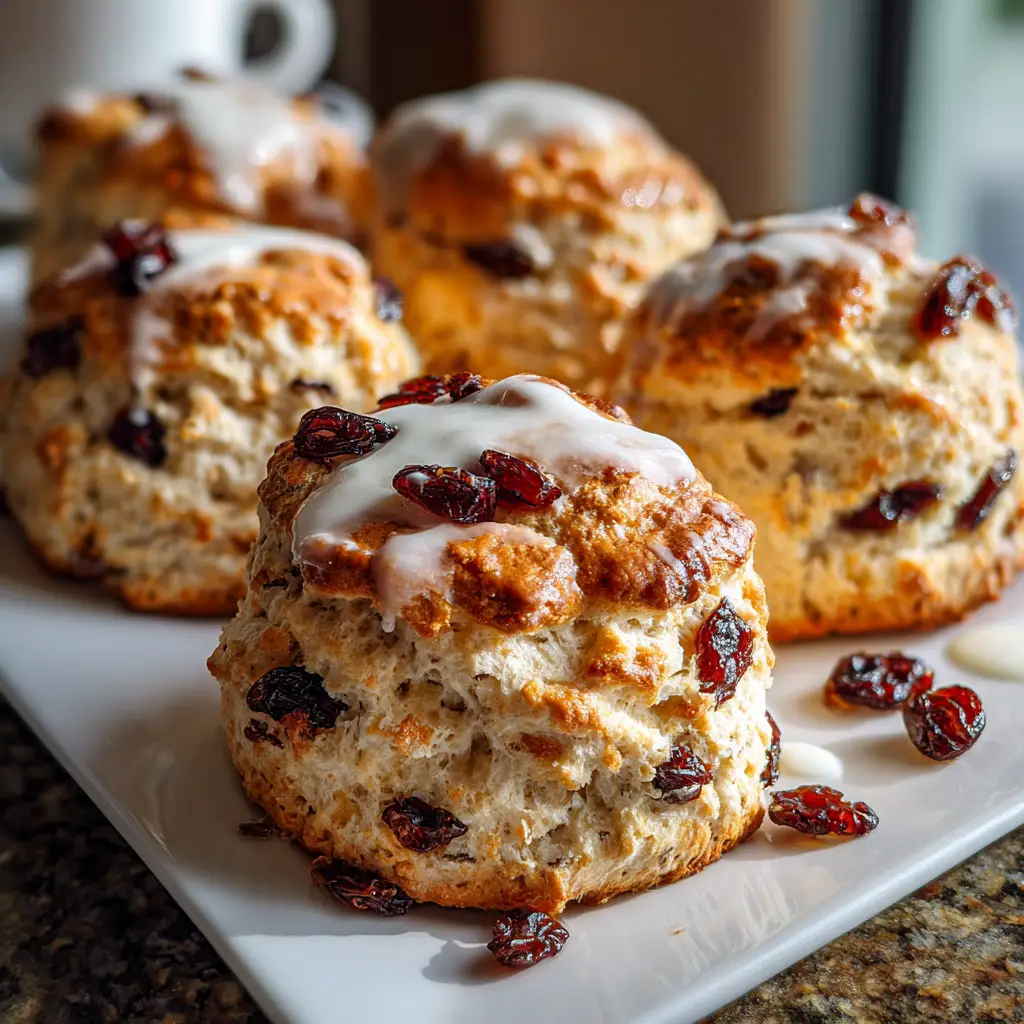
As a busy mom, I know how precious those morning moments can be. That’s why I absolutely adore these Orange Raisin Scones! They’re not just a treat; they’re a quick solution for a busy day. Imagine waking up to the warm, inviting aroma of freshly baked scones wafting through your kitchen. It’s like a hug in pastry form! Perfect for breakfast or a delightful snack, these scones are sure to impress your loved ones. Plus, they’re so easy to whip up, you’ll wonder why you didn’t try them sooner!
Why You’ll Love This Orange Raisin Scones
These Orange Raisin Scones are a game-changer for busy mornings! They come together in just 35 minutes, making them perfect for those hectic days. The delightful combination of sweet raisins and zesty orange creates a flavor explosion that will brighten your morning. Plus, they’re versatile enough to enjoy with coffee, tea, or even as an afternoon snack. Trust me, once you try them, they’ll become a staple in your kitchen!
Ingredients for Orange Raisin Scones
Let’s gather our ingredients for these delightful Orange Raisin Scones! Each component plays a vital role in creating that fluffy, flavorful treat we all crave. Here’s what you’ll need:
- All-purpose flour: The backbone of our scones, providing structure and fluffiness.
- Sugar: Adds sweetness and helps achieve that lovely golden color when baked.
- Baking powder: This leavening agent gives the scones their rise, making them light and airy.
- Salt: Just a pinch enhances the flavors and balances the sweetness.
- Unsalted butter: Cold and cubed, it creates that tender, flaky texture we all love.
- Raisins: These little gems add natural sweetness and a chewy texture that complements the scones perfectly.
- Orange zest: The star of the show! It infuses the scones with a bright, citrusy flavor that wakes up your taste buds.
- Milk: This moistens the dough and helps bind everything together.
- Large egg: Adds richness and helps with the scone’s structure.
If you’re feeling adventurous, you can swap out the raisins for dried cranberries or even chocolate chips for a fun twist! And remember, the exact measurements are at the bottom of the article, ready for you to print out and keep handy. Let’s get baking!
How to Make Orange Raisin Scones
Now that we have our ingredients ready, let’s dive into the fun part—making these delightful Orange Raisin Scones! Follow these simple steps, and you’ll have a batch of warm, fluffy scones in no time.
Step 1: Preheat the Oven
First things first, preheat your oven to 400°F (200°C). Preheating is crucial because it ensures that your scones bake evenly and rise beautifully. Think of it as warming up your kitchen for the deliciousness to come!
Step 2: Mix Dry Ingredients
In a large bowl, combine the all-purpose flour, sugar, baking powder, and salt. Use a whisk to mix them well. This step is essential for distributing the baking powder evenly, which helps your scones rise. A well-mixed dry base sets the stage for a perfect scone!
Step 3: Incorporate Butter
Next, add the cold, cubed butter to the flour mixture. Using a pastry cutter or your fingers, mix until the mixture resembles coarse crumbs. This technique is key to achieving that tender, flaky texture we all love. Remember, the colder the butter, the better!
Step 4: Add Raisins and Zest
Now, stir in the raisins and orange zest. These ingredients are what make your scones sing! The raisins add a delightful chewiness, while the orange zest brings a burst of citrusy flavor that brightens every bite. It’s like a little party in your mouth!
Step 5: Combine Wet Ingredients
In a separate bowl, whisk together the milk and egg until well combined. This mixture will help bind your scone dough together. Make sure to whisk thoroughly; you want a smooth blend that will mix easily with the dry ingredients.
Step 6: Mix Wet and Dry Ingredients
Now, pour the wet ingredients into the dry mixture. Gently stir until just combined. Be careful not to overmix! Overworking the dough can lead to tough scones, and we want them light and fluffy. A few lumps are perfectly fine!
Step 7: Knead the Dough
Turn the dough onto a floured surface and knead it gently. Just a few folds will do! The goal is to bring the dough together without overworking it. Think of it as giving your dough a gentle hug, not a wrestling match!
Step 8: Shape and Cut the Scones
Pat the dough into a circle about 1 inch thick. Then, cut it into wedges. You can use a sharp knife or a pizza cutter for clean edges. This is where the magic happens—each wedge will become a fluffy scone, ready to rise in the oven!
Step 9: Bake the Scones
Place the scones on a baking sheet lined with parchment paper. Bake them for 15-20 minutes, or until they’re golden brown. To check for doneness, gently tap the top of a scone; it should feel firm. The aroma wafting through your kitchen will be heavenly!
Step 10: Cool and Serve
Once baked, let the scones cool slightly on a wire rack. This step is important because it allows the flavors to settle. Serve them warm, perhaps with a pat of butter or a dollop of jam. Trust me, your taste buds will thank you!
Tips for Success
- Use cold butter for flaky scones; it makes all the difference!
- Don’t overmix the dough; a few lumps are okay for light scones.
- For extra flavor, try adding a pinch of cinnamon or nutmeg.
- Keep your baking sheet lined with parchment for easy cleanup.
- Experiment with different dried fruits for a unique twist!
Equipment Needed
- Mixing bowls: A large bowl for dry ingredients and a smaller one for wet ingredients.
- Whisk: Perfect for mixing dry ingredients and whisking eggs and milk.
- Pastry cutter: Great for incorporating butter; a fork works too!
- Baking sheet: Use a standard one or a stone for even baking.
- Parchment paper: Optional, but it makes cleanup a breeze!
Variations
- Cranberry Orange Scones: Swap raisins for dried cranberries for a tart twist.
- Chocolate Chip Scones: Add semi-sweet chocolate chips for a decadent treat.
- Gluten-Free Option: Use a gluten-free all-purpose flour blend to make these scones gluten-free.
- Vegan Scones: Replace butter with coconut oil and use almond milk instead of regular milk.
- Spiced Orange Scones: Add a teaspoon of cinnamon or ginger for a warm, spiced flavor.
Serving Suggestions
- Pair your Orange Raisin Scones with a hot cup of tea or coffee for a cozy breakfast.
- Serve with a side of fresh fruit, like berries or sliced oranges, for a refreshing contrast.
- For a special touch, drizzle with honey or spread with your favorite jam.
- Present them on a beautiful platter for an inviting brunch display.
FAQs about Orange Raisin Scones
As you embark on your baking adventure with these Orange Raisin Scones, you might have a few questions. Here are some common queries I’ve encountered, along with helpful answers to guide you along the way!
Can I make the dough ahead of time?
Absolutely! You can prepare the dough and refrigerate it for up to 24 hours. Just remember to let it sit at room temperature for a few minutes before shaping and baking. This way, you can enjoy fresh scones even on your busiest mornings!
How do I store leftover scones?
To keep your scones fresh, store them in an airtight container at room temperature for up to 2 days. If you want to keep them longer, freeze them in a single layer, then transfer to a freezer bag. They’ll be ready to bake straight from the freezer!
Can I substitute the raisins with other fruits?
Definitely! Feel free to swap raisins for dried cranberries, apricots, or even chocolate chips. Each variation brings a unique flavor to your Orange Raisin Scones, making them even more delightful!
What can I serve with these scones?
These scones pair beautifully with butter, jam, or even clotted cream. For a refreshing twist, serve them alongside a fruit salad or a hot cup of tea. The options are endless!
Can I make these scones gluten-free?
Yes! Simply use a gluten-free all-purpose flour blend in place of regular flour. This way, everyone can enjoy the deliciousness of Orange Raisin Scones, regardless of dietary preferences!
Final Thoughts
Making Orange Raisin Scones is more than just baking; it’s about creating moments of joy in our busy lives. The delightful aroma that fills your kitchen, the warm, fluffy texture, and the burst of citrus flavor all come together to create a comforting experience. Whether you’re enjoying them with your morning coffee or sharing them with loved ones, these scones bring a little sunshine to your day. So, roll up your sleeves, gather your ingredients, and let the magic happen. Trust me, once you take that first bite, you’ll be hooked on this delicious breakfast delight!
Print
Orange Raisin Scones: The Perfect Breakfast Delight!
- Total Time: 35 minutes
- Yield: 8 scones 1x
- Diet: Vegetarian
Description
Delicious and fluffy orange raisin scones, perfect for breakfast or a snack.
Ingredients
- 2 cups all-purpose flour
- 1/2 cup sugar
- 1 tablespoon baking powder
- 1/2 teaspoon salt
- 1/2 cup unsalted butter, cold and cubed
- 1/2 cup raisins
- 1 tablespoon orange zest
- 1/2 cup milk
- 1 large egg
Instructions
- Preheat the oven to 400°F (200°C).
- In a large bowl, mix together flour, sugar, baking powder, and salt.
- Add the cold butter and mix until the mixture resembles coarse crumbs.
- Stir in the raisins and orange zest.
- In a separate bowl, whisk together the milk and egg.
- Add the wet ingredients to the dry ingredients and mix until just combined.
- Turn the dough onto a floured surface and knead gently.
- Pat the dough into a circle about 1 inch thick and cut into wedges.
- Place the scones on a baking sheet and bake for 15-20 minutes or until golden brown.
- Let cool slightly before serving.
Notes
- For a sweeter scone, add more sugar to the dough.
- These scones can be frozen before baking for later use.
- Serve with butter or jam for added flavor.
- Prep Time: 15 minutes
- Cook Time: 20 minutes
- Category: Breakfast
- Method: Baking
- Cuisine: American
Nutrition
- Serving Size: 1 scone
- Calories: 210
- Sugar: 8g
- Sodium: 150mg
- Fat: 9g
- Saturated Fat: 5g
- Unsaturated Fat: 3g
- Trans Fat: 0g
- Carbohydrates: 30g
- Fiber: 1g
- Protein: 3g
- Cholesterol: 30mg
Keywords: Orange Raisin Scones, Breakfast Scones, Baking Recipes