
Pickle Brined Fried Chicken Sandwich Will Change Your Lunch!

Introduction to Pickle Brined Fried Chicken Sandwich
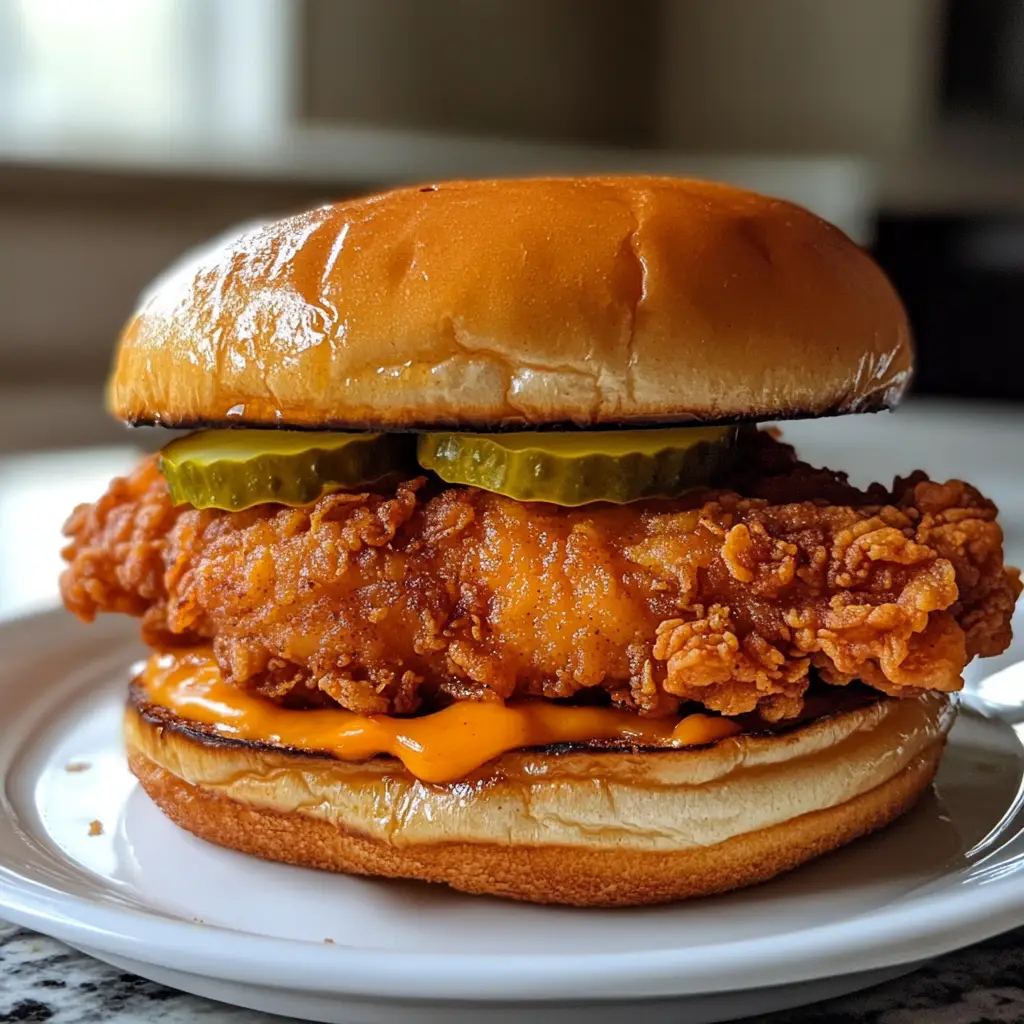
As a busy mom, I know how challenging it can be to whip up something delicious yet quick for lunch. That’s where my Pickle Brined Fried Chicken Sandwich comes in! This recipe is a game-changer, offering a crispy, flavorful bite that will impress your family and friends. Imagine sinking your teeth into a juicy chicken thigh, perfectly brined in pickle juice, and nestled between soft buns. It’s not just a meal; it’s a moment of joy in your hectic day. Let’s dive into this delightful dish that’s sure to become a lunchtime favorite!
Why You’ll Love This Pickle Brined Fried Chicken Sandwich
This Pickle Brined Fried Chicken Sandwich is not just about taste; it’s about convenience too! With just a few simple steps, you can create a mouthwatering meal that’s ready in under 30 minutes. The brining process infuses the chicken with a burst of flavor, making every bite unforgettable. Plus, it’s a fantastic way to please picky eaters, as the crispy coating and juicy chicken are sure to win everyone over!
Ingredients for Pickle Brined Fried Chicken Sandwich
Gathering the right ingredients is key to making a delicious Pickle Brined Fried Chicken Sandwich. Here’s what you’ll need:
- Boneless chicken thighs: These are juicy and tender, perfect for frying. You can also use chicken breasts if you prefer.
- Pickle juice: This is the star of the show! It adds a tangy flavor and helps keep the chicken moist.
- Buttermilk: This creamy ingredient helps the coating stick and adds richness to the chicken.
- All-purpose flour: Essential for creating that crispy outer layer. You can substitute with gluten-free flour if needed.
- Spices: Paprika, garlic powder, onion powder, and cayenne pepper bring a delightful kick to the flavor profile. Adjust the cayenne to suit your spice preference.
- Salt and pepper: Simple but necessary for enhancing the overall taste.
- Vegetable oil: Used for frying, it should have a high smoke point. Canola or peanut oil works well too.
- Sandwich buns: Choose your favorite type, whether it’s classic, whole grain, or even gluten-free.
- Pickles: For topping, they add crunch and extra tanginess.
- Lettuce and tomato: Fresh toppings that add color and freshness to your sandwich.
For exact measurements, check the bottom of the article where you can find everything listed for easy printing. Happy cooking!
How to Make Pickle Brined Fried Chicken Sandwich
Step 1: Marinate the Chicken
Start by placing the boneless chicken thighs in a bowl and pouring in the pickle juice. This step is crucial! The pickle juice not only adds flavor but also tenderizes the chicken, making it juicy and delicious. Cover the bowl and let it marinate for at least two hours, or even better, overnight. The longer it sits, the more flavor it absorbs. Trust me, this is where the magic begins!
Step 2: Prepare the Coating
Once your chicken has marinated, it’s time to prepare the coating. First, remove the chicken from the pickle juice and pat it dry with paper towels. This helps the coating stick better. Next, dip each piece into buttermilk, allowing it to soak up that creamy goodness. Then, dredge the chicken in a mixture of flour, paprika, garlic powder, onion powder, cayenne pepper, salt, and pepper. This spice blend is what gives your Pickle Brined Fried Chicken Sandwich its irresistible flavor!
Step 3: Heat the Oil
Now, let’s get that oil ready for frying! In a deep skillet, pour in enough vegetable oil to cover the bottom, about an inch deep. Heat the oil over medium-high heat until it reaches around 350°F. To test if it’s hot enough, drop a small piece of the flour mixture into the oil. If it sizzles, you’re good to go! Properly heated oil ensures that your chicken cooks evenly and gets that perfect golden-brown crust.
Step 4: Fry the Chicken
Carefully place the coated chicken thighs into the hot oil, making sure not to overcrowd the pan. Fry each piece for about 5-7 minutes on each side, or until they are golden brown and cooked through. You’ll know they’re done when the internal temperature reaches 165°F. Once cooked, remove the chicken and let it drain on paper towels to absorb any excess oil. This step keeps your sandwich crispy and not greasy!
Step 5: Assemble the Sandwich
It’s time to bring your Pickle Brined Fried Chicken Sandwich to life! Start by placing a crispy chicken thigh on the bottom half of your sandwich bun. Top it with crunchy pickles, fresh lettuce, and juicy tomato slices. Finally, place the top bun on and give it a gentle press. Serve immediately while it’s hot and crispy. Your family will be begging for seconds!
Tips for Success
- For extra crunch, double-dip the chicken in buttermilk and flour.
- Let the chicken rest for a few minutes after frying to maintain its crispiness.
- Use a thermometer to check the oil temperature for perfect frying.
- Feel free to experiment with different spices in the coating for unique flavors.
- Don’t skip the marination; it’s key to juicy, flavorful chicken!
Equipment Needed
- Deep skillet: A cast-iron skillet works great, but any heavy-bottomed pan will do.
- Meat thermometer: Essential for checking chicken doneness; a simple instant-read thermometer is perfect.
- Mixing bowls: Use these for marinating and coating the chicken.
- Slotted spoon: Ideal for removing the chicken from the oil.
- Paper towels: For draining excess oil after frying.
Variations
- Spicy Kick: Add more cayenne pepper or a splash of hot sauce to the buttermilk for an extra spicy version.
- Herb-Infused: Mix in dried herbs like oregano or thyme into the flour mixture for a fragrant twist.
- Gluten-Free: Substitute all-purpose flour with a gluten-free blend to make this sandwich suitable for gluten-sensitive eaters.
- Air Fryer Option: For a healthier take, use an air fryer instead of frying in oil. Cook at 375°F for about 15-20 minutes.
- Vegetarian Version: Swap the chicken for thick slices of eggplant or portobello mushrooms, following the same marination and coating process.
Serving Suggestions
- Classic Sides: Pair your Pickle Brined Fried Chicken Sandwich with crispy French fries or sweet potato fries for a satisfying meal.
- Refreshing Slaw: A tangy coleslaw adds crunch and balances the richness of the sandwich.
- Drink Pairing: Enjoy with a cold lemonade or iced tea for a refreshing touch.
- Presentation: Serve on a wooden board with pickles and extra toppings for a rustic look.
FAQs about Pickle Brined Fried Chicken Sandwich
Can I use chicken breasts instead of thighs? Absolutely! While I love the juiciness of chicken thighs, breasts work just as well. Just be sure to adjust the cooking time, as they may cook faster.
How long can I marinate the chicken? You can marinate the chicken for as little as 2 hours, but for the best flavor, I recommend letting it sit overnight. The longer it marinates, the more flavorful your Pickle Brined Fried Chicken Sandwich will be!
What can I serve with this sandwich? This sandwich pairs beautifully with crispy fries, a fresh salad, or even a tangy coleslaw. You can also enjoy it with a refreshing drink like iced tea or lemonade.
Can I make this sandwich ahead of time? While the chicken is best served fresh, you can marinate it ahead of time. Just fry it right before serving for that crispy texture. Leftovers can be stored in the fridge for a day or two, but the bread may get soggy.
Is this recipe suitable for gluten-free diets? Yes! Simply substitute the all-purpose flour with a gluten-free flour blend. Your Pickle Brined Fried Chicken Sandwich will still be delicious and crispy!
Final Thoughts
Creating a Pickle Brined Fried Chicken Sandwich is more than just cooking; it’s about bringing joy to your table. The crispy, flavorful chicken, combined with fresh toppings, transforms a simple lunch into a delightful experience. I love how this recipe fits seamlessly into my busy life, allowing me to serve something special without spending hours in the kitchen. Whether it’s a quick weekday meal or a weekend treat, this sandwich is sure to impress. So, roll up your sleeves, gather your ingredients, and let the magic of this recipe brighten your day!
Print
Pickle Brined Fried Chicken Sandwich Will Change Your Lunch!
- Total Time: 30 minutes
- Yield: 4 sandwiches 1x
- Diet: Gluten Free
Description
A delicious and crispy fried chicken sandwich brined in pickle juice for an extra burst of flavor.
Ingredients
- 4 boneless chicken thighs
- 1 cup pickle juice
- 1 cup buttermilk
- 1 cup all-purpose flour
- 1 teaspoon paprika
- 1 teaspoon garlic powder
- 1 teaspoon onion powder
- 1/2 teaspoon cayenne pepper
- Salt and pepper to taste
- Vegetable oil for frying
- 4 sandwich buns
- Pickles for topping
- Lettuce and tomato for serving
Instructions
- In a bowl, combine chicken thighs and pickle juice. Marinate for at least 2 hours or overnight.
- Remove chicken from pickle juice and pat dry. Dip in buttermilk, then dredge in a mixture of flour, paprika, garlic powder, onion powder, cayenne, salt, and pepper.
- Heat vegetable oil in a deep skillet over medium-high heat.
- Fry the chicken thighs until golden brown and cooked through, about 5-7 minutes per side.
- Remove chicken and drain on paper towels.
- Assemble the sandwich by placing the fried chicken on a bun, topping with pickles, lettuce, and tomato.
- Serve immediately and enjoy!
Notes
- For extra crunch, double-dip the chicken in buttermilk and flour.
- Adjust the spice level by adding more or less cayenne pepper.
- Serve with your favorite dipping sauce.
- Prep Time: 15 minutes
- Cook Time: 15 minutes
- Category: Lunch
- Method: Frying
- Cuisine: American
Nutrition
- Serving Size: 1 sandwich
- Calories: 550
- Sugar: 2g
- Sodium: 1200mg
- Fat: 30g
- Saturated Fat: 5g
- Unsaturated Fat: 20g
- Trans Fat: 0g
- Carbohydrates: 40g
- Fiber: 2g
- Protein: 30g
- Cholesterol: 90mg
Keywords: Pickle Brined Fried Chicken Sandwich, Fried Chicken, Sandwich, Lunch