
Quick Pickled Red Onions
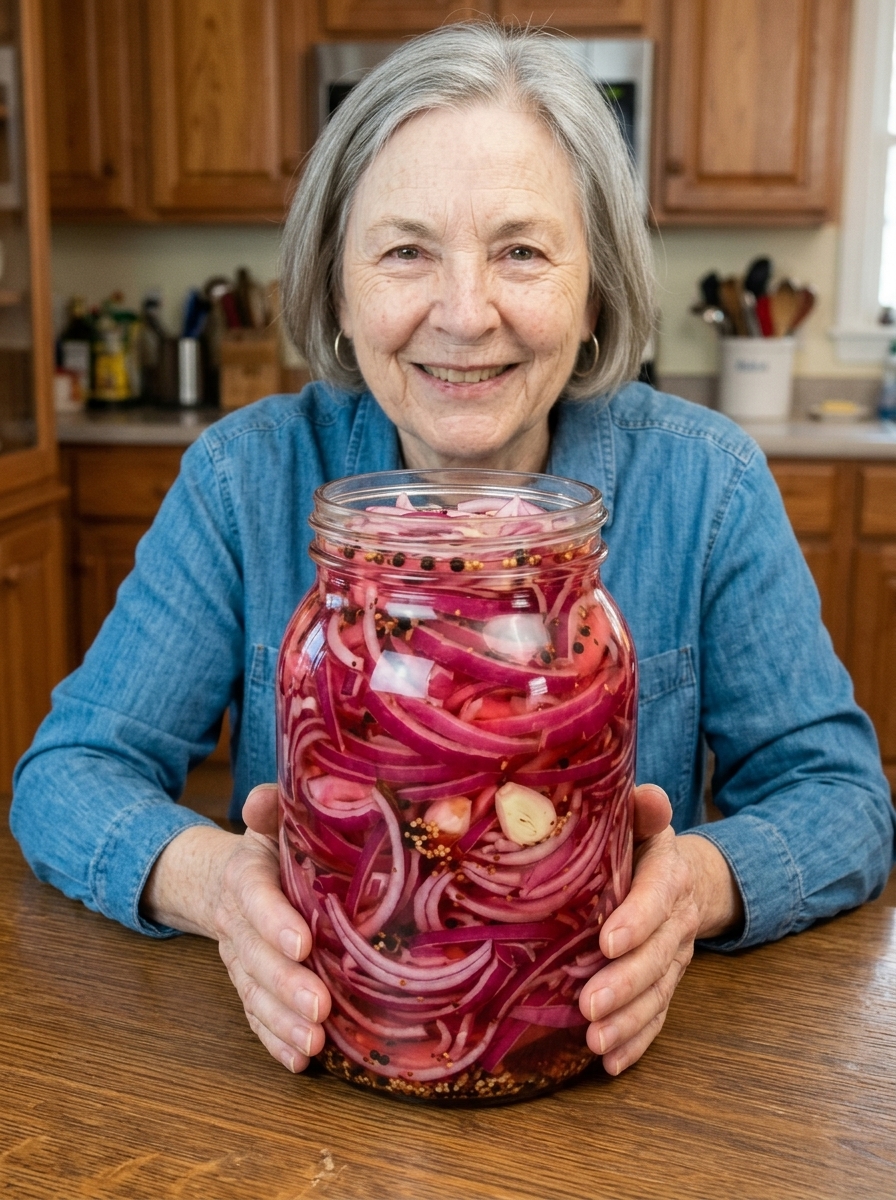
Quick Pickled Red Onions: The Easy 5-Minute Recipe for Tangy, Crunchy, Bright Pink Onions
Quick Pickled Red Onions Recipe (Ready in 45 Minutes!)
Meta description: Make crisp, tangy, bright pink quick pickled red onions with simple pantry ingredients. Easy recipe, expert tips, flavor variations, storage advice, and FAQs.
Focus keyword: quick pickled red onions
Secondary keywords: pickled red onions recipe, easy pickled onions, refrigerator pickled onions, how to pickle red onions, pickled onions for tacos
If there is one condiment that can make an ordinary meal look and taste like it came from a restaurant kitchen, it is quick pickled red onions. They are tangy, crunchy, lightly sweet, and a stunning shade of bright pink. They take only minutes of real work, they use ingredients you probably already have, and they improve almost everything they touch, from tacos and burgers to salads, grain bowls, and charcuterie boards.
In this complete guide, you will learn exactly how to make the best pickled red onions at home, why the recipe works, how to customize the flavor, how to store them safely, and how to use them in dozens of ways. Whether you are a beginner who has never made a pickle or a seasoned home cook looking for a reliable go-to recipe, this guide has you covered.
What Are Quick Pickled Red Onions?
Quick pickled red onions are thinly sliced red onions that are soaked in a seasoned vinegar brine for a short time, usually anywhere from 30 minutes to a few hours. Unlike traditional fermented pickles, which develop flavor over days or weeks, quick pickles get their tang directly from the acidic brine. That is why they are often called refrigerator pickles or fast pickles.
The process is simple. Vinegar, water, sugar, and salt are warmed until dissolved, then poured over sliced onions. As the onions sit in the brine, they soften slightly, lose their harsh raw bite, and absorb the tangy, savory-sweet flavor of the liquid. Red onions also contain natural pigments that react with the acid in vinegar, which is why they transform into that unmistakable vivid pink.
The result is a condiment that is:
- Tangy from the vinegar
- Slightly sweet from a touch of sugar
- Crisp and crunchy when made correctly
- Colorful enough to make any plate look more appealing
- Versatile enough to pair with nearly any cuisine
Why You Will Love This Recipe
There are plenty of pickled onion recipes online, but this one is designed to be foolproof and flexible. Here is why it deserves a permanent spot in your recipe box:
1. It is incredibly fast. You need about 10 minutes of prep and 5 minutes of cooking. After just 30 minutes in the fridge, the onions are ready to eat. After 2 to 4 hours, they are even more flavorful and a deeper pink.
2. It uses simple pantry ingredients. Red onions, white vinegar, water, sugar, and salt are the foundation. Everything else, such as garlic, peppercorns, mustard seeds, red pepper flakes, and lime juice, is optional.
3. It makes meals feel special. A spoonful of pickled onions adds acidity, crunch, and color. Rich, fatty, or heavy foods especially benefit from that bright contrast.
4. It is easy to customize. You can make the brine sweeter, spicier, more citrusy, or more herbaceous with a few small changes.
5. It is budget-friendly. Red onions are inexpensive, and one batch makes about 2 cups, which is enough for 8 to 10 servings.
Recipe at a Glance
- Prep time: 10 minutes
- Cook time: 5 minutes
- Chilling time: 30 minutes to 4 hours
- Total time: About 45 minutes for the first taste
- Yield: 1 large jar (approximately 2 cups)
- Servings: 8 to 10
- Difficulty: Easy
- Flavor profile: Tangy, slightly sweet, crisp, zesty, and refreshing
Ingredients for Quick Pickled Red Onions
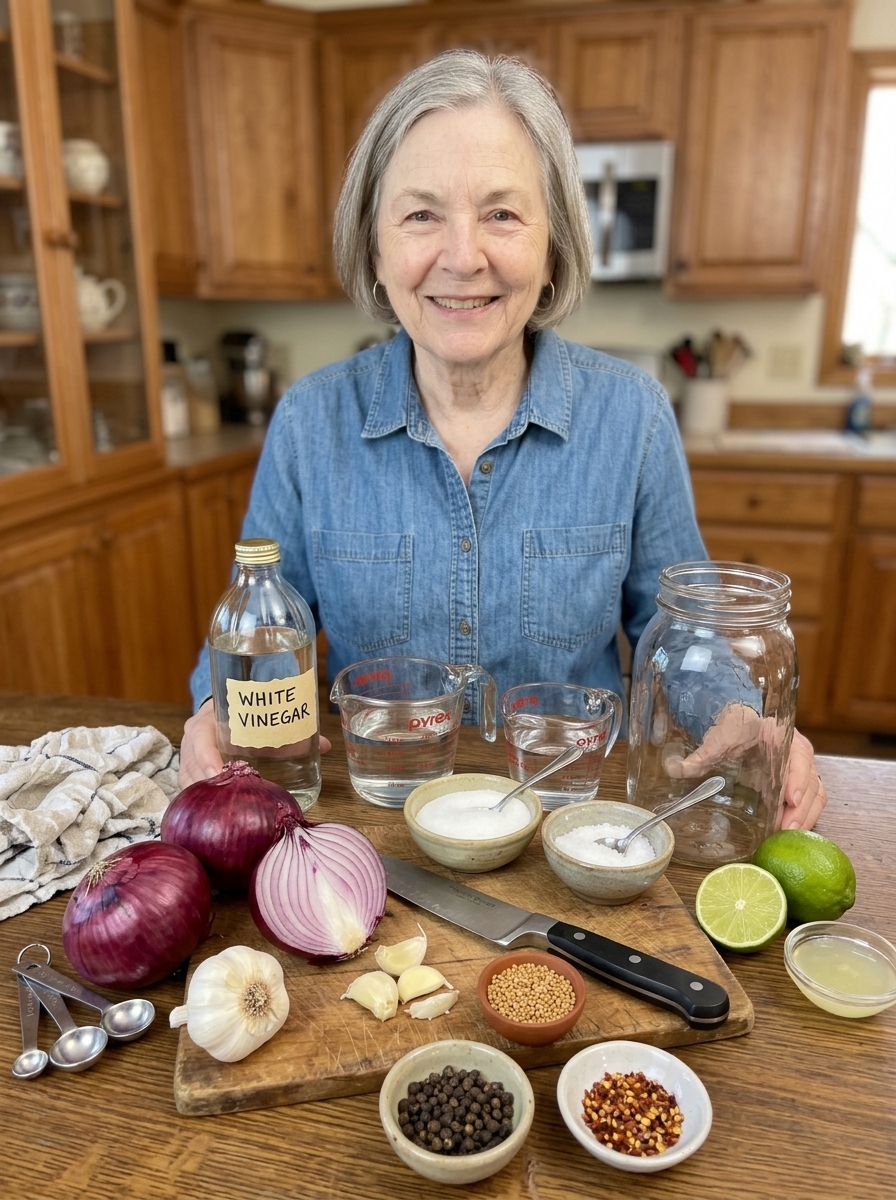
Here is everything you need for one large jar:
- 2 medium red onions, thinly sliced
- 1 cup white vinegar (5% acidity)
- ½ cup water
- 1 tablespoon granulated sugar
- 1½ teaspoons salt
- 1 garlic clove, peeled and lightly crushed (optional)
- ½ teaspoon black peppercorns
- ½ teaspoon mustard seeds (optional)
- ¼ teaspoon red pepper flakes (optional)
- 1 to 2 tablespoons fresh lime juice (optional, for extra zing)
Ingredient Notes and Smart Substitutions
Red onions: Choose firm, heavy onions with dry, papery skins and no soft spots. Fresh onions give the crispest texture and the brightest color.
White vinegar: Distilled white vinegar with 5% acidity gives a clean, sharp tang and lets the onion color shine. Using vinegar with at least 5% acidity matters for flavor and for keeping the pickles safe in the refrigerator. You can swap in other vinegars if you prefer a different flavor profile:
- Apple cider vinegar: fruity and slightly mellow, but the color may be a little less vibrant
- White wine vinegar: softer and more delicate
- Rice vinegar: gentler and slightly sweet (check that it is at least 5% acidity)
Sugar: One tablespoon adds just enough sweetness to balance the vinegar without making the onions taste like candy. Honey or maple syrup can be used, though they add their own flavor.
Salt: Use fine sea salt or kosher salt. Avoid iodized table salt if you can, since it may cloud the brine slightly, though it is safe to use.
Aromatics and spices: Garlic, peppercorns, mustard seeds, and red pepper flakes add depth. They are optional, but even a few peppercorns make the brine taste more complex.
Lime juice: A splash of fresh lime juice adds a bright citrus note that pairs beautifully with tacos and Latin-inspired dishes.
How to Make Quick Pickled Red Onions (Step by Step)
Step 1: Slice the Onions
Peel the red onions and slice them into thin rings or half-moons. For the most even results, use a sharp knife or a mandoline, aiming for slices about ⅛ inch (3 mm) thick. Separate the slices with your fingers so the brine can reach every layer. Uniform slices pickle evenly and stay crisp.
Step 2: Fill the Jar
Pack the sliced onions into a clean, heat-safe glass jar. Add the garlic, black peppercorns, mustard seeds, and red pepper flakes if you are using them. A wide-mouth jar makes packing and serving easier.
Step 3: Prepare the Brine
In a small saucepan, combine the vinegar, water, sugar, and salt. Heat gently, stirring until the sugar and salt dissolve. Bring the mixture to a brief simmer, then remove it from the heat right away. There is no need to boil it for a long time, and overcooking the brine does not make the pickles any better.
Step 4: Pour the Brine Over the Onions
Carefully pour the warm brine over the onions until they are fully covered. Gently press them down with a clean utensil to release trapped air bubbles and make sure every slice is submerged. Onions that stick out above the liquid will not pickle evenly.
Step 5: Cool the Jar
Let the onions cool until they are no longer hot, then cover the jar and refrigerate promptly. Do not leave the jar sitting out for hours.
Step 6: Let the Flavors Develop
Chill for at least 30 minutes for a quick tangy bite. After 2 to 4 hours, the onions will be noticeably more flavorful and will turn a beautiful bright pink. For the best flavor, many cooks wait until the next day, when the brine has fully penetrated the onions.
Step 7: Serve and Enjoy
Scoop out the onions with a clean fork or tongs and add them to tacos, burgers, sandwiches, salads, grain bowls, grilled meats, or your favorite snack boards.
Pro Tips for the Best Pickled Red Onions
A few small details separate good pickled onions from great ones:
For extra crunch: Slice the onions evenly and avoid boiling them in the brine. Pouring warm brine over raw onions softens them just enough while keeping a pleasant snap.
For a sweeter flavor: Increase the sugar to 1½ tablespoons. This is a great option if you are serving the onions to people who prefer a milder, less sharp pickle.
For extra citrus zing: Add the lime juice after the brine has cooled. Heat can dull the fresh flavor of citrus, so adding it later keeps it bright.
For a spicy version: Add sliced jalapeños or extra red pepper flakes to the jar. Habanero rings make an intensely hot version for spice lovers.
For beautiful color: Use fresh red onions and allow them to chill in the brine. The color deepens as the onions rest, so patience pays off.
Use a clean jar and clean utensils. This keeps the pickles tasting fresh and helps them last longer in the refrigerator.
Taste and adjust next time. Every cook’s palate is different. If your first batch is too sharp, add a little more sugar or water. If it is too mild, reduce the water slightly.
Flavor Variations to Try
Once you have mastered the classic recipe, experiment with these easy twists:
Spicy Jalapeño Pickled Red Onions
Add a few slices of fresh jalapeño and an extra pinch of red pepper flakes. These are fantastic on nachos, burritos, and breakfast tacos.
Citrus Pickled Red Onions
Stir in 1 to 2 tablespoons of lime juice once the brine cools. You can also add a few strips of orange or lemon zest for a more aromatic result.
Garlic and Herb Pickled Onions
Add a sprig of fresh thyme, oregano, or dill to the jar along with the garlic. These herbal onions are lovely on grilled chicken, lamb, and Mediterranean salads.
Sweet and Tangy Pickled Onions
Increase the sugar to 1½ tablespoons for a sweeter finish that pairs well with barbecue, pulled pork, and burgers.
Warm Spice Pickled Onions
Add a small cinnamon stick, a couple of whole cloves, or a star anise. This variation works well on roasted vegetables and holiday cheese boards.
Mexican-Style Pickled Onions (Cebollas Encurtidas)
Use the lime juice option, add a pinch of dried oregano, and include a sliced jalapeño or habanero. These are the perfect topping for tacos al pastor, carnitas, and cochinita pibil.
25+ Ways to Use Quick Pickled Red Onions
Pickled red onions are one of those ingredients that quickly become a kitchen essential. Here are plenty of ways to put them to work:
On handheld foods
- Tacos of every kind, from carne asada to fish to roasted vegetable
- Burgers and veggie burgers
- Hot dogs and sausages
- Sandwiches and wraps
- Grilled cheese, for a tangy contrast to melted cheese
- Banh mi-style sandwiches
In salads and bowls
- Green salads, for instant dressing-like acidity
- Grain bowls with rice, quinoa, or farro
- Burrito bowls
- Mediterranean salads with feta and olives
- Potato salad or pasta salad
- Grilled chicken or steak salads
With proteins
- Grilled chicken, steak, and pork
- Roasted salmon and other fish
- Pulled pork and brisket
- Falafel and kebabs
- Eggs, including avocado toast with a fried or soft-boiled egg
On boards and appetizers
- Charcuterie and cheese boards
- Bruschetta and crostini
- Hummus and dips
- Deviled eggs
- Nachos and loaded fries
Everyday uses
- Stirred into rice or beans
- Layered onto pizza after baking
- Added to omelets or frittatas
- Served alongside curries or lentil dishes
- Tossed into coleslaw for extra zing
Because they add acidity, crunch, and color all at once, pickled onions are especially good with rich, creamy, or fatty foods. Think of them as a quick way to balance a dish.
Why Do Red Onions Turn Pink When Pickled?
Red onions get their purple-red color from natural plant pigments called anthocyanins. These pigments are sensitive to acidity: in an acidic environment, like a vinegar brine, they shift toward a vivid pink or magenta shade. That is why the longer your onions sit in the brine, the brighter and pinker they become.
It also explains why using a fresh, high-quality red onion matters. Older onions or pale varieties can produce a duller color. For the prettiest result, choose onions with deep, dark purple skin and let them rest in the brine for at least a few hours.
How to Store Quick Pickled Red Onions Safely
Proper storage is important, so please keep these guidelines in mind.
These are refrigerator pickles, not shelf-stable canned onions. The recipe has not been designed or tested for water-bath canning, so the jar should never be stored in the pantry.
- Keep the pickles covered and refrigerated at or below 40°F (4°C).
- Use clean utensils every time you take onions out of the jar.
- Make sure the onions stay submerged in the brine.
- Enjoy them within about 2 weeks for the best quality.
- Do not store at room temperature.
If the onions develop an off smell, a slimy texture, mold, or any unusual appearance, discard them. When in doubt, throw it out.
If you would like to share a jar as a gift, be sure to label it clearly as a refrigerator pickle and tell the recipient to keep it chilled and eat it within two weeks.
Troubleshooting: Common Pickled Onion Problems
My onions are too soft. They may have been sliced too thin, or the brine may have been too hot for too long. Slice them to an even ⅛ inch, remove the brine from the heat as soon as it simmers, and avoid leaving the onions in hot liquid.
My onions did not turn pink. Give them more time. Color often develops over several hours in the refrigerator. Also check that your onions are fresh, deeply colored red onions and that your vinegar is acidic enough.
The flavor is too sharp. Add a little more sugar, or rinse the onions briefly before serving. Next time, try a slightly higher water-to-vinegar ratio or increase the sugar to 1½ tablespoons.
The flavor is too mild. Let the onions chill longer, ideally overnight, or reduce the water in the brine slightly.
The brine looks cloudy. Cloudiness can come from spices, garlic, or iodized salt. A little haze is usually harmless, but if it comes with a bad smell or slimy texture, discard the batch.
The onions float above the brine. Press them down with a clean utensil, or place a small piece of clean parchment or a pickle weight on top to keep them submerged.
Nutrition and Dietary Notes
Quick pickled red onions are a light, flavorful way to add interest to meals without adding much fat. A serving of this recipe is small in calories, and the sugar content is modest because only 1 tablespoon is spread across 8 to 10 servings. Because the brine contains salt, people who watch their sodium intake can enjoy the onions in small amounts or lift them out of the brine and let them drain before serving.
The recipe is naturally vegan, vegetarian, gluten-free, and dairy-free, which makes it easy to serve to guests with different dietary needs. If you prefer to cut back on sugar, you can reduce it slightly, though a little sweetness helps balance the vinegar.
Frequently Asked Questions
How long do quick pickled red onions take?
You can taste them after just 30 minutes in the refrigerator. For better flavor and deeper color, chill them for 2 to 4 hours. Overnight is even better if you have time.
How long do pickled red onions last in the fridge?
For best quality, enjoy them within about 2 weeks. Keep the jar covered, refrigerated at or below 40°F (4°C), and use clean utensils each time.
Do I have to heat the brine?
Heating the brine helps the sugar and salt dissolve quickly and gives the onions a head start on pickling. A brief simmer is all you need. Remove the brine from the heat before pouring it over the onions.
Can I use a different vinegar?
Yes. Apple cider vinegar, white wine vinegar, and rice vinegar all work. Choose a vinegar with at least 5% acidity, and keep in mind that the flavor and color will vary slightly.
Can I make pickled red onions without sugar?
You can, but the flavor will be sharper and more acidic. A small amount of sugar balances the vinegar. If you want to reduce it, try using less rather than leaving it out completely.
Can I can these onions to store them on the shelf?
No. This is a refrigerator recipe and has not been developed for shelf-stable canning. Keep the jar in the refrigerator at all times.
What kind of jar should I use?
Use a clean, heat-safe glass jar with a tight-fitting lid. A wide-mouth pint or quart jar works well, depending on how many onions you have.
Can I double the recipe?
Absolutely. Simply double all the ingredients and use a larger jar or two jars. Make sure all the onions are submerged in brine.
Why are my pickled onions bitter?
Raw onions can taste harsh, and pickling mellows that bite. If the flavor still seems strong, give the onions more time in the brine or add a touch more sugar.
Can I eat them right away?
Yes, though they are best after chilling for at least 30 minutes. The longer they rest, the better the flavor and color.
Are pickled red onions healthy?
They are a low-calorie way to add flavor and crunch to meals, and they are made from whole vegetables. As with any pickled food, they contain salt, so enjoy them in moderation as part of a balanced diet.
Final Thoughts: Your New Favorite Condiment
Quick pickled red onions prove that a few simple ingredients can make a big difference. In under an hour, with almost no effort, you can turn plain red onions into a tangy, crunchy, vividly pink topping that brightens everything from weeknight tacos to a weekend charcuterie spread.
Once you make your first jar, you will probably find yourself keeping one in the refrigerator at all times. Start with the classic recipe, then experiment with spicy, citrusy, or herbal variations until you find your signature version. Remember to keep them chilled, use clean utensils, and enjoy them within about 2 weeks.
Ready to try it? Grab a couple of red onions, a jar, and your favorite vinegar, and bring a little color and zest to your next meal. 🧅✨
Did you make this recipe? Leave a comment, share your favorite way to serve pickled red onions, and tell us which variation you tried!
Print
Quick Pickled Red Onions
Ingredients
Here is everything you need for one large jar:
- 2 medium red onions, thinly sliced
- 1 cup white vinegar (5% acidity)
- ½ cup water
- 1 tablespoon granulated sugar
- 1½ teaspoons salt
- 1 garlic clove, peeled and lightly crushed (optional)
- ½ teaspoon black peppercorns
- ½ teaspoon mustard seeds (optional)
- ¼ teaspoon red pepper flakes (optional)
- 1 to 2 tablespoons fresh lime juice (optional, for extra zing)
Ingredient Notes and Smart Substitutions
Red onions: Choose firm, heavy onions with dry, papery skins and no soft spots. Fresh onions give the crispest texture and the brightest color.
White vinegar: Distilled white vinegar with 5% acidity gives a clean, sharp tang and lets the onion color shine. Using vinegar with at least 5% acidity matters for flavor and for keeping the pickles safe in the refrigerator. You can swap in other vinegars if you prefer a different flavor profile:
- Apple cider vinegar: fruity and slightly mellow, but the color may be a little less vibrant
- White wine vinegar: softer and more delicate
- Rice vinegar: gentler and slightly sweet (check that it is at least 5% acidity)
Sugar: One tablespoon adds just enough sweetness to balance the vinegar without making the onions taste like candy. Honey or maple syrup can be used, though they add their own flavor.
Salt: Use fine sea salt or kosher salt. Avoid iodized table salt if you can, since it may cloud the brine slightly, though it is safe to use.
Aromatics and spices: Garlic, peppercorns, mustard seeds, and red pepper flakes add depth. They are optional, but even a few peppercorns make the brine taste more complex.
Lime juice: A splash of fresh lime juice adds a bright citrus note that pairs beautifully with tacos and Latin-inspired dishes.
Instructions
Peel the red onions and slice them into thin rings or half-moons. For the most even results, use a sharp knife or a mandoline, aiming for slices about ⅛ inch (3 mm) thick. Separate the slices with your fingers so the brine can reach every layer. Uniform slices pickle evenly and stay crisp.
Pack the sliced onions into a clean, heat-safe glass jar. Add the garlic, black peppercorns, mustard seeds, and red pepper flakes if you are using them. A wide-mouth jar makes packing and serving easier.
In a small saucepan, combine the vinegar, water, sugar, and salt. Heat gently, stirring until the sugar and salt dissolve. Bring the mixture to a brief simmer, then remove it from the heat right away. There is no need to boil it for a long time, and overcooking the brine does not make the pickles any better.
Carefully pour the warm brine over the onions until they are fully covered. Gently press them down with a clean utensil to release trapped air bubbles and make sure every slice is submerged. Onions that stick out above the liquid will not pickle evenly.
Let the onions cool until they are no longer hot, then cover the jar and refrigerate promptly. Do not leave the jar sitting out for hours.
Chill for at least 30 minutes for a quick tangy bite. After 2 to 4 hours, the onions will be noticeably more flavorful and will turn a beautiful bright pink. For the best flavor, many cooks wait until the next day, when the brine has fully penetrated the onions.
Scoop out the onions with a clean fork or tongs and add them to tacos, burgers, sandwiches, salads, grain bowls, grilled meats, or your favorite snack boards.