
3-Ingredient High-Protein Chickpea Sandwich Bread
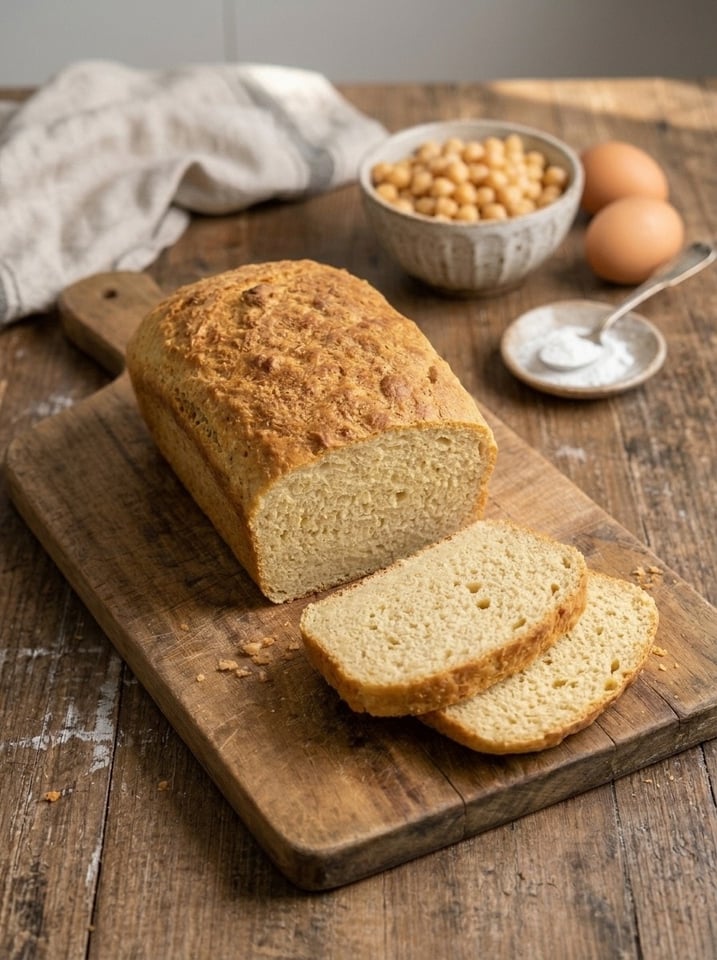
3-Ingredient High-Protein Chickpea Sandwich Bread: Easy, Healthy & Flourless
If you have ever looked at the ingredient list on a store-bought loaf and wondered whether bread could be simpler, this 3-ingredient high-protein chickpea sandwich bread is your answer. It is made with cooked chickpeas, eggs, and baking powder. There is no wheat flour, no yeast, no kneading, and no waiting for dough to rise. You blend, pour, and bake, and about 45 minutes later you have a hearty little loaf that slices neatly and works for sandwiches, breakfast toast, and quick lunches.
The chickpeas give the bread a dense, satisfying texture and a mild, nutty flavor, while the eggs bind everything together and add even more protein. If you are looking for an easy way to bring more plant-based protein and fiber into your everyday meals, this recipe is a great place to start. In this complete guide, you will find the full recipe, helpful tips, flavor variations, storage and freezing instructions, serving ideas, troubleshooting advice, and answers to the most common questions.
Why You Will Love This Chickpea Bread
- Only three main ingredients. Chickpeas, eggs, and baking powder are all you need. Salt and seasonings are optional extras.
- Flourless. The loaf contains no wheat flour, which makes it a popular choice for people who want to cut back on traditional bread.
- Naturally gluten-free when you use certified gluten-free ingredients. Chickpeas and eggs do not contain gluten, but always check labels, especially on baking powder and canned goods, if you need to avoid gluten strictly.
- High in protein and fiber. Chickpeas are a good source of plant-based protein and fiber, and eggs add more protein to every slice.
- No yeast and no kneading. There is no proofing, rising, or shaping. If you own a blender or food processor, you can make this bread.
- Quick to prepare. Ten minutes of prep and a short bake means fresh bread on a weeknight is realistic.
- Meal-prep friendly. It keeps well in the fridge and freezes beautifully in slices.
- Versatile. Sweet or savory toppings both work, and the batter welcomes herbs and spices.
Recipe at a Glance
- Prep time: 10 minutes
- Bake time: 35–45 minutes
- Total time: 45–55 minutes (plus cooling)
- Servings: 1 small loaf (6–8 slices)
- Oven temperature: 350°F (175°C)
Ingredients
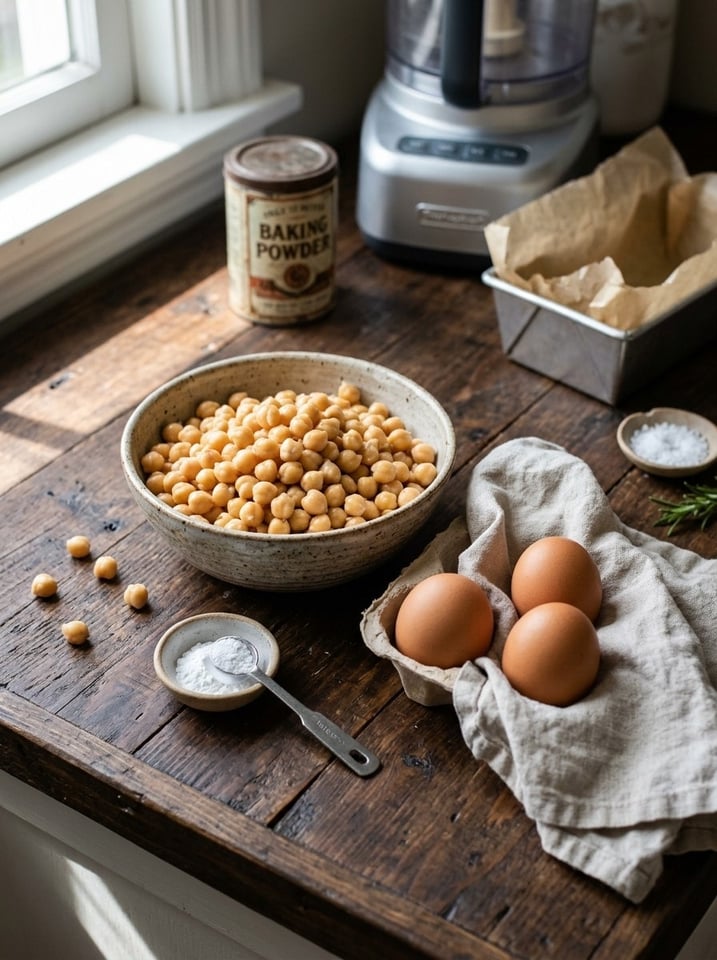
The Three Main Ingredients
- 2 cups (330 g) cooked chickpeas, well drained
- 3 large eggs
- 1 teaspoon baking powder
Optional Seasonings
A pinch of salt, garlic powder, or dried herbs. These are not counted among the three main ingredients, but they make a noticeable difference in flavor.
Equipment
- A blender or food processor
- A small loaf pan
- Parchment paper or nonstick spray
- A spatula
- A wire cooling rack
- A sharp serrated knife for slicing
Step-by-Step Instructions
Step 1: Prepare the Chickpeas
If you are using canned chickpeas, drain and rinse them thoroughly under cold water, then let them drain well to remove as much moisture as possible. If you are cooking chickpeas from dried, soak and cook them until they are completely tender before using. Tender chickpeas blend into a much smoother batter, which leads to a better loaf.
Excess moisture is the most common reason chickpea bread turns out dense or gummy, so give the chickpeas a few minutes in a colander. You can even pat them gently with a clean kitchen towel.
Step 2: Blend the Ingredients
Place the chickpeas, eggs, and baking powder in a blender or food processor. Blend until the mixture is as smooth as possible, pausing to scrape down the sides if needed. Add a pinch of salt or your favorite seasonings if you like.
A smooth batter creates an even crumb and helps the bread slice cleanly. If you see small chickpea chunks, keep blending for another 30 to 60 seconds.
Step 3: Prepare the Loaf Pan
Preheat your oven to 350°F (175°C). Line a small loaf pan with parchment paper, or lightly grease it, so the bread releases easily after baking. Parchment with a little overhang on the long sides makes lifting the loaf out very simple.
Step 4: Pour in the Batter
Transfer the chickpea mixture into the prepared pan. Smooth the top with a spatula and gently tap the pan on the counter a couple of times to release any large air bubbles.
Step 5: Bake Until Set
Bake for approximately 35 to 45 minutes, or until the loaf is firm in the center and a toothpick inserted into the middle comes out without wet batter. If the top browns too quickly, cover it loosely with foil for the remaining baking time.
Ovens differ, so begin checking at 35 minutes. The loaf should feel set and spring back lightly when touched in the center.
Step 6: Cool Before Slicing
Remove the loaf from the oven and let it rest in the pan for 10 minutes. Then transfer it to a wire rack and allow it to cool completely before slicing. This step matters: the bread continues to firm up as it cools, which helps it hold together and gives it a better texture.
Step 7: Serve and Enjoy
Slice the bread and serve it with avocado, eggs, cottage cheese, hummus, turkey, or your favorite sandwich fillings. For extra flavor and a firmer texture, lightly toast each slice before serving.
What Does Chickpea Bread Taste and Feel Like?
It helps to set the right expectations. This is not a fluffy, airy loaf like a white sandwich bread. The texture is denser and more moist, closer to a savory protein loaf or a firm, tender cake. The flavor is mild and slightly nutty, with a gentle beany note that mellows once the bread is toasted and topped. Because there is no wheat flour, the crumb is tight rather than stretchy.
Most people find the bread tastes best toasted, when the outside turns crisp and the inside stays soft. If you are new to chickpea-based baking, start with savory toppings such as avocado and egg, hummus and cucumber, or turkey and mustard. Those flavors pair naturally with the chickpea base.
Tips for Perfect Chickpea Sandwich Bread
- Drain the chickpeas thoroughly. Too much moisture can make the loaf dense or gummy. Give them time in a colander and pat them dry.
- Blend until smooth. A smooth batter creates a more even texture and helps the bread slice cleanly.
- Do not skip the cooling time. The loaf becomes firmer as it cools, which makes it much easier to cut into neat slices.
- Add savory flavors. Garlic powder, paprika, rosemary, oregano, or black pepper can make this bread even more delicious.
- Use fresh baking powder. Old baking powder loses its lifting power, and your loaf may bake up flatter. If you are unsure, test a pinch in warm water: it should fizz right away.
- Use a small loaf pan. The recipe makes a compact loaf. A pan that is too large will spread the batter thin and produce a short, dry bread.
- Make individual portions. Divide the batter between greased muffin cups and bake for approximately 18 to 25 minutes, checking that the centers are fully set.
- For a crispier sandwich. Toast the slices in a skillet or toaster before adding your favorite fillings.
- Slice with a serrated knife. Use a gentle sawing motion rather than pressing down, which helps keep the slices intact.
Delicious Variations to Try
Once you have made the basic loaf, it is easy to adapt the flavor. Add any of the following to the blender along with the main ingredients:
- Garlic and herb: garlic powder, dried oregano, and a pinch of salt for a loaf that tastes like savory focaccia.
- Everything-style: a sprinkle of sesame seeds, poppy seeds, and dried onion on top before baking.
- Spicy: a pinch of chili flakes, smoked paprika, or cumin for a warm, earthy flavor.
- Rosemary and black pepper: a classic combination that works especially well with eggs and soups.
- Cheesy: a handful of grated Parmesan or cheddar blended into the batter or sprinkled on top, which will add richness and a golden crust.
- Seeded: top the loaf with pumpkin seeds or sunflower seeds for crunch.
- Lightly sweet: omit the savory seasonings and add a little cinnamon for a toast that pairs with nut butter and sliced banana.
Keep in mind that heavier additions, like cheese, may slightly change the baking time, so test for doneness with a toothpick.
How to Serve Chickpea Sandwich Bread
Breakfast Ideas
- Toast a slice and top it with mashed avocado, a soft-boiled egg, and a pinch of salt and pepper.
- Spread cottage cheese on a warm slice and add sliced tomatoes and fresh herbs.
- Layer scrambled eggs and spinach for a high-protein breakfast sandwich.
Lunch Ideas
- Build a turkey sandwich with lettuce, cucumber, and mustard.
- Spread hummus and add roasted vegetables for a fully plant-forward sandwich.
- Make a tuna or chicken salad sandwich and toast the bread first so it stays sturdy.
Snack and Dinner Ideas
- Cut slices into fingers and serve with soup or a dipping sauce.
- Use a toasted slice as a base for open-faced sandwiches with cheese and tomato.
- Serve alongside a salad as a hearty, protein-rich side.
Storage, Freezing, and Reheating
Refrigerator: Store the bread in an airtight container in the refrigerator for up to 4 days. Because it contains eggs and moisture-rich chickpeas, it should not be left at room temperature for long periods.
Freezer: Slice the cooled loaf, separate the slices with parchment paper, and freeze in a sealed bag for up to 2 months. The parchment lets you pull out just the slices you need.
Reheating: Thaw slices in the refrigerator, or toast them straight from the freezer. Toasting brings back a pleasant crispness and improves the texture noticeably.
Meal prep tip: Bake the loaf on the weekend, slice it once it is completely cool, and freeze it in portions. You will have grab-and-toast bread ready for the entire week.
Troubleshooting Common Problems
My bread is gummy in the middle. The chickpeas were probably too wet, or the loaf needed more time. Drain and dry the chickpeas well next time, and bake until a toothpick comes out clean. Make sure the loaf cools fully before slicing, because the center continues to set as it cools.
The bread is too dense. This recipe is naturally denser than wheat bread, but a very heavy loaf can mean the batter was not blended smoothly enough or the baking powder was old. Blend longer and use fresh baking powder.
The top browned too quickly. Tent the loaf loosely with foil partway through baking. Oven hot spots can also cause fast browning, so rotate the pan if needed.
The loaf stuck to the pan. Line the pan with parchment paper, or grease it very well. Let the loaf rest for 10 minutes before lifting it out.
It tastes too much like chickpeas. Add garlic, herbs, black pepper, or a bit of salt to the batter, and toast the slices before serving. Rinsing canned chickpeas well also helps reduce the canned flavor.
The slices fall apart. Make sure the loaf has cooled completely, use a serrated knife, and slice with a gentle sawing motion. Cutting slightly thicker slices can also help.
Is Chickpea Bread Healthy?
This bread has a simple, whole-food ingredient list, with no refined flour, added sugar, or preservatives. Chickpeas provide plant-based protein and dietary fiber, which can help you feel full longer, and the eggs add complete protein. The loaf also tends to be lower in refined carbohydrates than traditional sandwich bread, which is one reason it appeals to people looking for a more protein-forward option.
Keep in mind that the exact protein content depends on the size of the eggs and the amount of chickpeas used, so nutrition values can vary from loaf to loaf. If you track nutrition closely, calculate it using your own ingredients and divide by the number of slices you cut. As with any recipe, people with egg allergies, legume sensitivities, or specific medical diets should check whether it fits their needs, and consult a healthcare professional if they are unsure.
Chickpea Bread vs. Traditional Bread
| Feature | Chickpea sandwich bread | Traditional wheat bread |
|---|---|---|
| Main ingredients | Chickpeas, eggs, baking powder | Wheat flour, yeast, water, salt |
| Flour | None | Wheat flour |
| Gluten | Naturally gluten-free with certified ingredients | Contains gluten |
| Rising time | None | Usually 1–2 hours or more |
| Texture | Dense, moist, tender | Soft, airy, chewy |
| Best served | Toasted | Fresh or toasted |
| Shelf life | Up to 4 days refrigerated | Several days at room temperature |
The two breads serve different purposes. Traditional bread offers an airy crumb that chickpea bread cannot fully replicate, but chickpea bread wins on simplicity, protein, and speed.
Frequently Asked Questions
Can I use canned chickpeas?
Yes. Canned chickpeas are the most convenient option. Drain and rinse them thoroughly, then let them drain well so the batter is not too wet.
Is this bread really gluten-free?
Chickpeas and eggs are naturally gluten-free, and the recipe has no wheat flour. To be safe, use certified gluten-free ingredients, since baking powder and canned goods may be processed in facilities that handle gluten.
Can I make it without eggs?
The eggs are essential for binding and structure in this recipe, so a direct swap is not recommended. If you need an egg-free option, you would need a different recipe designed for that purpose.
Can I use a food processor instead of a blender?
Yes. A food processor works well, though you may need to scrape down the sides more often and blend a little longer to get the batter smooth.
Can I double the recipe?
Yes, but use a larger loaf pan or two small pans, and expect a longer baking time. Check for doneness with a toothpick rather than relying on time alone.
Why does my chickpea bread smell eggy?
A mild egg aroma right out of the oven is normal. It fades as the bread cools, and toasting the slices helps further. Adding garlic powder or herbs also balances the smell.
Can I add flour or other ingredients?
This recipe is designed to be flourless. You can add seasonings, herbs, seeds, or a little cheese, but significant changes to the ratios may affect the texture, so make small adjustments.
Does it taste like regular bread?
Not exactly. It is denser and more moist, with a mild, nutty flavor. Many people enjoy it most when toasted and paired with savory toppings.
Can I bake it as muffins or rolls?
Yes. Divide the batter between greased muffin cups and bake for roughly 18 to 25 minutes, until the centers are fully set. They are handy for portion control and lunchboxes.
How do I know when it is done?
The loaf should be firm in the center, lightly golden on top, and a toothpick inserted into the middle should come out without wet batter.
Final Thoughts
This 3-ingredient high-protein chickpea sandwich bread proves that a satisfying loaf does not need flour, yeast, or a long ingredient list. With a blender, a loaf pan, and about 10 minutes of prep, you can have a hearty, protein-rich bread ready for sandwiches, breakfast toast, and quick lunches. It is denser and more moist than traditional bread, but when toasted and topped with your favorite fillings, it is a delicious and practical everyday staple.
Start with the basic recipe, then experiment with garlic, herbs, spices, and seeds to make it your own. Cool it completely, slice it, and keep a stash in the freezer for busy days. If you try it, leave a comment with your favorite topping, and share the recipe with friends who love easy, healthy bread alternatives.
Note: Protein content depends on the size of the eggs and the amount of chickpeas used. This recipe contains no wheat flour, but the texture is denser and more moist than traditional sandwich bread.
Print
3-Ingredient High-Protein Chickpea Sandwich Bread
Ingredients
- 2 cups (330 g) cooked chickpeas, well drained
- 3 large eggs
- 1 teaspoon baking powder
Optional Seasonings
A pinch of salt, garlic powder, or dried herbs. These are not counted among the three main ingredients, but they make a noticeable difference in flavor.
Equipment
- A blender or food processor
- A small loaf pan
- Parchment paper or nonstick spray
- A spatula
- A wire cooling rack
- A sharp serrated knife for slicing
Instructions
If you are using canned chickpeas, drain and rinse them thoroughly under cold water, then let them drain well to remove as much moisture as possible. If you are cooking chickpeas from dried, soak and cook them until they are completely tender before using. Tender chickpeas blend into a much smoother batter, which leads to a better loaf.
Excess moisture is the most common reason chickpea bread turns out dense or gummy, so give the chickpeas a few minutes in a colander. You can even pat them gently with a clean kitchen towel.
Place the chickpeas, eggs, and baking powder in a blender or food processor. Blend until the mixture is as smooth as possible, pausing to scrape down the sides if needed. Add a pinch of salt or your favorite seasonings if you like.
A smooth batter creates an even crumb and helps the bread slice cleanly. If you see small chickpea chunks, keep blending for another 30 to 60 seconds.
Preheat your oven to 350°F (175°C). Line a small loaf pan with parchment paper, or lightly grease it, so the bread releases easily after baking. Parchment with a little overhang on the long sides makes lifting the loaf out very simple.
Transfer the chickpea mixture into the prepared pan. Smooth the top with a spatula and gently tap the pan on the counter a couple of times to release any large air bubbles.
Bake for approximately 35 to 45 minutes, or until the loaf is firm in the center and a toothpick inserted into the middle comes out without wet batter. If the top browns too quickly, cover it loosely with foil for the remaining baking time.
Ovens differ, so begin checking at 35 minutes. The loaf should feel set and spring back lightly when touched in the center.
Remove the loaf from the oven and let it rest in the pan for 10 minutes. Then transfer it to a wire rack and allow it to cool completely before slicing. This step matters: the bread continues to firm up as it cools, which helps it hold together and gives it a better texture.
Slice the bread and serve it with avocado, eggs, cottage cheese, hummus, turkey, or your favorite sandwich fillings. For extra flavor and a firmer texture, lightly toast each slice before serving.