
Cheesy Patty Melt Sliders
You know that blissful moment when the aroma of sizzling beef fills the air, mingling with the rich scent of melting cheese? Picture biting into a warm patty melt slider, the crispy exterior giving way to a scenery of flavor. The crunch of toasted bread harmonizes with the juiciness of seasoned beef, while the sweet, caramelized onions introduce an extra layer of depth. Every bite seems to whisper comfort, nostalgic yet fresh, evoking memories of cozy family dinners and carefree gatherings with friends.
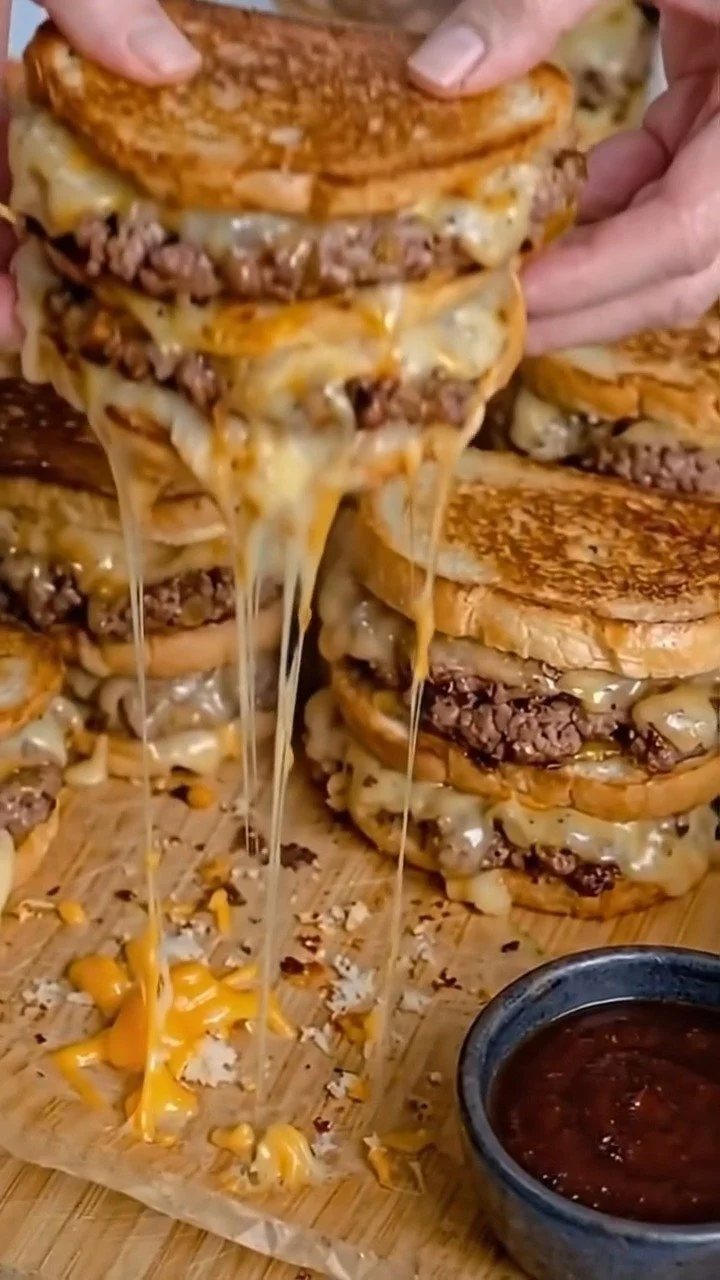
Cheesy patty melt sliders embody the perfect union of flavors and textures. The contrasting elements of creamy cheese, savory beef, and the slightly crispy edge of perfectly buttered bread create a tantalizing experience that dances on your taste buds. Each little slider cradles a warm, mouthful of joy, ample enough for sharing but satisfying enough that you might just keep them all to yourself.
These delightful sliders serve as a reminder that comfort food can be both deliciously simple and sophisticated. Whether enjoyed at a casual game night, as a fun dinner option for the family, or during a cozy Sunday brunch, cheesy patty melt sliders cater to any occasion, transforming the ordinary into something extraordinary. With every slider devoured, you find not just flavor but a connection – to your loved ones, the joy of togetherness, and the hearty satisfaction that food brings.
Why You’ll Love This Cheesy Patty Melt Sliders
What makes cheesy patty melt sliders truly special? These sliders are full of flavor and offer incredible versatility. The brown, crispy exterior meets a soft, gooey center, creating an indulgent contrast. Perfect for gatherings, they provide a nostalgic touch that everyone adores. Elevate your appetizer game or serve them as a fulfilling main dish; the options are limitless.
You will relish the ooey-gooey cheese melting over the juicy beef, cradled within warm, toasty bread. The sweetness from caramelized onions brings an unforgettably rich flavor profile that enhances each bite. Suitable for casual gatherings and hearty family dinners alike, they transport you back to cherished moments while also giving you a comforting boost in today’s busy world. No wonder everyone loves them!
Preparation Phase & Tools to Use
Preparing cheesy patty melt sliders is a breeze, especially with a few essential tools at your side:
- Skillet or Griddle: Your trusty skillet or a flat-top griddle will keep the cooking process even, ensuring the bread gets golden and the cheese melts perfectly.
- Spatula: A sturdy spatula will help you flip those sliders smoothly without risking a cheesy catastrophe.
- Cutting Board & Knife: For slicing the onions and assembling the sliders, having a sturdy cutting board and a sharp knife becomes vital.
- Measuring Spoons: You don’t want to over-salt your beef. Measuring spoons ensure you season precisely, enhancing flavors without overpowering them.
Preparation Tips:
- Have all ingredients prepped and within reach before you start cooking. This allows for a smooth assembly and cooking process.
- Allow the beef to cool slightly before assembling your sliders for better cheese melting and ease of handling.
Ingredients for Cheesy Patty Melt Sliders
Gather these simple yet flavorful ingredients to create your own cheesy patty melt sliders:
- 1 pound ground beef: The foundation of the sliders, your beef should be well-seasoned for maximum flavor.
- 8 slices of bread: Rye or sourdough are ideal. These choices bear a lovely crunch and unique taste that adds depth.
- 8 slices of cheddar cheese: The star of the show, cheddar melts beautifully, offering a rich, creamy background for your sliders.
- 1 onion, thinly sliced: Sweet, caramelized onions add sweetness and balance, enriching the overall flavor.
- Butter for spreading: Buttering the bread ensures a golden, crispy crust that beckons your taste buds.
- Salt and pepper to taste: Simple seasonings that elevate the flavor of the beef to its peak potential.
Substitution ideas:
- You can use ground turkey or plant-based substitutes for a leaner or vegetarian option.
- Bell peppers or mushrooms can be added to diversify the flavor profile or substitute for onions entirely for those with different tastes.
How to Make Cheesy Patty Melt Sliders
Prepare to indulge in this mouthwatering recipe by following these straightforward steps:
-
Cook the Beef: In a skillet over medium heat, cook the ground beef until it reaches a rich brown hue. Season it with salt and pepper, allowing the flavors to meld beautifully.
-
Caramelize the Onions: In the same skillet, add the sliced onions. Sauté them slowly, stirring occasionally until they become golden and sweet. This process should take about 10 minutes.
-
Prepare the Bread: Generously butter one side of each slice of bread. The butter will create that irresistible golden crust as you cook.
-
Assemble the Sliders: Layer your sliders. Place a slice of cheese on the unbuttered side of the bread, add a portion of the cooked beef, and sprinkle with caramelized onions. Top with another slice of cheese and finish with another slice of buttered bread, buttered side out.
-
Grill to Perfection: Heat your griddle to medium heat and place the assembled sliders on it. Cook for about 3-4 minutes per side, until the bread turns golden brown and the cheese melts into a gooey delight. Press down slightly with the spatula for that perfect crust.
-
Serve Warm: Once golden and melted, slice the sliders in half, serve them warm, and prepare for the delightful oohs and aahs from your guests!
Chef’s Notes & Helpful Tips
-
Make-Ahead Options: You can prepare the beef and onions in advance. Store them in airtight containers in the fridge. When you’re ready to cook, simply reheat and assemble your sliders.
-
Cooking Alternatives: If you prefer an air fryer, assemble the sliders as directed, cook at 350°F for about 8-10 minutes or until golden and completely melted, flipping halfway. If using an oven, bake at 375°F for about 10-15 minutes, covering with foil for the first half to keep the sliders moist.
-
Customization Ideas: Add toppings like sliced jalapeños for a spicy kick or different cheeses such as pepper jack or mozzarella for a varied taste experience. You can also try an herb butter for an aromatic twist.
Common Mistakes to Avoid
-
Overcooking the Beef: Aim for a perfectly cooked patty that retains a juicy texture. Don’t rush this step by cranking up the heat.
-
Ignoring the Bread: Skipping the buttering step means you miss out on that gorgeous crust. Never underestimate the power of golden-brown bread!
-
Rushing Assembly: If you don’t allow your beef to cool slightly, the cheese will not melt as effectively, making for a less satisfying slider.
What to Serve With Cheesy Patty Melt Sliders
Enhance your slider experience with these delicious pairings:
- French Fries: Classic and crispy, they complement the rich sliders beautifully.
- Onion Rings: Add texture and contrast with a bit of crunch and sweetness that echoes the caramelized onions.
- Coleslaw: The crisp, tangy slaw brings freshness that balances the richness of the sliders.
- Pickles: Their briny crunch cuts through the richness, providing a perfect bite with every slider.
- Chips: Serve alongside kettle-cooked chips for an addictive crunch.
- Salad: A light salad helps round out the meal, bringing in greens and a refreshing contrast to the warm sliders.
- Soup: Pair them with a warm bowl of tomato soup for a delightful dipping experience that feels nostalgic and comforting.
Storage & Reheating Instructions
To store your cheesy patty melt sliders, keep them in an airtight container in the fridge. They will be good for up to three days. To reheat, warm them up in a skillet over low heat to ensure the bread stays crispy while the cheese melts again. Alternatively, place them in the microwave for a quick warm-up, but be cautious, as this may compromise the wonderful crunch.
If you want to store sliders for longer, wrap them tightly in plastic wrap and store in the freezer for up to a month. When ready to enjoy, let them defrost overnight in the fridge before reheating.
Estimated Nutrition Information
Each cheesy patty melt slider contains approximately:
- Calories: 300
- Protein: 15g
- Fat: 20g
- Carbohydrates: 20g
- Fiber: 1g
Note: Nutritional values may vary based on specific ingredients used. This is an estimate only.
FAQs
1. Can I make these sliders gluten-free?
Absolutely! Simply use gluten-free bread. The recipe remains deliciously indulgent.
2. What ground meat can I use other than beef?
Feel free to substitute ground turkey, chicken, or even plant-based alternatives to suit your dietary needs.
3. Can I use different types of cheese?
Certainly! Swiss, gouda, or provolone all melt wonderfully and will give unique flavors to your sliders.
4. How do I achieve the perfect crust on my sliders?
Patience is key. Cook them on medium heat, pressing down with a spatula for even crispiness, and ensure each side has sufficient time to brown beautifully.
5. How long does the prep process take?
Preparation should take around 15-20 minutes, and cooking about 15-20 minutes, making them a quick snack or meal!
Conclusion
Cheesy patty melt sliders invite you into a world of delightful flavors, comforting textures, and the joyous experience of shared meals. With rich cheese, savory beef, and the sweet crescendo of caramelized onions nestled in warm, crispy bread, every bite immerses you deeper into satisfaction. Whether it’s a weekday meal or a party highlight, these sliders are more than just food; they symbolize connection and warmth. So gather your ingredients, channel your inner chef, and dive into the comforting bliss of cheesy patty melt sliders – your taste buds will thank you!
Print
Cheesy Patty Melt Sliders
- Total Time: 35 minutes
- Yield: 4 servings 1x
- Diet: None
Description
Delicious cheesy patty melt sliders with seasoned beef, caramelized onions, and gooey cheddar cheese, all nestled between crispy, buttery bread.
Ingredients
- 1 pound ground beef
- 8 slices of bread (rye or sourdough)
- 8 slices of cheddar cheese
- 1 onion, thinly sliced
- Butter for spreading
- Salt and pepper to taste
Instructions
- Cook the beef: In a skillet over medium heat, cook the ground beef until it reaches a rich brown hue. Season it with salt and pepper.
- Caramelize the onions: In the same skillet, add the sliced onions and sauté until golden and sweet, about 10 minutes.
- Prepare the bread: Butter one side of each slice of bread generously for a golden crust.
- Assemble the sliders: Place a slice of cheese on the unbuttered side of the bread, add a portion of cooked beef, sprinkle with onions, top with another slice of cheese, and finish with another slice of buttered bread, butter side out.
- Grill to perfection: Heat a griddle to medium and cook the assembled sliders for 3-4 minutes per side, until golden brown and melted.
- Serve warm: Slice the sliders in half, serve them warm, and enjoy!
Notes
For make-ahead options, prepare beef and onions in advance. Customization ideas include using different cheeses or adding toppings like jalapeños.
- Prep Time: 20 minutes
- Cook Time: 15 minutes
- Category: Appetizer
- Method: Grilling
- Cuisine: American
Nutrition
- Serving Size: 1 slider
- Calories: 350
- Sugar: 2g
- Sodium: 600mg
- Fat: 20g
- Saturated Fat: 10g
- Unsaturated Fat: 8g
- Trans Fat: 0g
- Carbohydrates: 28g
- Fiber: 2g
- Protein: 20g
- Cholesterol: 50mg
Keywords: patty melt, sliders, comfort food, cheesy, beef, onions