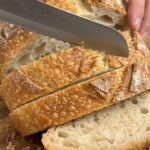
Ingredients
- 3 cups (375 g) all-purpose or bread flour
- 1½ cups (360 ml) lukewarm water
- 1 teaspoon instant yeast
- 1½ teaspoons salt
- 1 teaspoon sugar (optional)
A Closer Look at the Ingredients
Flour. All-purpose flour gives a tender crumb and a lovely, slightly softer crust, while bread flour has more protein, producing a chewier, loftier loaf with a bit more structure. Both work well. Weighing the flour is best: 375 g is more consistent than 3 cups, since flour that is scooped and packed can make the dough too dry.
Lukewarm water. This dough contains a lot of water, about 96 percent of the flour weight, which is what makes it sticky and what produces its airy, open crumb. Lukewarm means roughly 100–110°F (38–43°C), warm to the touch but not hot. Water that is too hot can kill the yeast.
Instant yeast. Just 1 teaspoon is enough, because this dough rises slowly over a couple of hours, which also gives it more flavor than a quick rise. Instant yeast can be mixed straight into the flour. If you only have active dry yeast, use the same amount and dissolve it in the water for about 5 to 10 minutes first.
Salt. Salt adds flavor and strengthens the dough, and it moderates the yeast so the rise stays steady. Skipping it gives a flat-tasting, pale loaf.
Sugar (optional). One teaspoon of sugar gives the yeast a little extra food and helps the crust brown. It is not required, and the bread is fine without it.
Instructions
In a large bowl, combine the flour, instant yeast, salt, and sugar if using. Pour in the lukewarm water and stir with a wooden spoon until a sticky, shaggy dough forms and no dry flour remains. This takes only a minute or two. Do not add more flour. The sticky dough is what gives you an airy crumb.
Cover the bowl with plastic wrap or a clean kitchen towel. Leave in a warm place for 2 to 2½ hours, until the dough has expanded and looks bubbly. You should see bubbles across the surface and along the sides of the bowl, and the dough should jiggle when you shake the bowl. A cooler kitchen may need more time.
Lightly flour your work surface and your hands. Turn the dough out and fold the edges toward the center a few times to form a rough round loaf. Avoid kneading. You want to keep as many air bubbles as possible. Flip the dough so the seam is on the bottom and tuck the edges under to make a loose round.
Place the dough seam-side down on a piece of parchment paper. Cover and let it rest for 20 to 30 minutes while the oven heats. It will puff slightly.
Place a Dutch oven with its lid inside the oven and preheat to 450°F (230°C) for about 30 minutes. A properly hot pot is key to a crisp crust and good oven spring. Use oven mitts when handling the hot pot.
Carefully remove the hot Dutch oven. Lift the dough, using the parchment paper as a sling, and lower it into the pot. With a sharp knife or razor blade, make one shallow slash across the top, about ½ inch deep. Scoring controls where the loaf expands, so it opens neatly instead of bursting at random.
Cover with the lid and bake for 30 minutes. The trapped steam keeps the crust soft and stretchy at first, which allows the loaf to rise fully before the crust sets.
Remove the lid and bake for another 10 to 15 minutes, until the bread is deeply golden and crisp. If you have an instant-read thermometer, the center of the loaf should reach about 205–210°F (96–99°C).
Lift the loaf out of the pot and transfer it to a wire rack. Cool for at least 45 minutes so the crumb can set properly. As the bread cools, you may hear the crust crackle, which is a very good sign. Cutting too early can leave the center gummy.