
Easy No-Knead Farmhouse Bread
Easy No-Knead Farmhouse Bread: Rustic Dutch Oven Loaf With a Crispy Golden Crust 🍞
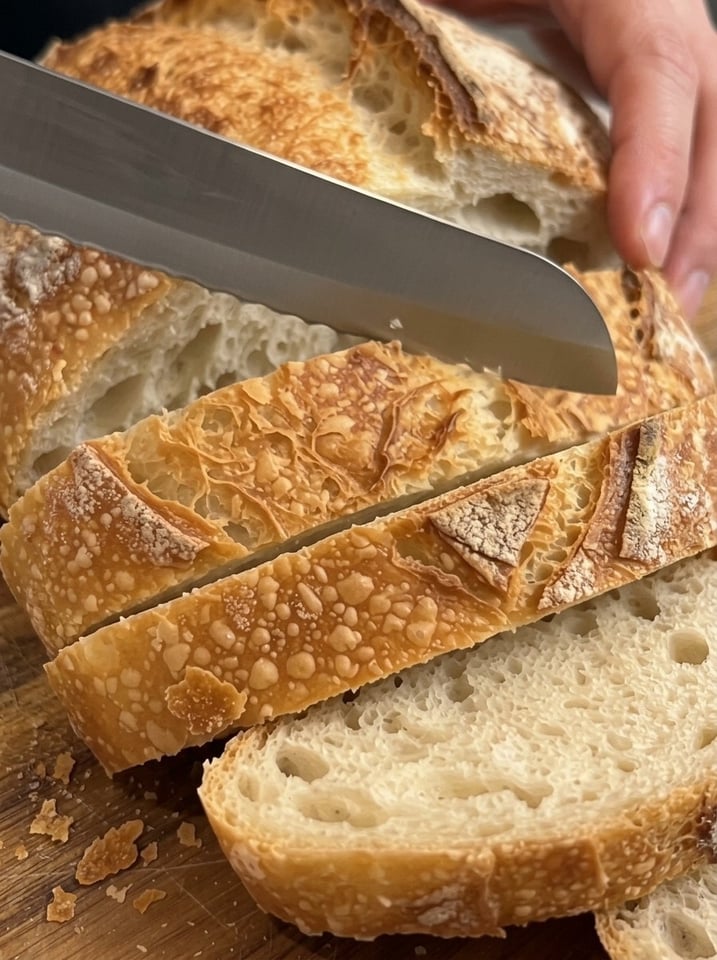
There is a reason rustic, crusty, homemade bread has such a hold on us. The crackle of the crust when you slice into it, the soft, airy, open crumb inside, and the aroma that fills the whole house are hard to beat. This Easy No-Knead Farmhouse Bread delivers all of it with just a few pantry ingredients and almost no hands-on effort.
You stir flour, water, a little yeast, salt, and an optional pinch of sugar into a shaggy dough, then let time do the work. There is no kneading and no stand mixer. A hot Dutch oven traps steam and gives you a bakery-style, deeply golden, crisp crust. The result is perfect for breakfast toast, hearty sandwiches, cozy soups, or tearing apart and enjoying warm with butter straight from the oven.
In this complete guide you will find the full recipe, a closer look at each ingredient, detailed step-by-step instructions with visual cues, the science behind a Dutch oven loaf, expert tips (including a no-Dutch-oven option and an overnight method), troubleshooting help, variations, serving ideas, storage and freezing instructions, and answers to the most common questions.
Why You’ll Love This Farmhouse Bread 🤎
It needs only 4 ingredients, plus an optional fifth. Flour, water, yeast, and salt, with a pinch of sugar if you like. That is a pantry-staple loaf.
There is no kneading. A wooden spoon is all you need to mix the dough.
It is mostly hands-off. About 10 minutes of active work, then the dough rises on its own.
The crust is spectacular. Baking in a covered, preheated Dutch oven creates steam, which gives the crackly, deeply golden crust people pay bakery prices for.
The crumb is soft and airy. The wet dough develops an open interior with a delicious homemade flavor.
It is incredibly versatile. Toast it, make sandwiches, serve it with soup, or turn the leftovers into croutons.
It is very budget-friendly. A loaf costs only pennies compared with artisan bread from a bakery.
It is beginner friendly. Shaping is gentle and forgiving, and the Dutch oven does the hard part.
It can fit your schedule. You can bake it the same day or let the dough ferment overnight in the refrigerator for even more flavor.
Recipe Overview
- Prep Time: 10 minutes
- Cook Time: 40–45 minutes
- Total Time: About 3 hours (including rising, resting, and baking, with extra time for cooling)
- Servings: 10 slices
Ingredients You’ll Need 🛒
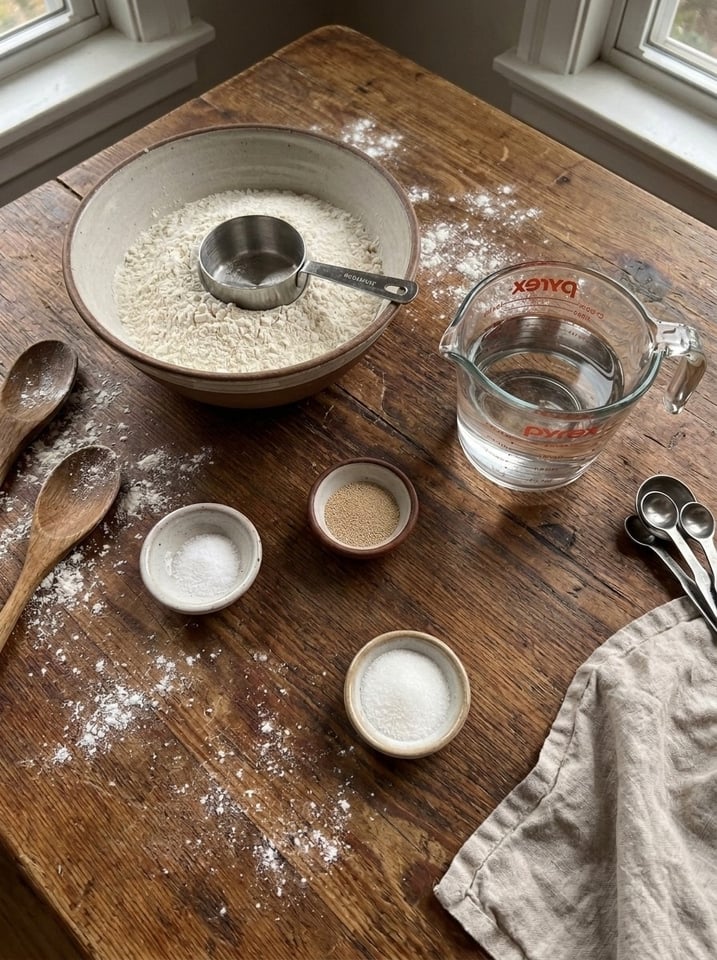
- 3 cups (375 g) all-purpose or bread flour
- 1½ cups (360 ml) lukewarm water
- 1 teaspoon instant yeast
- 1½ teaspoons salt
- 1 teaspoon sugar (optional)
A Closer Look at the Ingredients
Flour. All-purpose flour gives a tender crumb and a lovely, slightly softer crust, while bread flour has more protein, producing a chewier, loftier loaf with a bit more structure. Both work well. Weighing the flour is best: 375 g is more consistent than 3 cups, since flour that is scooped and packed can make the dough too dry.
Lukewarm water. This dough contains a lot of water, about 96 percent of the flour weight, which is what makes it sticky and what produces its airy, open crumb. Lukewarm means roughly 100–110°F (38–43°C), warm to the touch but not hot. Water that is too hot can kill the yeast.
Instant yeast. Just 1 teaspoon is enough, because this dough rises slowly over a couple of hours, which also gives it more flavor than a quick rise. Instant yeast can be mixed straight into the flour. If you only have active dry yeast, use the same amount and dissolve it in the water for about 5 to 10 minutes first.
Salt. Salt adds flavor and strengthens the dough, and it moderates the yeast so the rise stays steady. Skipping it gives a flat-tasting, pale loaf.
Sugar (optional). One teaspoon of sugar gives the yeast a little extra food and helps the crust brown. It is not required, and the bread is fine without it.
Step-by-Step Instructions 👩🍳
Step 1: Mix the Dough
In a large bowl, combine the flour, instant yeast, salt, and sugar if using. Pour in the lukewarm water and stir with a wooden spoon until a sticky, shaggy dough forms and no dry flour remains. This takes only a minute or two. Do not add more flour. The sticky dough is what gives you an airy crumb.
Step 2: Let It Rise
Cover the bowl with plastic wrap or a clean kitchen towel. Leave in a warm place for 2 to 2½ hours, until the dough has expanded and looks bubbly. You should see bubbles across the surface and along the sides of the bowl, and the dough should jiggle when you shake the bowl. A cooler kitchen may need more time.
Step 3: Shape Gently
Lightly flour your work surface and your hands. Turn the dough out and fold the edges toward the center a few times to form a rough round loaf. Avoid kneading. You want to keep as many air bubbles as possible. Flip the dough so the seam is on the bottom and tuck the edges under to make a loose round.
Step 4: Rest the Dough
Place the dough seam-side down on a piece of parchment paper. Cover and let it rest for 20 to 30 minutes while the oven heats. It will puff slightly.
Step 5: Preheat the Oven
Place a Dutch oven with its lid inside the oven and preheat to 450°F (230°C) for about 30 minutes. A properly hot pot is key to a crisp crust and good oven spring. Use oven mitts when handling the hot pot.
Step 6: Score the Loaf
Carefully remove the hot Dutch oven. Lift the dough, using the parchment paper as a sling, and lower it into the pot. With a sharp knife or razor blade, make one shallow slash across the top, about ½ inch deep. Scoring controls where the loaf expands, so it opens neatly instead of bursting at random.
Step 7: Bake Covered
Cover with the lid and bake for 30 minutes. The trapped steam keeps the crust soft and stretchy at first, which allows the loaf to rise fully before the crust sets.
Step 8: Finish Uncovered
Remove the lid and bake for another 10 to 15 minutes, until the bread is deeply golden and crisp. If you have an instant-read thermometer, the center of the loaf should reach about 205–210°F (96–99°C).
Step 9: Cool Before Slicing
Lift the loaf out of the pot and transfer it to a wire rack. Cool for at least 45 minutes so the crumb can set properly. As the bread cools, you may hear the crust crackle, which is a very good sign. Cutting too early can leave the center gummy.
The Science Behind a Great Dutch Oven Loaf 🔬
Time builds gluten without kneading. Kneading helps flour proteins link into gluten. In a very wet dough, those proteins hydrate and align by themselves over a long rest, so time replaces effort.
Slow fermentation builds flavor. Using only a small amount of yeast and rising the dough slowly gives the yeast and naturally present bacteria time to produce alcohols, acids, and aromatic compounds. That is what gives the bread its deep homemade flavor.
The Dutch oven traps steam. Moisture in the dough turns to steam in the sealed pot. The steam keeps the surface of the loaf flexible so it can expand freely, which is called oven spring. Without steam, the crust sets too soon and the loaf rises less.
Removing the lid builds the crust. Once the loaf has expanded, taking the lid off lets the steam escape and the dry heat brown and crisp the surface.
Maillard reaction and caramelization. Sugars and proteins on the crust brown at high heat, producing the golden color and toasty, nutty flavors. A little sugar in the dough helps.
Cooling sets the crumb. As the loaf cools, starch firms up and moisture redistributes, making clean slices possible.
Expert Tips for the Best Farmhouse Bread 💡
Sticky dough is normal. Resist adding too much flour. A wetter dough helps create an airy crumb.
For extra flavor, ferment overnight. Let the dough rise slowly in the refrigerator overnight, then shape and bake the next day. Let it sit at room temperature for about 30 to 60 minutes before shaping if it feels very cold and stiff.
No Dutch oven? Bake on a preheated baking tray and place an oven-safe metal pan with hot water on the lower rack to create steam. Avoid pouring water onto the oven floor or glass, which can cause damage or burns.
Preheat the pot fully. A hot Dutch oven gives the best crust and rise.
Use parchment paper. It makes moving the dough into the hot pot safe and easy, and it prevents sticking.
Handle with care. The Dutch oven, the lid, and the escaping steam are extremely hot. Use thick oven mitts, and keep your face and arms away from the steam when lifting the lid.
Score confidently. One quick, shallow slash with a sharp knife or razor works best.
Watch the dough, not just the clock. Cooler kitchens need more rising time, and warmer ones less.
For the best slices. Allow the loaf to cool fully before cutting, and use a serrated knife.
Dust sparingly. Use just enough flour on the surface and your hands to keep the dough from sticking.
Storage. Keep in a paper bag or bread box for up to 2 days, or freeze sliced portions for longer storage.
Troubleshooting Common Problems
My dough didn’t rise. The yeast may be old, the water too hot or too cold, or the kitchen too cool. Use fresh yeast, lukewarm water, and a warmer spot, and allow extra time.
My loaf is flat. The dough may have over-proofed, been handled too roughly, or been too slack. Shape gently, and bake when the dough is puffy but still holds some shape.
My loaf is dense. Too much flour, too little rise time, or a pot that was not hot enough can cause density. Weigh the flour, and let the dough become bubbly and expanded.
The crust is too hard. Cool the loaf uncovered on a rack, then store it in a paper bag. A shorter uncovered bake gives a thinner crust.
The crust is too pale. Bake uncovered a few minutes longer, and make sure the oven and pot are fully preheated.
The bottom is burnt. Place a baking sheet on the rack under the Dutch oven, or lift the loaf out on the parchment and finish baking directly on the rack for the last few minutes.
The crumb is gummy. The loaf may be underbaked or cut too soon. Check the temperature and let it cool for at least 45 minutes.
The bread tastes bland. Make sure you used the full 1½ teaspoons of salt, and consider the overnight refrigerator rise for deeper flavor.
The dough is too sticky to shape. Use a lightly floured surface and hands, or a dough scraper. A little stickiness is expected.
The loaf didn’t open at the score. The cut may have been too shallow, or the dough under-proofed. Slash about ½ inch deep, and give the dough enough time to rise.
There are very large holes. The dough may have over-proofed or been shaped too loosely. Gently degas and tighten the shaping slightly.
Delicious Variations to Try 🌿
Rosemary and garlic loaf. Add 1 tablespoon of chopped fresh rosemary and 2 teaspoons of garlic powder to the dry ingredients.
Cheddar and jalapeño loaf. Fold in 1 cup of shredded sharp cheddar and a diced jalapeño during shaping.
Seeded farmhouse loaf. Brush the top with water and sprinkle sesame, sunflower, or poppy seeds before baking.
Whole wheat farmhouse bread. Replace up to 1 cup of the flour with whole wheat flour, and add a splash more water if the dough seems stiff.
Olive and herb bread. Fold in ¾ cup of chopped olives and a teaspoon of dried Italian herbs.
Cinnamon raisin loaf. Add 1 teaspoon of cinnamon and ¾ cup of raisins, plus a tablespoon of sugar.
Honey oat loaf. Add a tablespoon of honey and sprinkle rolled oats on top.
Everything seasoning loaf. Brush with water and sprinkle everything bagel seasoning on the top before baking.
Smaller rolls. Divide the dough into 6 to 8 pieces, and bake on a sheet at 425°F (220°C) for about 20 to 25 minutes.
What to Serve with Farmhouse Bread 🍽️
- Butter and jam: Warm slices with butter, honey, or fruit preserves.
- Soups and stews: Perfect for dunking into tomato soup, chicken noodle soup, or beef stew.
- Sandwiches: Thick slices hold up well to roast beef, turkey, or grilled vegetables.
- Grilled cheese: Butter the outside and griddle until golden and melty.
- Avocado toast: Top toasted slices with avocado, a fried egg, and chili flakes.
- Olive oil dip: Serve warm pieces with olive oil, balsamic vinegar, and herbs.
- Cheese boards: Pair with cheese, cured meats, and fruit.
- Breakfast toast: Toast and top with butter, peanut butter, or cream cheese.
- French toast: Slightly stale slices make superb French toast.
- Croutons and breadcrumbs: Cube or crumb the leftovers for salads, soups, and stuffing.
Storage and Freezing Instructions
Room temperature. Once the loaf is completely cool, keep it in a paper bag or bread box for up to 2 days. A paper bag keeps the crust crisp. A plastic bag softens the crust, but keeps the interior moist longer.
Cut-side down. Store the loaf cut-side down on a cutting board to slow drying out.
Freezer. Slice the cooled loaf, wrap the slices tightly, and freeze in a freezer bag for up to 3 months. Toast slices straight from the freezer, or thaw at room temperature.
Refreshing the crust. Warm a whole or half loaf in a 350°F (175°C) oven for 5 to 10 minutes to bring back the crackle.
Avoid the refrigerator. Cold storage speeds up staling, so keep the bread at room temperature or in the freezer.
Make-ahead dough. Refrigerate the covered dough after the first rise for up to about 24 hours, then shape, rest, and bake.
Frequently Asked Questions
Is this really a no-knead bread? Yes. You stir the dough and gently fold it during shaping. Time and the high water content develop the gluten for you.
Do I need a Dutch oven? A Dutch oven gives the best crust, but it is not required. Bake on a preheated baking tray with an oven-safe metal pan of hot water on the lower rack for steam. Avoid pouring water directly onto the oven floor or glass.
Can I use all-purpose flour instead of bread flour? Yes. All-purpose flour gives a softer crumb, and bread flour gives a chewier, taller loaf.
Why is my dough so wet and sticky? The high hydration is intentional. It gives the open, airy crumb. Use floured hands and a bench scraper instead of adding lots of flour.
Can I use active dry yeast? Yes. Use the same amount and dissolve it in the lukewarm water for 5 to 10 minutes first.
Is the sugar necessary? No, it is optional. A teaspoon helps with browning and feeds the yeast.
Can I let the dough rise overnight? Yes. Refrigerate the covered dough overnight, then shape and bake the next day, for more flavor.
How do I know when the bread is done? The crust should be deeply golden and crisp, the loaf should sound hollow when tapped on the bottom, and the center should reach about 205–210°F (96–99°C).
Can I bake it without parchment paper? You can, but parchment makes handling much easier and prevents sticking in the hot pot. Take great care if you drop the dough directly into the preheated pot.
How do I score bread without a special tool? A sharp serrated or paring knife works well. Cut quickly, about ½ inch deep.
Why did my bread come out dense? Common causes are too much flour, old yeast, under-proofing, or a pot that was not hot enough.
Can I add mix-ins? Yes. Cheese, herbs, olives, and seeds work well. Fold them in during shaping.
Can I use a loaf pan instead? Yes. Transfer the shaped dough to a greased 9 × 5-inch loaf pan for the last rest, and bake at 425°F (220°C) for about 40 to 45 minutes. The crust will be softer than in a Dutch oven.
How long does it keep? Up to 2 days at room temperature in a paper bag or bread box, or up to 3 months frozen.
Why do I need to wait before slicing? The crumb is still setting as it cools. Cutting early can make it gummy and cause the loaf to compress.
Final Thoughts 🏡🍞🤎
This Easy No-Knead Farmhouse Bread shows that a rustic, bakery-style loaf does not require hard work, only a few humble ingredients and a little time. With a crackly golden crust, a soft, airy interior, and a flavor that tastes like it came from a farmhouse kitchen, it is a recipe you will return to again and again. Keep the dough sticky, preheat the pot, bake until deeply golden, and wait for the loaf to cool before slicing.
Print
Easy No-Knead Farmhouse Bread
Ingredients
- 3 cups (375 g) all-purpose or bread flour
- 1½ cups (360 ml) lukewarm water
- 1 teaspoon instant yeast
- 1½ teaspoons salt
- 1 teaspoon sugar (optional)
A Closer Look at the Ingredients
Flour. All-purpose flour gives a tender crumb and a lovely, slightly softer crust, while bread flour has more protein, producing a chewier, loftier loaf with a bit more structure. Both work well. Weighing the flour is best: 375 g is more consistent than 3 cups, since flour that is scooped and packed can make the dough too dry.
Lukewarm water. This dough contains a lot of water, about 96 percent of the flour weight, which is what makes it sticky and what produces its airy, open crumb. Lukewarm means roughly 100–110°F (38–43°C), warm to the touch but not hot. Water that is too hot can kill the yeast.
Instant yeast. Just 1 teaspoon is enough, because this dough rises slowly over a couple of hours, which also gives it more flavor than a quick rise. Instant yeast can be mixed straight into the flour. If you only have active dry yeast, use the same amount and dissolve it in the water for about 5 to 10 minutes first.
Salt. Salt adds flavor and strengthens the dough, and it moderates the yeast so the rise stays steady. Skipping it gives a flat-tasting, pale loaf.
Sugar (optional). One teaspoon of sugar gives the yeast a little extra food and helps the crust brown. It is not required, and the bread is fine without it.
Instructions
In a large bowl, combine the flour, instant yeast, salt, and sugar if using. Pour in the lukewarm water and stir with a wooden spoon until a sticky, shaggy dough forms and no dry flour remains. This takes only a minute or two. Do not add more flour. The sticky dough is what gives you an airy crumb.
Cover the bowl with plastic wrap or a clean kitchen towel. Leave in a warm place for 2 to 2½ hours, until the dough has expanded and looks bubbly. You should see bubbles across the surface and along the sides of the bowl, and the dough should jiggle when you shake the bowl. A cooler kitchen may need more time.
Lightly flour your work surface and your hands. Turn the dough out and fold the edges toward the center a few times to form a rough round loaf. Avoid kneading. You want to keep as many air bubbles as possible. Flip the dough so the seam is on the bottom and tuck the edges under to make a loose round.
Place the dough seam-side down on a piece of parchment paper. Cover and let it rest for 20 to 30 minutes while the oven heats. It will puff slightly.
Place a Dutch oven with its lid inside the oven and preheat to 450°F (230°C) for about 30 minutes. A properly hot pot is key to a crisp crust and good oven spring. Use oven mitts when handling the hot pot.
Carefully remove the hot Dutch oven. Lift the dough, using the parchment paper as a sling, and lower it into the pot. With a sharp knife or razor blade, make one shallow slash across the top, about ½ inch deep. Scoring controls where the loaf expands, so it opens neatly instead of bursting at random.
Cover with the lid and bake for 30 minutes. The trapped steam keeps the crust soft and stretchy at first, which allows the loaf to rise fully before the crust sets.
Remove the lid and bake for another 10 to 15 minutes, until the bread is deeply golden and crisp. If you have an instant-read thermometer, the center of the loaf should reach about 205–210°F (96–99°C).
Lift the loaf out of the pot and transfer it to a wire rack. Cool for at least 45 minutes so the crumb can set properly. As the bread cools, you may hear the crust crackle, which is a very good sign. Cutting too early can leave the center gummy.