
No-Knead Garlic Rosemary Mini Focaccia
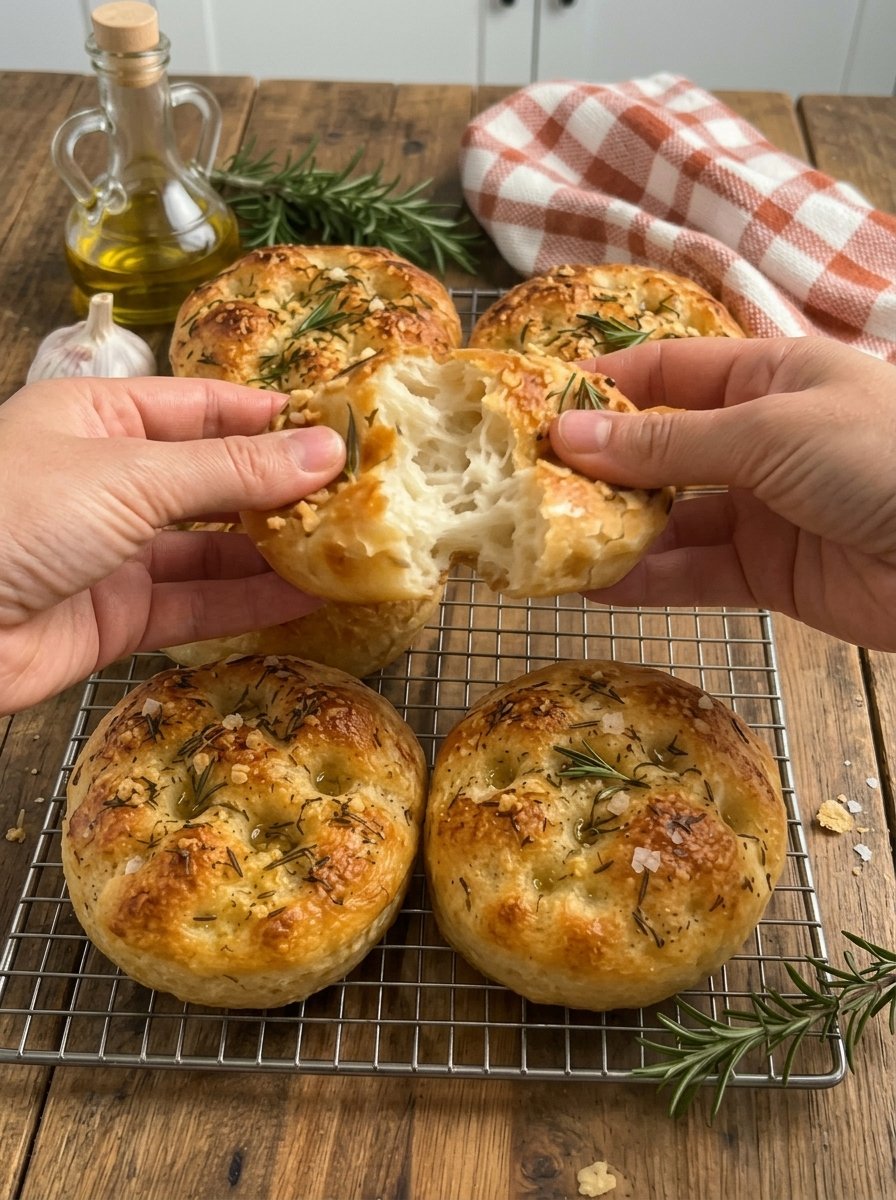
🧄🌿🍞 No-Knead Garlic Rosemary Mini Focaccia: Soft, Fluffy & Golden
Meta Title: No-Knead Garlic Rosemary Mini Focaccia Recipe (Easy & Fluffy) 🍞
Meta Description: Make soft, fluffy No-Knead Garlic Rosemary Mini Focaccia with a golden crispy crust, fresh rosemary and olive oil. Just mix, rise, dimple and bake. Perfect with soup and salad.
Focus Keyword: no-knead garlic rosemary mini focaccia
Secondary Keywords: mini focaccia recipe, easy no-knead focaccia, garlic rosemary focaccia, homemade focaccia bread, focaccia for beginners, rosemary olive oil bread, individual focaccia, no-knead bread recipe
There is nothing quite like homemade focaccia fresh from the oven. 😍 The smell of garlic, rosemary and olive oil warming in a hot oven is enough to bring everyone into the kitchen. These No-Knead Garlic Rosemary Mini Focaccia breads take that experience and make it easier, faster and perfectly portioned.
They are beautifully golden and crispy on the outside, soft and airy on the inside, and bursting with the flavors of fresh garlic, fragrant rosemary and good olive oil. Each little loaf has deep dimples that catch pools of seasoned oil, which is exactly what makes focaccia so irresistible.
The best part? No kneading required. You simply mix the dough with a wooden spoon, let it rise, shape it into small rounds or ovals, add the topping, press the signature dimples and bake. These mini focaccia are perfect for dipping in olive oil, serving alongside soups and salads, tucking into lunchboxes, or enjoying warm as a snack. ❤️
In this complete guide you will find the full recipe with all ingredients, a clear explanation of how each step works, ingredient notes, pan and shaping advice, flavor variations, troubleshooting, serving ideas, storage and reheating instructions, and a detailed FAQ. Let’s bake! 🍞
📝 A note on estimates: the recipe card gives rise and bake times but not total or hands-on time. The totals above are simple estimates based on those steps.
🌟 Why You Will Love These Mini Focaccia
- Truly no-knead. A wooden spoon and a bowl are all you need to bring the dough together.
- Simple ingredients. Flour, yeast, sugar, salt, water and olive oil, plus garlic, rosemary and sea salt for the topping.
- Perfectly portioned. Four to six individual breads mean everyone gets a crispy edge and a soft center.
- Bakery-style flavor at home. The garlic rosemary oil gives them a restaurant-quality aroma.
- Quick bake. At 425°F they are ready in 15 to 20 minutes.
- Versatile. Serve them with soup, salad, pasta, cheese boards, or as mini sandwich buns.
- Great for sharing. They look beautiful on a table and are easy to tear and dip.
- Beginner friendly. The dough is forgiving, and the sticky texture is exactly what you want.
🛒 Ingredients Explained
For the Dough
🌾 All-purpose flour (2 cups / 250 g). All-purpose flour gives a soft, tender focaccia with a nice chew. If you can, weigh the flour: 250 g is the reliable measurement. If you use cups, spoon the flour into the cup and level it off instead of scooping, which packs in extra flour and makes the dough dry.
🧫 Instant yeast (1 teaspoon). Instant yeast can be mixed directly into the dry ingredients with no separate activation. It is what makes the dough rise and develop its airy texture. Check that your yeast is fresh. Old yeast is the most common reason bread does not rise.
🍬 Sugar (1 teaspoon). A small amount of sugar gives the yeast a little food and helps with browning. It does not make the focaccia sweet.
🧂 Salt (¾ teaspoon). Salt adds flavor and controls the yeast. Without it, focaccia tastes flat.
💧 Warm water (¾ cup / 180 ml). The water should feel comfortably warm, like a pleasant bath, not hot. Water that is too hot can kill the yeast. A sticky, shaggy dough is exactly what this recipe wants.
🫒 Olive oil (2 tablespoons). Olive oil makes the crumb soft and flavorful, and it keeps the crust tender.
For the Garlic Rosemary Topping
🫒 Olive oil (3 tablespoons). The base of the topping. It carries the garlic and rosemary flavor and pools in the dimples.
🧄 Garlic (3 cloves, finely minced). Fresh garlic is essential for the best aroma. Mince it very finely so that it spreads evenly and does not burn in large pieces.
🌿 Fresh rosemary (1 tablespoon, chopped). Fresh rosemary is the signature herb of focaccia. Its piney, lemony, slightly peppery flavor is perfect with garlic and olive oil. Strip the leaves from the woody stems and chop them finely.
✨ Flaky sea salt (½ teaspoon). Sprinkled on top before baking, flaky salt adds crunch and bursts of salty flavor.
🌿 Italian seasoning (½ teaspoon, optional). Adds a little extra herbal warmth.
⚫ Black pepper (a pinch). For a hint of spice.
👩🍳 Step-by-Step Instructions
Step 1: Mix the Dough 🥣
In a large mixing bowl, combine the flour, instant yeast, sugar and salt. Add the warm water and olive oil. Stir with a wooden spoon until a sticky, shaggy dough forms. Make sure no dry flour remains at the bottom of the bowl. No kneading needed.
The dough should look rough, wet and sticky. That is normal. This high moisture is what creates the soft, airy interior.
Step 2: First Rise ⏳
Cover the bowl with plastic wrap or a clean kitchen towel. Let the dough rise in a warm place for 1 to 1½ hours, or until doubled in size. A turned-off oven with the light on, or a warm spot in the kitchen, works well. You should see bubbles on the surface and the dough should look puffy and jiggly.
Step 3: Prepare the Topping 🌿
While the dough rises, make the topping. In a small bowl, mix the olive oil, minced garlic, chopped rosemary, Italian seasoning and black pepper. Set aside to let the flavors infuse. The longer the garlic and rosemary sit in the oil, the more fragrant the topping becomes.
Step 4: Shape the Mini Focaccia 🍞
Lightly grease a mini baking pan, or line a baking sheet with parchment paper. Divide the dough into 4 to 6 equal portions. Oil your hands lightly, because the dough is sticky, and gently stretch each portion into a small round or oval shape. Place them on the pan with a little space between them, since they will puff up.
Step 5: Second Rise ⏱️
Cover the shaped dough and let it rest for another 20 to 30 minutes, until slightly puffy. The portions should look softer and a little larger than when you shaped them. Preheat your oven to 425°F (220°C) during this time.
Step 6: Add the Garlic Rosemary Oil 🧄
Spoon the garlic and rosemary mixture generously over each mini focaccia, spreading it evenly across the surface with the back of the spoon. Do not be shy. This oil is where the flavor lives.
Step 7: Make the Signature Dimples 👆
Lightly oil your fingertips, then press deep dimples into each dough piece, gently pushing your fingers almost to the bottom without tearing the dough. Dimples give focaccia its signature look and create little wells that hold the garlic and olive oil.
Step 8: Bake 🔥
Sprinkle the focaccia with flaky sea salt and bake in a preheated oven at 425°F (220°C) for 15 to 20 minutes, or until beautifully golden brown. Keep an eye on the garlic. If the garlic is browning much faster than the bread, you can tent the pan loosely with foil.
Step 9: Finish and Serve 😍
Remove from the oven and brush with a little extra olive oil if desired. Let the focaccia cool slightly on a wire rack, then serve warm. Tear them apart, dip them in olive oil, or slice them for sandwiches.
💡 Pro Tips for Perfect Mini Focaccia
- Do not knead the dough. The sticky texture is exactly what helps create a soft, airy focaccia.
- Use fresh rosemary. Fresh rosemary gives the bread a wonderful aroma and delicious flavor.
- Do not skip the dimples. They help hold the flavorful garlic and olive oil topping and give the breads their classic look.
- Watch the garlic. Finely mince the garlic and avoid letting it burn. If your garlic browns too quickly, add some of the garlic oil after baking.
- Get an extra crispy bottom. Generously coat the baking pan with olive oil before adding the dough.
- Oil your hands. It stops the dough from sticking while you shape and dimple.
- Choose a warm spot for rising. Warmth speeds up the yeast. If your kitchen is cold, the first rise may take longer than 1½ hours.
- Do not overbake. Pull the focaccia out as soon as it is deeply golden. Overbaked focaccia turns dry.
- Use a hot oven. The high temperature gives a crisp crust and an airy interior.
- Serve warm. Fresh from the oven, the crust is at its crispiest and the inside at its softest.
🧠 Why No-Knead Dough Works
Traditional bread dough is kneaded to develop gluten, the stretchy protein network that traps air bubbles and gives bread structure. No-knead dough uses a different approach: a wetter dough and time. When flour and water sit together, the gluten develops by itself as the flour hydrates and the yeast works. The stickier the dough, the more freely gluten strands can organize and the more steam the dough produces in the oven, which gives open, airy bubbles.
For focaccia, a wet dough is especially valuable. It stretches easily into shape, holds olive oil beautifully, and bakes into a soft crumb with a crispy bottom. This is why a little patience at the rise stage replaces the work of kneading.
Troubleshooting Common Problems
My dough did not rise. The yeast may be old, or the water may have been too hot or too cold. Use fresh instant yeast, and make sure the water is warm, not hot. Also try a warmer spot and give it more time.
The dough is too sticky to shape. It is supposed to be sticky. Oil your hands and the work surface rather than adding lots of flour, which can make the focaccia dense.
The focaccia is dense instead of airy. Possible causes include too much flour, a short rise or old yeast. Measure the flour carefully by weight, and let the dough double during the first rise.
The garlic burned. The garlic was probably in large pieces or the oven was too hot near the top. Mince it very finely, tent with foil if necessary, or add part of the garlic oil after baking.
The bottoms are pale. Use a generous amount of olive oil on the pan and bake on a lower rack if needed, so the bottom crisps up.
The dimples disappeared. Press deeper next time, almost to the bottom of the dough, and use well-oiled fingers. Dimples soften as the dough puffs in the oven, but deep ones remain visible.
The tops are browning too fast. Loosely cover with foil for the last few minutes and check that your oven is not running hot.
The focaccia is dry. It may have been overbaked. Reduce the bake time and brush with extra olive oil after baking.
The flavor is bland. Check the salt, use fresh rosemary, and sprinkle flaky sea salt before baking. A drizzle of olive oil at the end also boosts the flavor.
🍽️ How to Serve Garlic Rosemary Mini Focaccia
These little breads go with almost everything:
- 🫒 With olive oil: Serve with a small bowl of good olive oil and balsamic vinegar for dipping.
- 🍲 With soup: Perfect next to tomato soup, minestrone, lentil soup or creamy vegetable soup.
- 🥗 With salads: A warm focaccia alongside a Caesar, Greek or arugula salad makes a complete meal.
- 🍝 With pasta: Great for mopping up sauce next to spaghetti, lasagna or baked pasta.
- 🥪 As sandwich buns: Slice horizontally and fill with mozzarella, tomato and basil, or with grilled chicken and pesto.
- 🧀 On a cheese board: Serve with cheeses, olives, cured meats and roasted vegetables.
- 🍅 With tomato dips: Pair with marinara, hummus, or whipped ricotta.
- 🍳 At breakfast: Warm focaccia with a soft-boiled egg or scrambled eggs is surprisingly good.
- 🎉 At parties: Bake mini focaccia for dinner parties, picnics and holiday tables.
🔄 Flavor Variations
🧀 Parmesan & Herbs
Sprinkle grated Parmesan and dried Italian herbs over the dough after adding the oil. Keep an eye on the browning.
🫒 Olives & Cherry Tomatoes
Press halved cherry tomatoes and sliced olives into the dimples before baking for a colorful, juicy focaccia.
🍋 Lemon & Thyme
Swap rosemary for thyme and add a little lemon zest to the topping for a brighter flavor.
🌶️ Spicy Garlic
Add a pinch of red pepper flakes to the garlic oil for gentle heat.
🧅 Caramelized Onion
Top with cooked, caramelized onions and a sprinkle of salt for a sweet, savory focaccia.
🧄 Extra Garlic
Add a fourth clove for garlic lovers, but mince it very finely and watch for burning.
🧀 Mozzarella Melt
Add small pieces of mozzarella in the last 5 minutes of baking.
These variations are optional ideas that go beyond the recipe card. The base recipe stays the same.
🧊 Storage and Reheating
- Room temperature: Store leftovers in an airtight container at room temperature for up to 2 days.
- Refrigerator: Refrigerate for up to 4 days.
- Reheating: Warm in a 350°F (175°C) oven for 5 to 7 minutes to bring back that freshly baked texture.
- Avoid the microwave: It can make focaccia soft and chewy instead of crisp.
- Cool before storing: Let the focaccia cool completely so steam does not make the crust soggy.
🥗 Nutrition Note
Focaccia is a classic bread made with flour, olive oil, garlic and herbs. Olive oil adds flavor and richness, so portions matter, especially if you are watching calories. Because the exact nutrition depends on the number of portions you make (4 versus 6), how much topping you use and the brands of ingredients, this article does not give a precise nutrition label. If you track nutrition, use a calculator with your exact quantities. Anyone with dietary restrictions or health concerns should consult a healthcare professional.
❓ Frequently Asked Questions
1. Do I really not need to knead the dough?
Correct. Stirring with a wooden spoon until a sticky, shaggy dough forms is all you need.
2. How long does the dough take to rise?
The first rise takes 1 to 1½ hours, until doubled. The second rise after shaping takes 20 to 30 minutes.
3. Why is my dough so sticky?
Focaccia dough is meant to be wet and sticky. That is what makes the bread soft and airy. Oil your hands instead of adding more flour.
4. Can I use active dry yeast instead of instant yeast?
Yes. Dissolve it in the warm water first and let it sit for about 5 to 10 minutes until foamy. The rise may be slightly slower.
5. Can I use bread flour?
Yes. It gives a chewier texture. You may need a little more water, since bread flour absorbs more.
6. How many mini focaccia does the recipe make?
Four to six, depending on how you divide the dough.
7. What pan should I use?
A mini baking pan, or a baking sheet lined with parchment paper. Grease generously with olive oil for a crisp bottom.
8. What temperature should I bake at?
425°F (220°C) for 15 to 20 minutes, until golden brown.
9. How do I keep the garlic from burning?
Mince it very finely, avoid large pieces, and if it browns too quickly, add some of the garlic oil after baking.
10. Can I use dried rosemary?
Fresh is best. If you only have dried, use about 1 teaspoon, crumbled finely.
11. What is the point of dimpling the dough?
Dimples hold the olive oil and garlic, prevent large air bubbles, and create the classic focaccia look.
12. Can I make the dough ahead?
You can let the dough rise slowly in the refrigerator for added flavor, but this recipe as written uses a warm rise. If you try a cold rise, allow extra time and let the dough warm up before shaping.
13. How do I store leftovers?
At room temperature in an airtight container for up to 2 days, or in the refrigerator for up to 4 days.
14. How do I reheat focaccia?
Warm it in a 350°F (175°C) oven for 5 to 7 minutes.
15. Can I freeze the focaccia?
Freezing is not covered in the original recipe. In general, baked focaccia freezes reasonably well when wrapped airtight, then reheated in the oven, but the texture may be slightly less fresh.
16. Why is my focaccia flat?
The yeast may not have been active, the dough may not have risen enough, or the dimples were pressed too aggressively. Make sure the dough doubles and that you press gently.
17. Can I add cheese?
Yes. Parmesan before baking or mozzarella near the end are both tasty.
18. What can I serve with mini focaccia?
Soups, salads, pasta, cheese boards, dips and sandwiches all work beautifully.
19. Can I use the focaccia as sandwich buns?
Yes. Slice them horizontally once cooled slightly and fill as you like.
20. Is it vegan?
The recipe contains no animal products: flour, yeast, sugar, salt, water, olive oil, garlic, rosemary and salt. Check your ingredient labels to be sure.
21. How do I make the bottom extra crispy?
Coat the pan generously with olive oil before adding the dough.
22. What if my dough hasn’t doubled after 1½ hours?
Give it more time in a warmer place. Cold kitchens slow the yeast down. If there are no bubbles at all, the yeast may be old.
✨ Final Thoughts
No-Knead Garlic Rosemary Mini Focaccia proves that real bakery-style bread does not require special skills or equipment. A bowl, a wooden spoon, a little time and a handful of simple ingredients are enough to make golden, crisp-bottomed, fluffy-centered focaccia filled with the aroma of garlic, rosemary and olive oil. 🧄🌿🍞
Remember the key points: keep the dough sticky, let it double, press deep dimples, watch the garlic, and bake until beautifully golden. Serve them warm with soup, salad, pasta or simply a bowl of olive oil, and watch them disappear.
If you love homemade bread, make this recipe your next baking day project. Which topping will you try first: garlic and rosemary, parmesan and herbs, or olives and cherry tomatoes? 😍
🧾 Quick Recipe Card
🧄🌿🍞 No-Knead Garlic Rosemary Mini Focaccia
Rise: 1 to 1½ hours + 20 to 30 minutes | Bake: 15 to 20 minutes at 425°F (220°C) | Yield: 4 to 6 mini focaccia
Dough
- 2 cups (250 g) all-purpose flour
- 1 teaspoon instant yeast
- 1 teaspoon sugar
- ¾ teaspoon salt
- ¾ cup (180 ml) warm water
- 2 tablespoons olive oil
Garlic Rosemary Topping
- 3 tablespoons olive oil
- 3 cloves garlic, finely minced
- 1 tablespoon fresh rosemary, chopped
- ½ teaspoon flaky sea salt
- ½ teaspoon Italian seasoning (optional)
- A pinch of black pepper
Instructions
- Mix flour, yeast, sugar and salt. Add warm water and olive oil and stir into a sticky, shaggy dough. No kneading.
- Cover and let rise 1 to 1½ hours, until doubled.
- Mix the olive oil, garlic, rosemary, Italian seasoning and pepper. Set aside.
- Grease a mini baking pan or line a baking sheet with parchment. Divide the dough into 4 to 6 portions and stretch each into a small round or oval.
- Cover and rest 20 to 30 minutes until puffy.
- Spoon the garlic rosemary oil over each focaccia.
- Press deep dimples with oiled fingertips.
- Sprinkle with flaky sea salt and bake at 425°F (220°C) for 15 to 20 minutes, until golden.
- Brush with extra olive oil if desired, cool slightly and serve warm.
Storage: Airtight container at room temperature up to 2 days, or refrigerated up to 4 days. Reheat at 350°F (175°C) for 5 to 7 minutes.
Print
No-Knead Garlic Rosemary Mini Focaccia
Ingredients
🌾 All-purpose flour (2 cups / 250 g). All-purpose flour gives a soft, tender focaccia with a nice chew. If you can, weigh the flour: 250 g is the reliable measurement. If you use cups, spoon the flour into the cup and level it off instead of scooping, which packs in extra flour and makes the dough dry.
🧫 Instant yeast (1 teaspoon). Instant yeast can be mixed directly into the dry ingredients with no separate activation. It is what makes the dough rise and develop its airy texture. Check that your yeast is fresh. Old yeast is the most common reason bread does not rise.
🍬 Sugar (1 teaspoon). A small amount of sugar gives the yeast a little food and helps with browning. It does not make the focaccia sweet.
🧂 Salt (¾ teaspoon). Salt adds flavor and controls the yeast. Without it, focaccia tastes flat.
💧 Warm water (¾ cup / 180 ml). The water should feel comfortably warm, like a pleasant bath, not hot. Water that is too hot can kill the yeast. A sticky, shaggy dough is exactly what this recipe wants.
🫒 Olive oil (2 tablespoons). Olive oil makes the crumb soft and flavorful, and it keeps the crust tender.
For the Garlic Rosemary Topping
🫒 Olive oil (3 tablespoons). The base of the topping. It carries the garlic and rosemary flavor and pools in the dimples.
🧄 Garlic (3 cloves, finely minced). Fresh garlic is essential for the best aroma. Mince it very finely so that it spreads evenly and does not burn in large pieces.
🌿 Fresh rosemary (1 tablespoon, chopped). Fresh rosemary is the signature herb of focaccia. Its piney, lemony, slightly peppery flavor is perfect with garlic and olive oil. Strip the leaves from the woody stems and chop them finely.
✨ Flaky sea salt (½ teaspoon). Sprinkled on top before baking, flaky salt adds crunch and bursts of salty flavor.
🌿 Italian seasoning (½ teaspoon, optional). Adds a little extra herbal warmth.
⚫ Black pepper (a pinch). For a hint of spice.
Instructions
In a large mixing bowl, combine the flour, instant yeast, sugar and salt. Add the warm water and olive oil. Stir with a wooden spoon until a sticky, shaggy dough forms. Make sure no dry flour remains at the bottom of the bowl. No kneading needed.
The dough should look rough, wet and sticky. That is normal. This high moisture is what creates the soft, airy interior.
Cover the bowl with plastic wrap or a clean kitchen towel. Let the dough rise in a warm place for 1 to 1½ hours, or until doubled in size. A turned-off oven with the light on, or a warm spot in the kitchen, works well. You should see bubbles on the surface and the dough should look puffy and jiggly.
While the dough rises, make the topping. In a small bowl, mix the olive oil, minced garlic, chopped rosemary, Italian seasoning and black pepper. Set aside to let the flavors infuse. The longer the garlic and rosemary sit in the oil, the more fragrant the topping becomes.
Lightly grease a mini baking pan, or line a baking sheet with parchment paper. Divide the dough into 4 to 6 equal portions. Oil your hands lightly, because the dough is sticky, and gently stretch each portion into a small round or oval shape. Place them on the pan with a little space between them, since they will puff up.
Cover the shaped dough and let it rest for another 20 to 30 minutes, until slightly puffy. The portions should look softer and a little larger than when you shaped them. Preheat your oven to 425°F (220°C) during this time.
Spoon the garlic and rosemary mixture generously over each mini focaccia, spreading it evenly across the surface with the back of the spoon. Do not be shy. This oil is where the flavor lives.
Lightly oil your fingertips, then press deep dimples into each dough piece, gently pushing your fingers almost to the bottom without tearing the dough. Dimples give focaccia its signature look and create little wells that hold the garlic and olive oil.
Sprinkle the focaccia with flaky sea salt and bake in a preheated oven at 425°F (220°C) for 15 to 20 minutes, or until beautifully golden brown. Keep an eye on the garlic. If the garlic is browning much faster than the bread, you can tent the pan loosely with foil.
Remove from the oven and brush with a little extra olive oil if desired. Let the focaccia cool slightly on a wire rack, then serve warm. Tear them apart, dip them in olive oil, or slice them for sandwiches.