
Peanut Butter Chocolate Fudge Cups: A Delicious Treat!
Introduction to Peanut Butter Chocolate Fudge Cups
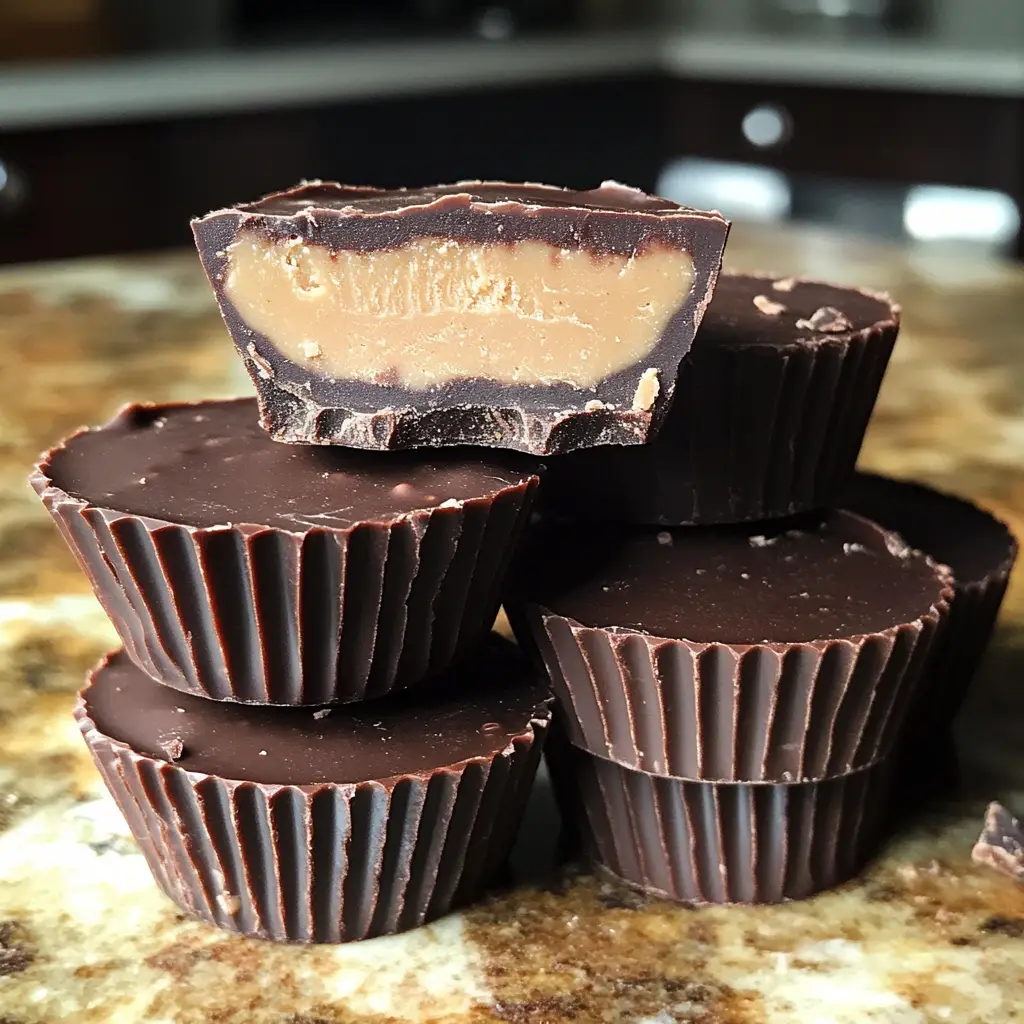
As a busy mom, I know how challenging it can be to find time for a sweet treat that everyone will love. That’s where these Peanut Butter Chocolate Fudge Cups come in! They’re not just delicious; they’re a quick solution for those hectic days when you need a little pick-me-up. Imagine rich chocolate melting in your mouth, perfectly balanced with creamy peanut butter. It’s a delightful combination that’s sure to impress your loved ones. Plus, they’re no-bake, making them a breeze to whip up. Let’s dive into this delightful recipe!
Why You’ll Love This Peanut Butter Chocolate Fudge Cups
These Peanut Butter Chocolate Fudge Cups are a dream come true for busy lives. They come together in just 15 minutes, making them perfect for last-minute cravings or unexpected guests. The rich, creamy taste is simply irresistible, and they’re a hit with both kids and adults alike. Plus, you can customize them with your favorite toppings, ensuring everyone gets a treat they love. What’s not to adore?
Ingredients for Peanut Butter Chocolate Fudge Cups
Gathering the right ingredients is the first step to creating these delightful Peanut Butter Chocolate Fudge Cups. Here’s what you’ll need:
- Creamy Peanut Butter: This is the star of the show! It adds that rich, nutty flavor and creamy texture that pairs perfectly with chocolate.
- Chocolate Chips: Choose your favorite type—milk, dark, or even dairy-free for a vegan option. They melt beautifully and create a luscious layer.
- Honey or Maple Syrup: This natural sweetener adds just the right amount of sweetness. Maple syrup gives a unique flavor, while honey is classic and comforting.
- Vanilla Extract: A splash of vanilla enhances the overall flavor, making each bite taste even more indulgent.
- Salt: Just a pinch! It balances the sweetness and brings out the flavors of the chocolate and peanut butter.
Feel free to get creative! You can add toppings like crushed nuts or a sprinkle of sea salt for an extra flavor boost. If you’re looking for a healthier twist, consider using almond butter instead of peanut butter. The exact quantities for each ingredient are listed at the bottom of the article for your convenience, ready for printing!
How to Make Peanut Butter Chocolate Fudge Cups
Now that you have your ingredients ready, let’s get started on making these delightful Peanut Butter Chocolate Fudge Cups! Follow these simple steps, and you’ll have a delicious treat in no time.
Step 1: Melt the Chocolate
Begin by taking a microwave-safe bowl and adding your chocolate chips and honey. Microwave them in 30-second intervals, stirring in between. This helps prevent burning. Keep going until the mixture is smooth and glossy. The aroma of melting chocolate is simply heavenly!
Step 2: Prepare the Peanut Butter Mixture
In a separate bowl, mix together the creamy peanut butter, vanilla extract, and salt. Use a spatula or spoon to combine everything until it’s smooth and well-blended. This mixture is the heart of your fudge cups, so make sure it’s creamy and delicious!
Step 3: Line the Muffin Tin
Grab your muffin tin and line it with cupcake liners. This makes it super easy to remove the fudge cups later. Plus, it adds a fun pop of color! If you don’t have liners, you can lightly grease the tin instead.
Step 4: Layer the Chocolate
Now, pour a layer of that luscious melted chocolate into the bottom of each cupcake liner. Aim for about a tablespoon in each. This layer is the foundation of your fudge cups, so make sure it’s evenly distributed.
Step 5: Add the Peanut Butter Layer
Next, take a spoonful of your peanut butter mixture and place it on top of the chocolate layer. Gently spread it out, but don’t worry about making it perfect. The beauty of these cups is in their homemade charm!
Step 6: Top with More Chocolate
Now it’s time to cover that peanut butter goodness! Pour more melted chocolate over the peanut butter layer, ensuring it’s completely covered. This creates a delightful surprise when you take a bite!
Step 7: Refrigerate to Set
Place the muffin tin in the refrigerator and let it chill for at least 1 hour. This step is crucial for the fudge cups to set properly. The anticipation will be worth it, I promise!
Step 8: Enjoy Your Treats
Once they’re set, carefully remove the fudge cups from the liners. Take a moment to admire your creation before diving in. Each bite is a heavenly mix of chocolate and peanut butter that’s sure to bring a smile to your face!
Tips for Success
- Make sure your chocolate is completely melted for a smooth texture.
- Use a cookie scoop for even peanut butter portions.
- Experiment with different types of nut butters for unique flavors.
- Let the fudge cups sit at room temperature for a few minutes before serving for easier removal.
- Store any leftovers in an airtight container to keep them fresh.
Equipment Needed
- Microwave-safe bowl: Any heatproof bowl will do if you don’t have one.
- Spatula or spoon: A regular spoon works just fine for mixing.
- Muffin tin: If you don’t have one, use a small baking dish.
- Cupcake liners: Parchment paper can be cut into squares as an alternative.
Variations
- Nut Butter Swap: Try almond butter or cashew butter for a different flavor profile.
- Chocolate Type: Use dark chocolate for a richer taste or white chocolate for a sweeter treat.
- Sweetener Options: Substitute agave syrup or coconut sugar for honey or maple syrup for a different sweetness.
- Flavor Add-ins: Mix in a pinch of cinnamon or a dash of espresso powder for an extra flavor kick.
- Vegan Version: Use dairy-free chocolate chips and ensure your peanut butter is free from added sugars.
Serving Suggestions
- Pair these Peanut Butter Chocolate Fudge Cups with a glass of cold almond milk for a delightful treat.
- Serve them alongside fresh fruit like strawberries or bananas for a refreshing contrast.
- For a fun presentation, arrange them on a colorful platter and sprinkle with crushed nuts or sea salt.
- These cups also make a great addition to a dessert table at parties!
FAQs about Peanut Butter Chocolate Fudge Cups
Can I make these Peanut Butter Chocolate Fudge Cups ahead of time?
Absolutely! These fudge cups can be made a few days in advance. Just store them in an airtight container in the refrigerator. They’ll be ready whenever you need a sweet treat!
What can I use instead of honey or maple syrup?
If you’re looking for alternatives, agave syrup or coconut nectar works well. They provide sweetness without altering the flavor too much. Just keep in mind that the consistency might vary slightly.
How do I store leftover fudge cups?
Store any leftovers in an airtight container in the refrigerator. They’ll stay fresh for about a week. Just remember to let them sit at room temperature for a few minutes before enjoying!
Can I freeze these fudge cups?
Yes, you can freeze them! Just wrap each cup in plastic wrap and place them in a freezer-safe container. They’ll last for up to three months. Thaw them in the fridge before serving.
What toppings can I add to my fudge cups?
The possibilities are endless! You can sprinkle crushed nuts, drizzle caramel, or add a pinch of sea salt on top. Get creative and make them your own!
Final Thoughts
Creating these Peanut Butter Chocolate Fudge Cups is more than just whipping up a dessert; it’s about bringing joy to your kitchen and smiles to your family. Each bite is a delightful reminder of the simple pleasures in life. Whether you’re enjoying them after a long day or sharing them with friends, these treats are sure to create sweet memories. Plus, the ease of making them means you can indulge without the stress. So, roll up your sleeves, gather your ingredients, and let the magic of chocolate and peanut butter brighten your day!
Print
Peanut Butter Chocolate Fudge Cups: A Delicious Treat!
- Total Time: 1 hour 15 minutes
- Yield: 12 cups 1x
- Diet: Vegetarian
Description
Peanut Butter Chocolate Fudge Cups are a delightful combination of rich chocolate and creamy peanut butter, perfect for satisfying your sweet tooth.
Ingredients
- 1 cup creamy peanut butter
- 1 cup chocolate chips
- 1/4 cup honey or maple syrup
- 1/2 teaspoon vanilla extract
- 1/4 teaspoon salt
Instructions
- In a microwave-safe bowl, combine chocolate chips and honey. Microwave in 30-second intervals until melted and smooth.
- In a separate bowl, mix peanut butter, vanilla extract, and salt until well combined.
- Line a muffin tin with cupcake liners.
- Pour a layer of melted chocolate into the bottom of each liner.
- Add a spoonful of the peanut butter mixture on top of the chocolate.
- Top with more melted chocolate to cover the peanut butter.
- Refrigerate for at least 1 hour until set.
- Remove from liners and enjoy!
Notes
- Store in an airtight container in the refrigerator.
- For a vegan option, use dairy-free chocolate chips.
- Feel free to add toppings like crushed nuts or sea salt for extra flavor.
- Prep Time: 15 minutes
- Cook Time: 0 minutes
- Category: Dessert
- Method: No-Bake
- Cuisine: American
Nutrition
- Serving Size: 1 cup
- Calories: 150
- Sugar: 8g
- Sodium: 50mg
- Fat: 10g
- Saturated Fat: 3g
- Unsaturated Fat: 7g
- Trans Fat: 0g
- Carbohydrates: 15g
- Fiber: 2g
- Protein: 4g
- Cholesterol: 0mg
Keywords: Peanut Butter, Chocolate, Fudge, Cups, Dessert