
Easiest No-Knead Sandwich Bread
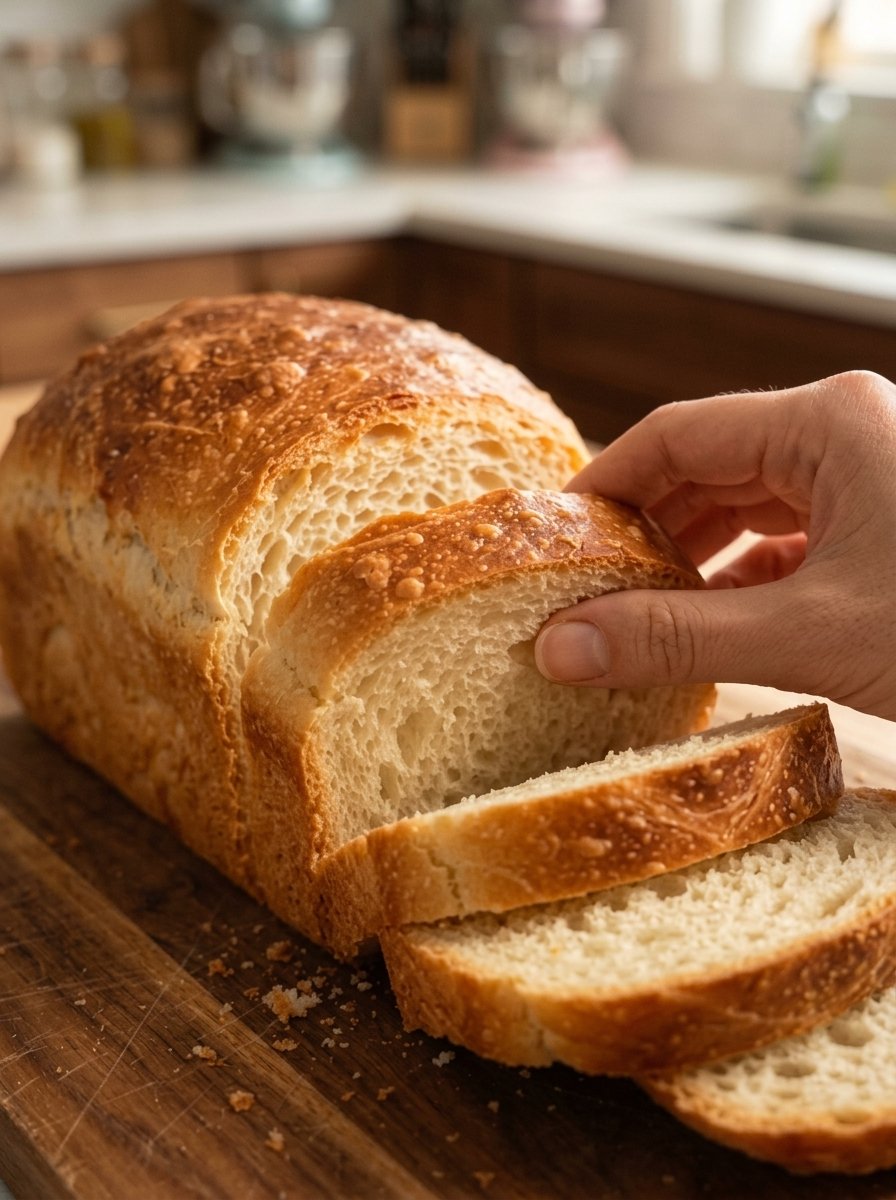
Easiest No-Knead Sandwich Bread: Soft, Fluffy, and Foolproof
SEO title (under 60 characters): Easiest No-Knead Sandwich Bread Recipe (Soft & Fluffy)
Meta description (under 160 characters): Make soft, fluffy homemade sandwich bread with no kneading, no mixer, and just 7 ingredients. Mix, rise, shape, and bake in about 2 hours.
Focus keyword: no-knead sandwich bread
Secondary keywords: easy homemade sandwich bread, no-knead bread recipe, soft sandwich bread, homemade bread without kneading, beginner bread recipe, instant yeast bread, bread in a loaf pan
If you have ever wanted to bake homemade bread but felt put off by kneading, proofing, and complicated techniques, this Easiest No-Knead Sandwich Bread is for you. It is soft, fluffy, and golden, and it needs nothing more than a bowl, a wooden spoon, and a loaf pan. There is no stand mixer and no floured countertop, and you don’t need any bread-baking experience.
You stir the dough together in one bowl, let it rise, drop it in a pan, let it rise again, and bake. In about two hours and fifteen minutes, most of it hands-off, you get a tall, tender loaf that is perfect for sandwiches, toast, French toast, or eating warm with butter.
In this guide you’ll find the full recipe, step-by-step explanations of why each stage matters, ingredient substitutions, troubleshooting tips, storage advice, and answers to the most common questions about no-knead bread.
Why You’ll Love This No-Knead Sandwich Bread
Plenty of homemade bread recipes promise to be easy. This one actually delivers, for several reasons.
1. No kneading at all. Traditional bread requires 8 to 10 minutes of kneading to develop gluten. In this recipe, a wetter dough and a long, relaxed rise let the gluten develop on its own, so there is no arm workout and no mess.
2. It uses simple pantry ingredients. You need flour, salt, yeast, honey or sugar, water, and olive oil or butter. Dry milk powder is optional but gives a softer crumb. Nothing is hard to find.
3. It is hard to get wrong. The dough is forgiving. If your rise runs a little long or short, the bread still turns out well.
4. The texture is truly sandwich-friendly. The crumb is soft and fluffy yet sturdy enough to hold fillings without tearing. The crust is golden and tender, not hard or chewy.
5. It fits a busy schedule. Active work takes about 10 minutes. The rest is waiting, which means you can start a loaf, do other things, and come back to shape and bake.
6. It is cheaper and better than store-bought. A loaf made at home costs a fraction of a bakery loaf, with no preservatives and a fresh-baked aroma that fills the kitchen.
Recipe at a Glance
- Prep time: 10 minutes
- Cook time: 30 to 35 minutes
- Total time: 2 hours 15 minutes
- Servings: 1 loaf (about 12 slices)
- Pan size: 9×5-inch loaf pan
- Difficulty: Beginner-friendly
Ingredients
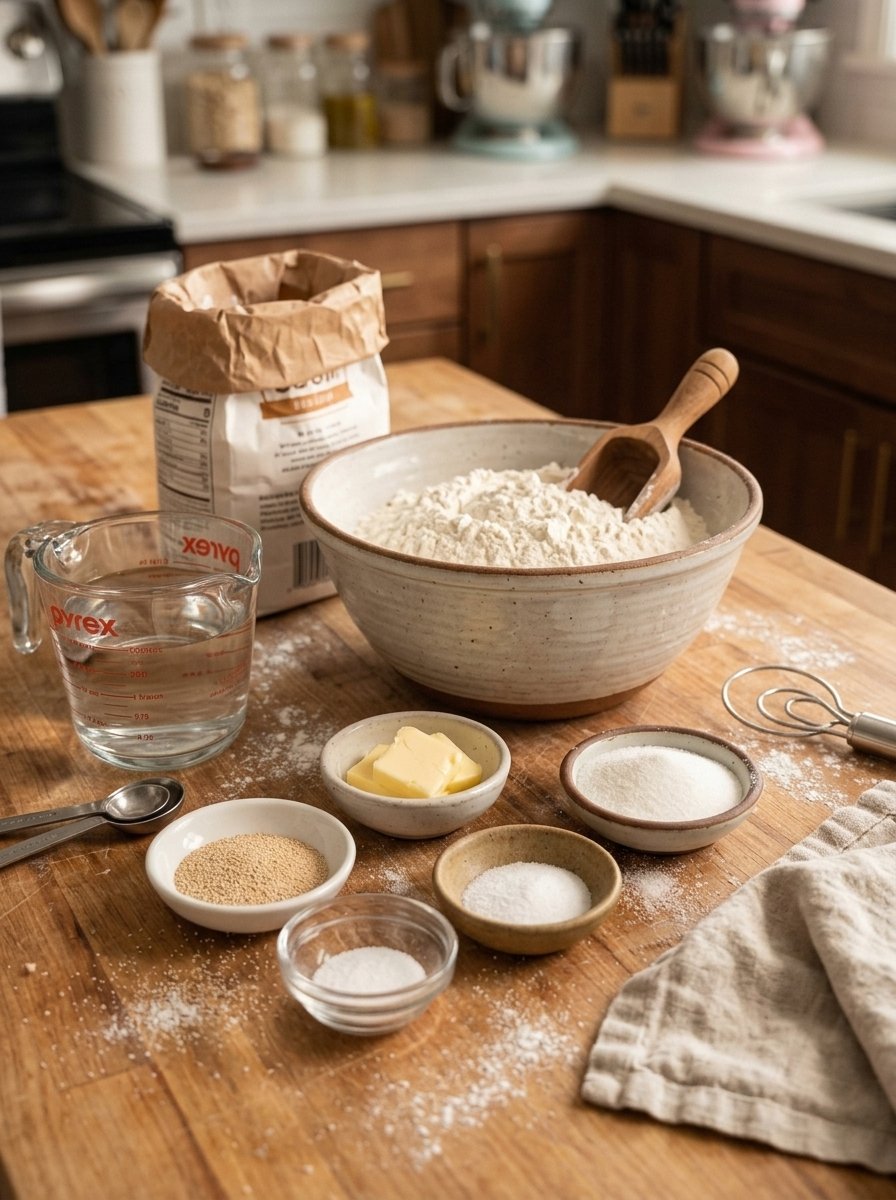
- 3 cups (375 g) all-purpose or bread flour
- 1½ teaspoons salt
- 2¼ teaspoons (7 g) instant yeast
- 1 tablespoon honey or granulated sugar
- 1¼ cups (300 ml) warm water
- 2 tablespoons olive oil or melted butter
- 2 tablespoons dry milk powder (optional)
Instructions
Step 1: Mix the dry ingredients
In a large bowl, whisk together the flour, salt, instant yeast, and milk powder if you’re using it. Whisking spreads the yeast and salt evenly through the flour so the dough rises uniformly and tastes balanced.
Step 2: Add the wet ingredients
Pour in the warm water, honey, and olive oil or melted butter. Stir with a wooden spoon until a soft, sticky dough forms. No kneading is needed. Stir only until no dry flour remains. The dough will look shaggy and wet, and that is exactly right.
Step 3: First rise
Cover the bowl with plastic wrap or a clean kitchen towel. Let the dough rise in a warm place for 60 to 75 minutes, or until it is noticeably puffy and nearly doubled in size.
Step 4: Shape the loaf
Lightly grease a 9×5-inch loaf pan. Gently transfer the dough into the pan and smooth the top with lightly oiled or wet hands.
Step 5: Second rise
Cover loosely and let the dough rise for another 20 to 30 minutes, until it is puffy and reaches close to the top of the pan.
Step 6: Bake
Preheat the oven to 375°F (190°C). Bake for 30 to 35 minutes, until the loaf is golden brown and sounds hollow when tapped.
Step 7: Cool
Remove the bread from the pan and place it on a wire rack. Brush the top with a little melted butter for a softer crust, if desired. Let it cool for at least 30 minutes before slicing.
How No-Knead Bread Works (The Simple Science)
Understanding why the recipe works makes you a more confident baker.
When flour meets water, two proteins, glutenin and gliadin, link together to form gluten. Gluten is the stretchy network that traps gas from yeast and gives bread its structure. Kneading speeds this up by physically stretching and folding the dough.
No-knead recipes get the same result differently. The dough contains a high proportion of water, so the flour hydrates thoroughly, and gluten strands align on their own as the dough rests and rises. Time does the work that your hands would otherwise do. Meanwhile, the yeast feeds on the sugars and starches, releasing carbon dioxide that inflates the dough and builds flavor.
The result is a tender, open crumb that is fluffy and slightly chewy, ideal for sandwiches.
Ingredient Notes and Substitutions
Flour: all-purpose or bread flour
Both work well. Bread flour has more protein, so it creates a slightly chewier, taller loaf with more structure. All-purpose flour gives a softer, more tender crumb and is what most people already have at home. For best results, measure by weight (375 g) with a kitchen scale. If you use cups, spoon the flour into the measuring cup and level it off rather than scooping directly from the bag, which packs in too much flour and makes the bread dense.
Instant yeast
This recipe uses instant yeast (also sold as rapid-rise or bread machine yeast), which can be mixed straight into the dry ingredients with no proofing. If you only have active dry yeast, use the same amount but dissolve it in the warm water for about 5 to 10 minutes until foamy before adding it to the flour. Expect the rise times to run slightly longer.
Salt
Salt controls the yeast’s activity and adds flavor. Without it, bread tastes flat and can rise too fast and collapse. Don’t skip it, and don’t put it directly on top of the yeast in the bowl for long periods before mixing, since concentrated salt can slow yeast down.
Honey or sugar
A tablespoon of honey or granulated sugar feeds the yeast, adds a hint of sweetness, and helps the crust brown. Honey gives a subtle flavor and keeps the bread moist a little longer. Maple syrup also works in the same amount.
Warm water
Water temperature matters. Aim for about 105°F to 115°F (40°C to 46°C), comfortably warm to the touch but not hot. Water that is too cold slows the rise, and water that is too hot can kill the yeast.
Olive oil or melted butter
Fat tenderizes the crumb, keeps the bread soft, and improves how long it stays fresh. Olive oil adds a light, slightly fruity note, while melted butter gives a richer, classic sandwich-bread flavor. Let melted butter cool slightly so it doesn’t heat the water too much.
Dry milk powder (optional)
Milk powder is the secret behind many bakery-soft loaves. It adds a touch of sweetness, encourages a golden crust, and makes the crumb softer. If you don’t have it, simply leave it out. The bread will still be delicious.
Pro Tips for the Best No-Knead Sandwich Bread
Find a warm spot for rising. Yeast thrives around 75°F to 80°F (24°C to 27°C). If your kitchen is chilly, place the covered bowl in the oven with only the light turned on, or on top of the refrigerator.
Judge by the dough, not just the clock. The times given are guidelines. After the first rise, the dough should look puffy and nearly doubled, with bubbles on the surface. In a cool kitchen, it may take longer.
Use a wet or oiled hand to shape. The dough is sticky by design. Lightly oiled or wet hands keep it from clinging while you smooth the top.
Don’t rush the second rise. The dough should climb close to the top of the pan before baking. If it hasn’t, give it a few more minutes. Under-risen dough bakes into a dense loaf.
Check for doneness. Besides the golden color and hollow sound when tapped on the bottom, an instant-read thermometer should read about 190°F to 200°F (88°C to 93°C) in the center.
Cool before slicing. It is tempting to cut into hot bread, but the interior is still setting. Slicing too early can make the crumb gummy. Thirty minutes on a wire rack is the minimum, and longer is even better for clean slices.
Delicious Variations
Once you’ve mastered the base recipe, try these easy twists.
Whole wheat no-knead bread. Replace up to 1 cup (about 120 g) of the flour with whole wheat flour. You may need a splash more water, since whole wheat absorbs more liquid.
Seeded sandwich loaf. Brush the top with water or beaten egg and sprinkle with sesame, sunflower, or pumpkin seeds, or oats, before the second rise.
Garlic and herb bread. Stir in 1 teaspoon of garlic powder and 1 to 2 teaspoons of dried Italian herbs with the dry ingredients. This is wonderful with soup.
Cheddar and chive loaf. Fold in ¾ cup of shredded sharp cheddar and 2 tablespoons of chopped chives when you add the wet ingredients.
Cinnamon raisin bread. Add 1 teaspoon of cinnamon and ½ cup of raisins to the dough, and use sugar instead of honey for a breakfast-ready loaf.
Honey oat topping. Brush the finished loaf with melted butter and sprinkle with rolled oats for a rustic look.
Troubleshooting: Common Problems and Easy Fixes
My dough didn’t rise.
The most common causes are expired yeast, water that was too hot or too cold, or a very cool room. Check the date on your yeast. If the dough hasn’t risen after 90 minutes, move it somewhere warmer and give it more time.
My bread is dense.
This usually means too much flour (measure by weight if you can), too little rising time, or old yeast. Make sure the dough is puffy and nearly doubled after the first rise and close to the top of the pan after the second.
The top collapsed or sank in the middle.
The dough probably over-proofed, meaning it rose too long and the gluten structure weakened. Next time, shorten the second rise slightly and bake as soon as the dough crowns the pan.
The crust is too dark.
Ovens vary. If the top browns too fast, tent the loaf loosely with foil for the last 10 to 15 minutes.
The crust is too hard.
Brush the warm loaf with melted butter right after baking and let it cool. For an even softer crust, wrap the cooled loaf in a clean kitchen towel.
The bread is gummy inside.
Either it wasn’t baked long enough or it was sliced too soon. Check that the internal temperature reaches at least 190°F, and allow the loaf to cool properly.
The dough is too sticky to handle.
That is normal. Resist adding extra flour, which will make the bread dry. Use wet or oiled hands to transfer and shape the dough.
How to Store Homemade Sandwich Bread
At room temperature: Keep the completely cooled loaf in a bread bag, airtight container, or wrapped in a clean towel for 2 to 3 days. Because the bread has no preservatives, it is best enjoyed fresh.
In the refrigerator: Refrigeration can dry bread out faster, so it is only recommended in very warm, humid climates where mold is a concern.
In the freezer: For longer storage, slice the cooled loaf, place parchment between the slices if you like, and freeze in a freezer bag for up to 3 months. Pull out slices as needed and toast them straight from frozen, or thaw at room temperature.
Reviving day-old bread: Wrap the loaf in foil and warm it in a 300°F (150°C) oven for 10 minutes, or toast the slices.
Ways to Enjoy Your Homemade Bread
This loaf is versatile enough to use all week:
- Classic sandwiches: turkey and cheese, egg salad, chicken salad, or a BLT
- Grilled cheese: the crumb crisps beautifully in butter
- Toast: with butter and jam, avocado, or peanut butter and banana
- French toast: day-old slices soak up custard perfectly
- Garlic bread: brush slices with garlic butter and broil
- Breadcrumbs and croutons: turn leftover slices into homemade crumbs for casseroles and salads
- Bread pudding: cube stale bread and bake with a sweet custard
Frequently Asked Questions
Can I make no-knead bread without a loaf pan?
Yes. You can bake the dough in a similar-sized oven-safe dish or even shape it into a rustic free-form loaf on a parchment-lined baking sheet. The shape will be wider and flatter than a pan loaf, and you may need to adjust the baking time slightly.
Can I use active dry yeast instead of instant yeast?
Yes. Use the same amount, dissolve it in the warm water for 5 to 10 minutes until foamy, then continue with the recipe. Your rise times may be a little longer.
Can I make the dough ahead of time?
Yes. After mixing, cover the bowl and refrigerate the dough overnight, up to about 12 to 18 hours. The slow, cold rise develops more flavor. Let the dough sit at room temperature for 30 to 60 minutes the next day, then shape it in the pan, complete the second rise, and bake.
Can I double the recipe?
You can double the ingredients and bake two loaves, each in its own pan. Use a large enough bowl, because the dough will expand, and bake both loaves on the same oven rack if they fit, or rotate them halfway through.
Is bread flour better than all-purpose flour for this recipe?
Bread flour produces a slightly taller, chewier loaf, and all-purpose gives a softer, more tender crumb. Both give excellent results, so use whichever you have.
Can I make this bread gluten-free?
This recipe depends on gluten for its structure, so a direct swap with gluten-free flour won’t give the same results. Look for a recipe developed specifically for a gluten-free flour blend.
Why is my dough so sticky?
No-knead dough is intentionally wet and sticky. The extra moisture helps gluten develop without kneading and creates a soft, airy crumb. Wet or oiled hands make it easy to handle.
How do I know when the bread is fully baked?
Look for a deep golden-brown crust and a hollow sound when you tap the bottom of the loaf. For certainty, an internal temperature of about 190°F to 200°F (88°C to 93°C) means it is done.
Can I use whole wheat flour?
Yes, but replace only part of the flour, up to about one-third, to keep the loaf light. Add a little extra water if the dough feels too stiff.
Can I add seeds, herbs, or cheese?
Absolutely. Mix dry flavorings in with the flour, and fold in cheese or mix-ins with the wet ingredients. Keep the additions to about ¾ to 1 cup total so the dough still rises well.
Can I bake this in a bread machine?
This recipe is written for hand mixing and oven baking. A bread machine uses its own cycles and ingredient order, so it is best to follow your machine’s manual for a similar loaf.
Final Thoughts
Homemade bread doesn’t have to be intimidating, and this Easiest No-Knead Sandwich Bread proves it. With a handful of basic ingredients, one bowl, and a wooden spoon, you can bake a soft, golden, bakery-quality loaf in about two hours, with only minutes of real effort. The aroma alone is worth it, and the first slice, warm with melted butter, is hard to beat.
Whether you are a first-time baker or an experienced one who wants a reliable everyday loaf, this recipe is a keeper. Bake it once, and you may never buy sandwich bread again.
Have you tried this recipe? Leave a comment with your results, and share it with a friend who thinks bread-baking is too hard. Happy baking!
Suggested on-page SEO extras:
- URL slug: /easy-no-knead-sandwich-bread
- Image alt text ideas: “Sliced no-knead sandwich bread on a wooden board,” “Soft homemade sandwich loaf fresh from the oven”
- Internal link ideas: homemade butter, easy soup recipes, French toast, sandwich ideas
- Schema: add Recipe structured data (prep time, cook time, yield, ingredients, instructions)