
Easy Homemade Mini French Baguettes
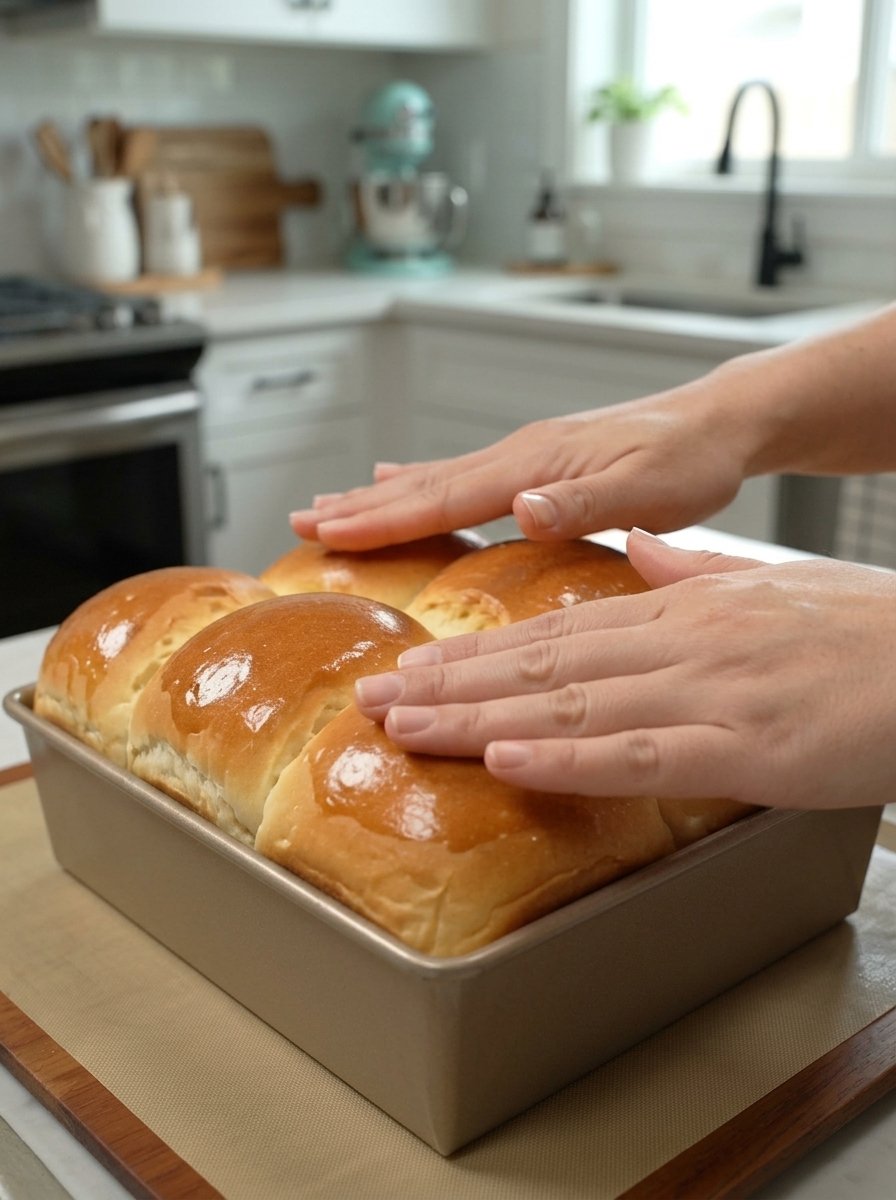
Easy Homemade Mini French Baguettes: Crispy Outside & Soft Inside ✨🥖
Easy Homemade Mini French Baguettes Recipe (Crispy Crust, Soft Inside) Meta description: Bake easy homemade mini French baguettes with a golden, crunchy crust and a soft, airy center. Simple pantry ingredients, no special equipment, and a steam trick for a bakery-style crust. Focus keyword: mini French baguettes Secondary keywords: homemade baguettes, easy baguette recipe, mini baguettes, French bread recipe, crusty baguettes at home, baguette with steam, homemade French bread, bread flour baguettes
Bring the delicious taste of a French bakery into your kitchen with these Easy Homemade Mini French Baguettes! ✨ They have a beautifully golden, crunchy crust and a soft, airy center. They are perfect for sandwiches, soups, cheese boards, or simply enjoying warm with butter. ❤️
Made with simple pantry ingredients, this recipe is easy to follow and gives you fresh, homemade bread without any special equipment. There is no baking stone, no Dutch oven, and no complicated technique. You need only a baking sheet, a metal pan for steam, and a little patience. The mini size also means each baguette bakes quickly and is the perfect portion for one sandwich or one bowl of soup.
In this complete guide, you will find the full recipe, step-by-step instructions with shaping help, an explanation of why steam creates a crisp crust, ingredient notes, troubleshooting, serving ideas, variations, storage and freezing tips, and answers to common questions. Let’s bake! 👩🍳
🤔 What Is a French Baguette?
A baguette is the iconic long, thin loaf of French bread, known for its crackly, golden crust and soft, open, slightly chewy crumb. Traditional French baguettes are made from just four ingredients: flour, water, yeast, and salt. The magic comes from the dough’s high water content, the shaping, and the baking method, especially the steam in the oven.
This recipe makes mini baguettes, about 6 to 8 inches (15 to 20 cm) long. They have the same crisp crust and tender crumb as full-size loaves, but they are quicker to shape and bake, and the portions are ideal for sandwiches, lunch boxes, and serving at dinner.
🥖 What Makes a Baguette a Baguette?
- A thin, crisp crust. The crust crackles when you press it and shatters slightly when you bite.
- A soft, airy crumb. The inside is tender and slightly chewy, with irregular holes.
- A simple flavor. Mild, wheaty, and slightly sweet, because the bread is not weighed down by fat or sugar.
- A tapered shape. The ends are slightly pointed, which makes the loaf look classic and gives extra crunchy tips.
- Diagonal slashes. The scoring on top lets the bread expand evenly in the oven.
❤️ Why You Will Love This Recipe
- ✅ Simple pantry ingredients. Flour, water, yeast, salt, sugar, and a little optional olive oil.
- ✅ No special equipment. A baking sheet and a metal pan are enough.
- ✅ Golden, crunchy crust. A little steam creates a bakery-style finish.
- ✅ Soft, airy center. A tender crumb that is perfect for butter and fillings.
- ✅ Mini size. Quick to shape and bake, and perfect for portions.
- ✅ Ready in about 2 hours 15 minutes. Fresh bread the same day.
- ✅ Versatile. Sandwiches, soups, boards, and garlic bread.
- ✅ Freezer friendly. Bake ahead and refresh in the oven.
- ✅ Impressive. Homemade baguettes always get compliments.
🛒 Ingredients
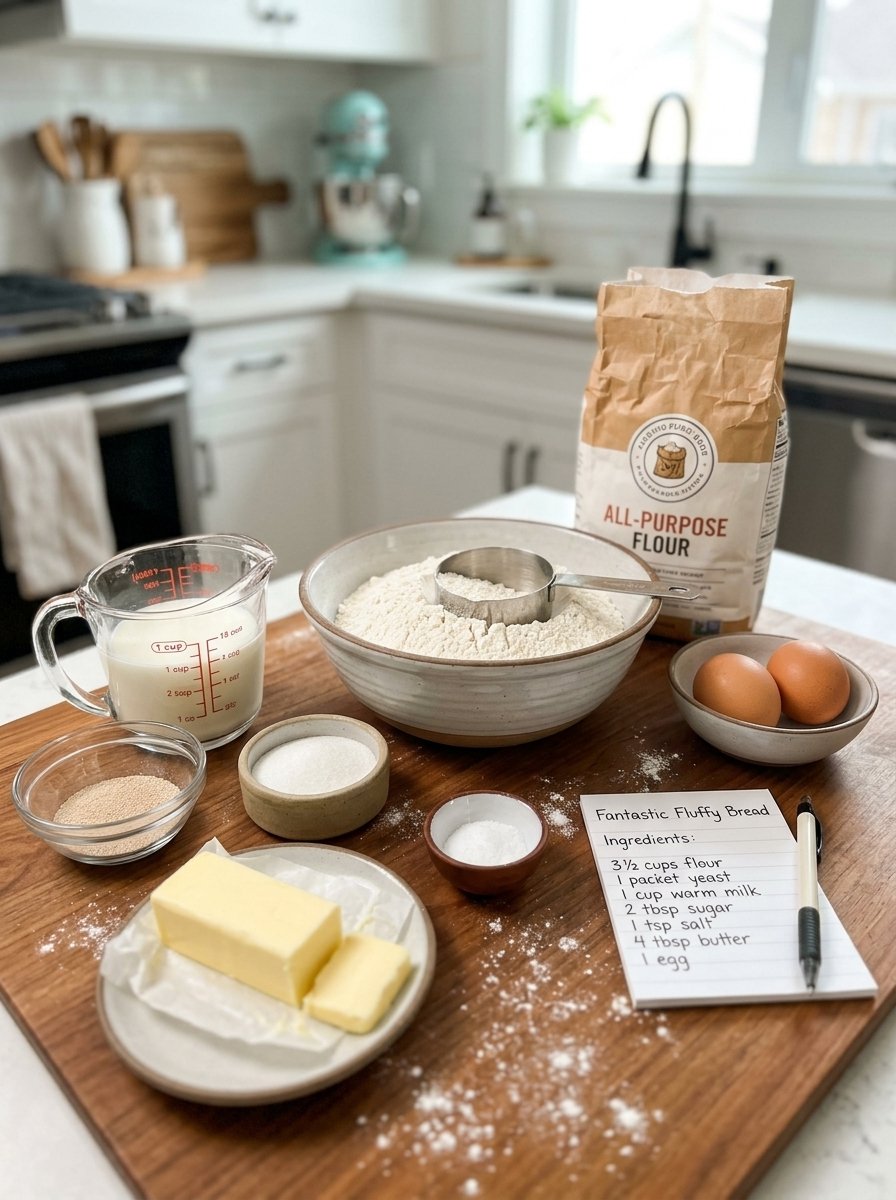
- 3½ cups (440 g) bread flour or all-purpose flour
- 1½ teaspoons salt
- 2 teaspoons instant yeast
- 1 teaspoon sugar
- 1½ cups (360 ml) warm water
- 1 tablespoon olive oil (optional)
You will also need:
- A large mixing bowl
- A baking sheet lined with parchment paper
- An empty metal baking pan (for steam)
- A sharp knife or bread lame
- A wire cooling rack
🧂 Ingredient Notes and Smart Substitutions
Bread flour vs. all-purpose flour
Bread flour has more protein, which builds stronger gluten. That gives baguettes a chewier bite, a taller rise, and a more open crumb. All-purpose flour gives a slightly softer, more tender result and works well too. Use whichever you have. Weighing the flour (440 g) is the most accurate method, because this dough has a high water content, and too much flour will make the baguettes dense.
Warm water
The water should feel comfortably warm, about 105 to 110°F (40 to 43°C). If it is too cool, the yeast will be slow. If it is too hot, it can kill the yeast. A good rule is that it should feel like a warm bath.
Instant yeast
Instant yeast mixes directly into the liquid and works quickly. If you use active dry yeast, use the same amount and let it sit in the warm water and sugar for 5 to 10 minutes until foamy.
Sugar
Just a teaspoon feeds the yeast and helps the crust brown. It does not make the baguettes taste sweet.
Salt
Salt flavors the bread, strengthens the gluten, and controls the yeast. Do not leave it out, or the baguettes will taste flat.
Olive oil (optional)
A tablespoon of olive oil makes the crumb a little softer and adds a subtle richness. Traditional baguettes do not contain oil, so it is optional. Leave it out for a more classic, crisper crust.
👩🍳 How to Make Mini French Baguettes: Step-by-Step
Step 1: Mix the dough
In a large mixing bowl, combine the warm water, yeast, and sugar. Add the flour and salt. Mix with a wooden spoon until a rough, sticky dough forms.
Tip: The dough will be wetter than a typical sandwich bread dough, and that is on purpose. The extra moisture creates steam inside the loaf and gives you an airy crumb.
Step 2: Knead until smooth
Transfer the dough to a lightly floured surface. Knead for 8 to 10 minutes until smooth and elastic. The dough should feel soft and slightly tacky. Add the olive oil during kneading if desired.
Handling tip: This dough is soft and sticky at first. Use a bench scraper to help lift and fold it, and lightly flour your hands rather than adding lots of flour to the dough. The stickiness will ease as the gluten develops over the 8 to 10 minutes. Avoid adding too much flour, because it will make the baguettes dense.
How to know it is ready: Gently press a finger into the dough. It should spring back slowly. You can also do the windowpane test. Stretch a small piece thin between your fingers. If it forms a translucent membrane without tearing right away, the gluten is ready.
Stand mixer option: Use the dough hook on medium-low speed for about 6 to 8 minutes.
Step 3: First rise
Place the dough in a lightly greased bowl. Cover with a clean kitchen towel or plastic wrap and let it rise in a warm place for 60 to 75 minutes, or until doubled in size.
Warm spot ideas: Place the bowl in an oven that is turned off with the light on, near a sunny window, or on top of the refrigerator. If your kitchen is cool, the rise may take longer. Watch the dough, not the clock.
Step 4: Divide the dough
Gently press the dough to release excess air. Divide it into 6 equal portions and shape each piece into a small ball. Cover and let rest for 10 minutes.
Tip: A kitchen scale makes dividing easy and accurate. Each portion should be roughly the same size so that the baguettes bake evenly. The 10-minute rest relaxes the gluten, so the dough is easier to shape.
Step 5: Shape the mini baguettes
Flatten each dough ball into a small rectangle. Fold the top edge toward the center and press to seal. Fold again, pinch the seam closed, and gently roll into a baguette shape about 6 to 8 inches (15 to 20 cm) long. Taper the ends slightly.
Shaping tips:
- Work on a lightly floured surface, and use only as much flour as you need.
- Press the seam closed firmly so that it does not open in the oven.
- Roll from the center outward with your palms, using light pressure.
- Shape gently. Do not press out all the air, since the air bubbles create the soft crumb.
- If the dough springs back and will not lengthen, cover it and rest it for 5 minutes, then roll again.
Step 6: Second rise
Place the baguettes seam-side down on a parchment-lined baking sheet, leaving space between them. Cover loosely and let rise for 25 to 35 minutes, until slightly puffy.
The poke test: Gently press a fingertip into a baguette. If the dent fills back slowly and only partly, it is ready. If it springs back right away, give it a few more minutes. If it does not spring back at all, bake right away.
Tip: If your pan is small, bake in two batches, keeping the second batch covered while the first one bakes.
Step 7: Preheat the oven
Preheat your oven to 450°F (230°C). Place an empty metal baking pan on the lower oven rack while the oven heats. Use a sturdy metal pan, not glass or ceramic, which can crack with a sudden temperature change.
Step 8: Score the baguettes
Using a sharp knife or bread lame, make 2 to 3 shallow diagonal cuts along the top of each baguette. This helps the bread expand beautifully while baking.
Scoring tip: Hold the blade at a slight angle, almost parallel to the surface, and make quick, confident cuts about ¼ inch (6 mm) deep. Overlap the cuts slightly for the classic baguette look. A hesitant cut can drag and tear the dough.
Step 9: Add steam and bake
Carefully pour about 1 cup of hot water into the empty preheated metal pan to create steam. Keep your hands and face away from the escaping steam. Immediately place the baguettes in the oven and bake for 18 to 22 minutes, until deeply golden and crisp.
Safety note: Steam can burn. Use oven mitts, pour slowly from a pitcher with a spout, and avoid leaning over the oven. Never pour water directly onto the oven’s glass door or the oven floor.
Step 10: Cool and enjoy
Transfer the baguettes to a wire rack and let them cool for at least 15 minutes before slicing. Enjoy fresh from the oven!
Tip: You may hear the crust crackle as it cools, which is a sign you did it right. 🥖
🔬 The Secrets to a Crispy Baguette Crust
Why steam matters
When bread first enters a hot oven, it expands rapidly in a final burst called oven spring. If the surface dries out and hardens too early, it acts like a lid and limits that expansion. Steam keeps the surface of the dough moist and flexible during the first minutes of baking, so the baguette can rise fully before the crust sets. Steam also helps the crust develop a glossy, golden finish and a thin, crackly texture.
Why a hot oven matters
At 450°F (230°C), the crust sets quickly and browns deeply, giving flavor and crunch. A cooler oven gives a paler, softer crust.
Why a wetter dough matters
Dough with high water content creates more steam inside the loaf, which gives an airy crumb. It also encourages a thin crust. That is why the dough is soft and slightly sticky.
Why scoring matters
The cuts give the baguette a controlled place to expand. Without scoring, the loaf may burst open at a random point.
Why cooling matters
As the baguette cools, the crumb sets and the crust firms. Cutting too early lets steam escape and can leave the inside gummy.
Other ways to create steam
- Spray bottle: Mist the oven walls with water a few times when you load the bread (avoid the oven light and glass).
- Preheated tray with lava rocks or stones: Pour hot water over them for extra steam.
- Dutch oven or roasting pan with a lid: Bake a few baguettes at a time inside a covered pan for the first part of baking.
💡 Helpful Tips
- Keep the dough slightly sticky. Adding too much flour can make the baguettes dense.
- Knead properly. A smooth, elastic dough helps create a better texture.
- Shape gently. Avoid pressing out all the air when forming the baguettes.
- Do not skip the scoring. Shallow cuts allow the bread to expand evenly.
- Create steam safely. Steam helps develop a crisp, bakery-style crust.
- Bake until golden. A deeper golden color gives the baguettes a more flavorful crust.
- Weigh your flour. A scale gives consistent results with a wetter dough.
- Use a hot oven. Make sure it is fully preheated before the baguettes go in.
- Use a sharp blade. A dull knife drags the dough and deflates it.
- Eat them fresh. Baguettes are at their best within a few hours of baking.
🔧 Troubleshooting: Common Baguette Problems
My dough is too sticky to handle. This dough is meant to be soft and a little tacky. Use a bench scraper and lightly floured hands rather than adding lots of flour. Resting the dough for a few minutes also makes it easier to handle.
My baguettes are dense and heavy. Too much flour, under-rising, or old yeast can cause density. Weigh the flour, let the dough double in the first rise, and check that the yeast is fresh.
My dough did not rise. The yeast may be expired, or the water may have been too hot or too cold. Make sure the water is warm, not hot, and the rising spot is not too cool.
My crust is pale. The oven may not have been hot enough, or the baguettes may need more baking time. Bake until deeply golden and use an oven thermometer to check the temperature.
My crust is too hard or thick. It may have baked too long or had too much steam. Check a few minutes early next time. Wrapping the baguettes in a towel while cooling softens the crust slightly.
My baguettes spread flat. The dough may have been too wet, over-proofed, or shaped loosely. Shape firmly, use the poke test, and avoid letting the second rise go too long.
The seam opened in the oven. The seam was not sealed tightly, or it was on the top. Pinch the seam firmly and place the baguettes seam-side down.
The baguettes did not open at the scores. The cuts may have been too shallow, the blade may have been dull, or the dough may have been over-proofed. Use a sharp blade and cut about ¼ inch deep with a quick motion.
The bottoms are too dark. Move the baking sheet to a higher rack, or place a second baking sheet underneath for insulation.
They are gummy inside. They were likely cut too soon, or underbaked. Cool for at least 15 minutes, and bake until deeply golden.
The baguettes went stale quickly. Baguettes are best fresh, because they contain very little fat. Freeze extras the same day, and refresh them in the oven.
🍽 Serving Ideas
With butter and spreads
- Serve warm with salted butter or garlic butter. The classic way to enjoy fresh baguettes.
- Honey butter or jam. A sweet breakfast option.
- Herb butter and whipped ricotta. Elegant and simple.
- Olive oil and balsamic vinegar. An easy dipping duo.
For sandwiches
- Make mini sandwiches with cheese, ham, lettuce, and tomatoes. A French-style jambon-beurre or a classic deli sandwich.
- Turkey and avocado. A fresh lunch.
- Caprese: Fresh mozzarella, tomato, and basil.
- Chicken salad or tuna salad. Creamy fillings in a crisp roll.
- Meatball or steak sandwiches. Hearty and filling.
- Egg and cheese breakfast sandwiches. Great for brunch.
With soups, pasta, and salads
- Pair with creamy soups, pasta, or fresh salads. A baguette is ideal for dipping and scooping.
- French onion soup. Slice, toast, and top with melted cheese.
- Tomato soup. A cozy classic.
- Pasta with marinara. Mop up every bit of sauce.
- Caesar or Greek salads. A crunchy side.
On boards and platters
- Cheese boards. Slice and serve with brie, cheddar, and goat cheese.
- Charcuterie. A perfect base for cured meats and pâté.
- Bruschetta and crostini. Toast slices and top with tomatoes, garlic, and basil.
- Dips. Serve with hummus, tapenade, or spinach artichoke dip.
Using leftovers
- Turn leftovers into garlic bread or homemade croutons. Slice, brush with garlic butter, and bake until golden.
- Breadcrumbs: Pulse dry bread in a food processor.
- French toast: Day-old baguette makes excellent French toast.
- Panzanella: A Tuscan bread salad with tomatoes and basil.
- Bread pudding: A comforting dessert.
🌿 Delicious Flavor Variations
Once you have mastered the basic recipe, try these easy twists:
- Garlic herb baguettes: Brush with garlic butter and sprinkle with parsley after baking.
- Cheesy baguettes: Sprinkle grated Parmesan or Gruyère on top in the last 5 minutes of baking.
- Sesame or poppy seed baguettes: Brush with water and press seeds on the surface before scoring.
- Rosemary and sea salt: Brush with olive oil and sprinkle with rosemary and flaky salt.
- Olive baguettes: Fold in chopped olives when shaping.
- Whole wheat baguettes: Replace up to 1 cup of the flour with whole wheat flour, and add a splash more water if needed.
- Herbes de Provence: Mix 1 to 2 teaspoons into the flour.
- Garlic and Parmesan: Knead in minced garlic and grated Parmesan.
- Overnight baguettes: After kneading, refrigerate the dough for 8 to 12 hours, then continue with the shaping steps. The slow rise adds flavor.
- Larger baguettes: Divide the dough into 3 pieces for longer loaves, and bake a few minutes longer.
- Baguette rolls: Divide into 8 to 10 pieces and shape into small rolls. Reduce the baking time.
📦 Storage
Room temperature
Store in a paper bag or bread box for up to 2 days. Baguettes contain very little fat, so they are best on the day they are baked. Avoid plastic, which softens the crust.
Freezer
Freeze completely cooled baguettes in freezer-safe bags for up to 2 months. Press out the air and seal tightly.
Reheating
Warm in a 350°F (175°C) oven for 5 to 7 minutes to refresh the crust.
Serving from frozen
Thaw at room temperature before reheating. Then warm in the oven until hot and crisp.
Using stale baguettes
Turn leftovers into croutons, breadcrumbs, French toast, bread pudding, or garlic toast.
🥗 Nutrition Notes
French baguettes are a simple, lean bread made from flour, water, yeast, and salt, with only a little sugar and optional olive oil. Each mini baguette is a generous portion that makes a satisfying sandwich or a side for a meal.
Exact nutrition varies depending on ingredients and portion size. For accurate numbers, use a nutrition calculator with your specific ingredients.
❓ Frequently Asked Questions
Can I use all-purpose flour instead of bread flour?
Yes. All-purpose flour makes a slightly softer, less chewy baguette, and it works well. Bread flour gives a chewier, taller result.
Do I have to knead the dough?
This recipe uses 8 to 10 minutes of kneading to develop the gluten. Use a bench scraper to handle the sticky dough, or use a stand mixer with a dough hook.
Is the olive oil necessary?
No. It is optional. Leave it out for a more traditional, crisper crust, or add it for a slightly softer crumb.
Can I use active dry yeast?
Yes. Use the same amount, and let it foam in the warm water and sugar for 5 to 10 minutes before adding the flour.
Do I need a baking stone?
No. A baking sheet works fine. A preheated baking stone or steel can make the bottom crust crisper, but it is not required.
Can I skip the steam?
Yes, but the crust will be paler and thicker, and the baguettes may rise less. If you do not want to use a pan, mist the baguettes and the oven walls with water just before baking.
What can I use instead of a bread lame?
A very sharp knife, a razor blade, or sharp kitchen scissors will do the job. Make quick, shallow cuts.
Why are my baguettes dense?
Common causes are too much flour, not enough rising time, old yeast, or too little kneading. Weigh the flour, let the dough double, and knead until smooth and elastic.
Why is my dough so sticky?
This dough has a high water content to create an airy crumb. Use a bench scraper and lightly floured hands, and avoid adding too much flour.
How do I know when they are done?
They should be deeply golden and crisp and sound hollow when tapped on the bottom.
Can I make the dough ahead of time?
Yes. After kneading, refrigerate the dough in a greased, covered bowl for up to 24 hours. Let it come to room temperature for 30 to 45 minutes, then divide, shape, and let it rise before baking. Because this recipe has not been tested with a cold rise, watch the dough rather than the clock.
Can I make bigger baguettes?
Yes. Divide the dough into 3 pieces and shape each into a longer baguette, about 12 inches (30 cm). Bake a few minutes longer, checking for color.
Can I bake them in a baguette pan?
Yes. A perforated baguette pan helps the loaves keep their shape and gives a crispy all-around crust. Adjust the size so they fit.
How do I keep the crust crisp?
Store the baguettes in a paper bag, and refresh them in a 350°F (175°C) oven. Avoid plastic bags.
Can I freeze the dough?
It is easier to freeze the baked baguettes. If you freeze the shaped dough, thaw it in the refrigerator before the second rise.
Can I make this recipe vegan?
Yes. The recipe contains no eggs, dairy, or animal products.
What is the difference between a baguette and Italian bread?
Baguettes are typically thinner and crisper, made with just flour, water, yeast, and salt. Italian bread is often a little softer and may include olive oil or sugar.
🏁 Final Thoughts
These Easy Homemade Mini French Baguettes prove that you can bring the taste of a French bakery into your own kitchen with a few pantry ingredients and a splash of steam. With a golden, crunchy crust and a soft, airy center, they are perfect for sandwiches, soups, cheese boards, or simply enjoying warm with butter. ❤️
Golden, crunchy, fresh, and wonderfully soft inside, these homemade mini French baguettes are a simple baking recipe worth making again and again! 🥖
If you try this recipe, leave a comment and a star rating below, and let us know how you enjoyed your baguettes. Happy baking! 💛
📌 Quick Recipe Card
Easy Homemade Mini French Baguettes ⏱ Prep: 20 min | ⏳ Rise: 1 hr 30 min | 🔥 Bake: 18 to 22 min | 🕒 Total: About 2 hrs 15 min | 🍽 Yield: 6 mini baguettes
Ingredients: 3½ cups (440 g) bread flour or all-purpose flour, 1½ tsp salt, 2 tsp instant yeast, 1 tsp sugar, 1½ cups (360 ml) warm water, 1 tbsp olive oil (optional).
Method: Combine the warm water, yeast, and sugar, then add the flour and salt and mix into a rough, sticky dough. Knead 8 to 10 minutes until smooth and elastic, adding the olive oil during kneading if desired. Let rise in a greased, covered bowl for 60 to 75 minutes until doubled. Press out the air, divide into 6 portions, shape into balls, and rest 10 minutes. Flatten each into a rectangle, fold the top edge to the center and seal, fold again, pinch the seam closed, and roll into a 6 to 8 inch baguette with tapered ends. Place seam-side down on a parchment-lined sheet and rise 25 to 35 minutes until slightly puffy. Preheat the oven to 450°F (230°C) with an empty metal pan on the lower rack. Score each baguette with 2 to 3 shallow diagonal cuts. Pour about 1 cup of hot water into the pan for steam, add the baguettes right away, and bake 18 to 22 minutes until deeply golden and crisp. Cool on a wire rack at least 15 minutes before slicing.
Storage: Room temperature in a paper bag up to 2 days, or freeze cooled baguettes up to 2 months. Reheat in a 350°F (175°C) oven for 5 to 7 minutes.
Print
Easy Homemade Mini French Baguettes
Ingredients
- 3½ cups (440 g) bread flour or all-purpose flour
- 1½ teaspoons salt
- 2 teaspoons instant yeast
- 1 teaspoon sugar
- 1½ cups (360 ml) warm water
- 1 tablespoon olive oil (optional)
You will also need:
- A large mixing bowl
- A baking sheet lined with parchment paper
- An empty metal baking pan (for steam)
- A sharp knife or bread lame
- A wire cooling rack
🧂 Ingredient Notes and Smart Substitutions
Bread flour vs. all-purpose flour
Bread flour has more protein, which builds stronger gluten. That gives baguettes a chewier bite, a taller rise, and a more open crumb. All-purpose flour gives a slightly softer, more tender result and works well too. Use whichever you have. Weighing the flour (440 g) is the most accurate method, because this dough has a high water content, and too much flour will make the baguettes dense.
Warm water
The water should feel comfortably warm, about 105 to 110°F (40 to 43°C). If it is too cool, the yeast will be slow. If it is too hot, it can kill the yeast. A good rule is that it should feel like a warm bath.
Instant yeast
Instant yeast mixes directly into the liquid and works quickly. If you use active dry yeast, use the same amount and let it sit in the warm water and sugar for 5 to 10 minutes until foamy.
Sugar
Just a teaspoon feeds the yeast and helps the crust brown. It does not make the baguettes taste sweet.
Salt
Salt flavors the bread, strengthens the gluten, and controls the yeast. Do not leave it out, or the baguettes will taste flat.
Olive oil (optional)
A tablespoon of olive oil makes the crumb a little softer and adds a subtle richness. Traditional baguettes do not contain oil, so it is optional. Leave it out for a more classic, crisper crust.
Instructions
Step 1: Mix the dough
In a large mixing bowl, combine the warm water, yeast, and sugar. Add the flour and salt. Mix with a wooden spoon until a rough, sticky dough forms.
Tip: The dough will be wetter than a typical sandwich bread dough, and that is on purpose. The extra moisture creates steam inside the loaf and gives you an airy crumb.
Step 2: Knead until smooth
Transfer the dough to a lightly floured surface. Knead for 8 to 10 minutes until smooth and elastic. The dough should feel soft and slightly tacky. Add the olive oil during kneading if desired.
Handling tip: This dough is soft and sticky at first. Use a bench scraper to help lift and fold it, and lightly flour your hands rather than adding lots of flour to the dough. The stickiness will ease as the gluten develops over the 8 to 10 minutes. Avoid adding too much flour, because it will make the baguettes dense.
How to know it is ready: Gently press a finger into the dough. It should spring back slowly. You can also do the windowpane test. Stretch a small piece thin between your fingers. If it forms a translucent membrane without tearing right away, the gluten is ready.
Stand mixer option: Use the dough hook on medium-low speed for about 6 to 8 minutes.
Step 3: First rise
Place the dough in a lightly greased bowl. Cover with a clean kitchen towel or plastic wrap and let it rise in a warm place for 60 to 75 minutes, or until doubled in size.
Warm spot ideas: Place the bowl in an oven that is turned off with the light on, near a sunny window, or on top of the refrigerator. If your kitchen is cool, the rise may take longer. Watch the dough, not the clock.
Step 4: Divide the dough
Gently press the dough to release excess air. Divide it into 6 equal portions and shape each piece into a small ball. Cover and let rest for 10 minutes.
Tip: A kitchen scale makes dividing easy and accurate. Each portion should be roughly the same size so that the baguettes bake evenly. The 10-minute rest relaxes the gluten, so the dough is easier to shape.
Step 5: Shape the mini baguettes
Flatten each dough ball into a small rectangle. Fold the top edge toward the center and press to seal. Fold again, pinch the seam closed, and gently roll into a baguette shape about 6 to 8 inches (15 to 20 cm) long. Taper the ends slightly.
Shaping tips:
- Work on a lightly floured surface, and use only as much flour as you need.
- Press the seam closed firmly so that it does not open in the oven.
- Roll from the center outward with your palms, using light pressure.
- Shape gently. Do not press out all the air, since the air bubbles create the soft crumb.
- If the dough springs back and will not lengthen, cover it and rest it for 5 minutes, then roll again.
Step 6: Second rise
Place the baguettes seam-side down on a parchment-lined baking sheet, leaving space between them. Cover loosely and let rise for 25 to 35 minutes, until slightly puffy.
The poke test: Gently press a fingertip into a baguette. If the dent fills back slowly and only partly, it is ready. If it springs back right away, give it a few more minutes. If it does not spring back at all, bake right away.
Tip: If your pan is small, bake in two batches, keeping the second batch covered while the first one bakes.
Step 7: Preheat the oven
Preheat your oven to 450°F (230°C). Place an empty metal baking pan on the lower oven rack while the oven heats. Use a sturdy metal pan, not glass or ceramic, which can crack with a sudden temperature change.
Step 8: Score the baguettes
Using a sharp knife or bread lame, make 2 to 3 shallow diagonal cuts along the top of each baguette. This helps the bread expand beautifully while baking.
Scoring tip: Hold the blade at a slight angle, almost parallel to the surface, and make quick, confident cuts about ¼ inch (6 mm) deep. Overlap the cuts slightly for the classic baguette look. A hesitant cut can drag and tear the dough.
Step 9: Add steam and bake
Carefully pour about 1 cup of hot water into the empty preheated metal pan to create steam. Keep your hands and face away from the escaping steam. Immediately place the baguettes in the oven and bake for 18 to 22 minutes, until deeply golden and crisp.
Safety note: Steam can burn. Use oven mitts, pour slowly from a pitcher with a spout, and avoid leaning over the oven. Never pour water directly onto the oven’s glass door or the oven floor.
Step 10: Cool and enjoy
Transfer the baguettes to a wire rack and let them cool for at least 15 minutes before slicing. Enjoy fresh from the oven!
Tip: You may hear the crust crackle as it cools, which is a sign you did it right. 🥖