
Easy Mini Rosemary Olive Oil Focaccia
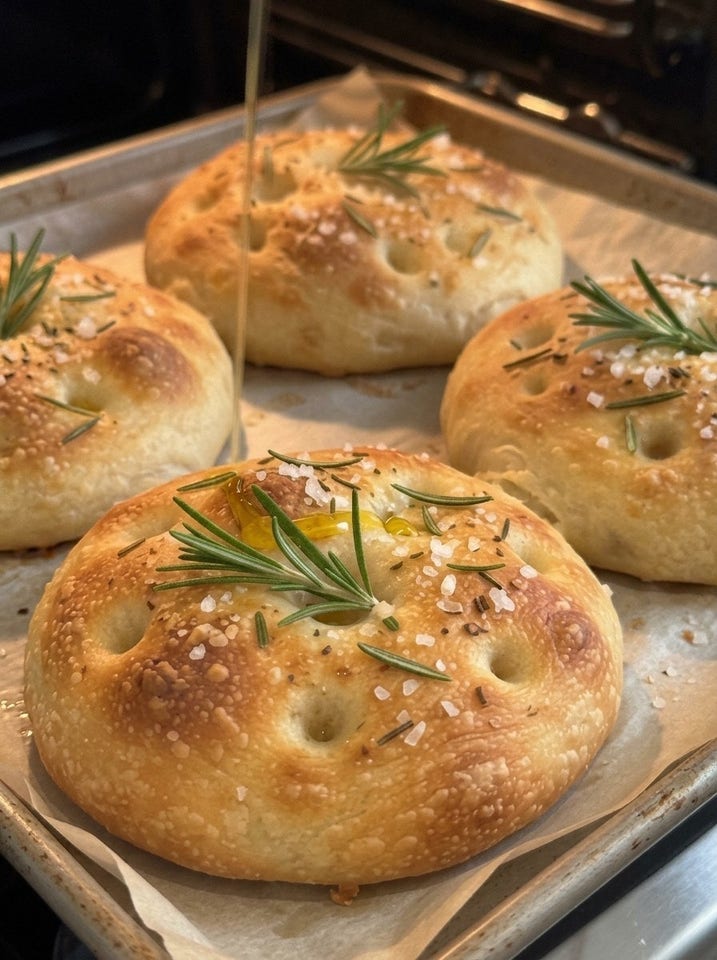
Easy Mini Rosemary Olive Oil Focaccia: Crispy, Fluffy & Golden 🌿🍞
Easy Mini Rosemary Olive Oil Focaccia Recipe (Crispy & Fluffy) Meta description: Make easy mini rosemary olive oil focaccia with a golden, crispy bottom, a soft airy center, and olive oil dimples. No kneading, simple ingredients, ready in about 2 hours. Focus keyword: mini focaccia Secondary keywords: rosemary focaccia, olive oil focaccia, easy focaccia recipe, no knead focaccia, individual focaccia breads, homemade focaccia, focaccia rolls, Italian focaccia
Imagine pulling a tray of warm homemade focaccia from the oven. The bottoms are golden and crisp from the olive oil. The centers are soft, airy, and full of tender holes. The tops are dotted with fragrant rosemary and glistening little pools of oil. 😍🌿 That first bite, with its crackle, chew, and richness, is pure bakery magic.
This Easy Mini Rosemary Olive Oil Focaccia gives you exactly that, without the commitment of a huge sheet-pan loaf. Instead of one big slab, you bake six individual focaccia breads, each with the signature little dimples that hold delicious pools of olive oil. They are wonderful as a snack, alongside soup, with pasta or salad, or split open for sandwiches. 🤍
The method is as simple as it gets. There is no complicated technique and no extensive kneading. You just mix, rise, dimple, and bake.
In this complete guide, you will find the full recipe, step-by-step instructions, ingredient notes, the secrets to a crispy bottom and fluffy center, troubleshooting help, flavor variations, serving ideas, storage and freezing tips, and answers to common questions. Let’s bake! 👩🍳
🤔 What Is Focaccia?
Focaccia is a flat, oven-baked Italian bread that is famous for its olive oil-rich flavor, golden crust, and dimpled surface. It originated in Liguria, in northwestern Italy, where it is traditionally served for breakfast, as a snack, or alongside meals. The word comes from the Latin panis focacius, meaning “hearth bread.”
What makes focaccia unique among breads?
- Generous olive oil. Oil goes into the dough, onto the pan, and over the top, which creates a tender crumb and a crisp, almost fried bottom.
- The dimples. Pressing your fingertips deep into the dough creates little wells that catch the olive oil and seasonings, and they give focaccia its beautiful, rustic look.
- A soft, airy interior. The dough is wetter and stickier than regular bread dough, which creates open, tender holes in the crumb.
- Simple toppings. Rosemary and flaky salt are the classic duo, but you can top focaccia with tomatoes, olives, onions, garlic, and cheese too.
This recipe takes the classic idea and makes it individual. Mini focaccia breads bake faster, have more crispy edges and golden bottoms per bite, and are easy to serve and share.
❤️ Why You Will Love This Recipe
- ✅ No heavy kneading. Just stir the dough with a wooden spoon.
- ✅ Made with everyday ingredients. Flour, water, yeast, salt, sugar, and olive oil.
- ✅ Crispy, golden bottoms. The olive oil in the pan fries the bottoms to perfection.
- ✅ Soft, fluffy, airy centers. A slightly wet dough creates a tender crumb.
- ✅ Fragrant and flavorful. Rosemary and olive oil are a classic Mediterranean pairing.
- ✅ Perfectly portioned. Six individual breads, ideal for sharing, lunches, and sandwiches.
- ✅ Ready in about 2 hours. Most of that time is hands-off rising.
- ✅ Freezer friendly. Make a batch and enjoy them all month.
- ✅ Endlessly customizable. Change the toppings to match any meal.
🛒 Ingredients
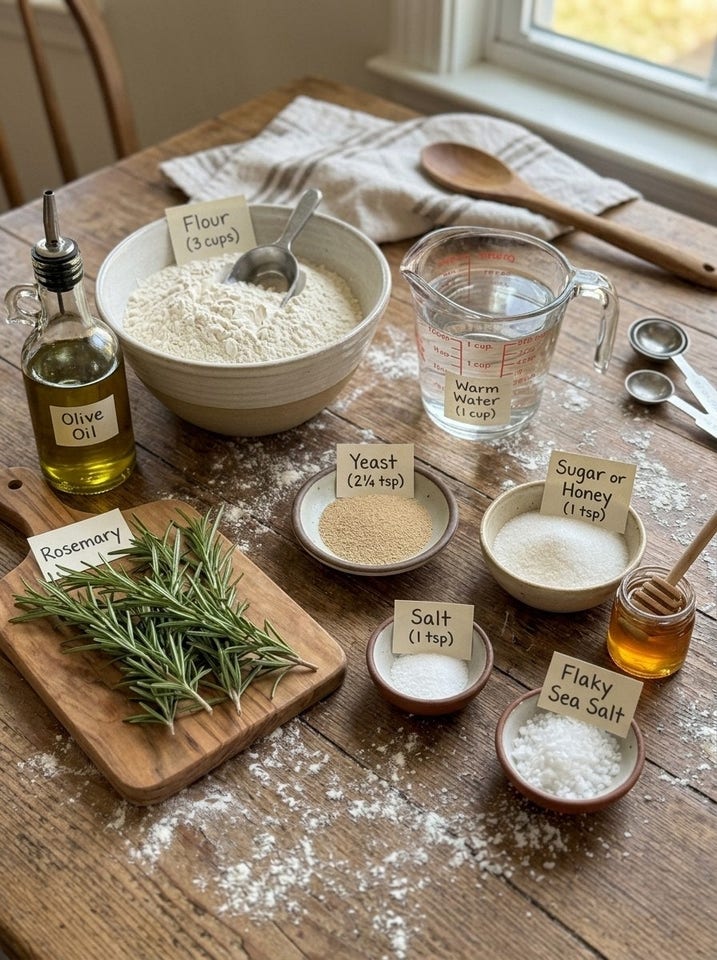
For the dough
- 3 cups (375 g) all-purpose flour or bread flour
- 1 cup (240 ml) warm water
- 2¼ teaspoons (7 g) instant yeast
- 1 teaspoon sugar or honey
- 1 teaspoon salt
- 2 tablespoons (30 ml) extra-virgin olive oil
For the topping
- 3 tablespoons (45 ml) extra-virgin olive oil
- 1 to 2 tablespoons fresh rosemary leaves, chopped or left whole
- ½ teaspoon flaky sea salt
- 1 to 2 tablespoons water, for lightly wetting your fingertips
🧂 Ingredient Notes and Smart Substitutions
All-purpose flour vs. bread flour
Either one works well. Bread flour has more protein and gives a chewier, taller, airier focaccia with a slightly more bakery-like texture. All-purpose flour makes a slightly softer, more tender bread. Use whichever you have on hand.
Warm water
The water should feel comfortably warm, about 105°F to 110°F (40°C to 43°C). Water that is too cool slows the yeast, and water that is too hot can kill it. Aim for the temperature of a warm bath.
Instant yeast
Instant yeast mixes directly into the liquid, which makes things simple. If you use active dry yeast, use the same amount and let it bloom in the warm water with the sugar for 5 to 10 minutes, until foamy, before adding the other ingredients.
Sugar or honey
Just a teaspoon feeds the yeast and encourages a golden crust. Honey adds a subtle floral note. It will not make the bread taste sweet.
Salt
Salt flavors the dough and controls the yeast. The flaky sea salt on top adds a delightful crunch and a burst of salty flavor. Without salt, focaccia can taste flat.
Extra-virgin olive oil
Olive oil is the soul of focaccia. Because it is used generously, choose a good-quality extra-virgin olive oil with a flavor you enjoy. A fruity, slightly peppery oil makes the bread taste noticeably better. The oil also helps create the crisp, golden bottom and the tender crumb.
Fresh rosemary
Rosemary brings a fragrant, piney, slightly lemony aroma that pairs beautifully with olive oil. Use the leaves only, and either chop them finely for even flavor or leave them whole for a more rustic look. Whole leaves can crisp up and become sharp in the oven, so press them gently into the dimples where they stay protected under the oil.
Substitution: No fresh rosemary? Use 1 teaspoon of dried rosemary, crushed between your fingers. Thyme, oregano, or Italian seasoning also work well.
Flaky sea salt
Flaky salt (such as Maldon) sprinkles beautifully and gives a satisfying crunch. If you do not have it, use a coarse kosher salt, but use slightly less.
👩🍳 How to Make Mini Rosemary Olive Oil Focaccia: Step-by-Step
Step 1: Mix the dough
In a large bowl, combine the warm water, yeast, and sugar. Add the flour, salt, and 2 tablespoons of olive oil.
Stir with a wooden spoon until a sticky dough forms and no dry flour remains. The dough should be soft and slightly tacky. There is no need to knead it extensively.
Tip: Resist the urge to add more flour. A wetter, stickier dough is the secret to a light, airy focaccia with an open crumb. If the dough is too stiff, the bread will come out dense.
Step 2: Let the dough rise
Cover the bowl with a clean kitchen towel or plastic wrap. Leave it in a warm place for 60 to 90 minutes, or until the dough has doubled in size and looks airy, with bubbles visible on the surface.
Warm spot ideas: Turn your oven off and leave the light on, place the bowl near a sunny window, or set it on top of the refrigerator. If your kitchen is cool, the rise may take a little longer. Watch the dough, not the clock.
Step 3: Divide into mini portions
Drizzle a little olive oil onto a parchment-lined baking sheet. Gently transfer the dough to a lightly floured surface and divide it into 6 equal portions. Shape each portion into a small round or oval and place them on the prepared baking sheet, leaving a little space between them.
Let the dough rest for 10 to 15 minutes. This short rest relaxes the gluten, which makes the dough easier to stretch.
Handling tip: Because the dough is sticky, lightly oil or flour your hands to prevent it from clinging. Handle it gently so you keep the air bubbles that create the fluffy interior.
Step 4: Shape and dimple
Gently stretch each portion into a small flatbread about ½ inch (1.25 cm) thick. Drizzle the tops generously with olive oil. Using your fingertips, press deep dimples into each piece without tearing the dough. Dip your fingers lightly in water if the dough sticks.
These little pockets help capture the olive oil and create the classic focaccia look and texture.
Step 5: Add the topping
Drizzle the remaining olive oil over the dimpled breads, so that it pools in the little wells. Scatter the rosemary over the tops, pressing the leaves gently into the dimples. Sprinkle with flaky sea salt.
Step 6: Rest briefly and preheat
Let the shaped, topped focaccia rest for 15 to 20 minutes while you preheat the oven to 425°F (220°C). This brief final rest lets the dough puff up slightly before baking.
Step 7: Bake
Bake for 15 to 20 minutes, until the focaccia are golden brown on top and the bottoms are crisp and golden. Check the bottoms with a spatula if you like. They should be a deep golden color.
Step 8: Cool and serve
Transfer the focaccia to a wire rack and let them cool for 5 to 10 minutes. Serve them warm, with extra olive oil for dipping if you like. 🌿
Tip: Ovens vary, so keep an eye on the focaccia during the last few minutes and adjust the time to match the color and crispness you prefer.
🔬 The Secrets to Crispy Bottoms and Fluffy Centers
Great focaccia has two contrasting textures: a crisp, golden base and a light, tender interior. Here is how this recipe delivers both.
1. A wet, sticky dough
Dough with high hydration (a lot of water compared with flour) creates steam inside as it bakes, which forms open, airy pockets. That is why the dough in this recipe stays sticky and soft. The more you resist adding flour, the lighter the bread will be.
2. Plenty of olive oil on the pan
Oil on the bottom of the pan essentially “fries” the underside of the focaccia, creating that irresistible golden, crisp base. Do not skimp on it.
3. Deep dimples
Pressing firmly into the dough forms pockets that hold olive oil and also prevent the focaccia from puffing up into a puffy, bread-like dome. The dimples create a delightful contrast between crisp edges and soft, oil-soaked wells.
4. A hot oven
A hot oven (425°F or 220°C) gives the dough a quick burst of expansion, called oven spring, and sets the crust before the interior dries out. This keeps the crust crisp and the center moist.
5. A good rise
An airy, doubled dough is essential. If the dough is under-risen, the focaccia will be dense. If it is over-risen, it can collapse. Look for a dough that has about doubled with bubbles on the surface.
💡 Pro Tips for the Best Mini Focaccia
- Do not add extra flour. A sticky dough is the key to a light, airy crumb.
- Use plenty of good olive oil. It affects both the flavor and the crisp bottom.
- Oil your hands. This prevents sticking and makes shaping easier.
- Press deep dimples. Go almost all the way to the pan without tearing the dough.
- Dip your fingers in water. If the dough sticks to your fingertips while dimpling, a little water helps.
- Press rosemary into the dimples. This protects the leaves from burning and keeps them fragrant.
- Salt generously on top. Flaky salt gives crunch and balances the richness.
- Space them out. Leave room between the focaccia so they brown evenly and get crispy edges.
- Bake until deeply golden. Pale focaccia can taste doughy. A deeper color means a crispier, more flavorful bread.
- Serve warm. Focaccia is at its best fresh from the oven.
🔧 Troubleshooting: Common Focaccia Problems
My focaccia is dense. This usually means the dough was under-risen, or too much flour was added. Allow the dough to double and keep it sticky. Old yeast can also be the cause.
My dough did not rise. Check that your yeast is fresh and that your water was warm, not hot or cold. Make sure your rising spot is not too chilly. If nothing happens after 90 minutes, the yeast may be expired.
The dough is too sticky to handle. Sticky is normal, but if it is truly unmanageable, oil your hands and work surface rather than adding lots of flour. A little flour dusting is fine, but avoid kneading in extra flour.
The dough keeps springing back when I stretch it. The gluten is tight. Let the dough rest for 5 to 10 minutes, then stretch again.
The bottoms are not crispy. Make sure there is enough olive oil under the dough, and bake on the middle or lower rack. A dark metal baking sheet crisps the bottoms better than a light one.
The bottoms are burned. Move the pan to a higher rack, or place a second baking sheet underneath to insulate the bottom. Ovens vary, so check a few minutes early.
The rosemary burned. Leaves sticking up out of the oil can scorch. Press them into the dimples and make sure they are coated in oil, or use chopped rosemary mixed with a little oil.
The focaccia is pale. They may need a bit more time, a hotter oven, or a drizzle of extra olive oil on top. Bake until golden brown.
The focaccia is greasy. It may have too much oil pooling on the bottom. Use the amounts in the recipe, and let the baked focaccia rest on a wire rack so excess oil can drip away.
They deflated when I dimpled them. Dimple gently but firmly, and do it just before baking. If the dough is over-proofed, it may deflate. Shorten the rise next time.
🍽 What to Serve with Mini Focaccia
These little breads are wonderfully versatile. Here are some favorite ways to enjoy them.
🍲 With soups and stews
- Tomato soup: A classic pairing for dunking.
- Minestrone: Mop up the savory broth.
- Creamy soups: Potato leek, broccoli cheddar, or butternut squash.
- Chili and hearty stews: Perfect for scooping.
- Italian wedding soup and pasta e fagioli: A traditional match.
🍝 With pasta and mains
- Spaghetti and meatballs: Soak up every drop of sauce.
- Lasagna and baked ziti: The perfect side for cheesy, saucy dishes.
- Chicken parmesan: Serve alongside or use for a sandwich.
- Roasted chicken and grilled meats: A great accompaniment.
- Grilled fish and shrimp: Light and flavorful.
🥪 For sandwiches
- Split and filled mini sandwiches: Slice each focaccia in half horizontally and fill with turkey, ham, or roast beef.
- Caprese: Fresh mozzarella, tomatoes, basil, and a drizzle of balsamic glaze.
- Italian cold cut sandwiches: Salami, prosciutto, provolone, and arugula.
- Grilled chicken with pesto: A fresh, vibrant filling.
- Roasted vegetable and goat cheese: A vegetarian favorite.
- Burger buns: Use as dimpled sliders with beef or chicken patties.
🥗 With salads and boards
- Caesar, Greek, and arugula salads: A fresh pairing.
- Charcuterie and cheese boards: Serve whole or torn into pieces with cured meats, cheeses, and olives.
- Antipasto platters: Pair with marinated vegetables and fresh mozzarella.
- Burrata: Serve warm focaccia with creamy burrata, tomatoes, and basil.
🫒 As a dipper and snack
- Olive oil and balsamic vinegar: Simple and classic.
- Hummus and whipped feta: Creamy, flavorful dips.
- Tomato sauce or marinara: A quick pizza-style dip.
- Whipped ricotta with honey: A sweet and savory treat.
- Pesto: Spread over warm focaccia.
🍳 For breakfast
- Egg sandwiches: Split, fill with scrambled eggs, cheese, and tomato.
- Avocado toast: Use toasted focaccia as the base.
🌿 Delicious Flavor Variations
Once you have mastered the basic recipe, try these easy variations:
- Garlic and herb focaccia: Mix 2 minced garlic cloves into the olive oil topping and add thyme or oregano.
- Cherry tomato and basil: Press halved cherry tomatoes into the dimples and finish with fresh basil after baking.
- Olive focaccia: Press pitted olives (Kalamata or green) into the dough before baking.
- Parmesan focaccia: Sprinkle grated Parmesan over the top in the last 5 minutes of baking.
- Caramelized onion focaccia: Top with slow-cooked caramelized onions.
- Lemon and thyme: Add lemon zest to the dough and top with fresh thyme.
- Everything seasoning: Sprinkle with everything bagel seasoning instead of rosemary.
- Pizza-style mini focaccia: Top with tomato sauce, mozzarella, and pepperoni.
- Sun-dried tomato and feta: Press sun-dried tomatoes and crumbled feta into the dimples.
- Honey and sea salt: Drizzle with honey after baking for a sweet and salty finish.
- Whole wheat focaccia: Replace up to 1 cup of the flour with whole wheat flour.
- Overnight focaccia: After mixing, refrigerate the dough for 8 to 12 hours. Let it come to room temperature, then shape, dimple, and bake. The slow rise develops deeper flavor.
📦 Storage, Freezing, and Reheating
Storing
Store leftover focaccia in an airtight container or bag at room temperature for up to 2 days. They are best on the day they are baked.
Freezing
Let the baked focaccia cool completely, then wrap them individually and place them in a freezer bag. Freeze for up to 3 months.
Thawing and reheating
Thaw at room temperature for about 30 to 60 minutes. Reheat in a 350°F (175°C) oven for 5 to 10 minutes to bring back the crispness. You can also warm them in a skillet or toaster oven. A microwave will soften the crust, so the oven is best.
Make-ahead dough
After the first mix, cover the bowl tightly and refrigerate the dough for up to 24 hours. Let it come to room temperature for 30 to 45 minutes before dividing and shaping.
Using leftovers
Turn stale focaccia into croutons, breadcrumbs, panzanella salad, or garlic toast.
🥗 Nutrition Notes
Mini focaccia is a simple bread made without eggs or dairy. Olive oil is the main fat, which contributes to the rich flavor and tender texture. Each mini focaccia is a generous individual portion, ideal for a snack or alongside a meal.
Exact nutrition varies depending on your ingredients and how much olive oil you use. For accurate numbers, use a nutrition calculator with your specific ingredients.
❓ Frequently Asked Questions
Do I need to knead the dough?
No. This is a no-knead style dough. Stir it with a wooden spoon until no dry flour remains. The wetness of the dough and the rise do the work.
Can I use bread flour instead of all-purpose flour?
Yes. Bread flour gives a slightly chewier, taller focaccia. All-purpose flour gives a softer result. Both work well.
Can I use active dry yeast?
Yes. Use the same amount, but dissolve it in the warm water with the sugar and let it sit for 5 to 10 minutes until foamy.
Do I need a lot of olive oil?
Yes. Olive oil is essential for the flavor and the crisp, golden bottom. Use a good-quality extra-virgin olive oil for the best taste.
Why is my focaccia dense?
The most common reasons are old yeast, not enough rising time, or too much flour. Make sure the dough doubles and stays soft and sticky.
How do I get a crispy bottom?
Use enough olive oil on the pan, bake on the middle or lower rack, and use a metal baking sheet. A hot oven also helps.
Can I make one large focaccia instead of six mini ones?
Yes. Press the dough into an oiled 9 by 13 inch (23 by 33 cm) pan, dimple, top, and bake at 425°F (220°C) for about 20 to 25 minutes, until golden.
Can I use dried rosemary?
Yes. Use about 1 teaspoon of dried rosemary, crushed between your fingers. Fresh rosemary has a more vibrant flavor, but dried works well.
Why did my rosemary burn?
Leaves that stick out of the oil can scorch in the hot oven. Press them into the dimples and coat them in oil.
Can I make the dough ahead of time?
Yes. Refrigerate the covered dough for up to 24 hours after mixing. Let it warm for 30 to 45 minutes before shaping.
How do I know when the focaccia is done?
They should be golden brown on top, with crisp, golden bottoms. They should feel light and sound slightly hollow when tapped on the bottom.
Can I freeze mini focaccia?
Yes. Cool completely, wrap individually, and freeze for up to 3 months. Reheat in a 350°F (175°C) oven.
Can I make this recipe vegan?
Yes. It is naturally vegan, as long as you use sugar or a plant-based sweetener instead of honey.
Can I add cheese?
Absolutely. Parmesan, mozzarella, and feta all work beautifully. Add them near the end of baking so they melt without burning.
What pan is best?
A rimmed baking sheet lined with parchment and a little olive oil works well. A dark metal pan gives the crispiest bottoms.
Can I use a stand mixer?
You can, but it is not necessary. A wooden spoon and a bowl are all you need.
🏁 Final Thoughts
This Easy Mini Rosemary Olive Oil Focaccia proves that bakery-style bread does not require complicated techniques or a huge loaf. With everyday ingredients, a sticky no-knead dough, and a generous drizzle of olive oil, you get golden, crispy-bottomed, fluffy-centered focaccia, fragrant with rosemary and flaky salt. 🌿
Serve them warm with soup, pasta, salad, or a dish of extra olive oil, and watch them disappear. Once you taste that first crisp, oily, herby bite, you will want to make them again and again. 🤍
If you try this recipe, leave a comment and a star rating below, and let us know how you served your mini focaccia. Happy baking! 💛
📌 Quick Recipe Card
Easy Mini Rosemary Olive Oil Focaccia ⏱️ Prep: 15 min | ⏳ Rise: 1 to 1½ hrs | 🔥 Bake: 15 to 20 min | 🕒 Total: About 2 hrs | 🍽️ Yield: 6 mini focaccia
Ingredients: 3 cups (375 g) all-purpose or bread flour, 1 cup (240 ml) warm water, 2¼ tsp (7 g) instant yeast, 1 tsp sugar or honey, 1 tsp salt, 2 tbsp (30 ml) extra-virgin olive oil. Topping: 3 tbsp (45 ml) extra-virgin olive oil, 1 to 2 tbsp fresh rosemary leaves, ½ tsp flaky sea salt, 1 to 2 tbsp water for wetting fingertips.
Method: Mix the warm water, yeast, and sugar, then stir in the flour, salt, and 2 tbsp olive oil until a sticky dough forms. Cover and let rise 60 to 90 minutes until doubled. Divide into 6 portions on an oiled, parchment-lined baking sheet and rest 10 to 15 minutes. Stretch each to about ½ inch thick, drizzle with olive oil, and press deep dimples. Add the remaining olive oil, rosemary, and flaky salt. Bake at 425°F (220°C) for 15 to 20 minutes until golden and crisp. Cool 5 to 10 minutes and serve warm.
Print
Easy Mini Rosemary Olive Oil Focaccia
Ingredients
- 3 cups (375 g) all-purpose flour or bread flour
- 1 cup (240 ml) warm water
- 2¼ teaspoons (7 g) instant yeast
- 1 teaspoon sugar or honey
- 1 teaspoon salt
- 2 tablespoons (30 ml) extra-virgin olive oil
For the topping
- 3 tablespoons (45 ml) extra-virgin olive oil
- 1 to 2 tablespoons fresh rosemary leaves, chopped or left whole
- ½ teaspoon flaky sea salt
- 1 to 2 tablespoons water, for lightly wetting your fingertips
🧂 Ingredient Notes and Smart Substitutions
All-purpose flour vs. bread flour
Either one works well. Bread flour has more protein and gives a chewier, taller, airier focaccia with a slightly more bakery-like texture. All-purpose flour makes a slightly softer, more tender bread. Use whichever you have on hand.
Warm water
The water should feel comfortably warm, about 105°F to 110°F (40°C to 43°C). Water that is too cool slows the yeast, and water that is too hot can kill it. Aim for the temperature of a warm bath.
Instant yeast
Instant yeast mixes directly into the liquid, which makes things simple. If you use active dry yeast, use the same amount and let it bloom in the warm water with the sugar for 5 to 10 minutes, until foamy, before adding the other ingredients.
Sugar or honey
Just a teaspoon feeds the yeast and encourages a golden crust. Honey adds a subtle floral note. It will not make the bread taste sweet.
Salt
Salt flavors the dough and controls the yeast. The flaky sea salt on top adds a delightful crunch and a burst of salty flavor. Without salt, focaccia can taste flat.
Extra-virgin olive oil
Olive oil is the soul of focaccia. Because it is used generously, choose a good-quality extra-virgin olive oil with a flavor you enjoy. A fruity, slightly peppery oil makes the bread taste noticeably better. The oil also helps create the crisp, golden bottom and the tender crumb.
Fresh rosemary
Rosemary brings a fragrant, piney, slightly lemony aroma that pairs beautifully with olive oil. Use the leaves only, and either chop them finely for even flavor or leave them whole for a more rustic look. Whole leaves can crisp up and become sharp in the oven, so press them gently into the dimples where they stay protected under the oil.
Substitution: No fresh rosemary? Use 1 teaspoon of dried rosemary, crushed between your fingers. Thyme, oregano, or Italian seasoning also work well.
Flaky sea salt
Flaky salt (such as Maldon) sprinkles beautifully and gives a satisfying crunch. If you do not have it, use a coarse kosher salt, but use slightly less.
Instructions
In a large bowl, combine the warm water, yeast, and sugar. Add the flour, salt, and 2 tablespoons of olive oil.
Stir with a wooden spoon until a sticky dough forms and no dry flour remains. The dough should be soft and slightly tacky. There is no need to knead it extensively.
Tip: Resist the urge to add more flour. A wetter, stickier dough is the secret to a light, airy focaccia with an open crumb. If the dough is too stiff, the bread will come out dense.
Cover the bowl with a clean kitchen towel or plastic wrap. Leave it in a warm place for 60 to 90 minutes, or until the dough has doubled in size and looks airy, with bubbles visible on the surface.
Warm spot ideas: Turn your oven off and leave the light on, place the bowl near a sunny window, or set it on top of the refrigerator. If your kitchen is cool, the rise may take a little longer. Watch the dough, not the clock.
Drizzle a little olive oil onto a parchment-lined baking sheet. Gently transfer the dough to a lightly floured surface and divide it into 6 equal portions. Shape each portion into a small round or oval and place them on the prepared baking sheet, leaving a little space between them.
Let the dough rest for 10 to 15 minutes. This short rest relaxes the gluten, which makes the dough easier to stretch.
Handling tip: Because the dough is sticky, lightly oil or flour your hands to prevent it from clinging. Handle it gently so you keep the air bubbles that create the fluffy interior.
Gently stretch each portion into a small flatbread about ½ inch (1.25 cm) thick. Drizzle the tops generously with olive oil. Using your fingertips, press deep dimples into each piece without tearing the dough. Dip your fingers lightly in water if the dough sticks.
These little pockets help capture the olive oil and create the classic focaccia look and texture.
Drizzle the remaining olive oil over the dimpled breads, so that it pools in the little wells. Scatter the rosemary over the tops, pressing the leaves gently into the dimples. Sprinkle with flaky sea salt.
Let the shaped, topped focaccia rest for 15 to 20 minutes while you preheat the oven to 425°F (220°C). This brief final rest lets the dough puff up slightly before baking.
Bake for 15 to 20 minutes, until the focaccia are golden brown on top and the bottoms are crisp and golden. Check the bottoms with a spatula if you like. They should be a deep golden color.
Transfer the focaccia to a wire rack and let them cool for 5 to 10 minutes. Serve them warm, with extra olive oil for dipping if you like. 🌿
Tip: Ovens vary, so keep an eye on the focaccia during the last few minutes and adjust the time to match the color and crispness you prefer.
Great focaccia has two contrasting textures: a crisp, golden base and a light, tender interior. Here is how this recipe delivers both.
Dough with high hydration (a lot of water compared with flour) creates steam inside as it bakes, which forms open, airy pockets. That is why the dough in this recipe stays sticky and soft. The more you resist adding flour, the lighter the bread will be.
Oil on the bottom of the pan essentially “fries” the underside of the focaccia, creating that irresistible golden, crisp base. Do not skimp on it.
Pressing firmly into the dough forms pockets that hold olive oil and also prevent the focaccia from puffing up into a puffy, bread-like dome. The dimples create a delightful contrast between crisp edges and soft, oil-soaked wells.
A hot oven (425°F or 220°C) gives the dough a quick burst of expansion, called oven spring, and sets the crust before the interior dries out. This keeps the crust crisp and the center moist.
An airy, doubled dough is essential. If the dough is under-risen, the focaccia will be dense. If it is over-risen, it can collapse. Look for a dough that has about doubled with bubbles on the surface.