
Easy Skillet Focaccia for One
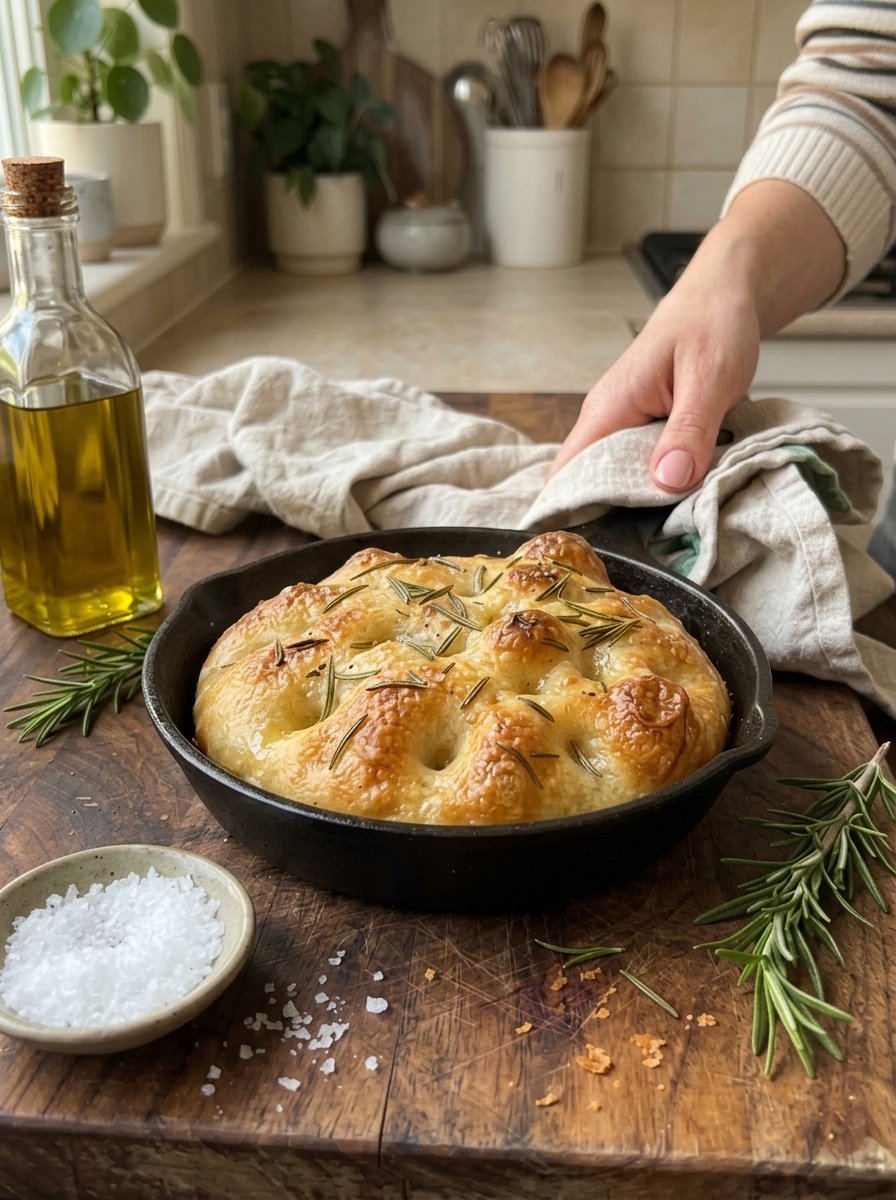
Easy Skillet Focaccia for One: Fresh Homemade Bread in a Small Skillet ✨🌿
There’s a special kind of joy in pulling a small, golden, olive-oil-crisped focaccia out of the oven, just for you. No big batch, no leftovers going stale on the counter, and no feeling like you need to commit to a whole loaf. This Easy Skillet Focaccia for One is soft, airy, and chewy inside, with a crisp, golden bottom, dimpled top, and a sprinkle of fragrant herbs and flaky sea salt. It’s made in a small 6-inch skillet with simple pantry ingredients, and it’s ready in about an hour and fifteen minutes, most of which is hands-off rising time.
It’s perfect for a solo lunch, a cozy snack, an easy side with soup, or a small dinner for two. In this complete guide, you’ll find the full recipe, a closer look at each ingredient, step-by-step instructions with visual cues, the science behind focaccia’s signature texture, expert tips, skillet and pan alternatives, troubleshooting help, topping ideas, serving suggestions, storage and reheating instructions, and answers to the most common questions about small-batch focaccia.
Why You’ll Love This Skillet Focaccia for One
It’s the perfect small batch. Most bread recipes make a full loaf or even two. This one makes just enough for one or two people, so there’s no waste and no need to scale down a bigger recipe yourself.
It uses simple pantry ingredients. Flour, yeast, water, salt, sugar, and olive oil are all you need for the dough. You probably have everything on hand right now.
The texture is bakery-quality. Soft, airy, and chewy inside, with a crisp, golden, olive-oil-fried bottom and edges. That contrast is the hallmark of great focaccia.
It’s ready in about 1 hour 15 minutes. Most of that time is hands-off rising, so you can do other things while the dough works.
It only takes 10 minutes of active prep. A short mixing and kneading session is all it takes.
Skillet baking gives a better crust. A hot cast iron skillet conducts heat beautifully, giving the bottom a crisp, golden, almost fried texture that a regular baking pan struggles to match.
It’s endlessly customizable. Add garlic, cherry tomatoes, olives, Parmesan, caramelized onions, or fresh herbs to make it your own.
It’s wonderful with almost anything. Dip it in soup, olive oil, and balsamic, or slice it for a mini sandwich.
Recipe Overview
- Prep Time: 10 minutes
- Cook Time: 15–20 minutes
- Total Time: 1 hour 15 minutes
- Servings: 1–2
Ingredients You’ll Need 🛒
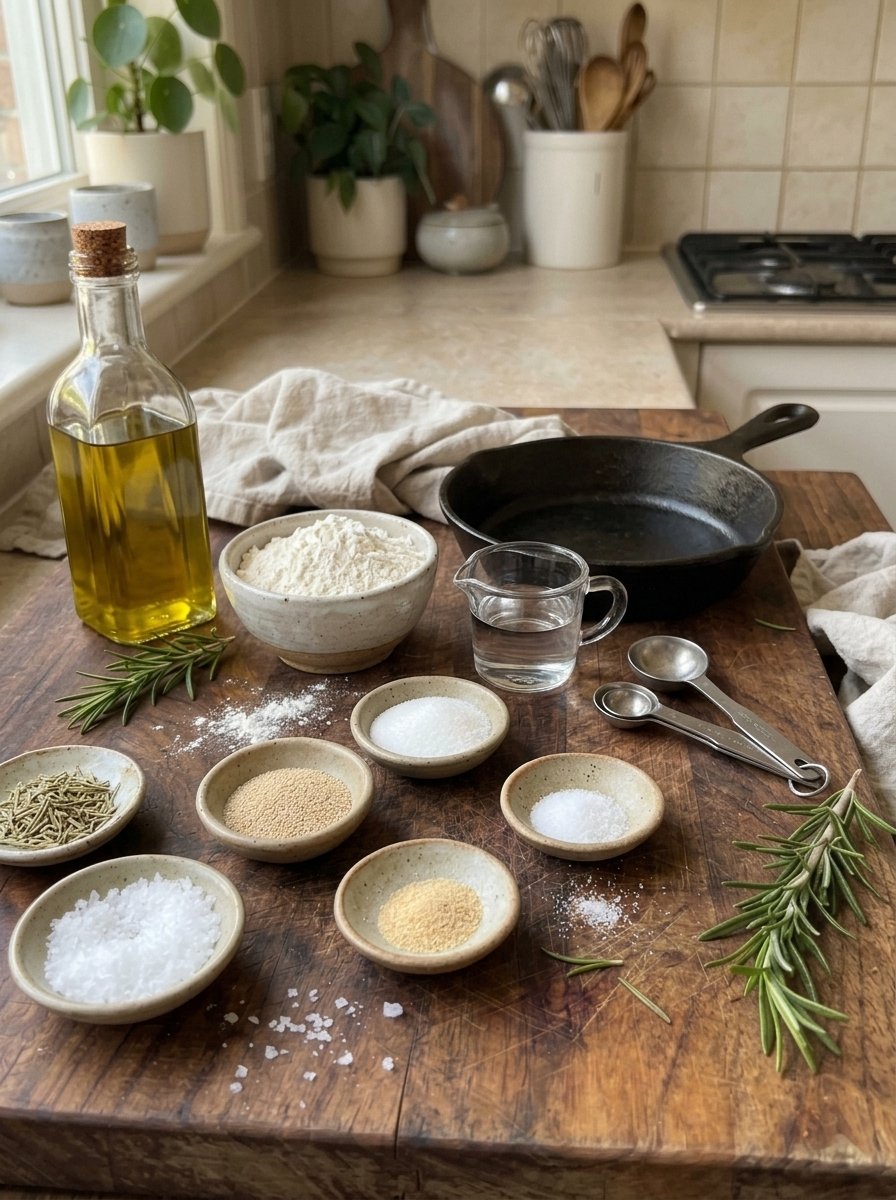
For the Dough
- ¾ cup (95 g) all-purpose or bread flour
- ¼ cup (60 ml) warm water
- ½ tsp instant yeast
- ½ tsp sugar
- ¼ tsp salt
- 1 tsp olive oil
For the Topping
- 1 tbsp olive oil, plus extra for the skillet
- ½ tsp dried rosemary or Italian seasoning
- Pinch of flaky sea salt
- ½ tsp garlic powder (optional)
A Closer Look at the Ingredients
Flour. All-purpose flour produces a soft, tender focaccia, while bread flour gives a chewier, slightly taller result thanks to its higher protein content. Either works well. Because this recipe is so small, accuracy matters. Weighing the flour at 95 grams is far more reliable than using a measuring cup.
Warm water. The water should feel comfortably warm, roughly 105°F to 115°F (40°C to 46°C). Too hot and it can damage the yeast, while too cold slows down the rise. Because the dough is made with a small amount of water, the dough will be slightly sticky, which is exactly what makes focaccia airy.
Instant yeast. Instant yeast can be mixed directly into the dough. If you only have active dry yeast, use the same amount but dissolve it in the warm water with the sugar for 5 to 10 minutes, until foamy, before adding the flour.
Sugar. A small amount of sugar feeds the yeast and encourages a golden crust. It won’t make the bread sweet.
Salt. Salt flavors the dough and strengthens the gluten. Don’t skip it. Focaccia relies on salt both inside the dough and on top.
Olive oil. Olive oil is the soul of focaccia. A teaspoon in the dough makes it tender, while the generous amount in the skillet and on top gives the crust its rich flavor and crisp texture. Use a good-quality extra virgin olive oil if you can.
Dried rosemary or Italian seasoning. Rosemary is the classic choice, giving a piney, aromatic flavor. Italian seasoning is a milder, more versatile alternative. Fresh rosemary works too, so use a small sprig, chopped.
Flaky sea salt. The crunchy flakes add bursts of salty flavor and a satisfying crackle on top. Kosher salt can work in a pinch.
Garlic powder (optional). This adds savory warmth without the risk of burning that fresh garlic can have on a hot surface.
Step-by-Step Instructions 👩🍳
Step 1: Mix the Dough
In a small bowl, combine the warm water, yeast, and sugar. Stir briefly. Add the flour, salt, and olive oil. Mix with a spoon or your hands until a soft, slightly sticky dough forms and no dry flour remains.
Step 2: Knead Briefly
Knead the dough by hand for 4 to 5 minutes on a lightly floured surface, until it feels smooth and elastic. The dough will start sticky and gradually become softer and more cohesive. Resist adding too much extra flour, since a slightly tacky dough produces a lighter, airier crumb. If the dough is truly unmanageable, dust your hands rather than the dough.
Step 3: Let It Rise
Place the dough in a lightly oiled bowl, turn it once to coat, and cover with plastic wrap, a plate, or a damp towel. Set it in a warm place for 45 to 60 minutes, or until the dough looks noticeably puffy and has grown significantly in size. A turned-off oven with the light on works well as a draft-free warm spot.
Step 4: Prepare the Skillet
Generously coat the bottom and sides of a small, oven-safe 6-inch cast iron skillet with olive oil. Don’t be shy. The oil is what fries the bottom of the focaccia into a golden, crisp crust.
Step 5: Shape the Dough
Transfer the dough into the oiled skillet and gently stretch it toward the edges with your fingertips. If the dough springs back and resists, cover it and let it rest for 5 to 10 minutes. The gluten will relax, making it much easier to stretch. Avoid forcing it, which can tear the dough and compress the air bubbles.
Step 6: Second Rise
Cover the skillet loosely and let the dough rise for another 15 minutes. It should look puffy and fill the skillet nicely. Use this time to preheat your oven.
Step 7: Add the Toppings
Preheat the oven to 400°F (200°C). Drizzle the olive oil over the dough, then press your fingertips straight down into the dough to create the classic focaccia dimples, all the way to the bottom of the skillet. The dimples catch pools of olive oil and give the bread its unmistakable look. Sprinkle with rosemary or Italian seasoning, flaky sea salt, and garlic powder if you like.
Step 8: Bake
Bake for 15 to 20 minutes, until the top is deeply golden and the edges are crisp and sizzling. If you lift the edge with a spatula, the bottom should be golden brown. If the top browns too quickly, tent loosely with foil.
Step 9: Cool Slightly
Let the focaccia rest in the skillet for 3 to 5 minutes before carefully removing it. The skillet will be extremely hot, so use oven mitts and take care when handling it. Slide a spatula around the edges and gently lift the bread onto a wire rack.
Step 10: Serve Warm
Tear or slice into pieces and enjoy with olive oil, balsamic vinegar, cheese, or your favorite dip. It’s at its best warm, when the crust is crisp and the interior is soft and fragrant.
The Science Behind Great Focaccia 🔬
A wetter dough means a lighter crumb. Focaccia dough is typically higher in moisture than standard bread dough. That extra water turns to steam in the oven, helping create the open, airy holes that characterize the bread.
Olive oil creates the crust. The oil in the pan essentially fries the bottom of the dough as it bakes, producing a crisp, golden, flavorful crust. The oil on top keeps the surface moist and rich, while also promoting browning.
Dimpling protects the shape. Pressing dimples into the dough deflates the largest bubbles, which prevents a puffy dome from forming and keeps the bread flat and even. It also creates pockets for oil and toppings.
A hot cast iron skillet adds crispness. Cast iron holds heat well and transfers it directly to the dough, delivering a deeply browned bottom that’s hard to achieve in a thin pan.
Resting relaxes the gluten. When dough springs back as you stretch it, the gluten is tight. Letting it rest lets the proteins relax so the dough stretches without tearing.
Expert Tips for Perfect Skillet Focaccia 💡
Don’t add too much flour. Slightly sticky dough creates a soft, airy crumb. If you add too much flour while kneading, the focaccia turns dense and bready.
Use enough olive oil. Generously oil the skillet. It might look like a lot, but that’s what gives the bottom its signature crisp, golden texture.
Customize the flavor. Add cherry tomatoes, olives, Parmesan, caramelized onions, or fresh herbs to make the focaccia your own.
Check your skillet. Use an oven-safe skillet, such as cast iron, and handle the hot pan carefully. Always use oven mitts, and remember the handle stays hot long after you remove it from the oven.
Dimple deeply. Press all the way to the bottom of the skillet so the dimples hold their shape during baking.
Wet or oil your fingertips. This prevents the dough from sticking while you dimple and stretch it.
Preheat the skillet for extra crunch. For an even crispier bottom, warm the oiled skillet in the oven while it preheats, then carefully add the dough. Use extreme caution when handling the hot pan.
Keep an eye on the oven. Ovens vary, so check for doneness at the early end of the baking window.
Add delicate toppings late. Fresh herbs and soft cheeses can burn or dry out. Add fresh basil or arugula after baking instead.
What If I Don’t Have a 6-Inch Cast Iron Skillet?
You can still enjoy this focaccia without a perfectly sized skillet. Here are some alternatives:
- Small oven-safe skillet or sauté pan: Any heavy, oven-safe pan around 6 to 7 inches wide works. Make sure the handle is oven-safe.
- Small cake pan or pie plate: A 6-inch round cake pan or a small metal pie dish works nicely. Grease it generously with olive oil.
- Ramekin or small baking dish: For a thicker, smaller focaccia, use an oven-safe dish and adjust baking time.
- Loaf-style mini pan: A small loaf pan creates a taller, more sandwich-friendly focaccia.
- Baking sheet: Shape the dough into a small oval or round on a parchment-lined, olive-oil-brushed sheet pan. The result will be a bit flatter with a slightly less crisp bottom.
Avoid skillets with plastic or rubber handles, which are not oven-safe, and nonstick pans that aren’t rated for 400°F.
Troubleshooting Common Problems
My dough didn’t rise. The yeast may be old, the water may have been too hot or cold, or the room may be too cool. Use fresh yeast, check the water temperature, and move the dough to a warmer spot.
The focaccia is dense. Too much flour, too little rise, or insufficient dimpling can cause density. Weigh your flour, and make sure the dough looks puffy before baking.
The dough keeps springing back. The gluten is tight. Cover the dough and let it rest for 5 to 10 minutes, then try stretching it again.
The bottom is pale and soft. Not enough olive oil was used, or the skillet wasn’t hot enough. Use more oil and consider preheating the skillet.
The bottom burned. Cast iron heats intensely. Lower the rack position slightly, reduce the oven temperature by 25°F, or cut the bake time a few minutes.
The top is too dark. Tent the focaccia loosely with foil for the last few minutes of baking.
The focaccia sticks to the skillet. Use more olive oil, and loosen the edges with a thin spatula while it’s still warm.
The dough is too sticky to handle. Lightly oil your hands rather than adding flour. Slightly sticky dough is normal and desirable for focaccia.
The center is gummy. The focaccia may need a few more minutes in the oven. The edges should be crisp and the top deeply golden.
Delicious Topping Ideas 🍅🧀
Garlic and Parmesan. Sprinkle grated Parmesan and garlic powder over the dough before baking.
Cherry tomato and basil. Press halved cherry tomatoes into the dimples and finish with fresh basil after baking.
Olive and rosemary. Add sliced Kalamata or green olives with fresh rosemary for a Mediterranean flavor.
Caramelized onion. Top with sweet, jammy caramelized onions and a little thyme.
Cheesy pizza focaccia. Add a spoonful of marinara and shredded mozzarella during the last 5 minutes of baking.
Lemon and herb. Add lemon zest, thyme, and a drizzle of honey for a bright, fragrant version.
Roasted garlic. Press cloves of roasted garlic into the dimples for a mellow, sweet flavor.
Everything seasoning. Finish with everything bagel seasoning for a savory crunch.
Hot honey and ricotta. Serve warm and finish with a dollop of ricotta and a drizzle of hot honey.
Pesto swirl. Brush the baked focaccia with pesto and top with sun-dried tomatoes.
What to Serve with Skillet Focaccia
- Soup: Dip it in tomato soup, minestrone, or creamy vegetable soup.
- Olive oil and balsamic: Pour a little olive oil and balsamic vinegar into a small dish for dipping.
- Cheese and charcuterie: Serve with cheese, olives, and cured meats for a solo snack board.
- Salad: Pair a warm slice with a big green salad for a light lunch.
- Mini sandwich: Slice it horizontally and fill with mozzarella, tomato, basil, and a drizzle of balsamic.
- Pasta night: Serve alongside your favorite pasta to soak up the sauce.
- Dips: Try hummus, whipped feta, or marinara.
- Breakfast: Top with a fried egg and avocado for a hearty morning meal.
Storage and Reheating Instructions
Room temperature: Focaccia is best eaten the day it’s made. Once cooled, store leftovers in an airtight container or bag at room temperature for up to 1 to 2 days.
Refrigerator: Refrigeration tends to dry out bread, so it’s generally best to avoid it unless you’ve used perishable toppings such as cheese or fresh vegetables. If you do refrigerate, use within 3 days.
Freezer: Wrap cooled focaccia tightly and freeze for up to 2 months. Thaw at room temperature before reheating.
Reheating: Warm in a 350°F (175°C) oven for 5 to 8 minutes, or crisp in a dry skillet over medium heat for a couple of minutes per side. This restores the crisp crust and soft interior. A quick drizzle of olive oil before reheating helps too.
Make-ahead option: You can mix the dough, let it rise slowly in the refrigerator overnight, and bake it the next day. Allow the dough to come to room temperature and rest in the skillet before baking.
Frequently Asked Questions
Can I make this focaccia without kneading? You can mix the dough and let it rise for a longer period, around 1.5 to 2 hours, folding it gently once or twice to build structure. The kneading step in this recipe is brief, but a slightly longer rise can substitute for it.
Can I use active dry yeast instead of instant yeast? Yes. Use the same amount, dissolve it in the warm water with the sugar for 5 to 10 minutes until foamy, then continue with the recipe. The rise may take a little longer.
Do I need a cast iron skillet? No. Any small oven-safe pan will work, though cast iron gives the best crisp, golden bottom.
Can I double the recipe? Yes. Doubling the ingredients fits an 8-inch skillet or small cake pan, or you can make two small focaccias. Baking time may increase by a few minutes.
Can I use bread flour? Absolutely. Bread flour gives a slightly chewier, taller focaccia.
Why is my dough so sticky? Focaccia dough is meant to be soft and a little tacky. This moisture creates the airy interior. Use oiled hands for handling.
Can I let the dough rise overnight? Yes. Place the covered dough in the refrigerator for 8 to 12 hours, then let it sit at room temperature for about 30 minutes, shape it in the skillet, let it rise briefly, and bake.
Can I use fresh rosemary instead of dried? Yes. Use about 1 teaspoon of finely chopped fresh rosemary. Press it into the dough so it doesn’t burn.
Can I make it vegan? Yes, as written the recipe is vegan, provided your sugar is vegan-friendly. Just skip any cheese toppings or use plant-based alternatives.
How do I know when it’s done? The top should be deeply golden brown, the edges crisp, and the bottom golden and crunchy when lifted with a spatula.
Can I bake it in a toaster oven? Yes, if your skillet fits. Check for doneness a few minutes early since toaster ovens often run hotter.
What if I want to make it for two? The recipe already serves one hungry person or two lighter eaters. For two hearty appetites, double the recipe and bake in an 8-inch skillet.
Final Thoughts ✨🌿
This Easy Skillet Focaccia for One proves that fresh, bakery-style bread doesn’t need a big batch or a big commitment. With simple pantry staples, a small skillet, and a little rising time, you can enjoy a soft, airy, golden focaccia with a crisp olive-oil bottom and fragrant herbs, made just for you. Enjoy it warm with soup, dipped in olive oil, or turned into a mini sandwich.
Mix up a small batch today, give the dough time to puff, press in those signature dimples, and enjoy the aroma of fresh focaccia filling your kitchen. Here’s to a little homemade bread, just for you!
Print
Easy Skillet Focaccia for One
Ingredients
Ingredients You’ll Need 🛒
For the Dough
- ¾ cup (95 g) all-purpose or bread flour
- ¼ cup (60 ml) warm water
- ½ tsp instant yeast
- ½ tsp sugar
- ¼ tsp salt
- 1 tsp olive oil
For the Topping
- 1 tbsp olive oil, plus extra for the skillet
- ½ tsp dried rosemary or Italian seasoning
- Pinch of flaky sea salt
- ½ tsp garlic powder (optional)
A Closer Look at the Ingredients
Flour. All-purpose flour produces a soft, tender focaccia, while bread flour gives a chewier, slightly taller result thanks to its higher protein content. Either works well. Because this recipe is so small, accuracy matters. Weighing the flour at 95 grams is far more reliable than using a measuring cup.
Warm water. The water should feel comfortably warm, roughly 105°F to 115°F (40°C to 46°C). Too hot and it can damage the yeast, while too cold slows down the rise. Because the dough is made with a small amount of water, the dough will be slightly sticky, which is exactly what makes focaccia airy.
Instant yeast. Instant yeast can be mixed directly into the dough. If you only have active dry yeast, use the same amount but dissolve it in the warm water with the sugar for 5 to 10 minutes, until foamy, before adding the flour.
Sugar. A small amount of sugar feeds the yeast and encourages a golden crust. It won’t make the bread sweet.
Salt. Salt flavors the dough and strengthens the gluten. Don’t skip it. Focaccia relies on salt both inside the dough and on top.
Olive oil. Olive oil is the soul of focaccia. A teaspoon in the dough makes it tender, while the generous amount in the skillet and on top gives the crust its rich flavor and crisp texture. Use a good-quality extra virgin olive oil if you can.
Dried rosemary or Italian seasoning. Rosemary is the classic choice, giving a piney, aromatic flavor. Italian seasoning is a milder, more versatile alternative. Fresh rosemary works too, so use a small sprig, chopped.
Flaky sea salt. The crunchy flakes add bursts of salty flavor and a satisfying crackle on top. Kosher salt can work in a pinch.
Garlic powder (optional). This adds savory warmth without the risk of burning that fresh garlic can have on a hot surface.
Instructions
In a small bowl, combine the warm water, yeast, and sugar. Stir briefly. Add the flour, salt, and olive oil. Mix with a spoon or your hands until a soft, slightly sticky dough forms and no dry flour remains.
Knead the dough by hand for 4 to 5 minutes on a lightly floured surface, until it feels smooth and elastic. The dough will start sticky and gradually become softer and more cohesive. Resist adding too much extra flour, since a slightly tacky dough produces a lighter, airier crumb. If the dough is truly unmanageable, dust your hands rather than the dough.
Place the dough in a lightly oiled bowl, turn it once to coat, and cover with plastic wrap, a plate, or a damp towel. Set it in a warm place for 45 to 60 minutes, or until the dough looks noticeably puffy and has grown significantly in size. A turned-off oven with the light on works well as a draft-free warm spot.
Generously coat the bottom and sides of a small, oven-safe 6-inch cast iron skillet with olive oil. Don’t be shy. The oil is what fries the bottom of the focaccia into a golden, crisp crust.
Transfer the dough into the oiled skillet and gently stretch it toward the edges with your fingertips. If the dough springs back and resists, cover it and let it rest for 5 to 10 minutes. The gluten will relax, making it much easier to stretch. Avoid forcing it, which can tear the dough and compress the air bubbles.
Cover the skillet loosely and let the dough rise for another 15 minutes. It should look puffy and fill the skillet nicely. Use this time to preheat your oven.
Preheat the oven to 400°F (200°C). Drizzle the olive oil over the dough, then press your fingertips straight down into the dough to create the classic focaccia dimples, all the way to the bottom of the skillet. The dimples catch pools of olive oil and give the bread its unmistakable look. Sprinkle with rosemary or Italian seasoning, flaky sea salt, and garlic powder if you like.
Bake for 15 to 20 minutes, until the top is deeply golden and the edges are crisp and sizzling. If you lift the edge with a spatula, the bottom should be golden brown. If the top browns too quickly, tent loosely with foil.
Let the focaccia rest in the skillet for 3 to 5 minutes before carefully removing it. The skillet will be extremely hot, so use oven mitts and take care when handling it. Slide a spatula around the edges and gently lift the bread onto a wire rack.
Tear or slice into pieces and enjoy with olive oil, balsamic vinegar, cheese, or your favorite dip. It’s at its best warm, when the crust is crisp and the interior is soft and fragrant.