
Southern 3-Ingredient Pecan Pralines
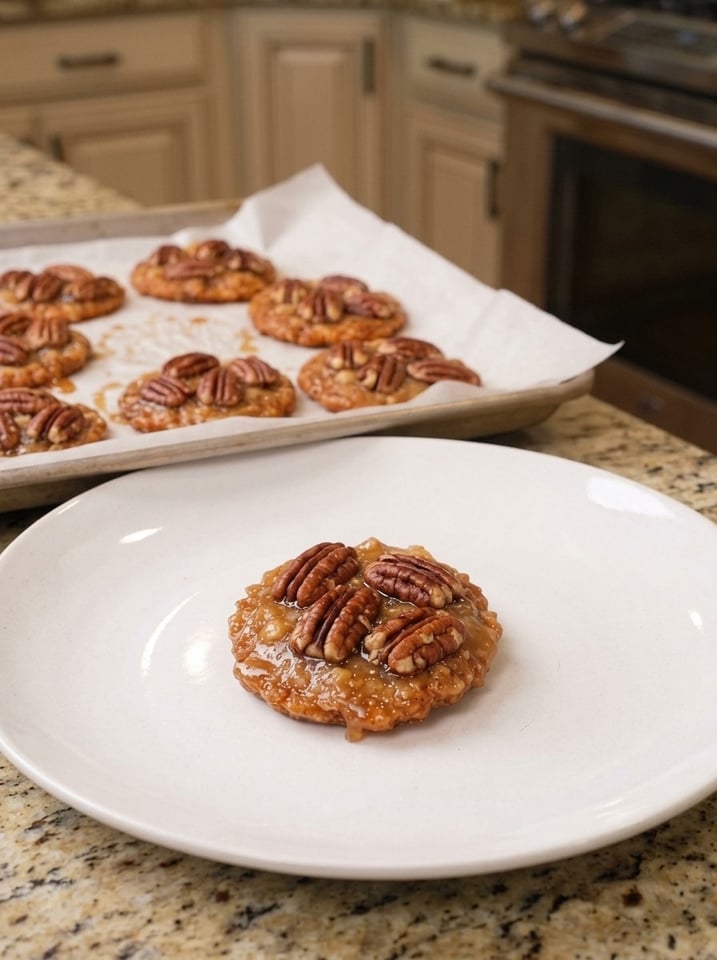
Southern 3-Ingredient Pecan Pralines ✨
These classic Southern 3-ingredient pecan pralines are rich, sweet and irresistibly nutty. Made with only sugar, evaporated milk and pecans, they deliver toasted pecans wrapped in a creamy, caramel-colored candy that melts in your mouth. They have a delicate, sugary texture and a satisfying crunch from the nuts, and they look just as impressive on a dessert platter as they do tucked into a holiday gift box.
Best of all, you do not need an oven, a long ingredient list or any advanced candy-making experience. You need a heavy saucepan, a candy thermometer, a little attention and about half an hour. In this guide you will find the full recipe, an explanation of how pralines work, the most important temperature and texture tips, troubleshooting for common problems, variations, storage advice and answers to frequently asked questions.
Why You Will Love These Pecan Pralines
- Only three ingredients. Sugar, evaporated milk and pecans are all you need.
- No oven required. Everything happens on the stovetop.
- Classic Southern flavor. Buttery-tasting, caramelly and nutty, just like the pralines from candy shops.
- Perfect for gifting. They look beautiful in small boxes and tins, especially around the holidays.
- Quick to make. From stovetop to set pralines in roughly an hour, most of it hands-off cooling time.
- Great for sharing. One batch makes a generous plate for a party, potluck or cookie swap.
- Naturally gluten-free. With no flour in the ingredient list, they suit many gluten-free eaters.
What Are Pecan Pralines?
A praline, in the Southern American tradition, is a sweet, creamy candy made from sugar, a dairy ingredient and pecans, cooked to the soft-ball stage and then stirred until it starts to crystallize. That controlled crystallization is what gives pralines their signature texture: a smooth, sugary, slightly crumbly, melt-in-your-mouth candy that is quite different from a hard, brittle candy or a chewy caramel.
Pralines are strongly associated with Louisiana, Texas and the wider American South, where pecan trees are abundant and the candy has been enjoyed for generations. Many classic recipes include butter and vanilla, and some use cream or buttermilk. This streamlined version keeps the focus on just three ingredients, letting the caramelized sugar and toasted pecans shine.
The Three Ingredients
1. Granulated sugar
White granulated sugar is the foundation of the candy. As it cooks with the milk, it caramelizes slightly and takes on a warm, golden-tan color and a toffee-like flavor.
2. Evaporated milk
Evaporated milk is concentrated, shelf-stable milk with some of the water removed. It adds creaminess, richness and subtle caramel notes, and it behaves well in candy making because it is more stable and less likely to curdle than fresh milk. Make sure you buy evaporated milk, not sweetened condensed milk, which would completely change the recipe.
3. Pecans
Pecans bring buttery flavor, crunch and a lovely contrast to the sweet candy. Use pecan halves for an elegant look or roughly chopped pecans for easier eating and more even distribution.
Ingredients
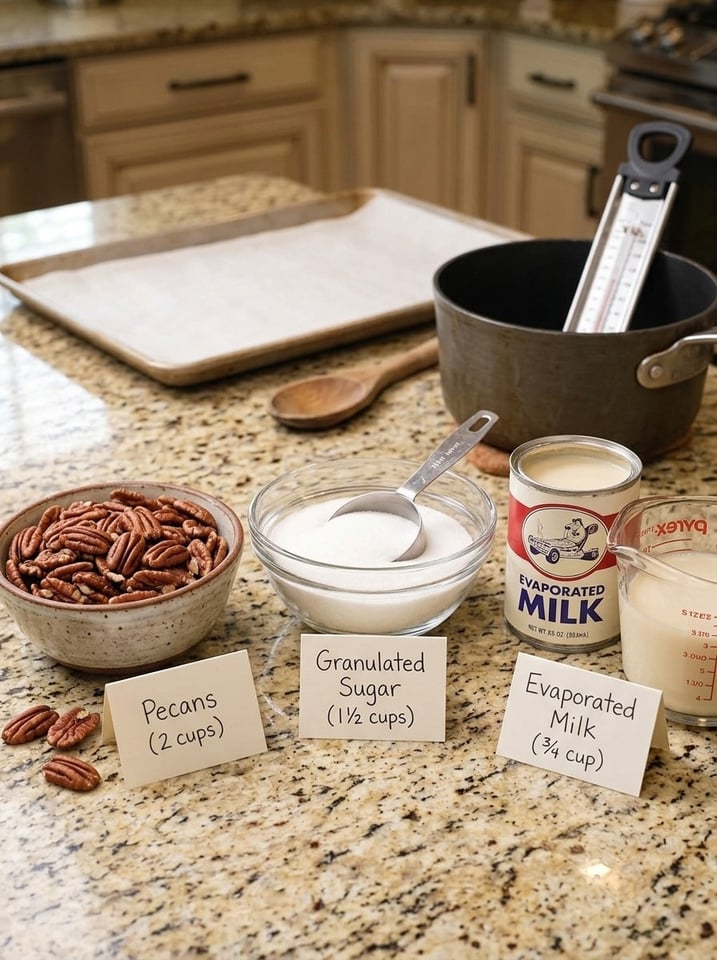
- 1½ cups (300 g) granulated sugar
- ¾ cup (180 ml) evaporated milk
- 2 cups (220 g) pecan halves or roughly chopped pecans
Equipment You Will Need
- A medium, heavy-bottomed saucepan
- A candy thermometer
- A wooden spoon or heatproof spatula
- A baking sheet lined with parchment paper or a silicone baking mat
- A tablespoon for portioning
- Measuring cups and spoons
Step-by-Step Instructions
Step 1: Prepare the ingredients
Measure all three ingredients before you begin, because the candy mixture needs your attention once it starts boiling. Line a baking sheet with parchment paper or a silicone baking mat and set it aside.
Step 2: Combine the sugar and milk
In a medium, heavy-bottomed saucepan, combine the granulated sugar and evaporated milk. Stir over medium heat until the sugar dissolves and the mixture becomes smooth.
Step 3: Bring the mixture to a boil
Increase the heat slightly and bring the mixture to a steady boil, stirring gently to prevent scorching. Once it begins boiling, keep cooking while watching the temperature carefully.
Step 4: Cook to the soft-ball stage
Cook until the candy reaches 235 to 240°F (113 to 116°C) on a candy thermometer. This is the soft-ball stage, which helps the pralines develop their signature creamy, slightly crumbly texture. Avoid scraping any crystallized sugar from the sides of the pan into the mixture.
Step 5: Add the pecans
Remove the saucepan from the heat and immediately stir in the pecans. Mix thoroughly until every pecan is coated in the thick, glossy sugar mixture.
Step 6: Beat until creamy
Let the mixture cool for a short moment, then stir vigorously for about 1 to 3 minutes as it thickens and loses some of its shine. It should become creamy and begin to hold its shape when spooned. Work quickly before it sets.
Step 7: Spoon the pralines
Using a tablespoon, drop small mounds of the mixture onto the prepared baking sheet. Leave space between each praline, as they may spread slightly before setting.
Step 8: Let them cool
Allow the pralines to cool completely at room temperature for roughly 30 to 60 minutes, or until firm enough to lift easily from the parchment.
Step 9: Check the texture
Once cooled, the pralines should have a delicate, sugary exterior and a rich, nutty center. If they are still too soft, the mixture may not have reached the correct temperature, or they may simply need more time to set.
Step 10: Serve and enjoy
Arrange your pecan pralines on a serving platter or package them in small candy boxes as a homemade gift. Enjoy them with coffee, tea or a glass of cold milk. ☕🥜
Recipe Card at a Glance
- Prep time: 10 minutes
- Cook time: 10 to 15 minutes
- Cooling time: 30 to 60 minutes
- Yield: A batch of small pralines (the exact number depends on how large you make each one)
- Course: Dessert, candy, gift
- Cuisine: Southern American
- Method: Stovetop
Tips for Perfect Southern Pecan Pralines
1. Use a candy thermometer
Temperature is the single most important factor in getting the texture right. Aim for 235 to 240°F (113 to 116°C) and avoid guessing when possible. If the mixture is undercooked, the pralines stay soft and sticky. If overcooked, they turn hard and grainy. Before you start, check that your thermometer is accurate by testing it in boiling water, which should read about 212°F (100°C) at sea level.
2. Choose fresh pecans
Fresh pecans have a sweet, buttery aroma and crisp texture. Old pecans can taste bitter or stale and will affect the flavor of the whole batch. Taste a pecan before you start.
3. Toast the pecans first
Lightly toasting the pecans before adding them deepens their flavor and improves their crunch. Spread them on a baking sheet and toast in a 350°F (175°C) oven for about 5 to 8 minutes, or in a dry skillet over medium heat, until fragrant. Let them cool slightly before using, and watch carefully, because pecans burn quickly.
4. Use a heavy-bottomed saucepan
A heavy pan distributes heat evenly and reduces the chance of scorching. Choose a pan with room for the mixture to bubble up, because it expands when boiling.
5. Do not rush the cooling
Let the pralines set naturally at room temperature. Putting them in the refrigerator too early can cause condensation on the surface and affect their texture.
6. Work quickly when shaping
Praline mixture thickens rapidly once you start beating it. Have your parchment-lined tray and spoon ready before you begin cooking, so you can portion the pralines before the candy sets in the pan.
7. Watch the texture while you stir
If you spoon the mixture while it is still too hot and fluid, the pralines will spread flat. If you wait too long, it becomes thick and hard to shape. Look for the moment when the mixture loses its glossy shine and begins to hold its shape on the spoon.
8. Stir gently while boiling
Gentle, controlled stirring before the mixture reaches the target temperature helps limit unwanted sugar crystallization. Avoid scraping the sides of the pan into the candy, since sugar crystals stuck there can cause the whole batch to turn grainy too early.
9. Do not make pralines on a very humid day
Sugar candy absorbs moisture from the air. On very humid or rainy days, pralines may stay soft or sticky. If you can, make them on a dry day, or cook the candy a degree or two higher to compensate.
10. Customize with care
For a variation, replace a small portion of the pecans with toasted walnuts, or add a tiny pinch of salt to balance the sweetness. Note that these additions mean the recipe is no longer strictly three ingredients.
Understanding the Science: Why Pralines Turn Creamy
Praline-making is a small lesson in sugar chemistry. When sugar and milk are boiled together, water evaporates and the sugar concentration increases. The temperature of the syrup tells you how much water remains: at 235 to 240°F (113 to 116°C), the soft-ball stage, the candy contains just enough moisture to form a soft, creamy texture when it sets.
After cooking, stirring the cooling mixture encourages many tiny sugar crystals to form. Small crystals feel smooth and creamy on the tongue. Large crystals feel gritty. This is why pralines are beaten while they cool: the stirring starts crystallization in a controlled way and produces that classic fine, sugary, melt-in-your-mouth texture. If crystals form too early, or if stray crystals fall into the hot syrup, the candy can become coarse and grainy.
Troubleshooting Common Praline Problems
My pralines are too soft or sticky
The most common reason is that the candy did not reach 235 to 240°F (113 to 116°C), or the day was humid. Let them sit longer at room temperature in a dry place. If they never set, you can scrape them back into the pan with a splash of milk or water, re-cook to the correct temperature and try again.
My pralines are hard or dry
The mixture was probably cooked too high or beaten too long. Stay within the target temperature range and spoon the candy while it is still creamy.
My pralines are grainy
Grittiness usually means crystals formed too early. Avoid scraping the sides of the pan, stir gently while boiling, and make sure the sugar dissolves completely before the mixture boils. Some cooks brush down the sides of the pan with a wet pastry brush to dissolve stray crystals.
The mixture seized in the pan before I could spoon it
You waited a little too long after beating. If it hardens, you can sometimes stir in a teaspoon or two of hot water or evaporated milk over low heat to loosen it, then spoon quickly.
The pralines spread too flat
The mixture was too hot and thin when spooned. Beat a bit longer until it thickens and loses some of its shine.
The pralines taste burnt
The heat was too high or the pan was too thin. Use medium heat, a heavy-bottomed pan and keep stirring gently.
Delicious Variations
- Classic butter praline. Stir in 2 tablespoons of butter after removing the pan from the heat for extra richness (a traditional addition, though it moves beyond three ingredients).
- Vanilla praline. Add ½ to 1 teaspoon of vanilla extract after cooking for a warm, bakery-style flavor.
- Sea salt praline. Sprinkle flaky sea salt on top of each praline as it sets for a salty-sweet contrast.
- Brown sugar version. Replace part or all of the granulated sugar with brown sugar for a deeper, molasses-like flavor.
- Bourbon pralines. Add a teaspoon of bourbon at the end for a grown-up twist.
- Cinnamon spice. Add a pinch of cinnamon or pumpkin pie spice for an autumn flavor.
- Chocolate drizzle. Drizzle cooled pralines with melted dark or milk chocolate.
- Mixed nuts. Replace a portion of the pecans with walnuts or almonds.
- Chopped versus halves. Use halves for a classic look, or chopped pecans for easier eating and a more uniform texture.
- Coffee pralines. Dissolve a little instant espresso powder into the milk before cooking for a mocha-caramel taste.
Serving and Gifting Ideas
Pecan pralines are as useful as they are delicious:
- Holiday gift boxes and tins, layered with parchment or wax paper
- Cookie swaps and candy platters
- Dessert tables and wedding favors
- Thank-you gifts for neighbors, teachers and coworkers
- Crumbled over ice cream, pudding or yogurt
- Chopped and sprinkled on cakes, cheesecakes or cupcakes
- Alongside coffee or tea as an afternoon treat
- With a cheese board, where the sweet-and-nutty flavor pairs well with aged cheeses
- Served with vanilla ice cream for an easy Southern dessert
Packaging Tips for Gifts
- Let the pralines cool completely before packing.
- Separate layers with parchment paper or wax paper to prevent sticking.
- Use airtight tins, boxes or cellophane bags tied with ribbon.
- Add a handwritten label with the date and storage advice.
- Keep gifts in a cool, dry place until you hand them over.
Storage, Make-Ahead and Freezing
Storing pralines
Once completely cooled, store the pralines in an airtight container at room temperature for about 5 to 7 days in a cool, dry place. Separate layers with parchment paper to prevent sticking. In humid weather, store them in a cool, dry spot and check the texture regularly.
Make ahead
Pralines are an excellent make-ahead candy. Prepare them a few days before a party or holiday, and keep them airtight until needed.
Freezing
You can freeze pralines in an airtight container or freezer bag, separated with parchment, for a month or two. Let them thaw in the sealed container at room temperature so that moisture does not condense on the surface.
Refrigeration
Refrigeration is generally not recommended, as it can cause moisture to form on the surface and change the texture.
Nutrition and Allergy Notes
Pralines are a sweet treat meant to be enjoyed in small portions. They contain sugar, milk and tree nuts, so they are not suitable for anyone with a tree nut allergy or milk allergy. Pecans provide healthy fats, while the candy itself is sugar-heavy. If you are gifting these, it is considerate to label them as containing nuts and dairy.
Common Mistakes to Avoid
- Using sweetened condensed milk instead of evaporated milk. They are not interchangeable.
- Skipping the thermometer. Guessing the temperature often leads to soft or hard pralines.
- Using a thin pan. It can scorch the sugar.
- Stirring too hard while boiling. This can encourage early crystallization.
- Scraping the sides of the pan. Stray crystals can make the candy grainy.
- Shaping too slowly. The candy sets quickly once beaten.
- Making them in high humidity. The pralines may remain sticky.
- Refrigerating too soon. Moisture can ruin the surface.
- Not measuring ingredients ahead. There is no time to measure once the candy is cooking.
Frequently Asked Questions
Can I make pralines without a candy thermometer?
You can use the cold-water test. Drop a small amount of the hot syrup into a glass of cold water. At the soft-ball stage, it should form a soft ball that flattens between your fingers. A thermometer is more reliable, especially for beginners.
Can I use fresh milk or cream instead of evaporated milk?
Evaporated milk is recommended because it is stable, rich and concentrated. Cream or whole milk can work in some recipes but may change the texture and cooking time, so for this three-ingredient version it is best to follow the recipe.
Why do I need to beat the mixture?
Beating the cooled syrup encourages the formation of small sugar crystals, which creates the signature creamy, slightly crumbly praline texture.
What is the difference between pralines and caramel?
Caramel is typically chewy and smooth and contains butter and cream, while pralines are sugary, creamy and slightly crumbly with a fine crystal structure and nuts throughout.
How are Southern pralines different from European pralines?
European pralines usually refer to nut-and-chocolate confections or caramelized nuts, while Southern pralines are creamy, sugary candies with pecans.
Do I have to toast the pecans?
No, but toasting adds depth and crunch. It is a quick step that noticeably improves the flavor.
Can I double the recipe?
Yes, but use a larger, deep saucepan to prevent boiling over, and be ready to work quickly when portioning, since larger batches can set faster in the pan. It may be easier to make two separate batches.
How long do homemade pralines last?
Stored airtight in a cool, dry place, they keep for about 5 to 7 days. They can be frozen for longer storage.
Can I add butter or vanilla?
Absolutely. Many traditional recipes include butter and vanilla. They make the pralines richer and more fragrant, though they take the recipe beyond three ingredients.
Why are my pralines white and crumbly instead of caramel-colored?
Pralines can look paler if the sugar did not caramelize much, and crumbly texture can mean the candy was slightly overcooked or beaten too long. Keep to the recommended temperature and stop stirring as soon as it thickens.
Are pralines gluten-free?
The recipe contains no gluten-containing ingredients. Always check labels, though, if you are serving someone with a medical need to avoid gluten.
Final Thoughts
Southern 3-ingredient pecan pralines prove that you do not need a long list of ingredients or fancy equipment to make a candy that tastes like a Southern tradition. With sugar, evaporated milk and pecans, a candy thermometer and a bit of attention, you can create buttery-tasting, creamy, crunchy treats that are perfect for gifting, sharing or simply enjoying with a hot cup of coffee. Once you get the feel for the timing and texture, you will find yourself making them again and again.
If you try this recipe, leave a comment with your favorite variation, share it with someone who loves homemade candy and save it for your next holiday or gift-giving season. Enjoy! 🤎🥜✨
Print
Southern 3-Ingredient Pecan Pralines
Ingredients
- 1½ cups (300 g) granulated sugar
- ¾ cup (180 ml) evaporated milk
- 2 cups (220 g) pecan halves or roughly chopped pecans
Equipment You Will Need
- A medium, heavy-bottomed saucepan
- A candy thermometer
- A wooden spoon or heatproof spatula
- A baking sheet lined with parchment paper or a silicone baking mat
- A tablespoon for portioning
- Measuring cups and spoons
Instructions
Measure all three ingredients before you begin, because the candy mixture needs your attention once it starts boiling. Line a baking sheet with parchment paper or a silicone baking mat and set it aside.
In a medium, heavy-bottomed saucepan, combine the granulated sugar and evaporated milk. Stir over medium heat until the sugar dissolves and the mixture becomes smooth.
Increase the heat slightly and bring the mixture to a steady boil, stirring gently to prevent scorching. Once it begins boiling, keep cooking while watching the temperature carefully.
Cook until the candy reaches 235 to 240°F (113 to 116°C) on a candy thermometer. This is the soft-ball stage, which helps the pralines develop their signature creamy, slightly crumbly texture. Avoid scraping any crystallized sugar from the sides of the pan into the mixture.
Remove the saucepan from the heat and immediately stir in the pecans. Mix thoroughly until every pecan is coated in the thick, glossy sugar mixture.
Let the mixture cool for a short moment, then stir vigorously for about 1 to 3 minutes as it thickens and loses some of its shine. It should become creamy and begin to hold its shape when spooned. Work quickly before it sets.
Using a tablespoon, drop small mounds of the mixture onto the prepared baking sheet. Leave space between each praline, as they may spread slightly before setting.
Allow the pralines to cool completely at room temperature for roughly 30 to 60 minutes, or until firm enough to lift easily from the parchment.
Once cooled, the pralines should have a delicate, sugary exterior and a rich, nutty center. If they are still too soft, the mixture may not have reached the correct temperature, or they may simply need more time to set.
Arrange your pecan pralines on a serving platter or package them in small candy boxes as a homemade gift. Enjoy them with coffee, tea or a glass of cold milk. ☕🥜