
4-Ingredient Chocolate Cool Whip Poke Cake
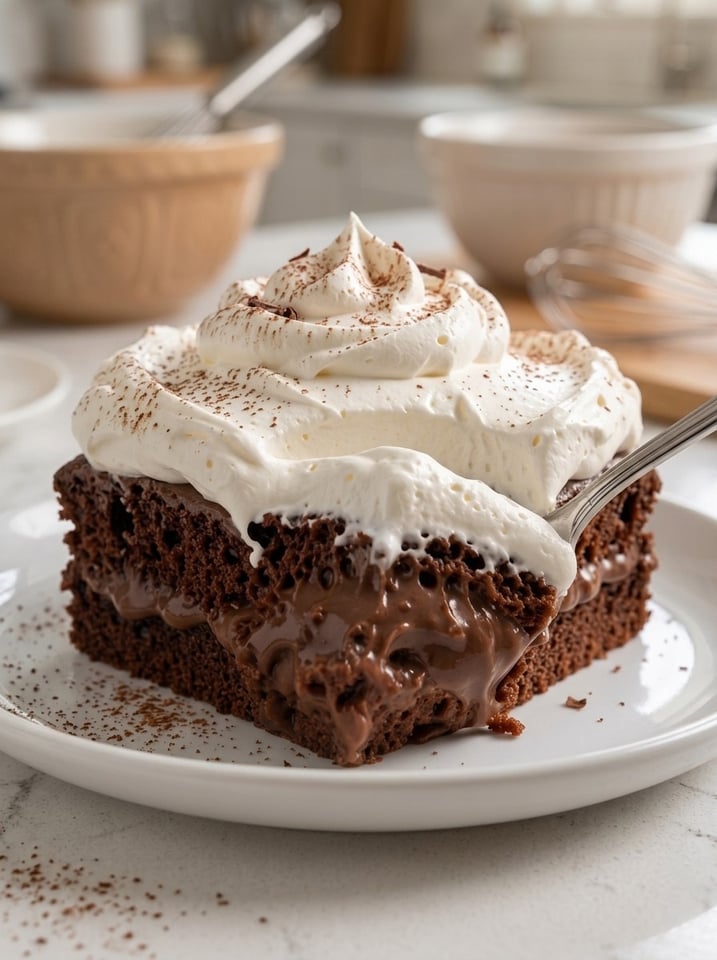
4-Ingredient Chocolate Cool Whip Poke Cake: The Ultimate Easy Chocolate Showstopper
Some desserts require hours of careful technique to achieve that rich, decadent result, but this 4-Ingredient Chocolate Cool Whip Poke Cake proves that isn’t always the case. With just four simple ingredients and minimal effort, this impossibly moist chocolate cake gets soaked through with silky chocolate pudding, filling every single poke hole with pure chocolate goodness, before being topped with a thick, billowy layer of Cool Whip. The result is a dessert so rich, creamy, and satisfying that no one will believe how little effort actually went into making it.
Whether you’re looking for the easiest possible birthday cake, a guaranteed potluck hit, a holiday dessert that comes together with minimal fuss, or simply craving something decadently chocolatey, this poke cake delivers every single time. With just 10 minutes of hands-on prep and a straightforward baking and chilling process, this recipe is the definition of an effortless showstopper.
Let’s dig into everything that makes this four-ingredient wonder such a beloved, foolproof dessert.
Why You’ll Love This 4-Ingredient Chocolate Cool Whip Poke Cake
It genuinely only requires four ingredients. In a world of increasingly elaborate dessert recipes, this cake stands out for its refreshing simplicity — a boxed cake mix, instant pudding mix, milk, and Cool Whip are truly all you need.
It’s incredibly moist. The chocolate pudding that seeps into every poke hole transforms an already good boxed cake into something extraordinarily rich and fudgy, with moisture in every single bite.
It’s virtually foolproof. With straightforward steps and no complicated techniques required, this is a dessert that even the most inexperienced bakers can make with complete confidence and success.
It’s a fantastic make-ahead dessert. Since it needs to chill for a total of 2 hours, this cake is perfect for preparing well in advance of a party or gathering, and it actually improves in flavor and texture the longer it sits.
It’s endlessly customizable. From chocolate shavings to crushed cookies to a drizzle of chocolate syrup, this simple base cake welcomes all sorts of fun, personalized toppings and mix-ins.
It’s a guaranteed crowd-pleaser. Poke cakes have been a beloved potluck and party staple for generations, and this rich, chocolatey version is no exception — it consistently disappears quickly from any dessert table.
It serves a big crowd. With 12 servings from a single 9×13-inch cake, this recipe is perfectly suited for birthdays, potlucks, and gatherings where a generous dessert is needed.
Ingredient Breakdown: What You’ll Need and Why
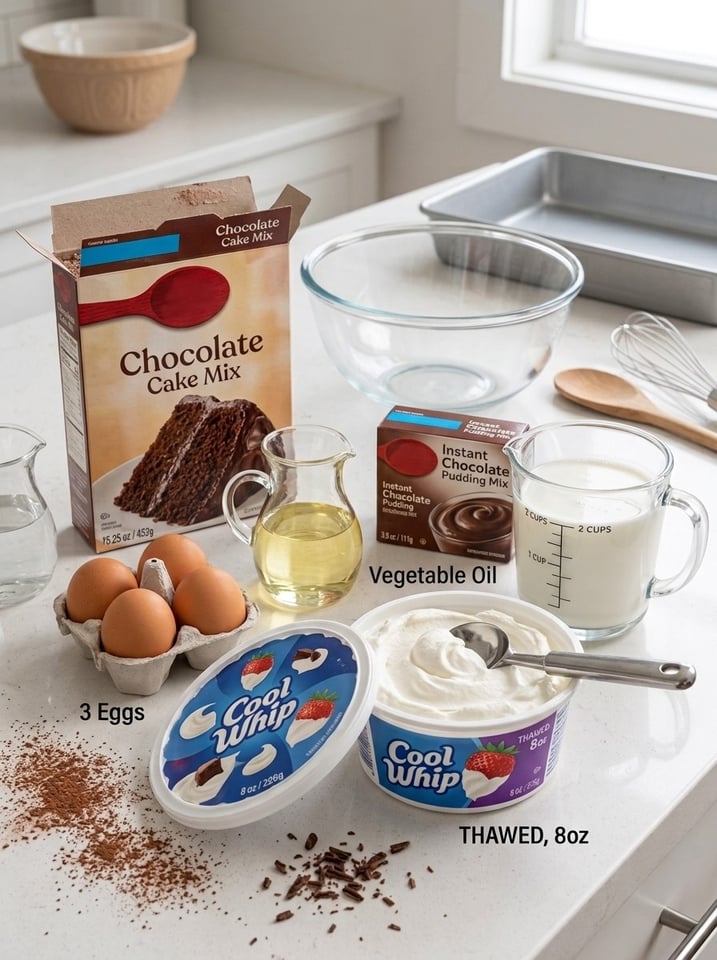
Understanding the role of each of the four ingredients helps ensure the best possible results every time you make this cake.
The Chocolate Cake Mix
A boxed chocolate cake mix, prepared and baked according to the package directions, forms the rich, chocolatey base of this dessert. Using a boxed mix is what makes this recipe so quick and approachable, delivering a reliably moist, flavorful cake without the need for measuring out individual baking ingredients from scratch.
The Instant Chocolate Pudding Mix
Instant chocolate pudding mix, whisked with cold milk, creates the luscious, silky filling that seeps into every poke hole throughout the cake. This pudding layer is truly what transforms a simple boxed cake into something extraordinarily moist and rich, infusing deep chocolate flavor throughout every single bite.
The Cold Milk
Cold milk is essential for properly preparing the instant pudding mix. Using cold milk (rather than room temperature or warm) allows the pudding to thicken properly within the short whisking time, while still remaining pourable enough to seep into the poke holes in the cake.
The Cool Whip
Cool Whip, thawed, forms the light, fluffy topping that finishes this cake beautifully. Its airy, stable texture holds up wonderfully in the refrigerator, creating that classic, billowy poke cake topping that contrasts so beautifully with the dense, fudgy cake and pudding layers below.
Step-by-Step Directions
Step 1: Bake the Cake
Prepare and bake the chocolate cake mix according to the instructions on the box, using a 9×13-inch baking dish and whatever additional ingredients (typically eggs, oil, and water) are called for on the packaging. Once baked, allow the cake to cool for about 10 minutes before moving on to the next step. This brief cooling period is important, as the cake should still be warm, but not piping hot, when you begin poking holes into it.
Step 2: Poke the Cake
Using the handle of a wooden spoon or a large straw, poke holes all over the surface of the warm cake, spacing them about 1 inch apart. Be generous with the number of holes, as more holes means more opportunities for that delicious chocolate pudding to seep down into the cake.
Step 3: Fill with Chocolate Pudding
In a mixing bowl, whisk together the instant chocolate pudding mix and cold milk for about 2 minutes, until the mixture is slightly thickened but still pourable. Work quickly once the pudding reaches the right consistency, immediately pouring it evenly over the poked cake. Use a spatula to gently spread the pudding across the surface, helping it work its way down into every hole.
Step 4: Chill
Refrigerate the cake for 1 hour, allowing the chocolate pudding to fully set inside the poke holes and firm up throughout the cake.
Step 5: Add the Topping
Once the cake has chilled and the pudding has set, spread the thawed Cool Whip evenly over the top of the cake, using a spatula to create soft, decorative swirls across the surface for an appealing, textured finish.
Step 6: Chill Again and Serve
Refrigerate the cake for an additional 1 hour before serving, allowing the entire dessert to fully chill and set. Slice and serve cold, garnishing with chocolate shavings, mini chocolate chips, cocoa powder, or chocolate curls, if desired, for an extra decadent presentation.
Expert Tips for the Best 4-Ingredient Chocolate Cool Whip Poke Cake
Pour the pudding over the cake while it’s still slightly warm. This timing is important, as a warm cake allows the pudding to seep more deeply into every poke hole, resulting in a more thoroughly moist, flavorful cake throughout.
Chill overnight for an even richer texture. While the recipe calls for a total of 2 hours of chilling, letting this cake rest in the refrigerator overnight results in an even fudgier, more developed flavor and texture.
Poke plenty of holes. Don’t be shy about the number and spacing of your poke holes — more holes mean more opportunities for the chocolate pudding to infuse the cake with moisture and flavor throughout.
Work quickly once the pudding is mixed. Instant pudding continues to thicken as it sits, so pour it over the cake soon after whisking to ensure it’s still pourable enough to seep properly into the poke holes.
Add crunchy toppings for extra texture. Crushed chocolate sandwich cookies or toffee bits sprinkled over the Cool Whip topping add a delightful crunch that contrasts beautifully with the soft, creamy layers below.
Drizzle with chocolate syrup for an extra chocolate boost. For those who truly can’t get enough chocolate, a drizzle of chocolate syrup over each slice just before serving takes this already indulgent dessert even further.
Use a sharp knife for clean slices. Wiping the knife clean between cuts helps create neat, well-defined pieces that showcase the beautiful layers of cake, pudding, and topping.
Serving Suggestions
This rich, chocolatey poke cake pairs wonderfully with a variety of accompaniments:
- Serve alongside a scoop of vanilla ice cream for an extra indulgent, à la mode presentation.
- Pair with fresh berries, such as raspberries or strawberries, for a bright, fruity contrast to the rich chocolate flavor.
- Offer with hot coffee or espresso, which pairs beautifully with the deep chocolate notes throughout the cake.
- Include as part of a birthday dessert spread, alongside other treats for a fun, celebratory table.
- Serve at potlucks and gatherings, where its crowd-pleasing flavor and easy make-ahead nature make it a reliable favorite.
Storage Instructions
Refrigerator: Store the cake covered tightly in the refrigerator for up to 4 days. In fact, many people find the flavor and texture continue to improve over the first day or two as the pudding fully melds with the cake.
Freezer: While this cake can technically be frozen, the texture of the Cool Whip topping may change slightly upon thawing. If freezing, it’s best to do so before adding the Cool Whip layer, wrapping the pudding-soaked cake tightly and freezing for up to 1 month. Thaw overnight in the refrigerator and add the Cool Whip topping just before serving.
Serving tip: For the cleanest slices, use a sharp knife and wipe it clean between cuts, as the layers are soft and creamy.
Frequently Asked Questions
Can I use a different flavor of cake mix or pudding? Absolutely. This basic formula works wonderfully with other flavor combinations, such as vanilla cake with vanilla pudding, or even chocolate cake with a different pudding flavor like caramel or peanut butter for a fun twist.
Can I make this cake ahead of time for a party? Yes, this cake is ideal for making ahead. In fact, preparing it a day in advance allows the flavors and texture to fully develop, making it one of the best make-ahead desserts for entertaining.
What can I use instead of Cool Whip? Freshly whipped heavy cream, sweetened slightly with powdered sugar, can be used as a substitute for Cool Whip if you prefer a more homemade approach, though it may be slightly less stable over time.
Can I make this recipe from scratch instead of using boxed mixes? Yes, a homemade chocolate cake and homemade chocolate pudding can both be used in place of the boxed versions, though this will require additional time and ingredients compared to the original quick, easy version.
How many poke holes should I make in the cake? There’s no exact number, but generally spacing them about 1 inch apart across the entire surface of the cake ensures the pudding is able to seep in evenly throughout.
Is there a way to make this cake less sweet? You can use a slightly reduced amount of Cool Whip on top, or opt for a sugar-free instant pudding mix if you’d like to reduce the overall sweetness of the dessert.
How long does this cake need to chill before serving? This cake requires a total of about 2 hours of chilling time — 1 hour after adding the pudding layer, and another hour after adding the Cool Whip topping — though chilling overnight yields the best texture and flavor.
Recipe Card
4-Ingredient Chocolate Cool Whip Poke Cake
Prep Time: 10 minutes Bake Time: 30 minutes Chill Time: 2 hours Total Time: 2 hours 40 minutes Servings: 12
Ingredients:
- 1 box (15.25 oz) chocolate cake mix (plus ingredients listed on the box)
- 1 package (3.9 oz) instant chocolate pudding mix
- 2 cups cold milk
- 1 container (8 oz) Cool Whip, thawed
Instructions:
- Prepare and bake the chocolate cake according to the package directions in a 9×13-inch baking dish. Allow the cake to cool for 10 minutes.
- Using the handle of a wooden spoon or a large straw, poke holes all over the warm cake about 1 inch apart.
- Whisk together the instant chocolate pudding mix and cold milk for about 2 minutes, until slightly thickened but still pourable. Immediately pour the pudding evenly over the cake, gently spreading it so it fills every hole.
- Refrigerate for 1 hour to allow the pudding to fully set inside the cake.
- Spread the thawed Cool Whip evenly over the chilled cake, creating soft, fluffy swirls with a spatula.
- Chill for another 1 hour, then slice and serve cold. Garnish with chocolate shavings, mini chocolate chips, cocoa powder, or chocolate curls if desired.
This 4-Ingredient Chocolate Cool Whip Poke Cake proves that the richest, most decadent desserts don’t need a long ingredient list or hours of effort — just a handful of pantry staples and a little patience in the fridge for a truly unforgettable chocolate treat.