
5-Ingredient No-Knead Sandwich Bread
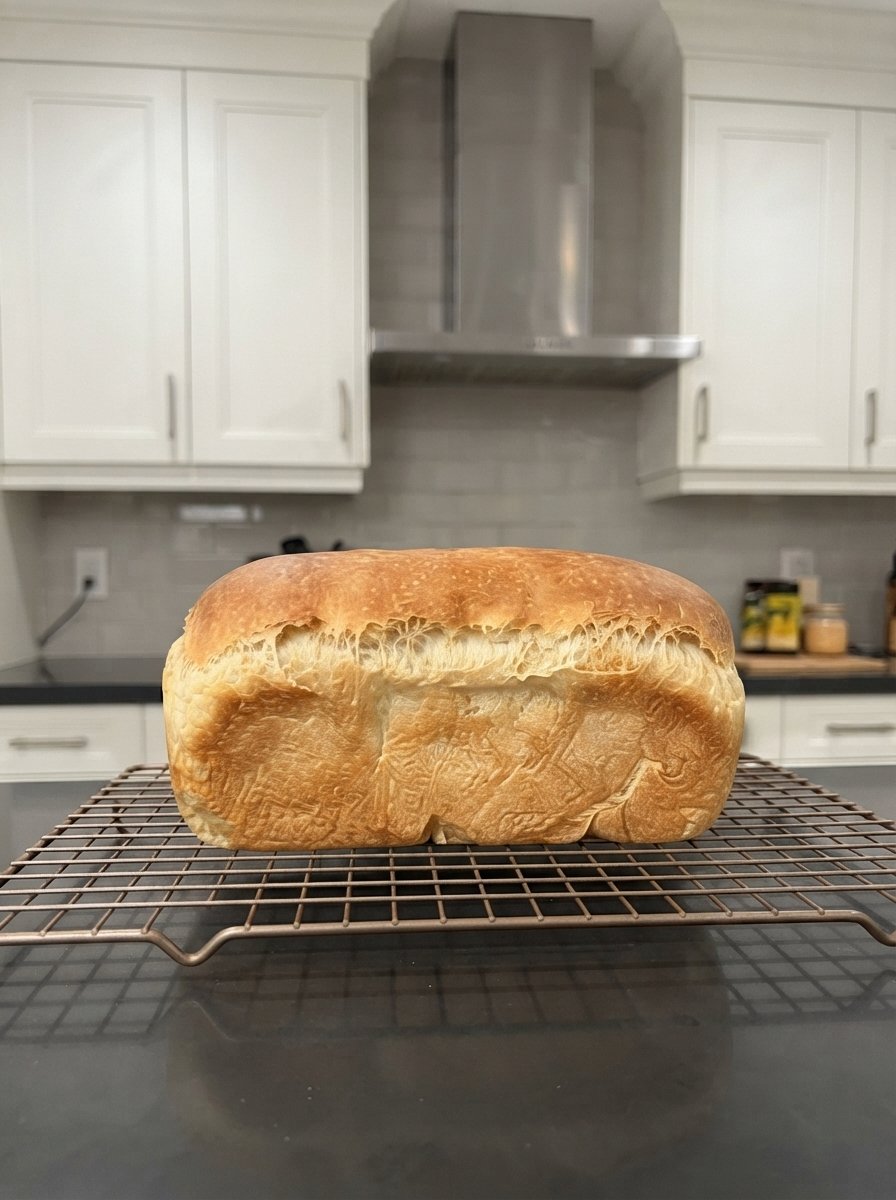
5-Ingredient No-Knead Sandwich Bread: The Easiest Homemade Loaf You’ll Ever Make 🍞✨
There’s nothing quite like the smell of fresh bread baking in the oven, and this 5-Ingredient No-Knead Sandwich Bread makes that experience accessible to absolutely anyone, regardless of baking experience. Forget everything you think you know about bread being complicated, time-consuming, or requiring special equipment — this recipe strips the process down to its simplest form, using just five pantry staples and zero kneading to produce a soft, fluffy, beautifully golden loaf that rivals anything from a bakery.
What makes this recipe so remarkable is how it defies the common assumption that good bread requires hours of hands-on labor and vigorous kneading. Thanks to a longer rise time and a higher hydration dough, the gluten in the flour develops naturally over time, without any need for the traditional kneading process. The result is a loaf with a soft, tender crumb and a beautifully golden crust — perfect for sandwiches, toast, grilled cheese, or simply slathering with butter while it’s still warm from the oven.
This recipe is a game-changer for anyone who’s been intimidated by homemade bread in the past, as well as for experienced bakers looking for a reliable, low-effort go-to recipe. With just 10 minutes of hands-on prep time and a total process of about 2 hours (most of which is hands-off rising time), this bread fits easily into a weekend baking routine or even a relaxed weekday schedule. Let’s explore exactly why this method works so well and how to make it perfectly every time.
Why This No-Knead Sandwich Bread Recipe Works So Well
Traditional bread-making often relies on kneading to develop gluten — the protein structure in flour that gives bread its characteristic chewy, elastic texture. Kneading works by physically manipulating the dough, aligning the gluten strands and creating a strong, elastic network that traps gas bubbles produced by the yeast, allowing the bread to rise properly and hold its shape.
No-knead bread recipes, including this one, take a different approach entirely. Instead of relying on physical manipulation to develop gluten, these recipes use time and hydration to do the work instead. When flour is combined with a relatively high proportion of water and left to rest for an extended period, the gluten strands develop naturally through a process of hydration and enzymatic activity, without any need for kneading. This is essentially the same scientific principle behind popular artisan no-knead bread recipes that have gained popularity over the past couple of decades, adapted here specifically for a soft, tender sandwich loaf rather than a crusty artisan boule.
The five ingredients in this recipe — flour, water, yeast, honey (or sugar), and salt — are each doing important work. The flour provides the structure and gluten-forming proteins necessary for the bread’s texture. Warm water hydrates the flour and activates the yeast, kickstarting the fermentation process. Instant yeast is responsible for the bread’s rise, producing carbon dioxide gas as it consumes sugars in the dough, which causes the dough to expand. Honey or sugar provides a touch of sweetness while also helping to feed the yeast, encouraging a more active rise. Finally, salt not only seasons the bread but also helps regulate the yeast’s activity, preventing it from rising too quickly and ensuring a more controlled, even fermentation process.
The two-stage rising process used in this recipe — a longer first rise in the bowl, followed by a shorter second rise in the loaf pan — allows the dough to develop flavor and structure during the first rise, then achieve the right shape and final volume during the second rise before baking. This method results in a loaf that’s both flavorful and perfectly shaped for slicing into sandwiches.
Ingredients You’ll Need
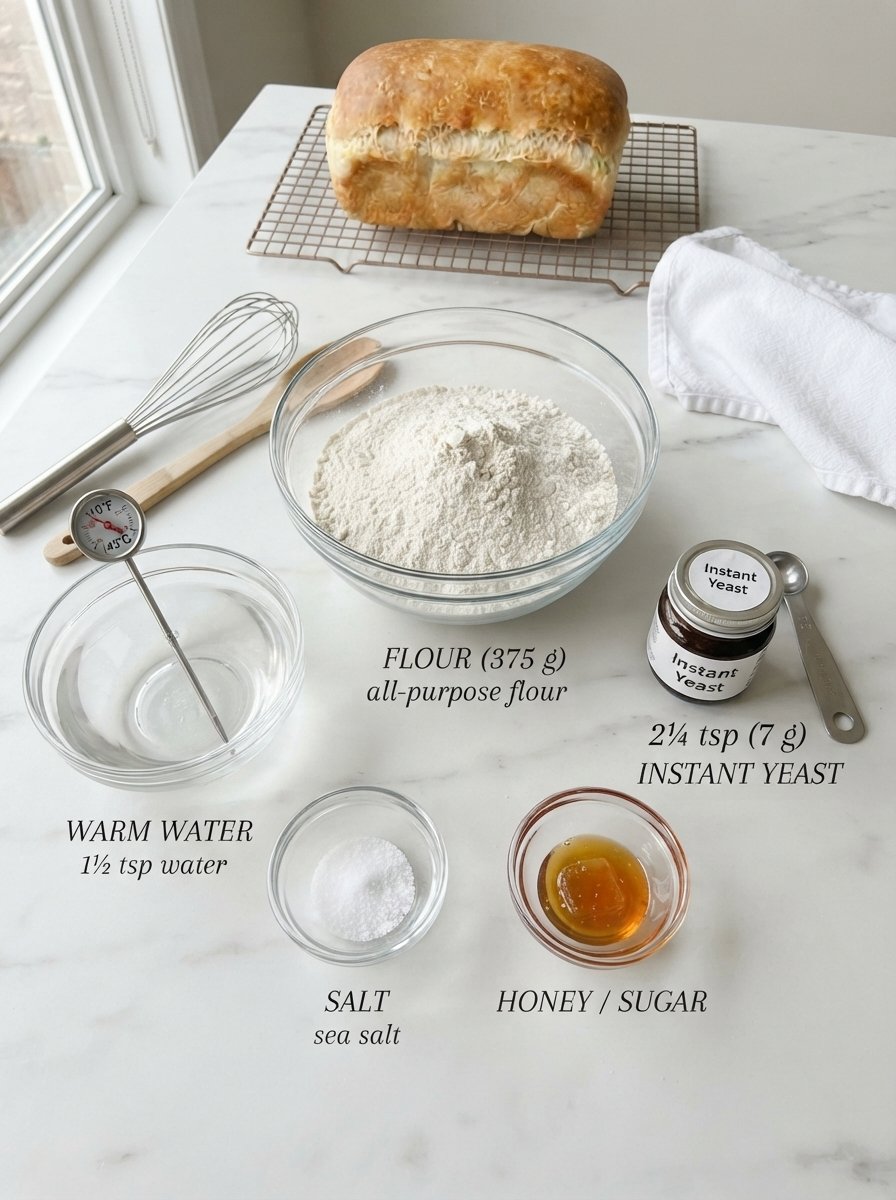
One of the most appealing aspects of this recipe is just how few ingredients are required — and how likely you are to already have all of them in your pantry.
- 3 cups (375 g) all-purpose or bread flour
- 1½ cups (360 ml) warm water
- 2¼ teaspoons (7 g) instant yeast
- 1 tablespoon honey or sugar
- 1½ teaspoons salt
Ingredient Notes and Substitutions
Flour: All-purpose flour works perfectly well in this recipe and will yield a soft, tender loaf. Bread flour, which has a slightly higher protein content, can be used as an alternative if you prefer a loaf with a bit more chew and structure, though the difference is relatively subtle in a no-knead recipe like this one, since the extended rise time does much of the gluten-developing work regardless of flour type.
Warm water: The water should be warm to the touch, similar to bathwater, generally around 100–110°F (38–43°C). Water that’s too hot can kill the yeast, preventing the bread from rising properly, while water that’s too cold will slow down the yeast’s activity significantly, resulting in a much longer rise time.
Instant yeast: Instant yeast (sometimes labeled as “rapid rise” or “quick rise” yeast) can be mixed directly into the dry ingredients without needing to be proofed in water first, which is part of what makes this recipe so quick and convenient. If you only have active dry yeast on hand, it can be substituted, though you may want to dissolve it in the warm water for about 5–10 minutes before mixing it with the other ingredients to ensure it’s properly activated.
Honey or sugar: Either option works well to provide a touch of sweetness and help feed the yeast. Honey adds a subtle depth of flavor, while granulated sugar provides a more neutral sweetness. Maple syrup can also be used as a substitute if desired.
Salt: Regular table salt or fine sea salt both work well in this recipe. Salt is an essential ingredient, not just for flavor but also for controlling the yeast’s fermentation rate, so it shouldn’t be omitted even if you’re trying to reduce sodium elsewhere in your diet.
Step-by-Step Instructions
Step 1: Mix the Dough
In a large mixing bowl, whisk together the flour, instant yeast, salt, and honey (or sugar) until evenly combined. Whisking the dry ingredients together first helps ensure the yeast and salt are evenly distributed throughout the flour, rather than ending up in concentrated pockets.
Pour in the warm water and stir everything together using a wooden spoon or sturdy spatula until a sticky, shaggy dough forms. The dough will look rough and uneven at this stage, with no smooth or uniform texture — this is completely normal and expected for a no-knead bread recipe. There’s no need to knead the dough at all; simply stir until there are no dry pockets of flour remaining.
Step 2: Let the Dough Rise
Cover the bowl with a clean kitchen towel or a piece of plastic wrap, and place it in a warm spot in your kitchen. Let the dough rise for 60 to 90 minutes, or until it has doubled in size. The exact rise time will depend on the temperature of your kitchen — a warmer environment will result in a faster rise, while a cooler kitchen may require closer to the full 90 minutes.
A good way to test if the dough has risen sufficiently is to gently press a finger into the surface; if the indentation springs back slowly and doesn’t fully disappear, the dough is ready for the next step.
Step 3: Transfer to the Pan
Grease a 9×5-inch loaf pan thoroughly with butter, oil, or nonstick cooking spray to prevent the bread from sticking once baked. Lightly oil your hands or a spatula to prevent the sticky dough from sticking to them, then transfer the risen dough into the prepared loaf pan. Gently smooth and shape the top of the dough with your oiled hands or the back of a spatula, pressing it evenly into the corners of the pan.
Step 4: Second Rise
Cover the loaf pan loosely with the kitchen towel or plastic wrap once again, and let the dough rest for another 20 to 30 minutes, until it becomes puffy and has risen slightly above the rim of the pan. This second, shorter rise allows the dough to achieve its final shape and volume before baking, resulting in a well-risen, evenly shaped loaf.
Step 5: Bake to Golden Perfection
While the dough completes its second rise, preheat your oven to 375°F (190°C). Once the dough is puffy and ready, place the loaf pan in the preheated oven and bake for 30 to 35 minutes, or until the top of the loaf is deeply golden brown and the bread sounds hollow when tapped on the bottom — this hollow sound is a reliable indicator that the bread is fully baked through.
Step 6: Cool Before Slicing
Once baked, remove the loaf from the oven and let it cool in the pan for about 10 minutes. This brief resting period allows the bread to firm up slightly, making it easier to remove from the pan without falling apart. After 10 minutes, carefully transfer the loaf to a wire cooling rack and let it cool completely before slicing.
While it may be tempting to slice into warm, fresh bread right away, allowing it to cool completely is important for achieving clean slices — cutting into bread while it’s still hot can cause it to compress and become gummy, since the internal structure hasn’t fully set yet.
Tips for the Best No-Knead Sandwich Bread
Use properly warm water. Water that’s too hot can kill the yeast, while water that’s too cold will slow the rising process significantly. Aim for a temperature similar to warm bathwater, around 100–110°F (38–43°C).
Find a warm spot for rising. If your kitchen tends to be cool, consider placing the covered dough in your oven with just the oven light on (not the heat itself), or on top of the refrigerator where warm air often collects, to encourage a more efficient rise.
Don’t rush the rising time. While it can be tempting to speed up the process, allowing the dough the full recommended rise time — both for the first and second rises — is important for developing proper structure and flavor, since this recipe relies on time rather than kneading to build gluten.
Brush with butter for a softer crust. For an extra-soft, slightly glossy crust, brush the top of the freshly baked loaf with a small amount of melted butter immediately after removing it from the oven.
Let the bread cool completely before slicing. Cutting into warm bread can compress the crumb and make slicing difficult. Allowing the loaf to cool fully on a wire rack ensures clean, even slices.
Store properly to maintain freshness. Once completely cooled, store the bread tightly wrapped at room temperature to maintain its soft texture for as long as possible.
Recipe Variations to Try
While this basic recipe is wonderful on its own, it also serves as a fantastic base for experimentation.
Whole Wheat Version: Substitute up to half of the all-purpose flour with whole wheat flour for a heartier, more nutritious loaf. You may need to add a touch more water, as whole wheat flour absorbs more liquid than all-purpose flour.
Herb Bread: Add a tablespoon of dried herbs, such as rosemary, thyme, or Italian seasoning, directly into the dry ingredients for a fragrant, savory variation perfect for sandwiches or serving alongside soup.
Cheesy Bread: Fold in a cup of shredded cheddar or another favorite cheese into the dough before the first rise for a rich, cheesy loaf.
Cinnamon Swirl Version: Roll the risen dough out into a rectangle, sprinkle with cinnamon and sugar, then roll it back up before placing it in the loaf pan for a sweet, cinnamon-swirled variation perfect for toast.
Seeded Bread: Sprinkle the top of the dough with sesame seeds, poppy seeds, or a mixture of seeds before the second rise for added texture and visual appeal.
Garlic Herb Bread: Add garlic powder and a blend of Italian herbs to the dry ingredients for a flavorful loaf that pairs perfectly with pasta dishes or as a base for garlic bread.
How to Store Homemade Sandwich Bread
Proper storage is key to maintaining the soft texture and freshness of this homemade bread for as long as possible.
Room temperature storage: Once the bread has cooled completely, wrap it tightly in plastic wrap, a reusable beeswax wrap, or store it in an airtight bread bag or container. Stored this way, the bread will stay fresh at room temperature for up to 3 days.
Refrigerating: While refrigeration isn’t typically recommended for homemade bread, as it can actually accelerate staling, it may be necessary in particularly warm or humid climates to prevent mold growth. If refrigerating, store in an airtight container and expect a slightly firmer texture.
Freezing: This bread freezes beautifully, making it a great option for baking ahead. Once completely cooled, wrap the whole loaf or individual slices tightly in plastic wrap, then place in a freezer-safe bag, removing as much air as possible. Frozen bread will keep for up to 3 months. Thaw at room temperature, or toast slices directly from frozen for a quick option.
Frequently Asked Questions
Why didn’t my dough rise properly?
This is usually caused by one of a few factors: water that was too hot and killed the yeast, expired or inactive yeast, or a kitchen environment that’s too cold for efficient yeast activity. Double-check your yeast’s expiration date and make sure your water temperature falls within the recommended range.
Can I use active dry yeast instead of instant yeast?
Yes, active dry yeast can be substituted, though it’s generally recommended to dissolve it in the warm water for about 5 to 10 minutes before combining it with the other ingredients, to ensure it’s properly activated before baking.
Why is my bread dense instead of fluffy?
Dense bread is often the result of not allowing enough rising time, using water that was too hot or too cold, or old, less active yeast. Make sure to give the dough the full recommended rising times for the best, fluffiest texture.
Can I double this recipe?
Yes, this recipe can be doubled to make two loaves at once, though you’ll need two separate loaf pans, as doubling the recipe within a single pan would result in uneven baking and an overly dense loaf.
Do I need a stand mixer for this recipe?
No, that’s part of what makes this recipe so convenient. Since no kneading is required, this bread can be made entirely by hand using just a bowl and a wooden spoon, with no special equipment necessary.
Final Thoughts
This 5-Ingredient No-Knead Sandwich Bread proves that truly great homemade bread doesn’t require complicated techniques, special equipment, or hours of hands-on effort. With just five simple pantry staples and a little patience for the rising process, you can create a soft, fluffy, beautifully golden loaf that’s perfect for sandwiches, toast, or simply enjoying warm with a pat of butter.
Once you try baking your own bread using this simple, foolproof method, it’s easy to see why so many home bakers return to this recipe again and again. Whether you’re a complete beginner or an experienced baker looking for a reliable, low-effort go-to, this sandwich bread recipe is sure to become a treasured staple in your kitchen.