
Easiest No-Knead Sandwich Bread
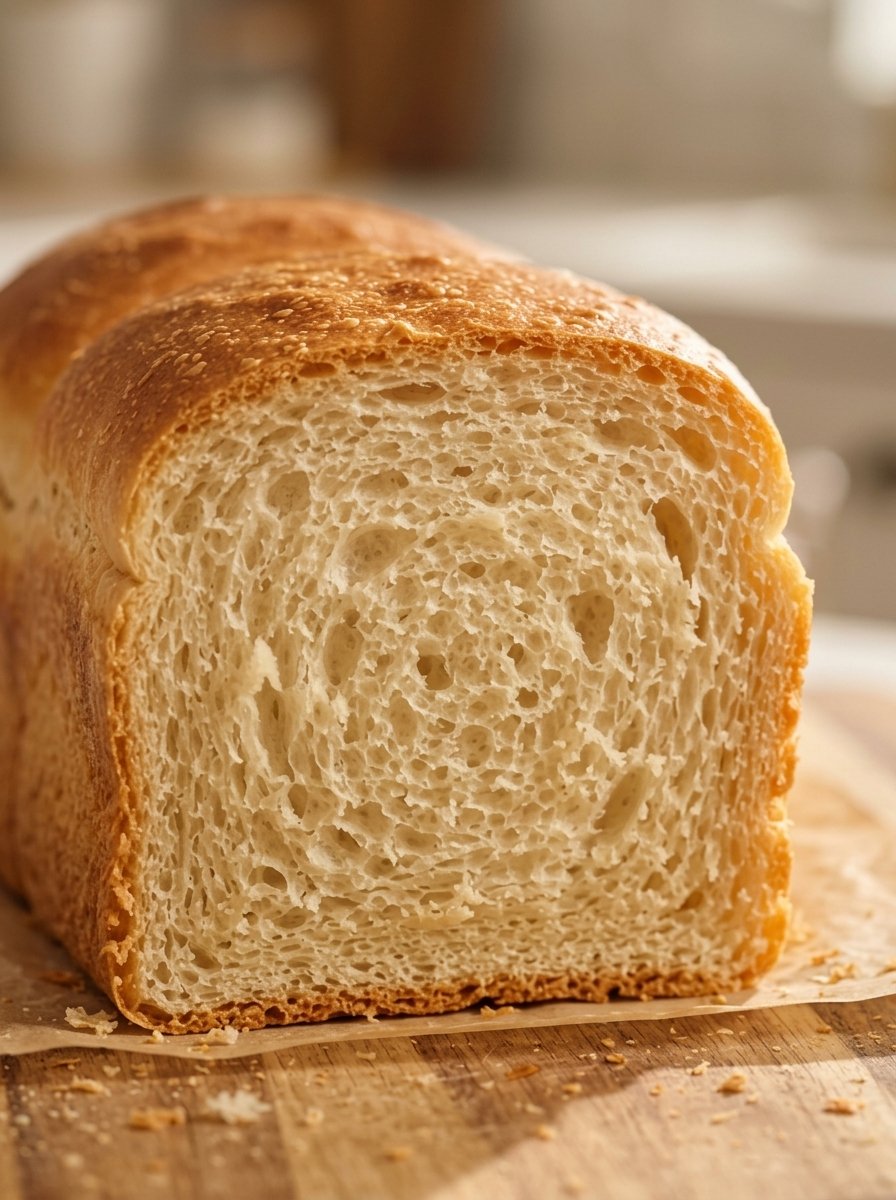
Easiest No-Knead Sandwich Bread: A Foolproof Homemade Loaf in Under 2 Hours 🍞🥪
Homemade sandwich bread has a reputation for being time-consuming, messy, and just a little intimidating. This recipe is here to change that. With a handful of everyday ingredients, a single bowl, and a wooden spoon, you can mix a sticky dough in about ten minutes, let it rise while you go about your day, and pull a golden, fluffy loaf out of the oven in about 1 hour 45 minutes. There’s no kneading, no mixer, and no special technique, just soft, tender bread that’s ready for sandwiches, morning toast, or a warm slice with butter.
This guide walks you through the entire process: the complete recipe, what each ingredient does, a timeline for the day, step-by-step instructions with visual cues, tips for getting a soft crumb and golden crust, troubleshooting for common problems, flavor variations, ways to use your loaf, storage and freezing advice, and a detailed FAQ. If you’re a beginner who has never baked bread, this is the perfect place to start.
Why This Is the Easiest Sandwich Bread You’ll Ever Make ❤️
There’s no kneading at all. Traditional bread recipes ask you to knead dough for ten minutes or more to build gluten. Here, a wetter dough and a patient rise do that job for you. You simply stir until combined.
You only need one bowl and one pan. Mix everything in a large bowl, then bake in a standard 9×5-inch loaf pan. Cleanup is quick and easy.
It’s ready in about 1 hour 45 minutes. Compared with many homemade loaves that rise for several hours, this one fits into an afternoon or an evening without much planning.
The texture is soft and fluffy. Olive oil or butter, honey, and optional milk powder produce a tender crumb and a gently golden crust, which is exactly what you want in a sandwich loaf.
The ingredients are simple and affordable. Flour, yeast, salt, honey, water, and oil are probably already in your pantry.
It’s incredibly forgiving. A sticky dough, a slightly warm or cool kitchen, or a few extra minutes of rising rarely ruin the result, which makes it ideal for new bakers.
It’s better than store-bought. You control the ingredients, so there are no preservatives or dough conditioners, and the flavor is far fresher.
Recipe Overview
- Prep Time: 10 minutes
- Cook Time: 30–35 minutes
- Total Time: About 1 hour 45 minutes
- Servings: 1 loaf (about 10 to 12 slices)
Ingredients You’ll Need 🛒
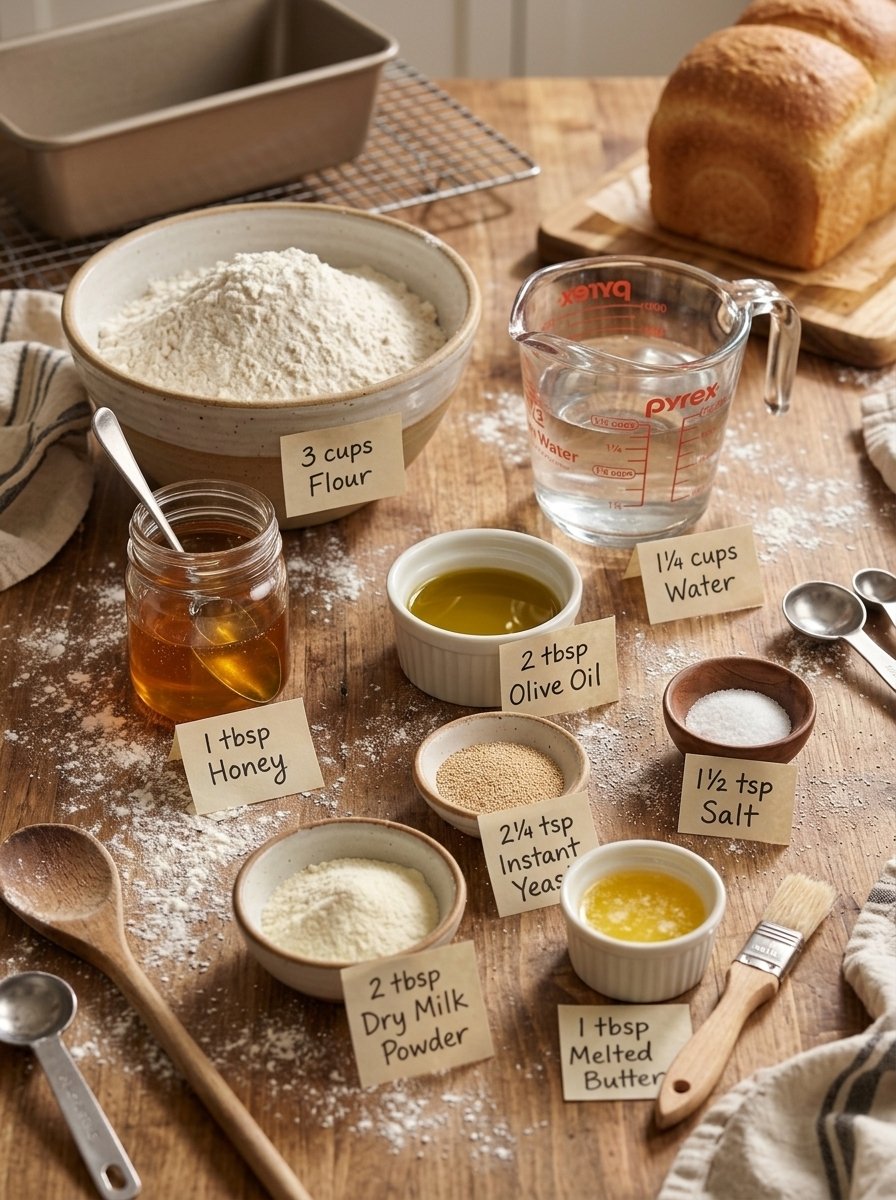
- 3 cups (375 g) all-purpose or bread flour
- 2¼ tsp (7 g) instant yeast
- 1½ tsp salt
- 1 tbsp honey or granulated sugar
- 1¼ cups (300 ml) warm water
- 2 tbsp olive oil or melted butter
- 2 tbsp dry milk powder (optional)
- 1 tbsp melted butter, for brushing the top
What Each Ingredient Does
Flour. Flour provides the structure of the loaf. All-purpose flour makes a soft, tender, slightly more delicate slice. Bread flour has more protein, so it develops more gluten and produces a taller, chewier loaf. Both work beautifully. Weighing the flour at 375 grams is the most reliable way to get the right dough consistency, since a scooped cup can vary quite a bit in weight.
Instant yeast. Instant yeast is the engine of the recipe. It can be mixed directly into the dry ingredients without proofing. If you have active dry yeast, use the same amount but stir it into the warm water with the honey for about 5 to 10 minutes until foamy before mixing, and expect slightly longer rise times.
Salt. Salt adds flavor, tightens the gluten structure, and keeps the yeast from working too quickly. Bread without enough salt tastes bland and can rise unevenly.
Honey or sugar. A small amount of sweetener gives the yeast a quick meal, promotes golden browning, and adds subtle flavor. The finished loaf isn’t sweet.
Warm water. Water should feel comfortably warm, like a baby’s bath, roughly 105°F to 115°F (40°C to 46°C). Hot water can kill yeast, so when in doubt, use slightly cooler water and allow a little more rising time.
Olive oil or melted butter. Fat softens the crumb, keeps the bread fresh longer, and adds richness. Olive oil is lightly fruity, while butter gives a classic sandwich-loaf flavor.
Dry milk powder (optional). Milk powder adds a subtle sweetness, encourages browning, and softens the crumb. It’s a small upgrade that gives the loaf a bakery-style quality, but the bread is still excellent without it.
Melted butter for brushing. Brushing butter on the finished loaf softens the crust, adds shine, and gives the top a rich, buttery flavor.
Your Baking Timeline ⏱️
Here’s what a typical bake looks like from start to finish:
- 0:00 – Mix the dough (10 minutes). Stir everything together in a bowl.
- 0:10 – First rise (60 to 75 minutes). Cover and let the dough rise in a warm place.
- 1:15 – Transfer to the pan. Grease the pan and scrape in the dough.
- 1:15 – Second rise (20 to 30 minutes). Preheat the oven while the dough puffs.
- 1:40 – Bake (30 to 35 minutes). Bake until deep golden brown.
- 2:15 – Brush, cool, and slice. Cool for at least 30 minutes before cutting.
Because some of the rising overlaps with oven preheating, the active recipe time stays close to 1 hour 45 minutes before cooling.
Step-by-Step Instructions 👩🍳
Step 1: Mix the Dough
In a large bowl, combine the flour, instant yeast, salt, and dry milk powder if you’re using it. Whisk briefly so the yeast and salt distribute evenly. Add the honey, warm water, and olive oil. Stir with a wooden spoon or sturdy spatula until a sticky dough forms and no dry flour remains. This usually takes about a minute. The dough will look shaggy, wet, and rough, and that’s exactly right. No kneading is necessary, so don’t be tempted to add extra flour.
Step 2: Let the Dough Rise
Cover the bowl with plastic wrap, a plate, or a clean kitchen towel, and place it in a warm spot for 60 to 75 minutes. A turned-off oven with the light on, a sunny countertop, or the top of the refrigerator works well. The dough is ready when it has roughly doubled in size, looks puffy, and has bubbles visible on the surface and along the sides of the bowl.
Step 3: Transfer to the Pan
Grease a 9×5-inch loaf pan thoroughly with butter, oil, or nonstick spray. Scrape the sticky dough into the pan using a greased spatula. Gently spread it evenly into the corners, smoothing the top. Greasing your spatula or lightly wetting your hands keeps the dough from sticking. Try not to press all the air out of it.
Step 4: Rise Again
Cover the pan loosely with a towel or greased plastic wrap and let the dough rise for another 20 to 30 minutes, until puffy and nearly reaching the top of the pan. While it rests, preheat your oven.
Step 5: Bake the Bread
Preheat the oven to 375°F (190°C). Bake the loaf for 30 to 35 minutes, until the top is deeply golden brown and the loaf is cooked through. It should sound hollow when tapped, and an instant-read thermometer should read about 190°F to 200°F (88°C to 93°C) in the center. If the top browns too quickly, loosely tent the loaf with foil for the last 10 minutes.
Step 6: Brush and Cool
Remove the bread from the pan right away and place it on a wire rack. Brush the top with melted butter for a softer crust and a lovely shine. Let the loaf cool for at least 30 minutes before slicing. Cutting too early traps steam and makes the crumb gummy.
Tips for Perfect No-Knead Bread 💡
Keep the dough slightly sticky. A wetter dough gives a softer, more open crumb. Resist the urge to add flour, and use a greased spatula or wet hands to handle the dough instead.
Use warm water, not hot. Water that’s too hot can kill the yeast, and your loaf won’t rise. Aim for comfortably warm.
Let the bread cool completely. The crumb is still setting as the bread cools. Slicing too soon leads to a gummy texture and squished slices.
Store it in an airtight bag. Once cool, keep your loaf in a sealed bread bag at room temperature for up to 3 days.
Use a scale if you have one. Weighing ingredients is the easiest way to get repeatable results.
Judge by the dough, not just the clock. Rising times depend on kitchen temperature. A cool kitchen needs more time and a warm one needs less. Look for a puffy, doubled dough.
Watch the second rise. If the dough rises too far over the rim of the pan, it may collapse. Bake when it’s puffy and reaching the top of the pan.
Check doneness with a thermometer. An internal temperature around 190°F to 200°F (88°C to 93°C) is the surest sign your loaf is done.
Troubleshooting Common Problems
The dough didn’t rise. The yeast may be expired, the water may have been too hot or too cold, or the room may be too cool. Use fresh yeast, check the water temperature, and move the dough to a warmer spot.
The loaf is dense and heavy. This usually comes from too much flour, old yeast, or an under-risen dough. Weigh the flour and make sure the dough has doubled during the first rise.
The top collapsed or sank. The second rise probably went too long. Bake the loaf as soon as it reaches the top of the pan.
The crust is too hard. Brush with butter right after baking and store the loaf in a sealed bag once cool.
The center is gummy. The loaf needs a few more minutes in the oven, or it was sliced before cooling. Use a thermometer and let it cool fully.
The bottom is pale. Make sure the pan is on the center rack and consider using a metal pan, which conducts heat better than glass.
The loaf has big holes. Overly wet dough or a too-long second rise can create large air pockets. Gently smooth the dough in the pan and bake on time.
The dough sticks to the bowl and pan. Grease generously and use a greased spatula. The sticky dough is normal for no-knead bread.
Delicious Variations to Try 🌾
Whole wheat sandwich loaf. Replace up to 1 cup of the flour with whole wheat flour for a nuttier flavor and added fiber. Add a tablespoon or two of extra water.
Garlic herb bread. Stir 1 to 2 teaspoons of dried herbs and 1 teaspoon of garlic powder into the dry ingredients for a savory loaf.
Cheddar jalapeño. Fold ½ cup of shredded cheddar and a spoonful of diced pickled jalapeños into the dough before transferring it to the pan.
Honey oat loaf. Replace ¼ cup of the flour with rolled oats and sprinkle extra oats on top for a rustic finish.
Seeded loaf. Brush the top with water and sprinkle with sesame, sunflower, or pumpkin seeds before the second rise.
Cinnamon raisin bread. Add 1 tablespoon of cinnamon and ½ cup of raisins for a breakfast-friendly loaf that makes exceptional toast.
Rosemary olive oil. Use olive oil as the fat and add chopped fresh rosemary and a pinch of coarse salt on top.
Dinner rolls. Divide the risen dough into portions, place them in a greased baking dish, let them rise briefly, and bake for about 20 minutes.
Ways to Use Your Homemade Sandwich Bread
- Classic sandwiches: Turkey and cheese, ham and mustard, egg salad, and chicken salad all hold together well on soft but sturdy slices.
- Toast: Cut thick slices and top with butter and jam, avocado, or peanut butter and banana.
- Grilled cheese: The tender crumb crisps up golden and buttery in a skillet.
- French toast: Day-old slices soak up custard well and cook up golden and creamy.
- Croutons and breadcrumbs: Cube or crumble leftover bread, toss with oil and seasoning, and bake.
- Bread pudding and strata: Slightly stale bread is perfect for sweet and savory baked dishes.
- Garlic bread: Spread slices with garlic butter and toast under the broiler.
Storage Instructions
Room temperature: Once fully cooled, store the loaf in an airtight bag or container at room temperature for up to 3 days. Keeping it cut-side down on a board also helps retain moisture.
Refrigerator: Refrigeration tends to dry out bread, so it’s generally best to avoid it unless your kitchen is very warm or humid.
Freezer: Slice the cooled loaf, place it in a freezer-safe bag, and freeze for up to 3 months. Toast slices from frozen or thaw at room temperature for about 30 minutes.
Reviving stale bread: A quick trip through the toaster, or a few minutes in a hot oven wrapped in foil, restores a bit of freshness.
Frequently Asked Questions
Do I really not need to knead the dough? That’s right. The wetter dough and the long rise allow gluten to develop naturally, giving you a good structure without any kneading.
Can I use active dry yeast instead of instant? Yes. Dissolve it in the warm water with the honey for 5 to 10 minutes until foamy, then continue with the recipe. Rise times may be a bit longer.
Can I use all-purpose flour and still get a good loaf? Absolutely. All-purpose flour makes a softer, more tender crumb. Bread flour makes a slightly taller, chewier loaf.
Why is my dough so sticky? No-knead dough is intentionally wet. The extra moisture helps gluten form on its own and gives a soft crumb. Use a greased spatula or wet hands to handle it.
Can I let the dough rise overnight? Yes. For a slower, more flavorful rise, refrigerate the covered dough for 8 to 12 hours, then let it come closer to room temperature before moving it to the pan and continuing with the second rise.
What if I don’t have a 9×5-inch pan? A slightly smaller or larger loaf pan will work, though the shape and baking time may change. A smaller pan gives a taller loaf and may need a few extra minutes.
Can I double the recipe? Yes. Mix the dough in a bigger bowl, divide it between two pans, and bake both on the same rack with space in between.
Why didn’t my bread brown well? Make sure the oven is fully preheated, and consider adding milk powder or brushing the top with butter or milk before baking.
Can I use whole wheat flour? Yes, but replace only part of the flour, since all whole wheat produces a denser loaf and needs more liquid.
How do I get a softer crust? Brush the loaf with melted butter as soon as it comes out of the oven, and store it in a sealed bag once it has cooled.
Is it okay to skip the milk powder? Yes. It’s optional and the loaf will still be soft and delicious.
How do I know the bread is baked through? It should be deeply golden, sound hollow when tapped, and register around 190°F to 200°F (88°C to 93°C) in the center.
Final Thoughts 🥖
This Easiest No-Knead Sandwich Bread proves that anyone can bake a beautiful loaf at home. With pantry staples, a bowl, a spoon, and a little patience, you’ll end up with a soft, fluffy, golden loaf that’s perfect for sandwiches, toast, and everything in between. It’s quick enough for a weekend afternoon, simple enough for a first-time baker, and endlessly customizable once you’ve mastered the basic recipe.
Stir up a batch today, let the dough do the work, and enjoy the warm, comforting aroma of fresh bread filling your kitchen. One slice with melted butter, and you’ll be hooked!