
Soft & Flaky Cranberry Orange Scones
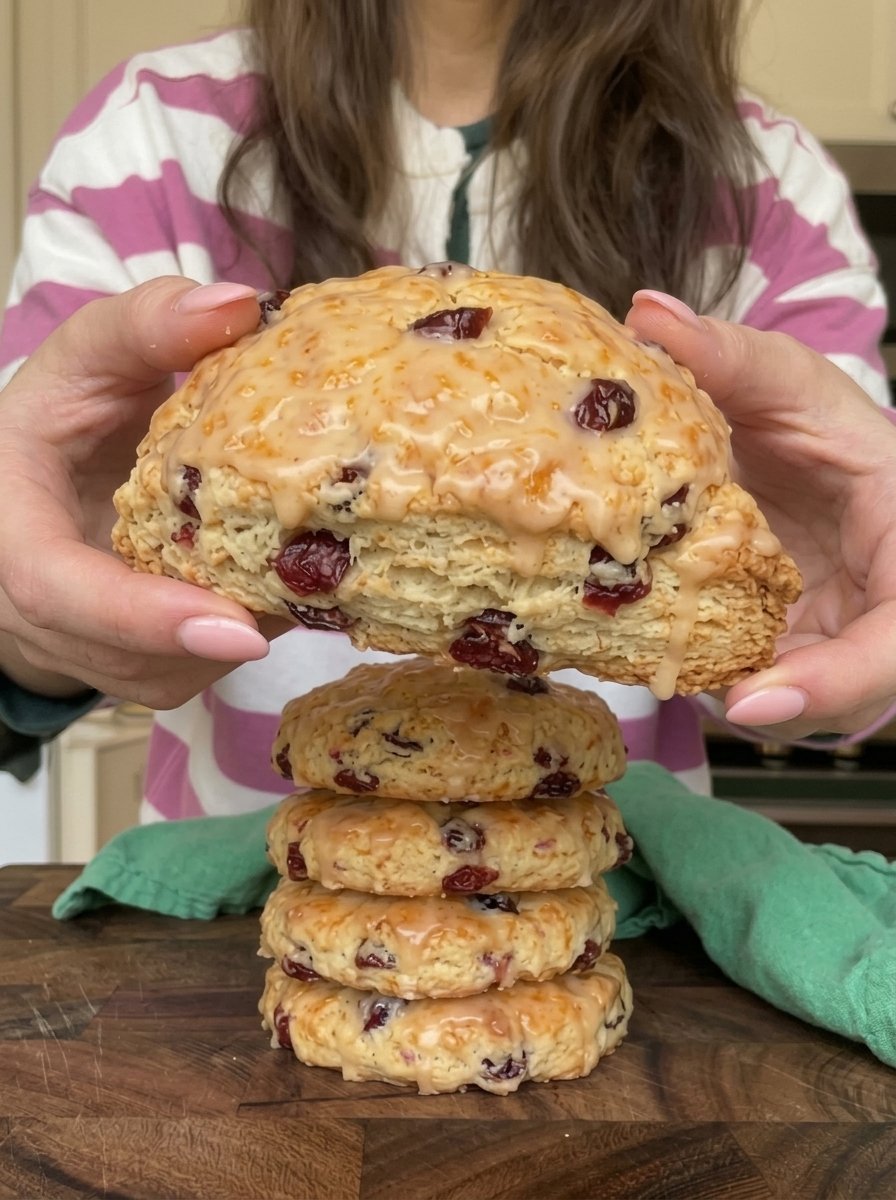
Soft & Flaky Cranberry Orange Scones: Easy Bakery-Style Recipe With Orange Glaze 🥐🍊
There are few baked goods as comforting as a warm, buttery scone fresh from the oven. These Soft & Flaky Cranberry Orange Scones take that classic comfort and brighten it up with sweet-tart dried cranberries, fragrant fresh orange zest, and a simple orange glaze that sets into a delicate, citrusy shell. They are tender on the inside, golden on the outside, and flaky in all the right places, and they come together in just 35 to 40 minutes.
In this complete guide, you’ll find the full recipe, a closer look at every ingredient, step-by-step instructions with visual cues, the science behind flaky scones, expert tips, troubleshooting help, creative variations, make-ahead and freezing instructions, serving ideas, and answers to the most common scone questions. Whether you’re baking for a holiday brunch, a weekend breakfast, or an afternoon tea, this recipe will help you bake scones that look and taste like they came from a bakery.
Why You’ll Love These Cranberry Orange Scones
They’re soft and flaky. Cold butter and cold cream create tender layers with a delicate, crumbly texture, rather than a dry or dense biscuit.
The flavor is bright and balanced. Sweet-tart cranberries and fresh orange zest give every bite a lively, fruity punch, while vanilla and a touch of sugar keep things rounded and cozy.
They’re quick to make. With 15 minutes of prep and 18 to 22 minutes of baking, you can have warm scones on the table in under an hour.
No special equipment needed. A bowl, a whisk, a pastry cutter or your fingertips, and a baking sheet are all you need.
The glaze adds a finishing touch. A simple drizzle of orange glaze makes them look beautiful and adds a gentle citrus sweetness.
They’re perfect for any occasion. Serve them for breakfast, brunch, holiday gatherings, baby showers, bridal showers, tea parties, or as a homemade gift.
They freeze beautifully. You can prepare them ahead of time and bake on demand, making fresh scones easy even on busy mornings.
Recipe Overview
- Prep Time: 15 minutes
- Cook Time: 18–22 minutes
- Total Time: 35–40 minutes
- Servings: 8 scones
Ingredients You’ll Need 🛒
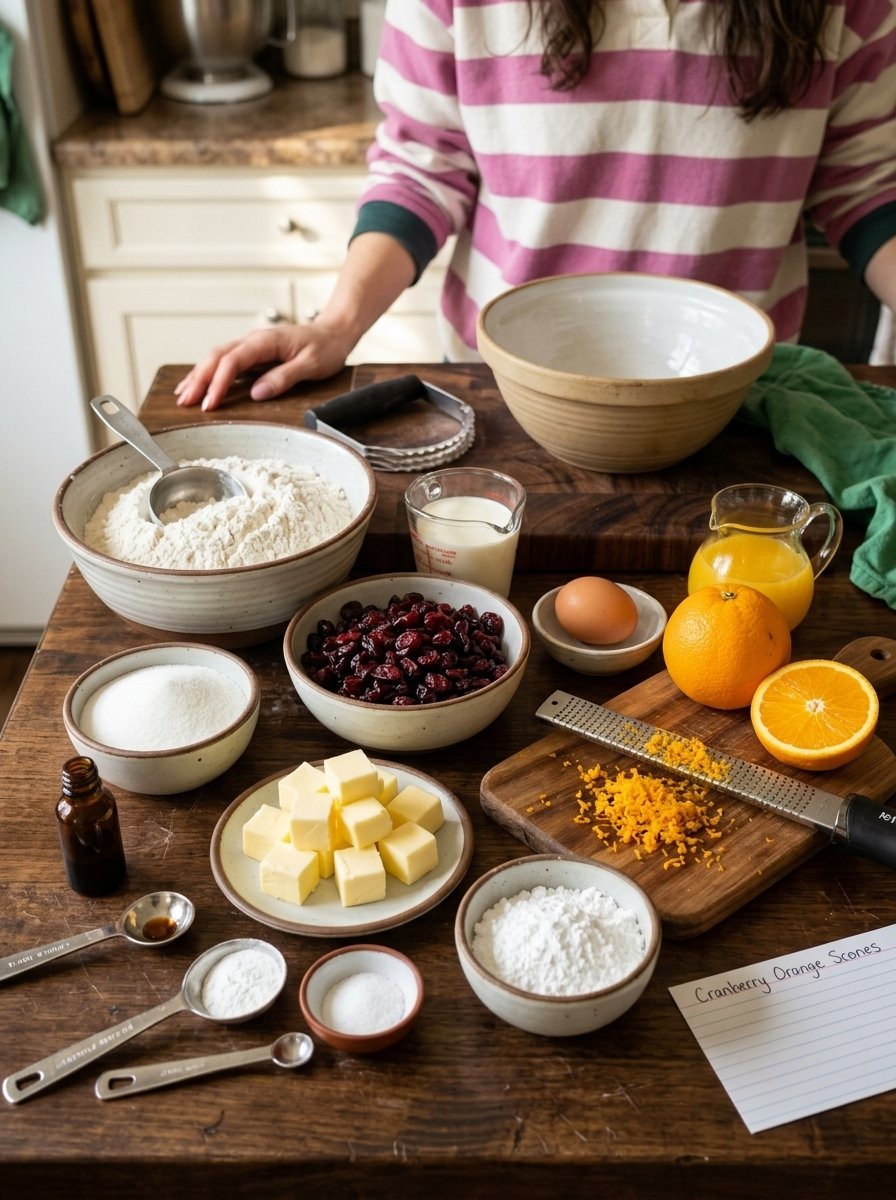
For the Scones
- 2 cups (250 g) all-purpose flour
- ⅓ cup (65 g) granulated sugar
- 1 tbsp baking powder
- ½ tsp salt
- ½ cup (115 g) cold unsalted butter, cubed
- ¾ cup dried cranberries
- Zest of 1 large orange
- ½ cup (120 ml) cold heavy cream
- 1 large egg
- 1 tsp vanilla extract
For the Orange Glaze
- ½ cup powdered sugar
- 1–2 tbsp fresh orange juice
- ½ tsp orange zest (optional)
A Closer Look at the Ingredients
All-purpose flour. All-purpose flour gives scones the right balance of structure and tenderness. Weigh it if you can, at 250 grams. Scooping with a measuring cup can pack in too much flour and lead to dry, heavy scones.
Granulated sugar. The sugar sweetens the scones lightly and helps them brown. These are not overly sweet, which makes them wonderful with butter, jam, or tea.
Baking powder. Baking powder is the leavening agent that makes the scones rise and lighten. Make sure yours is fresh, as old baking powder loses its power.
Salt. Salt balances the sweetness and brings out the flavor of the butter, orange, and cranberries.
Cold unsalted butter. Butter is the secret to flaky scones. When cold pieces of butter melt in the hot oven, they release steam that creates pockets and layers. Keep the butter as cold as possible until it goes into the flour.
Dried cranberries. They add chewy sweetness and a tart pop of color. Regular sweetened dried cranberries work well. You can also use reduced-sugar varieties if you prefer a tangier scone.
Orange zest. Zest contains the orange’s fragrant oils, which deliver big flavor without adding extra liquid. Use a fine grater and avoid the bitter white pith.
Cold heavy cream. Cream adds richness and tenderness. Its high fat content gives the scones a soft, plush crumb. Cold cream also helps keep the butter from melting during mixing.
Egg. The egg binds the dough and adds richness and structure.
Vanilla extract. Vanilla rounds out the flavor and pairs naturally with orange and cranberry.
Powdered sugar and orange juice (for the glaze). These two simple ingredients make a smooth, glossy glaze. Fresh orange juice tastes best and adds authentic citrus brightness.
Step-by-Step Instructions 👩🍳
Step 1: Prepare the Oven
Preheat your oven to 400°F (200°C) and line a baking sheet with parchment paper. A hot oven is important for scones because the initial blast of heat helps them rise quickly and bake into flaky layers.
Step 2: Mix the Dry Ingredients
In a large bowl, whisk together the flour, granulated sugar, baking powder, and salt. Stir in the orange zest, using your fingertips to rub it into the dry ingredients so the oils spread evenly and perfume the flour.
Step 3: Cut in the Butter
Add the cold cubed butter to the flour mixture. Use a pastry cutter or your fingertips to work the butter into the flour until the mixture resembles coarse crumbs, with some pea-sized pieces of butter remaining. Those visible bits of butter are what create the flaky layers, so don’t blend them completely. If the butter begins to feel warm or soft, place the bowl in the refrigerator for 10 minutes before continuing.
Step 4: Add the Cranberries
Gently fold in the dried cranberries until they’re evenly distributed throughout the flour and butter mixture.
Step 5: Make the Dough
In a separate bowl, whisk together the cold heavy cream, egg, and vanilla extract. Pour the wet mixture into the dry ingredients and stir gently with a spatula or fork just until a soft dough forms. It’s fine if a few dry spots remain. Do not overmix, as overworked dough leads to tough, dense scones.
Step 6: Shape the Scones
Transfer the dough to a lightly floured surface and gently bring it together with your hands, kneading only once or twice if needed. Pat it into a circle about 1 inch thick. Using a sharp knife or bench scraper, cut the circle into 8 wedges, pressing straight down rather than sawing, which helps the edges rise evenly.
Step 7: Bake
Place the wedges on the prepared baking sheet, leaving space between them. For the best rise and flakiest texture, chill the shaped scones in the refrigerator or freezer for 10 to 15 minutes before baking. Bake for 18 to 22 minutes, or until lightly golden around the edges and on top.
Step 8: Make the Glaze
While the scones bake, whisk the powdered sugar with 1 tablespoon of fresh orange juice until smooth. Add more juice, a little at a time, until the glaze reaches a thick but drizzle-able consistency. Stir in the optional orange zest for extra flavor and a pretty speckled look.
Step 9: Finish and Serve
Let the scones cool for about 10 minutes on the pan or a wire rack. Glazing while they’re too hot makes the glaze melt and slide off, so a short cooling time helps it set. Drizzle the glaze over the scones and serve warm or at room temperature.
The Science Behind Flaky, Tender Scones 🔬
Great scones come down to temperature, handling, and heat.
Cold fat creates layers. Small pieces of cold butter remain solid as the dough bakes at first. As they melt, they release steam, which pushes the dough apart and leaves behind tender, flaky pockets.
Minimal mixing keeps scones tender. Stirring flour with liquid develops gluten, the protein network that gives bread its chew. In scones, you want as little gluten as possible. Mixing gently and only until the dough comes together keeps the crumb tender.
High heat gives lift. A hot oven activates the baking powder quickly and sets the exterior before the butter melts away, helping the scones rise tall instead of spreading flat.
Cold dough bakes better. Chilling shaped scones solidifies the butter again after handling, which produces a taller rise and a flakier result.
Expert Tips for the Best Cranberry Orange Scones 💡
Keep everything cold. Use cold butter, cold cream, and a cold egg. If your kitchen is warm, chill the flour mixture and even the mixing bowl for a few minutes before starting.
Grate frozen butter. For an even easier method, freeze the butter for 15 minutes, then grate it into the flour on the large holes of a box grater. This distributes the butter quickly without warming it with your hands.
Handle the dough as little as possible. The less you work the dough, the more tender your scones will be. Stop mixing as soon as the dough holds together.
Press straight down when cutting. Don’t twist a cutter or drag a knife, which can seal the edges and keep the scones from rising fully.
Chill before baking. Ten to fifteen minutes in the refrigerator or freezer makes a noticeable difference in texture and rise.
Use a hot, preheated oven. Make sure the oven has fully reached 400°F (200°C) before the scones go in.
Space them apart. Leave room between the wedges so they bake evenly and develop golden edges.
Zest before juicing. Zest the orange first, since it’s difficult to zest a juiced orange. Then use the juice for the glaze.
Cool slightly before glazing. Wait about 10 minutes so the glaze sets instead of melting into the scones.
Brush with cream for a golden top. For a deeper, bakery-style color, brush the tops lightly with a little extra cream before baking.
Troubleshooting Common Scone Problems
My scones are dry. Dry scones usually result from too much flour or overbaking. Weigh the flour and start checking for doneness at the earlier end of the baking window.
My scones are tough. Overmixing or overworking the dough develops gluten. Stir only until combined and handle the dough gently.
My scones spread flat. The butter may have been too warm, or the baking powder may be old. Keep the ingredients cold, chill the shaped scones, and use fresh baking powder.
My scones didn’t rise much. Check your baking powder, and make sure you pressed the dough into a 1-inch thickness rather than a thin sheet.
The dough is too sticky. Lightly flour your hands and the surface. If the dough is still too wet, add a spoonful of flour, but avoid adding too much.
The dough is too dry and crumbly. Add a teaspoon or two of cold cream until the dough just holds together.
The cranberries burned. Cranberries on the surface can darken in the oven. Press them gently into the dough so they’re covered.
The glaze is too thin or runny. Whisk in a little more powdered sugar until it thickens.
The glaze is too thick. Add orange juice, a few drops at a time, until it becomes drizzle-able.
Delicious Variations to Try 🍊
White chocolate cranberry orange scones. Fold in ½ cup of white chocolate chips along with the cranberries for a richer, sweeter scone.
Cranberry pecan. Add ½ cup of chopped, toasted pecans for crunch and nutty depth.
Lemon cranberry scones. Replace the orange zest with lemon zest and the orange juice in the glaze with lemon juice for a tangier version.
Fresh cranberry scones. Use chopped fresh or frozen cranberries in place of dried, increasing the sugar slightly to balance the tartness.
Spiced scones. Add ½ teaspoon of cinnamon and a pinch of nutmeg or cardamom for a warm, holiday-style flavor.
Whole wheat blend. Replace up to half of the flour with whole wheat flour for a heartier texture.
Mini scones. Divide the dough into smaller wedges or rounds and reduce the baking time to roughly 12 to 15 minutes.
Drop scones. Skip shaping and drop spoonfuls of dough onto the baking sheet for a rustic, easier version.
Cream-brushed and sugared tops. Brush with cream and sprinkle with coarse sugar before baking for a crunchy, sparkly finish.
What to Serve with Cranberry Orange Scones
- Butter and jam: Orange marmalade, strawberry jam, or raspberry preserves complement the citrus flavor beautifully.
- Clotted cream or whipped cream: For a traditional afternoon tea experience.
- Coffee or tea: Earl Grey, English breakfast, or a spiced chai pair wonderfully.
- A brunch spread: Serve alongside fresh fruit, scrambled eggs, and bacon.
- Yogurt and fruit: Offer with Greek yogurt and berries for a lighter breakfast.
- Holiday gatherings: Their festive red and orange colors make them a natural fit for Thanksgiving, Christmas, and winter brunches.
Make-Ahead, Storage, and Freezing Instructions
Room temperature: Store completely cooled, glazed or unglazed scones in an airtight container at room temperature for up to 2 days.
Refrigerator: Scones are best at room temperature, but you can refrigerate them for up to 4 days if needed. Warm them briefly before serving.
Freezing unbaked scones: This is the best way to have fresh scones on demand. Shape the dough into wedges, freeze them on a baking sheet until solid, then transfer to a freezer bag for up to 3 months. Bake straight from frozen at 400°F (200°C), adding about 3 to 5 minutes to the baking time.
Freezing baked scones: Cool them completely, skip the glaze, wrap tightly, and freeze for up to 3 months. Thaw at room temperature and warm in a 350°F (175°C) oven for 8 to 10 minutes before glazing.
Make-ahead dough: You can prepare the dough, shape it, cover it, and refrigerate it overnight. Bake the next morning for a fresh breakfast with almost no effort.
Reheating: Warm scones in a 325°F to 350°F (160°C to 175°C) oven for 5 to 8 minutes to refresh the texture. Add the glaze after reheating for the best look.
Frequently Asked Questions
Can I use fresh cranberries instead of dried? Yes. Chop fresh or frozen cranberries and toss them with a tablespoon of sugar before folding them in. They add a tarter flavor and release more moisture, so handle the dough gently.
Can I use milk instead of heavy cream? Heavy cream gives the richest, most tender result. If you only have milk, use whole milk and consider adding a little extra butter, though the scones will be less rich.
Can I make these without an egg? You can replace the egg with an extra splash of cream, though the scones may be slightly less rich and structured.
Why do my scones need to be handled so gently? Overworking the dough develops gluten, which makes scones tough rather than tender and flaky.
Can I make the dough in a food processor? Yes. Pulse the dry ingredients and cold butter until crumbly, then transfer to a bowl before folding in the cranberries and liquid, so you don’t overprocess the dough.
Do I have to use the glaze? No. The scones are delicious without it, but the glaze adds extra orange flavor and a pretty finish.
Can I use orange juice in the dough? It’s best to keep the dough’s liquid mostly cream for richness and texture. The orange flavor comes from the zest, and the juice goes in the glaze.
Can I use salted butter? Yes, but reduce the added salt slightly, to about ¼ teaspoon, to avoid overly salty scones.
What’s the best way to cut scones? Use a sharp knife or bench scraper and press straight down. Avoid sawing or twisting, which can seal the edges and limit the rise.
How do I know when scones are done? They should be golden on the edges and lightly golden on top, and they should feel set. Avoid overbaking, which dries them out.
Can I make gluten-free scones with this recipe? You can try a good one-to-one gluten-free flour blend, but results will vary and the dough may need a small adjustment in liquid.
Can I double the recipe? Yes. Divide the dough into two circles, cut each into 8 wedges, and bake on two sheets, rotating halfway through baking.
Final Thoughts 🥐✨
These Soft & Flaky Cranberry Orange Scones combine everything people love about a classic scone: buttery layers, a tender crumb, and a golden finish, with the bright, festive flavors of cranberry and orange. They’re simple enough for a weekday treat and elegant enough for a holiday table, and with make-ahead and freezer-friendly options, they fit easily into any schedule.
Keep your ingredients cold, handle the dough gently, and finish with that glossy orange glaze. Serve them warm with a cup of coffee or tea, and enjoy a little bakery-style magic in your own kitchen!