
Homemade Bread Recipe
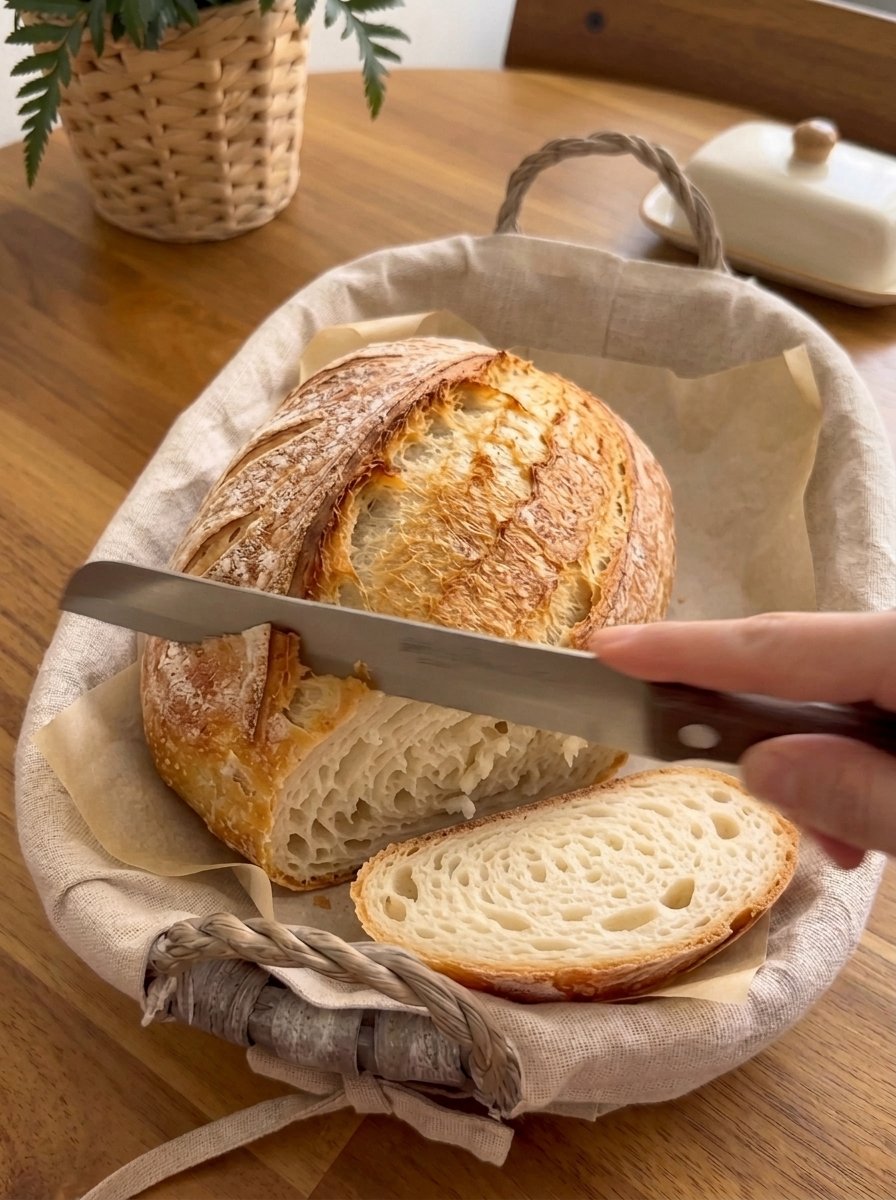
Homemade Bread Recipe: Bakery-Style Loaf with a Crispy Crust and Fluffy Center
If you love homemade bread, this is the recipe to try. It produces a beautifully golden loaf with a crispy crust and a soft, fluffy center, and it fills your kitchen with the kind of warm, yeasty aroma you usually only find in a real bakery. It’s simple, satisfying, and works equally well for first-time bakers and experienced bread lovers.
Serve it warm with butter, pile it with sandwich fillings, or tear off pieces to dunk in your favorite soup. Because the ingredients are basic pantry staples (flour, yeast, salt, sugar or honey, warm water, and olive oil), you can bake this loaf any day of the week without a special shopping trip.
This guide covers everything: the full recipe, step-by-step instructions, ingredient notes, kneading and rising tips, the science behind great bread, troubleshooting, flavor variations, serving ideas, storage, and answers to common questions.
Recipe at a Glance
- Prep time: 15 minutes
- Rise time: About 1½ hours total (two rises)
- Cook time: 30 to 35 minutes
- Total time: About 2 hours
- Servings: 1 loaf (10 to 12 slices)
- Difficulty: Beginner-friendly
Why You’ll Love This Homemade Bread Recipe
The texture is spot on. The crust is golden and crisp, while the inside stays soft, tender, and fluffy. It slices cleanly for sandwiches and tears beautifully when served warm.
It uses simple ingredients. No sourdough starter, no specialty flour, and no fancy equipment. If you keep flour, yeast, salt, and olive oil at home, you can bake today.
It’s beginner-friendly. The dough is forgiving, and the visual cues (doubled in size, golden brown, hollow-sounding) make it easy to know you’re on track.
It’s ready in about 2 hours. Most of that is hands-off rising time, so you can tidy the kitchen, start dinner, or simply relax while the dough does its work.
It’s incredibly versatile. Use it for butter and jam, sandwiches, toast, French toast, garlic bread, croutons, and more.
The aroma is unbeatable. There’s a reason people say fresh bread makes a house feel like home.
Ingredients for Easy Homemade Bread
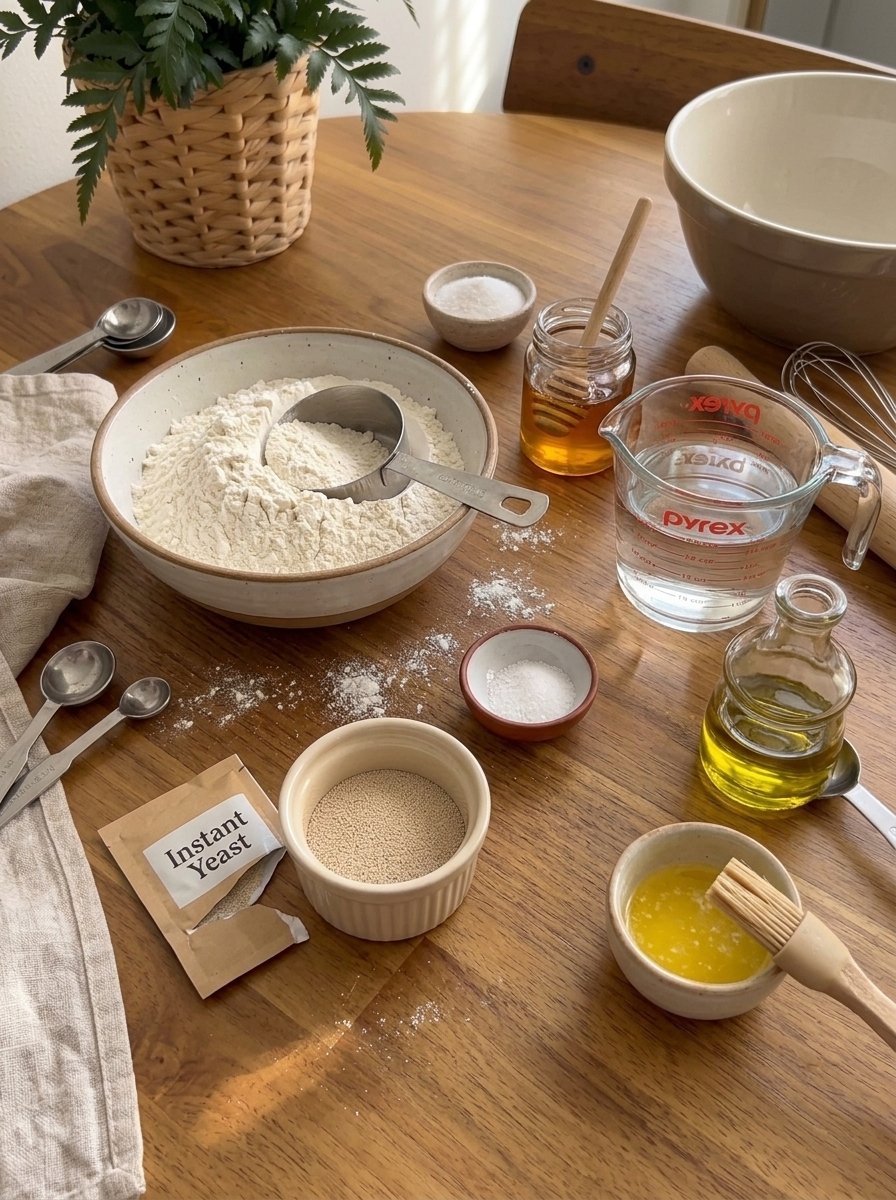
This recipe makes one loaf of 10 to 12 slices:
- 3 cups (375 g) all-purpose or bread flour
- 2¼ teaspoons (7 g) instant yeast
- 1½ teaspoons salt
- 1 tablespoon sugar or honey
- 1¼ cups (300 ml) warm water
- 2 tablespoons olive oil
- 1 tablespoon melted butter, for brushing
Ingredient Notes and Smart Swaps
Flour. Both all-purpose and bread flour work. Bread flour has a higher protein content, which builds more gluten and creates a chewier, taller loaf. All-purpose flour gives a slightly softer, more tender crumb. Whichever you use, weigh it if you can. Scooping a cup straight from the bag can add 20 to 30 grams of extra flour, which leads to dry, dense bread. If you only have measuring cups, spoon the flour into the cup and level it off with a knife.
Instant yeast. Instant yeast (also sold as rapid-rise or bread machine yeast) can be mixed directly into the dry ingredients. If you only have active dry yeast, use the same amount, but dissolve it in the warm water for 5 to 10 minutes until foamy, and expect the rises to take a little longer.
Salt. Salt adds flavor, strengthens gluten, and keeps yeast activity in check. Skipping it results in flat-tasting bread.
Sugar or honey. One tablespoon feeds the yeast, supports browning, and adds a hint of sweetness. Honey also adds a gentle floral flavor and helps keep the crumb moist.
Warm water. Aim for about 105°F to 115°F (40°C to 46°C), which feels comfortably warm to the touch. Water that is too hot can kill the yeast, and water that is too cold will slow the rise considerably.
Olive oil. Oil softens the crumb, adds flavor, and helps the bread stay fresh longer. You can substitute another neutral oil or melted butter.
Melted butter. Brushed on the hot loaf, butter softens the crust slightly and adds richness and shine. If you prefer a crunchier crust, skip it or brush on only a little.
Equipment You’ll Need
- A large mixing bowl
- A wooden spoon or dough whisk
- A clean work surface for kneading
- A lightly greased bowl for the first rise
- A parchment-lined baking tray or a 9×5-inch loaf pan
- A sharp knife or razor blade for scoring
- A pastry brush for the butter
- A wire cooling rack
- A kitchen scale (optional) for accurate measuring
- An instant-read thermometer (optional) to check doneness
How to Make Homemade Bread (Step by Step)
Step 1: Mix the Ingredients
In a large bowl, combine the flour, instant yeast, salt, and sugar. Whisk briefly so everything is evenly distributed. Add the warm water and olive oil, then stir until a soft, slightly sticky dough forms and no dry flour remains.
Step 2: Knead the Dough
Turn the dough out onto a lightly floured surface and knead by hand for 8 to 10 minutes. Push the dough away from you with the heel of your hand, fold it back over itself, rotate it a quarter turn, and repeat. The dough begins shaggy and sticky, then gradually turns smooth, elastic, and slightly tacky.
Add only a little extra flour if the dough is extremely sticky. Too much flour is the most common cause of dry, dense bread.
The windowpane test: Pinch off a small piece of dough and gently stretch it between your fingers. If it forms a thin, translucent sheet without tearing, the gluten is well developed. If it tears quickly, knead a few minutes longer.
Using a stand mixer? Knead with the dough hook on medium-low speed for about 6 to 8 minutes.
Step 3: Let the Dough Rise
Place the dough in a lightly greased bowl, turning it once to coat the surface. Cover with a clean towel or plastic wrap and let it rise in a warm place for 60 to 75 minutes, or until doubled in size.
Good rising spots include an oven with only the light switched on, a spot near (not on) a warm appliance, or a draft-free corner of the kitchen. In a cool kitchen the rise will take longer, so judge by the dough rather than the clock.
The poke test: Gently press a floured fingertip into the dough. If the dent springs back slowly and only partway, it’s ready. If it springs back immediately, give it more time. If it stays put and the dough sags, it may be over-proofed.
Step 4: Shape the Loaf
Gently press the dough down to release excess air. On a lightly floured surface, pat it into a rectangle, fold the sides toward the center, then roll it up tightly from the short end and pinch the seam closed. Place the loaf seam-side down on a parchment-lined baking tray, or in a greased loaf pan.
Step 5: Rest and Score
Cover the loaf and let it rise again for 25 to 30 minutes, until puffy. While it rests, preheat the oven to 400°F (200°C).
Just before baking, use a sharp knife to make 2 to 3 shallow cuts across the top, about ¼ inch deep. Scoring lets the loaf expand evenly in the oven rather than bursting open in random spots.
Step 6: Bake to Golden Perfection
Bake for 30 to 35 minutes, until the crust is deep golden brown and the loaf sounds hollow when you tap the bottom. An instant-read thermometer should read about 190°F to 200°F (88°C to 93°C) in the center.
If the top is browning too quickly, tent the loaf loosely with foil for the last 10 minutes.
Step 7: Cool Before Slicing
Transfer the loaf to a wire rack. If you like a softer, richer crust, brush the hot bread with the melted butter right away. For a crispier crust, skip the butter. Let the loaf cool for at least 30 minutes before slicing. The interior is still setting as it cools, and cutting too early can leave the crumb gummy.
The Science Behind Great Homemade Bread
A little baking science makes you a more confident baker.
Gluten development. When flour is mixed with water and kneaded, the proteins glutenin and gliadin link up to form gluten, a stretchy network that traps gas from the yeast. Kneading strengthens that network, which is why the dough turns from shaggy to smooth.
Yeast fermentation. Yeast eats the sugars in the dough and releases carbon dioxide and alcohol. The gas inflates the gluten network like tiny balloons, and the by-products add flavor.
Oven spring. In the first minutes of baking, trapped gases expand and the yeast gives a final burst of activity before it dies, making a well-proofed loaf puff up dramatically.
The Maillard reaction. The golden crust and toasty flavor come from the Maillard reaction between amino acids and sugars. A little sugar or honey helps the browning along.
Starch setting. As the loaf cools, starches finish gelatinizing and the crumb firms up. That’s why patience pays off with cleaner slices and better texture.
Tips for Perfect Homemade Bread
- Weigh your flour. It’s the single biggest upgrade you can make to your baking.
- Check your yeast. Old or poorly stored yeast is the most common reason bread fails to rise. Keep opened yeast in the refrigerator or freezer.
- Use warm, not hot, water. If it feels hot on your wrist, let it cool.
- Resist adding too much flour. A slightly tacky dough makes a softer loaf.
- Knead long enough. Well-developed dough rises higher and has a better texture.
- Judge by the dough, not the clock. Kitchen temperature changes rise times.
- Cover the dough. An uncovered surface dries out and forms a skin that restricts the rise.
- Preheat fully. A properly hot oven gives stronger oven spring.
- Use an oven thermometer. Many home ovens run hotter or cooler than the dial says.
- Let it cool. Patience rewards you with a better crumb.
Troubleshooting Common Bread Problems
The dough didn’t rise. The yeast may be expired, the water too hot or cold, or the kitchen too cool. Test your yeast by stirring a pinch into warm water with a little sugar; it should foam within 10 minutes. Move the dough somewhere warmer and give it more time.
The loaf is dense and heavy. Likely causes are too much flour, too little kneading, or under-proofing. Weigh the flour, knead until smooth and elastic, and let the dough double.
The crust is too hard. Bake slightly less or at a slightly lower temperature, and brush with butter after baking. Wrapping the cooled loaf in a clean towel softens the crust.
The crust is pale. The oven may not be hot enough, or the loaf may need a few more minutes. Check the temperature with an oven thermometer.
The top browned too fast. Tent with foil partway through baking, or move the rack down a level.
The loaf collapsed. The dough probably over-proofed. Shorten the second rise and bake as soon as the loaf looks puffy.
The center is gummy. The loaf may be underbaked or sliced too soon. Check that it sounds hollow and reaches the correct internal temperature, then let it cool fully.
There’s a big gap under the crust. This can come from over-proofing or too much flour during shaping. Shape the loaf with a taut surface and use flour sparingly.
The bread tastes bland. Make sure you included the salt. For more flavor, try a slower, cooler first rise in the refrigerator overnight.
The bread is dry. Too much flour, too long in the oven, or too little fat can cause dryness. Weigh ingredients and start checking for doneness at the early end of the baking window.
Variations to Try
- Honey wheat bread: Replace up to 1 cup of flour with whole wheat flour, use honey, and add a splash more water.
- Herb bread: Knead in 1 to 2 tablespoons of chopped fresh rosemary, thyme, or parsley.
- Garlic bread loaf: Add roasted garlic to the dough and brush with garlic butter after baking.
- Cheese bread: Fold in 1 cup of shredded cheddar, Parmesan, or Gruyère while shaping.
- Seeded bread: Sprinkle sesame, sunflower, poppy, or flax seeds on top before baking.
- Cinnamon raisin bread: Add a tablespoon of cinnamon and ½ cup of raisins to the dough.
- Olive and herb bread: Add chopped olives and Italian seasoning.
- Sandwich loaf: Bake in a loaf pan for a taller, evenly shaped loaf that slices neatly.
- Rustic bakery look: Dust the top with flour before scoring.
- Overnight version: After kneading, refrigerate the dough in a covered, oiled bowl for 8 to 12 hours, then bring it to room temperature, shape, and continue. The slow fermentation builds deeper flavor.
How to Serve Homemade Bread
Warm with butter. Simple and unbeatable. Add flaky salt or a drizzle of honey.
As sandwiches. Great for turkey and cheese, BLTs, egg salad, grilled chicken, or peanut butter and jelly.
As toast. Top with avocado, poached eggs, ricotta and honey, or tomatoes and olive oil.
With soup. Perfect for tomato soup, chicken noodle soup, potato leek soup, or hearty stews.
As grilled cheese. Fresh homemade bread makes an exceptional grilled cheese.
As garlic bread. Spread slices with garlic butter and herbs, then bake until golden.
As French toast. Slightly stale slices soak up custard beautifully.
As bruschetta or crostini. Toast slices and top with tomatoes, basil, and olive oil.
With dips and spreads. Serve with hummus, spinach dip, whipped feta, or olive oil and balsamic.
As croutons or breadcrumbs. Cube or pulse leftovers, then toast them for salads and casseroles.
As bread pudding. Day-old bread is the secret to a rich, custardy dessert.
How to Store Homemade Bread
- Room temperature: Once fully cooled, store in a bread box, paper bag, or loosely wrapped in a clean cloth for 2 to 3 days. A sealed plastic bag keeps the crumb soft but softens the crust.
- Freezer: Slice the cooled loaf, wrap tightly in plastic wrap or foil, and place in a freezer bag for up to 3 months. Toast slices straight from frozen.
- Reheating: Warm a whole loaf in a 350°F (175°C) oven for 8 to 12 minutes to refresh the crust.
- Avoid the refrigerator: Cold temperatures speed up staling and dry out the crumb.
Homemade bread has no preservatives, so it won’t last as long as store-bought. If you spot mold, discard the whole loaf rather than cutting off the affected part.
Frequently Asked Questions
Can I make this bread without kneading?
Kneading gives this loaf its soft, fluffy structure. For a no-knead approach, increase the water slightly, mix until combined, and let the dough rise longer, folding it a few times. The result will be more open and rustic.
Can I use a stand mixer?
Yes. Use the dough hook on medium-low speed for about 6 to 8 minutes, until smooth and elastic.
Can I use active dry yeast instead of instant yeast?
Yes, in the same amount. Dissolve it in the warm water first and wait until it foams, about 5 to 10 minutes. Rising may take a little longer.
Should I use all-purpose or bread flour?
Either works. Bread flour gives more chew and height, while all-purpose gives a slightly softer crumb.
Can I bake this in a loaf pan?
Yes. Grease a 9×5-inch pan, place the shaped dough inside, and let it rise until it crests slightly above the rim before baking.
Why is my dough sticky?
Slight stickiness is normal at the beginning and fades as you knead. If it’s truly unmanageable, add flour a tablespoon at a time.
How do I know when the bread is done?
It should be deep golden brown and sound hollow when tapped on the bottom. An internal temperature of 190°F to 200°F (88°C to 93°C) confirms doneness.
Can I make the dough ahead of time?
Yes. After kneading, refrigerate the dough in an oiled, covered bowl for up to 24 hours, then let it warm up and finish the recipe.
Can I use honey instead of sugar?
Yes, one-to-one. Honey adds subtle flavor and extra moisture.
Can I replace the olive oil with butter?
Yes. Use the same amount of melted butter for richer flavor.
Why didn’t my bread rise well?
Usual culprits are expired yeast, water that was too hot or cold, or a cool kitchen.
Can I double the recipe?
Yes. Double all ingredients, divide the dough into two loaves, and bake. Pan loaves may need a few extra minutes.
Can I make this gluten-free?
This recipe relies on gluten for structure. A gluten-free loaf needs a dedicated recipe and flour blend.
What’s the best way to slice homemade bread?
Use a serrated knife with a gentle sawing motion, and make sure the loaf has cooled completely.
Final Thoughts
Few kitchen projects are as rewarding as baking your own bread. With simple ingredients, a bit of kneading, and some patience while the dough rises, you get a golden, crispy-crusted loaf with a soft, fluffy center, and a kitchen that smells like a real bakery.
This homemade bread recipe is designed to be reliable and flexible, whether you’re baking your first loaf or your hundredth. Master the basics, then experiment with herbs, seeds, cheese, or whole grains. Before long, store-bought bread may start to feel like a missed opportunity.
Quick Recipe Recap:
- Combine flour, yeast, salt, and sugar, then add warm water and olive oil.
- Knead 8 to 10 minutes until smooth and elastic.
- Let rise 60 to 75 minutes until doubled.
- Shape, rest 25 to 30 minutes, and score the top.
- Bake at 400°F (200°C) for 30 to 35 minutes until golden and hollow-sounding.
- Cool before slicing, brushing with butter if you like a softer crust.

Homemade Bread Recipe
Ingredients
This recipe makes one loaf of 10 to 12 slices:
- 3 cups (375 g) all-purpose or bread flour
- 2¼ teaspoons (7 g) instant yeast
- 1½ teaspoons salt
- 1 tablespoon sugar or honey
- 1¼ cups (300 ml) warm water
- 2 tablespoons olive oil
- 1 tablespoon melted butter, for brushing
Ingredient Notes and Smart Swaps
Flour. Both all-purpose and bread flour work. Bread flour has a higher protein content, which builds more gluten and creates a chewier, taller loaf. All-purpose flour gives a slightly softer, more tender crumb. Whichever you use, weigh it if you can. Scooping a cup straight from the bag can add 20 to 30 grams of extra flour, which leads to dry, dense bread. If you only have measuring cups, spoon the flour into the cup and level it off with a knife.
Instant yeast. Instant yeast (also sold as rapid-rise or bread machine yeast) can be mixed directly into the dry ingredients. If you only have active dry yeast, use the same amount, but dissolve it in the warm water for 5 to 10 minutes until foamy, and expect the rises to take a little longer.
Salt. Salt adds flavor, strengthens gluten, and keeps yeast activity in check. Skipping it results in flat-tasting bread.
Sugar or honey. One tablespoon feeds the yeast, supports browning, and adds a hint of sweetness. Honey also adds a gentle floral flavor and helps keep the crumb moist.
Warm water. Aim for about 105°F to 115°F (40°C to 46°C), which feels comfortably warm to the touch. Water that is too hot can kill the yeast, and water that is too cold will slow the rise considerably.
Olive oil. Oil softens the crumb, adds flavor, and helps the bread stay fresh longer. You can substitute another neutral oil or melted butter.
Melted butter. Brushed on the hot loaf, butter softens the crust slightly and adds richness and shine. If you prefer a crunchier crust, skip it or brush on only a little.
Instructions
- A large mixing bowl
- A wooden spoon or dough whisk
- A clean work surface for kneading
- A lightly greased bowl for the first rise
- A parchment-lined baking tray or a 9×5-inch loaf pan
- A sharp knife or razor blade for scoring
- A pastry brush for the butter
- A wire cooling rack
- A kitchen scale (optional) for accurate measuring
- An instant-read thermometer (optional) to check doneness
How to Make Homemade Bread (Step by Step)
Step 1: Mix the Ingredients
In a large bowl, combine the flour, instant yeast, salt, and sugar. Whisk briefly so everything is evenly distributed. Add the warm water and olive oil, then stir until a soft, slightly sticky dough forms and no dry flour remains.
Step 2: Knead the Dough
Turn the dough out onto a lightly floured surface and knead by hand for 8 to 10 minutes. Push the dough away from you with the heel of your hand, fold it back over itself, rotate it a quarter turn, and repeat. The dough begins shaggy and sticky, then gradually turns smooth, elastic, and slightly tacky.
Add only a little extra flour if the dough is extremely sticky. Too much flour is the most common cause of dry, dense bread.
The windowpane test: Pinch off a small piece of dough and gently stretch it between your fingers. If it forms a thin, translucent sheet without tearing, the gluten is well developed. If it tears quickly, knead a few minutes longer.
Using a stand mixer? Knead with the dough hook on medium-low speed for about 6 to 8 minutes.
Step 3: Let the Dough Rise
Place the dough in a lightly greased bowl, turning it once to coat the surface. Cover with a clean towel or plastic wrap and let it rise in a warm place for 60 to 75 minutes, or until doubled in size.
Good rising spots include an oven with only the light switched on, a spot near (not on) a warm appliance, or a draft-free corner of the kitchen. In a cool kitchen the rise will take longer, so judge by the dough rather than the clock.
The poke test: Gently press a floured fingertip into the dough. If the dent springs back slowly and only partway, it’s ready. If it springs back immediately, give it more time. If it stays put and the dough sags, it may be over-proofed.
Step 4: Shape the Loaf
Gently press the dough down to release excess air. On a lightly floured surface, pat it into a rectangle, fold the sides toward the center, then roll it up tightly from the short end and pinch the seam closed. Place the loaf seam-side down on a parchment-lined baking tray, or in a greased loaf pan.
Step 5: Rest and Score
Cover the loaf and let it rise again for 25 to 30 minutes, until puffy. While it rests, preheat the oven to 400°F (200°C).
Just before baking, use a sharp knife to make 2 to 3 shallow cuts across the top, about ¼ inch deep. Scoring lets the loaf expand evenly in the oven rather than bursting open in random spots.
Step 6: Bake to Golden Perfection
Bake for 30 to 35 minutes, until the crust is deep golden brown and the loaf sounds hollow when you tap the bottom. An instant-read thermometer should read about 190°F to 200°F (88°C to 93°C) in the center.
If the top is browning too quickly, tent the loaf loosely with foil for the last 10 minutes.
Step 7: Cool Before Slicing
Transfer the loaf to a wire rack. If you like a softer, richer crust, brush the hot bread with the melted butter right away. For a crispier crust, skip the butter. Let the loaf cool for at least 30 minutes before slicing. The interior is still setting as it cools, and cutting too early can leave the crumb gummy.
The Science Behind Great Homemade Bread
A little baking science makes you a more confident baker.
Gluten development. When flour is mixed with water and kneaded, the proteins glutenin and gliadin link up to form gluten, a stretchy network that traps gas from the yeast. Kneading strengthens that network, which is why the dough turns from shaggy to smooth.
Yeast fermentation. Yeast eats the sugars in the dough and releases carbon dioxide and alcohol. The gas inflates the gluten network like tiny balloons, and the by-products add flavor.
Oven spring. In the first minutes of baking, trapped gases expand and the yeast gives a final burst of activity before it dies, making a well-proofed loaf puff up dramatically.
The Maillard reaction. The golden crust and toasty flavor come from the Maillard reaction between amino acids and sugars. A little sugar or honey helps the browning along.
Starch setting. As the loaf cools, starches finish gelatinizing and the crumb firms up. That’s why patience pays off with cleaner slices and better texture.