
Overnight No-Knead Sandwich Loaf
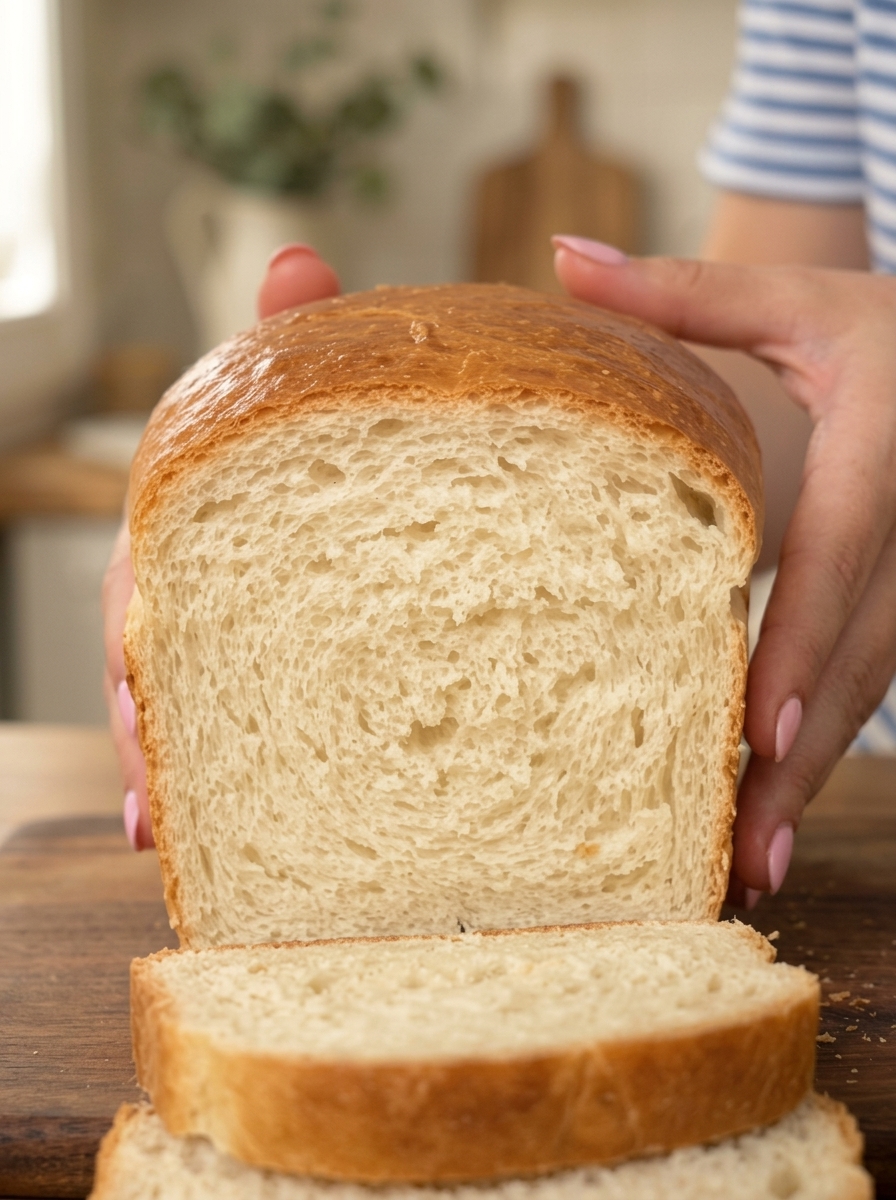
Overnight No-Knead Sandwich Loaf: Soft, Fluffy Homemade Bread While You Sleep 🌙🍞
There is something deeply satisfying about waking up to a bowl of dough that has quietly doubled while you slept. This Overnight No-Knead Sandwich Loaf turns that simple pleasure into a reliable recipe: you stir a handful of pantry ingredients together in about ten minutes, cover the bowl, and let time do the work. By morning, the dough is puffy, bubbly, and full of flavor, ready to be shaped, baked, and turned into a soft, fluffy loaf with a lightly golden crust.
This guide covers everything you need to bake the perfect overnight sandwich bread: the full recipe, a closer look at each ingredient, step-by-step instructions with visual cues, the science behind why the long rest works so well, troubleshooting help, variations, serving ideas, storage and freezing tips, and a detailed FAQ. If you’ve ever wanted bakery-quality sandwich bread without kneading, a mixer, or a complicated schedule, this is the recipe to bookmark.
Why You’ll Love This Overnight No-Knead Sandwich Loaf
Truly no kneading. The dough is mixed with a wooden spoon in a single bowl. There’s no mixer, no dough hook, and no need to work the dough on the counter. Time develops the gluten for you.
Only 10 minutes of active work. Even though the total time stretches across 10 to 12 hours, nearly all of it is hands-off. You mix before bed, then shape and bake the next morning.
Better flavor than same-day bread. A long, slow rise lets the yeast and flour develop deeper, more complex flavor than a quick rise. The finished loaf tastes subtly yeasty and wheaty in the best possible way.
Soft, tender, sandwich-ready texture. Olive oil or butter and optional milk powder keep the crumb tender and the crust gentle, so slices hold fillings without tearing.
Simple pantry ingredients. Flour, salt, yeast, honey, water, and oil are all you need. Nothing specialty, nothing expensive.
Fits a busy schedule. Because the dough rises while you sleep or while you’re at work, fresh bread fits into even the busiest weeks.
Budget-friendly and preservative-free. A homemade loaf costs far less than artisan bakery bread and contains none of the additives found in many store-bought loaves.
Recipe Overview
- Prep Time: 10 minutes
- Cook Time: 30–35 minutes
- Total Time: 10–12 hours (mostly hands-off rising time)
- Servings: 1 loaf (about 12 slices)
Ingredients You’ll Need 🛒
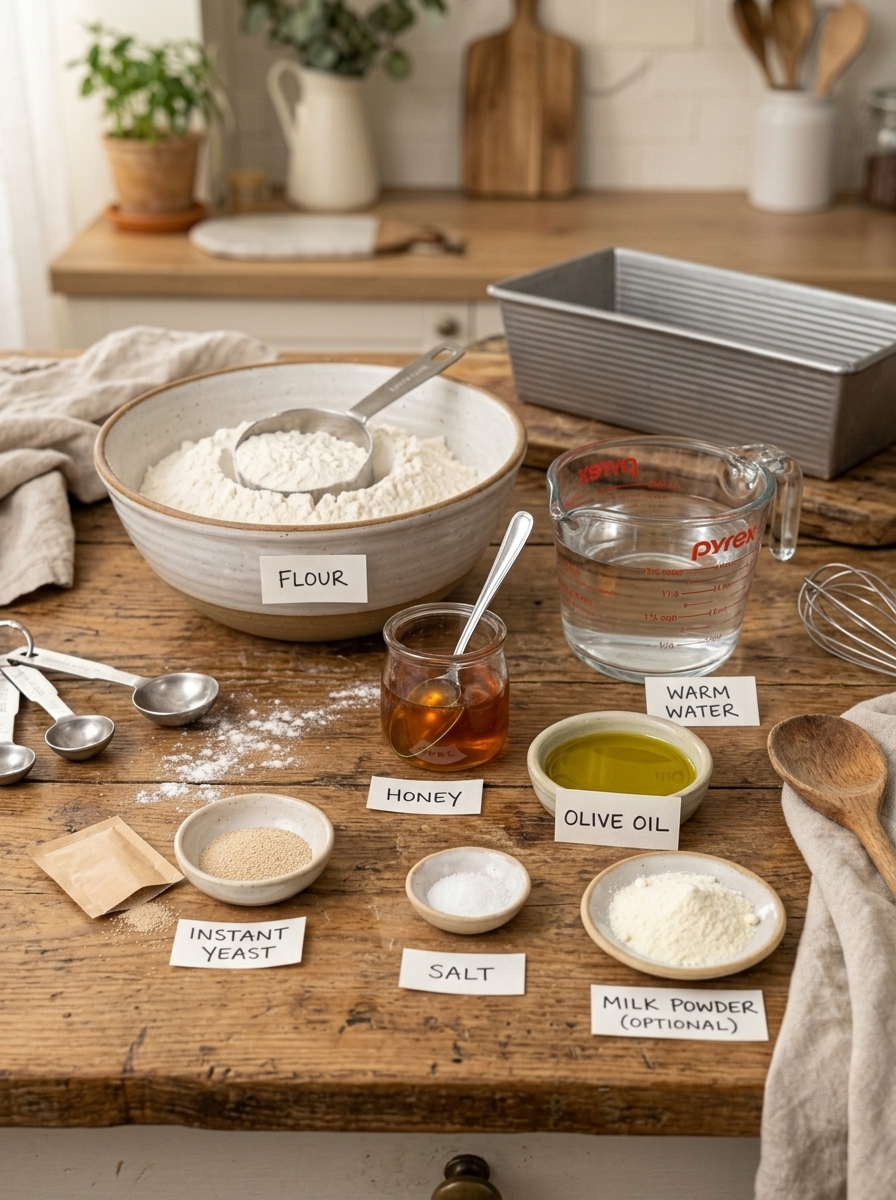
- 3 cups (375 g) all-purpose or bread flour
- 1½ tsp salt
- 2¼ tsp (7 g) instant yeast
- 1 tbsp honey or sugar
- 1¼ cups (300 ml) warm water
- 2 tbsp olive oil or melted butter
- 2 tbsp milk powder (optional)
A Closer Look at the Ingredients
Flour. Either all-purpose or bread flour works. Bread flour has a higher protein content, which builds a stronger gluten network and yields a slightly taller, chewier loaf. All-purpose flour gives a softer, more tender crumb that many people prefer for sandwiches. For consistent results, weigh the flour at 375 grams. Scooping with a measuring cup can pack in extra flour and make the dough dry.
Salt. Salt flavors the bread, strengthens the dough, and regulates yeast activity. Over a long overnight rise, salt is especially important because it keeps fermentation steady and prevents the dough from over-proofing too quickly.
Instant yeast. Instant yeast can be stirred directly into the dry ingredients. With the long rise, the yeast has plenty of time to work. If you only have active dry yeast, you can use the same amount, ideally dissolved in the warm water with the honey for a few minutes first.
Honey or sugar. A small amount of sweetener feeds the yeast, supports browning, and adds a very subtle flavor. The bread will not taste sweet.
Warm water. Use comfortably warm water, roughly 100°F to 110°F (38°C to 43°C). Water that’s too hot can damage the yeast. Because the dough rests for many hours, slightly cooler water is fine, and in a very warm kitchen you can even use cool tap water to slow fermentation.
Olive oil or melted butter. Fat tenderizes the crumb and helps the loaf stay soft for days. Olive oil adds a faint fruity note, while butter gives a richer, more classic sandwich-bread taste.
Milk powder (optional). This ingredient promotes browning, softens the crust and crumb, and gives the loaf a bakery-style flavor. The bread is still delicious without it.
Step-by-Step Instructions 👩🍳
Step 1: Mix the Dough
In a large bowl, whisk together the flour, salt, instant yeast, and milk powder if you’re using it. Add the honey, warm water, and olive oil or melted butter. Stir with a wooden spoon or sturdy spatula until a sticky, shaggy dough forms and no dry flour remains. This takes only about a minute. The dough will look rough and wet, and that’s exactly right. Resist the urge to add more flour.
Step 2: Let It Rise Overnight
Cover the bowl tightly with plastic wrap or a lid so the dough doesn’t dry out. Leave it at room temperature for 8 to 12 hours. By the end, the dough should be puffy, noticeably expanded, and covered with bubbles. In a warm kitchen, it may be ready closer to 8 hours, while in a cool kitchen it may need the full 12 or slightly more. Judge by how the dough looks rather than relying only on the clock.
Step 3: Shape the Loaf
The next morning, lightly flour your work surface and your hands. Gently turn out the dough, which will be soft, sticky, and stretchy. Fold it over itself a few times and shape it into a rough loaf, handling it carefully so you don’t deflate all of the air bubbles that developed overnight. Those bubbles are what give the finished bread its soft, open crumb.
Step 4: Transfer to the Pan
Place the shaped dough, seam side down, into a lightly greased 9×5-inch loaf pan. Cover loosely and let it rest for 20 to 30 minutes while the oven preheats. The dough should puff slightly and reach close to the top of the pan.
Step 5: Bake
Preheat the oven to 375°F (190°C). Bake the loaf for 30 to 35 minutes, until it’s deep golden brown and sounds hollow when tapped. An instant-read thermometer inserted into the center should read roughly 190°F to 200°F (88°C to 93°C). If the top darkens too quickly, tent it loosely with foil for the last 10 minutes.
Step 6: Cool
Remove the loaf from the pan right away and transfer it to a wire rack. Let it cool completely before slicing for the cleanest texture. Cutting into hot bread releases steam and can make the crumb gummy.
Why the Overnight Rise Works 🔬
A long, slow fermentation does several things at once.
First, it builds structure without kneading. As flour and water sit together, gluten proteins gradually link up on their own. Over many hours, this creates a stretchy network strong enough to trap gas and hold the loaf’s shape, with no kneading needed.
Second, it develops flavor. During a slow rise, yeast and naturally present enzymes break down starches and proteins into compounds that give bread its characteristic aroma and taste. The result is a loaf with more depth than one made with a fast, warm rise.
Third, it improves convenience. Because the dough is flexible about timing, you can mix it at night and bake whenever suits your morning, without watching the clock closely.
Expert Tips for the Best Overnight Sandwich Loaf 💡
Brush with butter for an extra-soft crust. Brush the hot loaf with a little melted butter right after it comes out of the oven. The butter softens the crust and adds a lovely sheen and flavor.
Weigh your flour. A kitchen scale is the easiest way to ensure the same dough consistency every time.
Cover the bowl tightly. A dry skin on the dough can create tough patches in the crumb. A lid or tightly stretched plastic wrap keeps the surface moist.
Adjust for your kitchen’s temperature. In summer, consider using cooler water or reducing the rise to around 8 hours. In winter, a cold kitchen may call for the full 12 hours or a warmer spot, such as inside a turned-off oven with the light on.
Use a large enough bowl. The dough can more than double, so choose a bowl with plenty of headroom.
Flour lightly when shaping. The dough is sticky, but too much flour at this stage can leave streaks in the crumb. Use just enough to prevent sticking.
Don’t skip the short second rest. The 20 to 30 minutes in the pan lets the dough relax and puff, giving you a better oven spring and a more even crumb.
Let it cool fully. It’s hard to wait, but the crumb finishes setting as the loaf cools, and slicing early can leave the texture gummy.
Troubleshooting Common Problems
The dough didn’t rise overnight. Check that your yeast is fresh and that the water wasn’t too hot. A very cold kitchen can also slow things dramatically. Move the bowl somewhere warmer and give it extra time.
The dough over-proofed and smells strongly sour or alcoholic. It may have risen too long in a warm kitchen. Next time, use cooler water, shorten the rise, or place the bowl in a cooler spot.
The dough is too sticky to shape. This is normal for no-knead dough. Use floured hands and a lightly floured surface, and work gently and quickly.
The loaf is dense. Too much flour, old yeast, or a short rise can cause density. Weigh the flour and make sure the dough has clearly expanded and become bubbly before shaping.
The loaf collapsed in the oven. The dough may have over-proofed in the pan. Bake it as soon as it reaches the top of the pan.
The crust is too hard. Brush with butter after baking and store the loaf wrapped to keep the crust tender.
The center is gummy. The loaf may need a few extra minutes in the oven, or it may have been cut before cooling.
Delicious Variations to Try 🌾
Whole wheat overnight loaf. Replace up to 1 cup of the flour with whole wheat flour for a nuttier flavor and added fiber. Add a tablespoon or two of extra water if the dough seems stiff.
Herb and garlic loaf. Stir in 1 to 2 teaspoons of dried herbs and a teaspoon of garlic powder for a savory loaf that pairs wonderfully with soup.
Cheddar and chive. Fold in ½ cup of shredded cheddar and a couple of tablespoons of chopped chives when shaping.
Oat-topped loaf. Brush the shaped loaf with water and press rolled oats onto the top for a rustic look and added texture.
Seeded sandwich bread. Sprinkle sesame, sunflower, or pumpkin seeds on top before baking.
Honey wheat blend. Use honey as the sweetener and replace a portion of the flour with whole wheat for a gently sweet, hearty loaf.
Cinnamon raisin version. Add a tablespoon of cinnamon and ½ cup of raisins for a breakfast-friendly loaf that makes incredible toast.
How to Enjoy Your Overnight Sandwich Loaf
This bread is made for everyday eating, and it shines in countless ways.
- Sandwiches: Turkey and cheese, chicken salad, egg salad, and BLTs all hold together beautifully on these soft but sturdy slices.
- Breakfast toast: Slice it thick and top with butter and jam, avocado, or peanut butter and banana.
- Grilled cheese: The tender crumb crisps up golden and buttery in a skillet.
- French toast: Day-old slices absorb custard well and cook up custardy inside and golden outside.
- Croutons and breadcrumbs: Cube or crumble leftover bread and toast it with olive oil and seasoning.
- Bread pudding and strata: Slightly stale slices are ideal for sweet and savory baked dishes.
Storage Instructions
Room temperature: Once fully cooled, store the loaf tightly wrapped or in a bread bag at room temperature for up to 3 days.
Refrigerator: Refrigeration tends to dry bread out faster, so it’s usually best to keep the loaf on the counter unless your kitchen is very warm or humid.
Freezer: For longer storage, slice the cooled loaf, place it in a freezer-safe bag, and freeze for up to 3 months. Toast slices straight from the freezer or thaw them at room temperature for 30 minutes or so.
Reviving day-old bread: Slightly stale slices come back to life in a toaster or a hot skillet with a little butter.
Frequently Asked Questions
Do I really have to let the dough rise 8 to 12 hours? That window gives the best flavor and structure, but the exact time depends on your kitchen’s temperature. Look for a puffy, bubbly, clearly expanded dough rather than relying only on the clock.
Can I refrigerate the dough overnight instead of leaving it on the counter? Yes, though a cold rise is much slower. If you refrigerate the dough, expect it to take longer to expand, and allow it to come closer to room temperature and finish rising before shaping.
Can I use active dry yeast instead of instant yeast? Yes. Use the same amount and dissolve it in the warm water with the honey for 5 to 10 minutes first. Then proceed with the recipe.
Why is my dough so wet and sticky? No-knead dough is intentionally high in moisture so that gluten can develop on its own over time. Use floured hands and a lightly floured surface when shaping.
Can I use bread flour instead of all-purpose flour? Absolutely. Bread flour creates a slightly taller, chewier loaf. You may need an extra teaspoon or two of water if the dough looks stiff.
Can I make this recipe with whole wheat flour? You can replace part of the flour with whole wheat. Using all whole wheat will give a denser loaf and require more water.
Can I double the recipe? Yes. Mix the dough in a larger bowl, divide it between two loaf pans after the overnight rise, and bake both on the same rack with a little space between them.
What if my kitchen is very hot? Use cooler water and consider shortening the rise to around 8 hours, or let the dough rest in the coolest part of your home to prevent over-proofing.
What if my kitchen is very cold? Move the dough to a warmer spot, such as a turned-off oven with the light on, or let it rise for the full 12 hours or a bit longer.
How do I know when the loaf is done? The loaf should be deep golden brown and sound hollow when tapped. An internal temperature of roughly 190°F to 200°F (88°C to 93°C) confirms it’s fully baked.
Can I add mix-ins like cheese or herbs? Yes. Fold them in gently when shaping the loaf, or stir dried herbs into the dry ingredients at the start.
Is this the same as the regular no-knead sandwich bread? It uses the same simple ingredients, but the long, slow rise develops more flavor and lets you spread the work across the night. Same-day recipes are faster, while this one trades time for flavor and flexibility.
Final Thoughts 🌙🥖
This Overnight No-Knead Sandwich Loaf is the ultimate low-effort, high-reward bread recipe. Ten minutes of mixing before bed gives you a dough that develops flavor, structure, and softness while you rest, and a short shaping and baking session in the morning delivers a golden, fluffy loaf worthy of any sandwich, toast, or breakfast table. With simple pantry ingredients, no kneading, and a method that fits easily into a busy life, it’s a recipe you’ll find yourself making again and again.
Mix a batch tonight, let the dough work its quiet magic, and wake up to the irresistible aroma of fresh homemade bread tomorrow morning!