
Simple Homemade No-Knead Bread
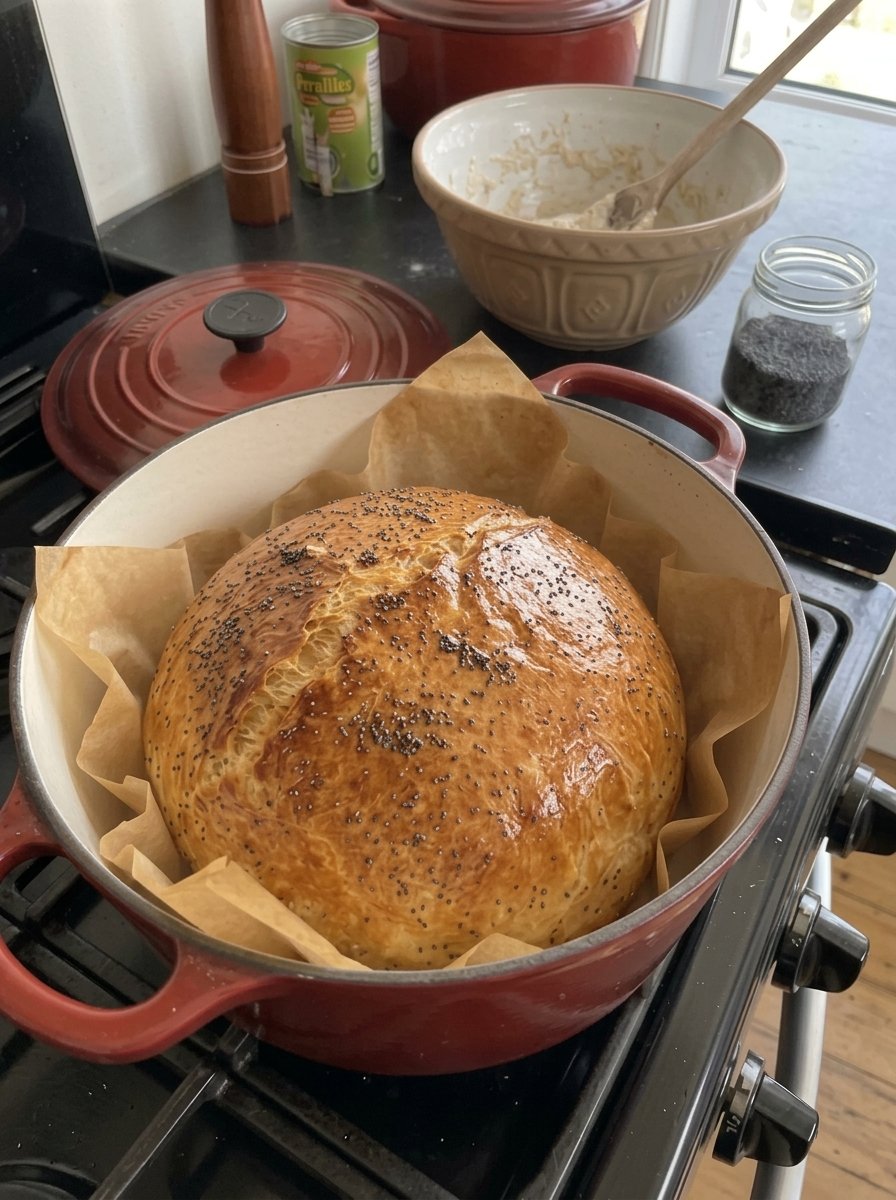
Simple Homemade No-Knead Bread: Crusty, Easy, and Foolproof
Meta description: Make bakery-style no-knead bread at home with just 4 ingredients. Crispy crust, soft airy inside, no kneading required. Step-by-step recipe, tips, FAQs, and troubleshooting.
URL slug: /simple-homemade-no-knead-bread
Primary keyword: no-knead bread
Secondary keywords: homemade bread recipe, easy bread recipe, Dutch oven bread, crusty bread, 4-ingredient bread, beginner bread recipe, no-knead bread with instant yeast
Simple Homemade No-Knead Bread
There’s something deeply satisfying about pulling a golden, crackling loaf of bread out of your own oven. The good news is that you don’t need special skills, a stand mixer, or an hour of kneading to do it. This simple homemade no-knead bread is rustic, crusty, and wonderfully soft inside, and it needs only four pantry staples: flour, salt, yeast, and water.
You stir the dough in one bowl, let it rise, fold it into a round, and bake it in a hot Dutch oven. The trapped steam creates the thin, crisp, blistered crust you’d expect from a bakery, while the inside stays tender and airy. Enjoy it warm with butter, alongside a bowl of soup, or sliced for sandwiches.
This guide covers the full recipe, why it works, ingredient notes, step-by-step tips, troubleshooting, variations, storage, serving ideas, and answers to the most common questions. It’s written for first-time bread bakers and for experienced ones who want an easy loaf.
Why You’ll Love This No-Knead Bread Recipe
It truly requires no kneading. Time does the work that kneading normally does. As the wet dough rests, the flour hydrates and gluten develops on its own, so you only need a spoon and a bowl.
It uses four simple ingredients. Flour, salt, instant yeast, and warm water. There are no eggs, dairy, sugar, or oils, so it’s a great recipe to keep in your back pocket.
It has a bakery-style crust. Baking in a preheated, covered Dutch oven traps steam around the loaf, which is what gives professional bread its crisp, deep golden crust.
It’s beginner-friendly. The dough is forgiving. It’s meant to be sticky and shaggy, so there’s no technique to perfect.
It’s mostly hands-off. Active work takes only a few minutes. The rest of the time is rising, preheating, and baking while you do something else.
It’s versatile. One loaf can become toast, sandwiches, bruschetta, croutons, breadcrumbs, or a sidekick to almost any meal.
It’s budget-friendly. A homemade loaf costs a fraction of artisan bread from a bakery.
ingredients
- 3 cups (375 g) all-purpose flour or bread flour
- 1½ tsp salt
- 2¼ tsp (7 g) instant yeast
- 1½ cups (360 ml) warm water
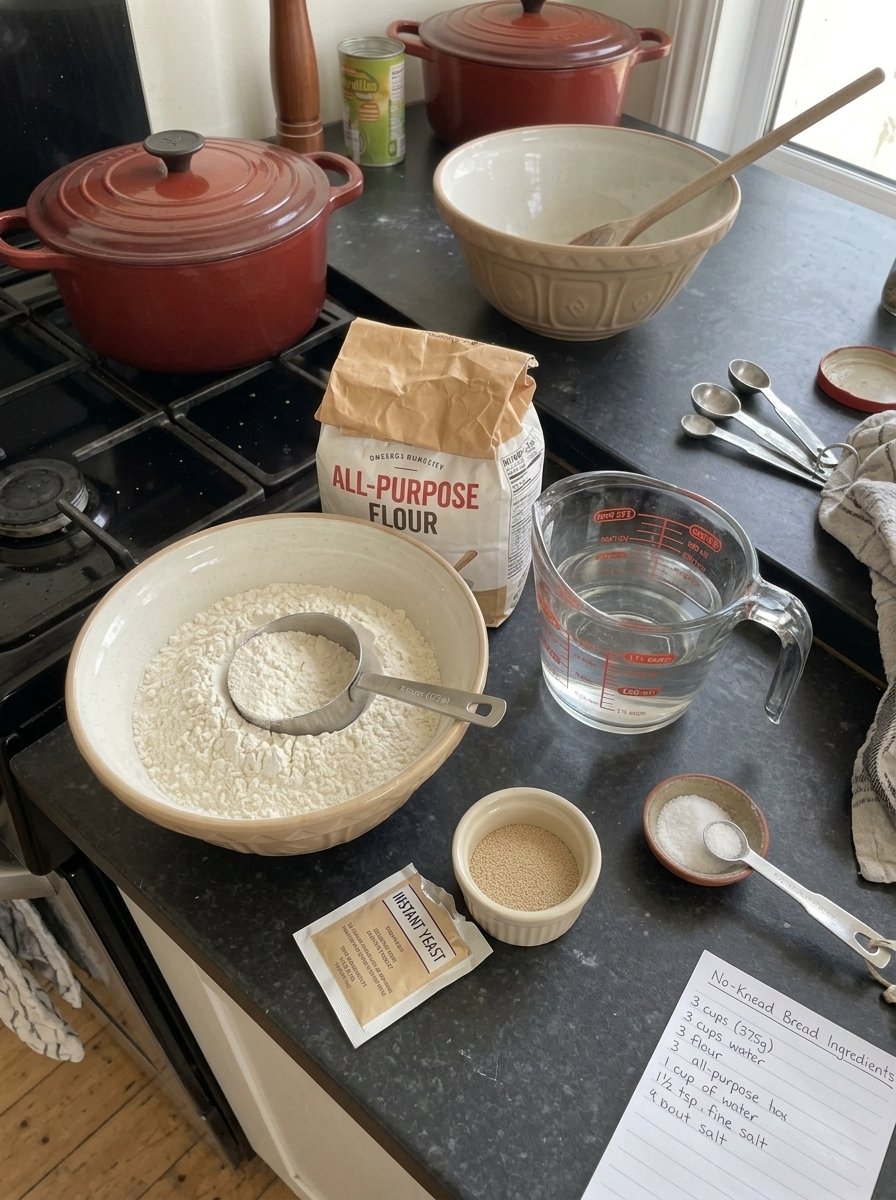
Ingredient Notes: What Each One Does
With only four ingredients, each one matters. Here’s what they do and how to choose them.
Flour: All-Purpose or Bread Flour
Both work well. Bread flour has more protein, which builds a stronger gluten structure, so the loaf tends to rise a bit taller and have a chewier crumb. All-purpose flour gives a slightly softer, more tender result and is perfectly good for this recipe. Use whichever you have.
For the most consistent results, weigh your flour with a kitchen scale (375 g). If you measure by cups, spoon the flour into the cup and level it off rather than scooping straight from the bag, which packs in too much flour and makes the dough dry.
Salt
Salt adds flavor and also helps regulate the yeast and strengthen the dough. Bread without enough salt tastes flat. Fine sea salt or table salt dissolves easily in the dry mix. If you use a coarser kosher salt, measurements by volume can differ between brands, so go by weight if you can.
Instant Yeast
Instant yeast (sometimes sold as rapid-rise or bread machine yeast) can be mixed straight into the dry ingredients without proofing first. The amount in this recipe, 2¼ teaspoons, is about one standard packet (7 g).
If you only have active dry yeast, you can use the same amount, but dissolve it in the warm water for about 5–10 minutes until it looks foamy before adding it to the flour. Rising may take a little longer.
Warm Water
The water should be warm, not hot. Around 100–110°F (38–43°C) feels comfortably warm on your wrist. Water that is too hot can kill the yeast, and water that is too cold slows the rise significantly. If your dough doesn’t rise, water temperature is one of the first things to check.
How to Make No-Knead Bread: Step-by-Step
Step 1: Mix the Dough
In a large bowl, combine the flour, salt, and instant yeast. Pour in the warm water and stir with a wooden spoon until a sticky, shaggy dough forms. Do not knead.
Stir only until no dry flour remains. The dough will look rough, wet, and messy, and that’s exactly right. A wetter dough produces the open, airy crumb that makes no-knead bread so good.
Step 2: Let It Rise
Cover the bowl with plastic wrap or a clean kitchen towel. Leave it in a warm place for 1½–2 hours, or until the dough has doubled in size and looks bubbly.
Look for bubbles on the surface and along the sides of the bowl. A good warm spot might be an oven with only the light on, the top of the refrigerator, or a draft-free corner of your kitchen. In a cool kitchen, the rise can take longer, so judge by how the dough looks rather than the clock alone.
Step 3: Shape the Loaf
Lightly flour your work surface and turn out the dough. With floured hands, gently fold the edges toward the center to form a round loaf. Avoid pressing out too much air.
The dough will be sticky, so don’t be shy with the flour on your hands and counter. Work quickly and gently. Folding the dough over itself a few times creates surface tension, which helps the loaf hold its shape and rise upward in the oven. Flip the loaf over so the smooth side faces up, or leave the seam side down if you prefer a more rustic look.
Step 4: Preheat the Oven and Dutch Oven
Place a Dutch oven with its lid inside and preheat the oven to 450°F (230°C) for about 30 minutes. If you don’t have a Dutch oven, use a heavy oven-safe pot with a lid.
Preheating the pot is essential. A screaming-hot pot gives the dough an immediate burst of heat, which helps it spring up and form a crisp crust. While the oven heats, the shaped dough can rest for a few minutes on a piece of parchment paper.
Step 5: Transfer the Dough
Carefully place the dough on a piece of parchment paper and lower it into the hot Dutch oven. Score the top with a sharp knife if desired.
Be careful: the pot is extremely hot. Use thick oven mitts and handle the lid with care. Lifting the dough by the edges of the parchment makes the transfer easy. Scoring, which means making a shallow slash across the top, gives steam a place to escape and helps control how the loaf expands. A simple single slash or an X works well. Trim any excess parchment that hangs over the pot so it doesn’t touch the oven heating elements.
A note on safety: many parchment papers are rated for temperatures near 420–450°F, so check the packaging for your brand. If yours has a lower limit, you can lower the dough into the pot on a floured or cornmeal-dusted surface instead, or use a parchment rated for higher heat.
Step 6: Bake
Cover and bake for 30 minutes. Remove the lid and bake for another 5–10 minutes, until the crust is deep golden brown and crisp.
The covered portion traps the steam released by the dough, keeping the crust soft and stretchy so the loaf can expand fully. Uncovering it lets the surface dry out and brown. For a darker, crunchier crust, bake closer to 10 minutes uncovered. For a lighter crust, take it out after 5.
Step 7: Cool
Carefully remove the bread and transfer it to a wire rack. Let it cool for at least 30 minutes before slicing to help the inside set properly.
This is the hardest step, because warm bread smells incredible. But the crumb is still finishing its cooking as it cools. Cutting too early can make the inside seem gummy or doughy. You may also hear the crust crackle as it cools, which is a good sign.
Pro Tips for the Best No-Knead Bread
Use a kitchen scale. Weighing flour is the single best way to get consistent dough. Too much flour makes the loaf dense, while too little makes it hard to handle.
Don’t skip the Dutch oven preheat. The hot pot plus trapped steam is the secret to the crust. A cold pot gives a paler, flatter loaf.
Make sure the dough is bubbly. Time is a guideline. A warm kitchen speeds up the rise, and a cool one slows it down. Look for doubled volume and a bubbly, jiggly surface.
Handle the dough gently when shaping. The bubbles you built up during the rise are what create the airy crumb. Press them out and you’ll get a denser loaf.
Flour your hands, not just the counter. Sticky dough is normal. Dusting your hands lets you fold it without it clinging to your fingers.
Check doneness. The loaf should be deep golden brown and sound hollow when tapped on the bottom. If you use an instant-read thermometer, bread is generally done when the center reaches roughly 200–210°F (93–99°C).
Be patient and let it cool. The crumb needs time to set.
Try a longer rise for more flavor. This recipe is designed for a quick 1½–2 hour rise, but many bakers let no-knead dough rest longer, even overnight in the refrigerator, for deeper, more complex flavor. If you try this, expect to adjust the timing, since cold fermentation is slower. It’s a worthwhile experiment once you’re comfortable with the basic loaf.
Troubleshooting Common No-Knead Bread Problems
My dough didn’t rise. Your yeast may be old or expired, or your water may have been too hot or too cold. Check the date on your yeast, and use warm water around 100–110°F. Also make sure the dough has had enough time in a warm spot.
My bread is dense. This can come from too much flour (measure by weight), a dough that wasn’t left to rise long enough, or a shaping step that pressed out too much air. Handle the dough gently and let it double.
The crust is too hard or too thick. The loaf may have baked too long uncovered. Reduce the uncovered time to 5 minutes, or check it a little earlier. Letting it cool fully also helps the crust soften a bit.
The crust is too pale. Bake uncovered for the full 10 minutes, or a few minutes longer, until it is deep golden brown. Make sure your oven was fully preheated.
The bottom of the loaf is too dark. Ovens and Dutch ovens vary. Try placing the pot on a lower or middle rack, or setting a baking sheet on the rack below to buffer the heat.
The inside is gummy. The loaf probably needed more cooling time or a few more minutes in the oven. Always let it cool at least 30 minutes before cutting.
The dough is too sticky to handle. Some stickiness is intended. Use well-floured hands and a lightly floured surface, and work quickly. Don’t add large amounts of extra flour to the dough itself.
The loaf spread flat instead of rising up. The dough may have over-risen, or it wasn’t shaped with enough surface tension. Fold it gently but firmly into a round, and bake as soon as the oven and pot are ready.
Variations and Add-Ins
Once you’ve mastered the basic loaf, it’s easy to customize.
Herb bread: Stir 1–2 tablespoons of chopped fresh rosemary, thyme, or chives into the dry ingredients.
Garlic and cheese bread: Fold in a few cloves of minced garlic and about ½ cup of shredded cheese, such as cheddar or Parmesan, when mixing the dough.
Seeded bread: Add 2 tablespoons of sesame, sunflower, or pumpkin seeds to the dough and sprinkle a few more on top before baking.
Olive bread: Stir in ½ cup of chopped olives, patted dry first so they don’t add excess moisture.
Whole wheat blend: Replace a portion of the white flour with whole wheat flour. Start by swapping about ½ cup, and expect a slightly denser, nuttier loaf. You may need a touch more water, since whole wheat flour absorbs more.
Cinnamon raisin bread: Add a teaspoon or two of cinnamon and a handful of raisins for a lightly sweet loaf. For a sweeter result, you could add a little sugar, though that changes the recipe slightly and may affect browning.
Everything-bagel style: Sprinkle everything bagel seasoning on top just before baking.
These add-ins change the dough’s hydration and flavor, so start small and adjust to your taste.
No Dutch Oven? Here’s What to Use Instead
A Dutch oven is the best tool for this bread, but you have options.
A heavy oven-safe pot with a lid: Any thick, lidded pot that can safely handle 450°F works. Check that the lid knob is also oven-safe at that temperature.
A baking sheet with an inverted roasting pan or oven-safe bowl: Bake the loaf on a preheated baking sheet and cover it with a large oven-safe pot or roasting pan for the first part of baking to trap steam.
A baking stone or sheet with a pan of water: Place a shallow pan of hot water on the lower rack to create steam, and bake the loaf on a preheated baking sheet or stone. The crust will be a bit less dramatic, but the bread will still be good.
The results differ slightly from a Dutch oven, but you’ll still get a tasty homemade loaf.
What to Serve With Homemade No-Knead Bread
This bread goes with almost everything.
With meals
- Alongside a bowl of tomato soup, vegetable soup, or hearty stew
- Next to a big salad or a pasta dish
- To soak up sauce from chili, curry, or braised dishes
For breakfast
- Toasted with butter and jam
- Topped with avocado, a fried egg, and a pinch of salt
- As French toast, since slightly stale crusty bread works beautifully
For lunch and snacks
- Sliced for sandwiches, grilled cheese, or melts
- As bruschetta with tomatoes, basil, and olive oil
- Dipped in olive oil with balsamic vinegar and herbs
- With cheese, olives, and fruit on a simple board
Make-ahead uses
- Cubed and toasted into croutons
- Blitzed into fresh breadcrumbs
- Cut into strips for dipping
And of course, nothing beats a warm slice with butter melting into it.
How to Store Homemade Bread
Room temperature: Once fully cooled, store the loaf cut-side down on a cutting board, or keep it in a paper bag or a bread box for 2–3 days. A paper bag helps keep the crust crisp. Plastic bags soften the crust but keep the crumb moist longer.
Freezer: Slice the cooled loaf, wrap it tightly or place it in a freezer-safe bag, and freeze for up to 3 months. Toast slices straight from the freezer, or thaw the whole loaf at room temperature and refresh it in a warm oven for about 10 minutes to revive the crust.
Refrigerator: Not generally recommended, because bread tends to go stale faster in the fridge.
Reviving day-old bread: Lightly sprinkle the crust with water and warm the loaf in a 350°F (175°C) oven for 5–10 minutes. It’ll taste freshly baked again.
Since homemade bread has no preservatives, it’s best enjoyed within a few days.
Frequently Asked Questions
Do I really not have to knead this bread?
Correct. The high water content and resting time let gluten develop on its own. Stirring until the dough comes together is all you need.
Can I use active dry yeast instead of instant yeast?
Yes. Use the same amount, but dissolve it in the warm water first and let it sit for about 5–10 minutes until foamy. The rise may take a little longer.
Can I use all-purpose flour instead of bread flour?
Yes, the recipe works with either. Bread flour gives a chewier, taller loaf, while all-purpose gives a slightly softer crumb.
What size Dutch oven should I use?
A 5- to 6-quart Dutch oven is a good fit, though smaller or slightly larger pots will work. A pot that is too large may produce a flatter loaf.
Can I bake this bread without parchment paper?
Yes, but the dough may stick. If you skip the parchment, dust the bottom of the pot lightly with flour or cornmeal. Be careful, since the pot is extremely hot.
Why is my dough so sticky?
No-knead dough is supposed to be wet and sticky. That moisture is what makes the crumb open and tender. Use floured hands and a floured surface when shaping.
How do I know when the dough has risen enough?
It should be roughly doubled in size, bubbly on top, and wobbly when you gently shake the bowl.
Can I let the dough rise overnight?
Many bakers do, often in the refrigerator, for more flavor. This recipe is written for a 1½–2 hour rise, so if you choose a longer, colder rise, you’ll need to adapt the timing and watch the dough rather than the clock.
Can I make it without a Dutch oven?
Yes. Use any heavy, lidded, oven-safe pot, or create steam using one of the alternatives above.
Why did my bread come out dense?
The usual culprits are too much flour, not enough rising time, old yeast, or pressing the air out during shaping.
Can I add herbs or cheese?
Absolutely. Stir them in during mixing. Start with small amounts so the dough isn’t weighed down.
Is this bread vegan?
Yes. The basic recipe contains only flour, salt, yeast, and water, so it’s vegan and dairy-free. It contains gluten, so it’s not suitable for people avoiding wheat or gluten.
How long should I cool the bread before slicing?
At least 30 minutes. Longer is even better for a clean slice.
Final Thoughts
Simple homemade no-knead bread proves you don’t need fancy equipment or years of baking experience to make something truly impressive. Four ingredients, one bowl, and a hot pot are enough to produce a loaf with a crisp, golden crust and a soft, airy inside.
Remember the key steps: use warm (not hot) water, let the dough double and turn bubbly, shape it gently, preheat the Dutch oven fully, and let the loaf cool before slicing. Those habits make the difference between a good loaf and a great one.
Once you’ve baked the basic recipe, try herbs, cheese, or seeds, or experiment with a longer, slower rise for even more flavor. Before long, this will be the loaf you bake every week.
If you tried this recipe, save it for later, share it with a friend who’s nervous about baking bread, and leave a comment about how your loaf turned out.