
Soft & Fluffy No-Knead Milk Bread Recipe
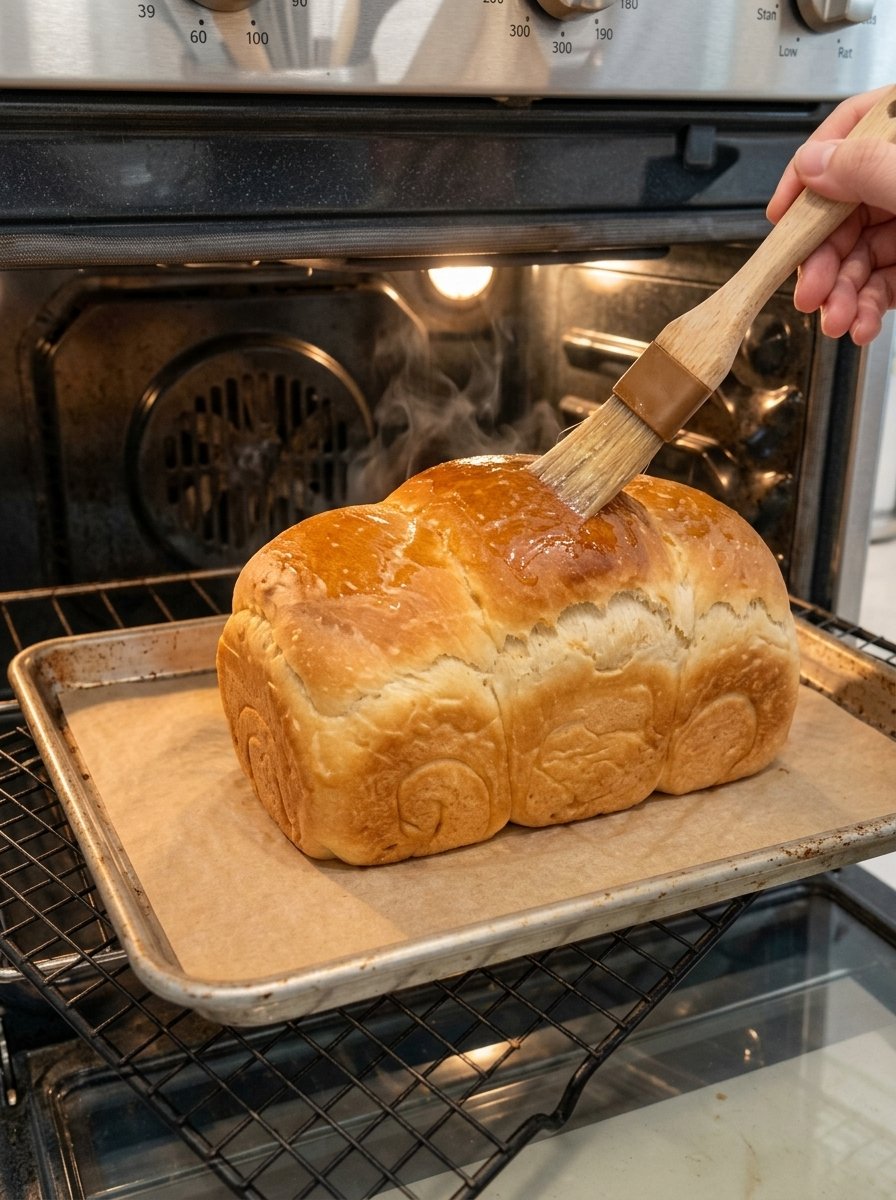
Soft & Fluffy No-Knead Milk Bread Recipe: Easy, Tender & Delicious 🍞🥛
There is nothing quite like the smell of freshly baked homemade bread drifting through the kitchen. This no-knead milk bread is incredibly tender, airy and delicious, with a beautiful golden crust and a soft, pillowy center that tears apart in cloud-like layers. Every slice has a delicate milky flavor that makes it hard to stop at just one.
Even better, this easy homemade bread uses simple pantry ingredients and requires absolutely no kneading. You do not need a stand mixer, a bread machine or any complicated technique. A bowl, a wooden spoon, a loaf pan and a little patience are all it takes to turn out a bakery-style loaf at home. It is perfect for breakfast, sandwiches, toast, French toast, or simply enjoying warm with a little butter and jam.
In this guide, you will find the full recipe, a clear explanation of why milk bread is so soft, ingredient notes, detailed step-by-step instructions, troubleshooting help, creative variations, storage and freezing advice, and answers to the most frequently asked questions.
Table of Contents
- Why You’ll Love This Recipe
- Recipe Overview
- What Is Milk Bread?
- Ingredients (and Why Each One Matters)
- Step-by-Step Instructions
- Tips for Perfect Milk Bread
- Common Bread Problems (and How to Fix Them)
- Variations and Flavor Ideas
- Ways to Serve and Use Milk Bread
- Storage, Freezing and Reheating
- Frequently Asked Questions
- Final Thoughts
Why You’ll Love This Recipe
- No kneading at all. Mix everything with a spoon and let time do the work. The long rise develops gluten for you.
- Incredibly soft and fluffy. The combination of milk, egg and butter creates a tender, pillowy crumb that stays soft for days.
- Simple pantry ingredients. Flour, milk, sugar, yeast, salt, butter and an egg. Nothing fancy or hard to find.
- No special equipment. No stand mixer, no dough hook, no bread machine. One bowl and one loaf pan.
- Beginner friendly. If you have never baked bread before, this is a wonderful place to start. The dough is forgiving and the steps are straightforward.
- Versatile. Use it for sandwiches, toast, French toast, bread pudding, grilled cheese or a simple slice with butter and honey.
- Great for meal prep. Slice and freeze the loaf for quick breakfasts all month long.
What Is Milk Bread?
Milk bread is a style of enriched bread made with milk in place of some or all of the water. It is famous for a feathery, tender crumb and a subtle, slightly sweet, creamy flavor. You may know it from Japanese shokupan, Hokkaido milk bread or Chinese-style soft buns, all of which are beloved for their cloud-like softness.
Traditional milk bread often uses a technique called tangzhong, a cooked flour-and-liquid paste that locks in moisture, along with plenty of kneading. This easy version skips those steps. By using warm milk, an egg and melted butter, and by allowing a generous rise time, you still get a wonderfully soft, fluffy loaf with far less work.
Why does milk make bread softer? Milk contains fat, proteins and natural sugars. The fat tenderizes the crumb, the proteins help the crust brown beautifully, and the milk sugars add a gentle sweetness and richness. Compared with a water-based loaf, milk bread has a softer texture, a more golden color and a longer shelf life.
Ingredients (and Why Each One Matters)
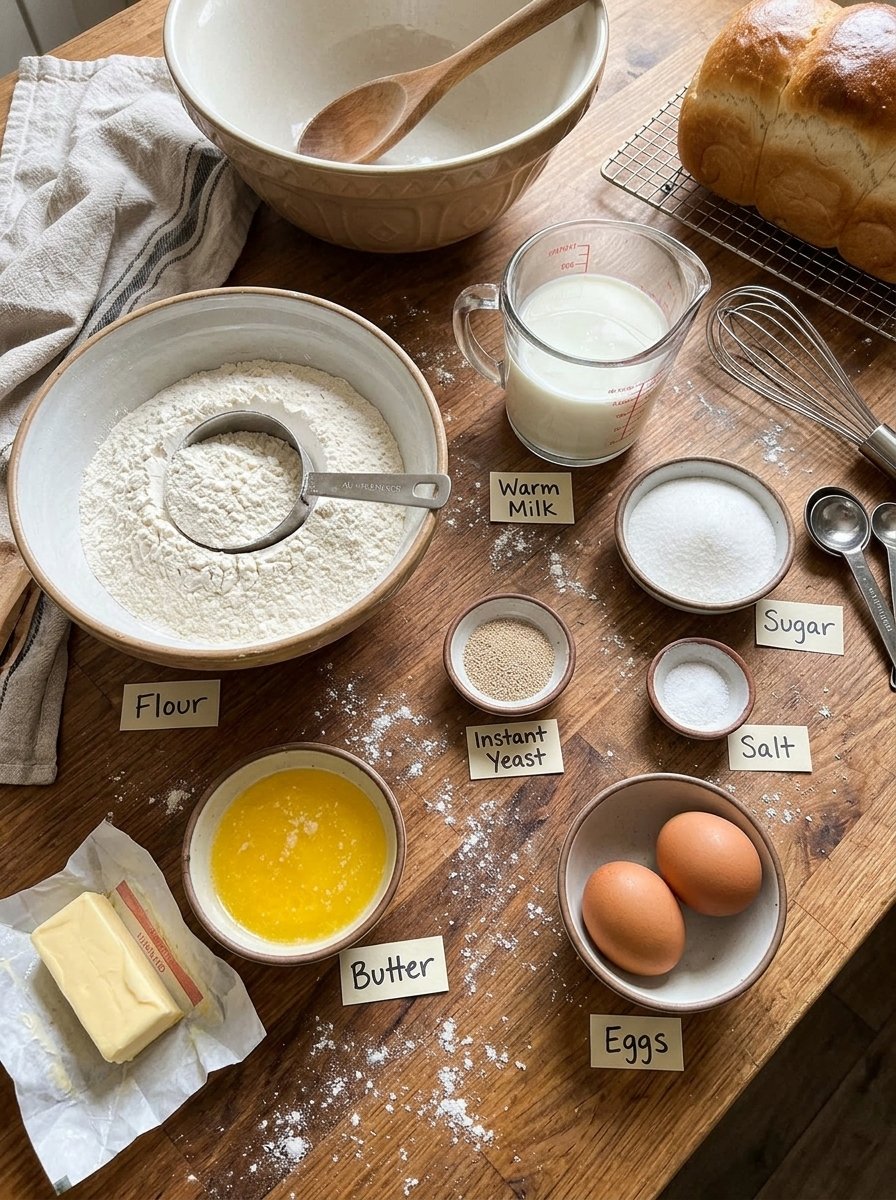
For the Bread
- 3 cups (375 g) all-purpose flour or bread flour
- 1 cup (240 ml) warm milk
- 2 tablespoons (25 g) granulated sugar
- 2 teaspoons (7 g) instant yeast
- 1 teaspoon salt
- 2 tablespoons (28 g) unsalted butter, melted
- 1 large egg, room temperature
For the Egg Wash
- 1 egg
- 1 tablespoon milk
Optional Topping
- 1 tablespoon melted butter for brushing after baking
Ingredient Notes
Flour. All-purpose flour gives a soft, tender loaf, while bread flour has more protein and produces a slightly chewier, taller loaf with more structure. Both work well here. If you can, weigh your flour. Scooping flour straight from the bag packs it down and can add too much, which leads to a dense loaf. If you use cups, spoon the flour into the cup and level it with a knife.
Warm milk. The milk should feel comfortably warm to the touch, roughly 100–110°F (38–43°C). It should never be hot. Milk that is too hot can damage or kill the yeast, and bread will not rise. Whole milk gives the richest flavor and softest texture, but 2% milk works too.
Sugar. A small amount of sugar feeds the yeast, helps the crust brown and adds a very gentle sweetness. This is not a sweet bread, just one with a hint of richness.
Instant yeast. Instant yeast can be mixed directly with the other ingredients. If you only have active dry yeast, you can use the same amount, but let it sit in the warm milk and sugar for about 5 minutes until foamy before continuing. The foam tells you the yeast is alive and active.
Salt. Salt controls the yeast, strengthens the dough and brings out flavor. Do not skip it, or the bread will taste flat.
Melted butter. Butter adds flavor, softness and a tender crumb. Let it cool slightly before adding so it does not warm the dough too much.
Egg. The egg enriches the dough, adds structure and gives a lovely golden color to the crumb. Use it at room temperature so it blends in smoothly and does not chill the dough.
Egg wash. The mixture of egg and milk brushed on top gives the loaf a glossy, deep golden crust that looks like it came from a bakery.
Step-by-Step Instructions
Step 1: Prepare the Dough
In a large mixing bowl, combine the warm milk, sugar and yeast. If you are using active dry yeast, let the mixture sit for about 5 minutes until foamy. With instant yeast you can move on right away.
Step 2: Add the Ingredients
Add the egg, melted butter, flour and salt to the bowl. Mix with a wooden spoon or sturdy spatula until a sticky, soft dough forms and no dry flour remains. The dough will look shaggy and wet. This is exactly right. No kneading is necessary!
Step 3: First Rise
Cover the bowl with a clean kitchen towel or plastic wrap. Let the dough rise in a warm place for 1 to 1½ hours, or until it has doubled in size and looks puffy with visible bubbles. A turned-off oven with the light on, or a spot near a warm (not hot) appliance, is an ideal rising spot.
Step 4: Shape the Bread
Lightly grease a standard loaf pan (about 9 × 5 inches). Gently transfer the risen dough to a lightly floured surface. With floured hands, shape it into a loaf by folding the edges toward the center, then pinching the seam closed. Place it seam-side down into the prepared pan. Handle the dough gently to keep the air bubbles that make the bread fluffy.
Step 5: Second Rise
Cover the pan and let the dough rise for another 30 to 45 minutes, until puffy and nearly doubled, rising to just above the edge of the pan. Do not let it overproof, or it may collapse in the oven.
Step 6: Prepare the Egg Wash
Whisk the egg and milk together until smooth. Gently brush it over the top of the dough using a soft pastry brush. Be careful not to let the egg wash drip down the sides of the pan, as it can glue the bread to the pan and limit the rise.
Step 7: Bake
Preheat your oven to 350°F (175°C) while the dough finishes its second rise. Bake for 30 to 35 minutes, until the loaf is deep golden brown and fully baked. The bread should sound hollow when tapped on the bottom, and an instant-read thermometer inserted into the center should read about 190–200°F (88–93°C). If the top browns too quickly, loosely cover it with a piece of aluminum foil for the remaining time.
Step 8: Brush and Cool
Remove the bread from the oven and brush the top with melted butter if desired. This keeps the crust soft and adds a beautiful sheen. Let the loaf cool in the pan for 10 minutes, then carefully turn it out onto a wire rack to cool.
Step 9: Slice and Enjoy
Let the bread cool for at least 30 minutes before slicing. Cutting too soon can make the crumb gummy because the inside is still setting. Use a serrated bread knife for clean slices. Enjoy with butter, jam, honey or your favorite sandwich fillings! 🍞❤️
Tips for Perfect Milk Bread
💡 Use warm, not hot, milk. Aim for roughly bathwater temperature. If it feels hot on your finger, let it cool for a few minutes.
💡 Keep the dough soft and slightly sticky. Resist the urge to add lots of extra flour. A wetter dough produces a softer, more open crumb. Wet your spatula or lightly oil your hands if the dough sticks.
💡 Give it enough time. Both rises matter. Rising is what develops flavor and builds structure in a no-knead dough. In a cool kitchen, the dough may take longer, so watch the dough rather than the clock. It should double in size.
💡 Try the poke test. Gently press a floured finger into the dough. If the indentation springs back slowly and only partly, the dough is ready. If it springs back immediately, it needs more time. If it does not spring back at all, it may be overproofed.
💡 Cover the top if it browns too fast. A loose piece of foil protects the crust while the inside finishes baking.
💡 Brush with butter right after baking. This softens the crust and gives a rich, glossy finish.
💡 Let it cool before slicing. Patience gives you clean slices and the best texture.
💡 Weigh ingredients for consistency. A kitchen scale takes the guesswork out of baking and gives the same results each time.
💡 Use a thermometer. An instant-read thermometer is the most reliable way to tell when bread is done.
Common Bread Problems (and How to Fix Them)
Problem: My dough did not rise. The most likely causes are expired yeast, milk that was too hot or too cold, or a room that was too chilly. Check the yeast expiration date, use milk that is comfortably warm, and find a warmer spot. If you are unsure whether your yeast is alive, test it by stirring it into warm milk with the sugar. It should foam in 5–10 minutes.
Problem: My bread is dense and heavy. This often means too much flour or not enough rising time. Measure flour carefully, keep the dough soft and give it the full rise.
Problem: The loaf collapsed or has a sunken top. The dough probably overproofed during the second rise. Next time, bake it when it is puffy and just above the pan rim, and check it a little earlier.
Problem: The crust is too dark but the inside is raw. Your oven may run hot. Use an oven thermometer to check the temperature, cover the loaf with foil, and bake a few extra minutes.
Problem: The crust is too hard. Brush the loaf generously with melted butter right out of the oven and cover it loosely with a clean towel while cooling. This traps steam and softens the crust.
Problem: The bread is gummy inside. It may be underbaked or sliced too soon. Check that the center reaches at least 190°F (88°C) and let the bread cool before cutting.
Problem: The dough is too sticky to shape. This dough is meant to be sticky. Use lightly floured or lightly oiled hands and a bench scraper. Add only a small amount of flour to the surface, since too much will make the bread dry.
Problem: The bread has big holes or tunnels. This can happen if the dough was not shaped firmly enough or if air pockets were trapped. Fold and pinch the dough firmly when shaping, and make sure the seam is on the bottom.
Variations and Flavor Ideas
Once you have the basic loaf down, you can customize it in many delicious ways.
Honey milk bread. Replace the sugar with 2 tablespoons of honey for a floral sweetness and an even softer crumb.
Cinnamon swirl milk bread. After the first rise, roll the dough into a rectangle, brush with melted butter, sprinkle with cinnamon sugar, roll it up tightly and place it in the pan. The result is a stunning swirled loaf that makes incredible toast.
Cheese milk bread. Fold ½ to 1 cup of shredded cheddar or mozzarella into the dough, or sprinkle it on top before baking.
Garlic herb milk bread. Mix in dried herbs and a little garlic powder, then brush the baked loaf with garlic butter.
Raisin or cranberry milk bread. Add ½ cup of raisins or dried cranberries for a sweeter breakfast loaf.
Soft dinner rolls. Divide the dough into 12 portions, shape into balls and bake in a greased baking dish for about 20–25 minutes until golden for pillowy dinner rolls.
Sesame or oat topped loaf. After the egg wash, sprinkle the top with sesame seeds, oats or poppy seeds for texture and visual appeal.
Whole wheat milk bread. Replace up to 1 cup of the flour with whole wheat flour. The loaf will be a little denser but nuttier and heartier. You may need an extra tablespoon or two of milk.
Dairy-free version. Use unsweetened plant-based milk (oat or soy work best) and plant-based butter. Results may vary slightly in flavor and softness.
Ways to Serve and Use Milk Bread
This loaf is wonderfully versatile. Here are some of the best ways to enjoy it.
For breakfast
- Toasted with butter and jam
- Drizzled with honey
- Cinnamon sugar toast
- Classic French toast or egg-in-a-hole
- Avocado toast with a soft-boiled egg
For sandwiches
- Turkey and cheese sandwiches
- Egg salad or tuna salad sandwiches
- Grilled cheese with a crisp golden exterior
- PB&J for lunchboxes
For desserts and treats
- Bread and butter pudding
- Bread pudding with cinnamon and raisins
- Sweet toast topped with fresh fruit and cream
- Dessert sandwiches with chocolate spread
With soups and meals
- Dunked in tomato soup
- Served alongside stews and chili
- Used for dipping in olive oil and herbs
Storage, Freezing and Reheating
Room Temperature
Store the cooled loaf in an airtight container or bread bag at room temperature for up to 3 days. Keep it away from heat and direct sunlight. Do not refrigerate, as the fridge makes bread stale faster.
Freezing
For the best convenience, slice the cooled loaf and freeze it for up to 2 months. Place the slices in a freezer-safe bag with the air pressed out, or separate them with parchment so you can pull out just what you need. This makes quick breakfast toast a breeze.
Reheating
- From frozen: Pop slices straight into the toaster.
- Whole loaf: Thaw at room temperature, then warm in a 300°F (150°C) oven for 8–10 minutes to bring back the softness and fresh-baked aroma.
- Day-old bread: Wrap the loaf loosely in foil and warm it in the oven, or make French toast and bread pudding to turn slightly dry slices into something spectacular.
Frequently Asked Questions
Can I make this bread without milk? Yes. You can use water, but the bread will be less soft and less rich. Plant-based milks also work well.
Can I use active dry yeast instead of instant yeast? Yes. Use the same amount and let it bloom in the warm milk and sugar for about 5 minutes until foamy before adding the other ingredients.
What is the best flour for milk bread? Bread flour gives a taller, slightly chewier loaf, while all-purpose flour gives a tender, soft crumb. Both give great results in this recipe.
Do I really not need to knead? Correct. The long rise gives the gluten time to develop on its own. The dough will be sticky, but the final loaf will still be soft and airy.
Can I make the dough ahead of time? Yes. After mixing, cover the dough and refrigerate it for up to 24 hours for a slow rise with deeper flavor. Let it come to room temperature, shape it and complete the second rise before baking.
What size loaf pan should I use? A standard 9 × 5-inch loaf pan works best. A slightly smaller pan will give a taller loaf, and a larger pan will give a flatter loaf.
Why is my milk bread not fluffy? Common reasons include too much flour, short rise times, cold ingredients or old yeast. Measure carefully, be patient with the rise and check your yeast.
Can I bake it in a different shape? Absolutely. You can make rolls, a braided loaf or a round boule. Adjust the baking time depending on the size.
Can I make this recipe in a bread machine or stand mixer? You can, but there is no need. The no-knead method is designed to be simple. If you prefer, a stand mixer will produce a very similar result.
How do I know when the bread is done? The crust should be deep golden brown, the loaf should sound hollow when tapped on the bottom, and the inside should reach 190–200°F (88–93°C).
Can I double the recipe? Yes. Double the ingredients and bake in two loaf pans. The rise and bake times stay about the same.
Why does my bread get stale quickly? Homemade bread has no preservatives. Store it airtight, slice and freeze extras, and use older bread for toast and French toast.
Final Thoughts
This soft and fluffy no-knead milk bread proves that you do not need special equipment or advanced skills to bake a gorgeous loaf at home. With a handful of simple ingredients, a wooden spoon and a little time, you get tender, golden bread with a pillowy crumb and a delicate milky flavor that is irresistible fresh from the oven.
Whether you are a first-time baker or a seasoned pro looking for an effortless everyday loaf, this recipe is a keeper. Make it for sandwiches, slice it for toast, share it with family and friends, and fill your kitchen with that unmistakable fresh-bread aroma. ❤️
Have you ever tried making homemade milk bread without kneading? Tell me in the comments: do you prefer your bread with butter and jam, honey, or as a delicious sandwich?
👇 Comment “MILK BREAD” if you would love to try this recipe, and don’t forget to LIKE ❤️, SAVE 📌 and SHARE it with someone who loves fresh homemade bread!
Quick Recipe Card
Soft & Fluffy No-Knead Milk Bread Prep: 15 min | Rise: 1½–2 hours | Bake: 30–35 min | Total: about 2 hrs 45 min | Yield: 10–12 slices
Bread: 3 cups (375 g) all-purpose or bread flour · 1 cup (240 ml) warm milk · 2 tbsp (25 g) granulated sugar · 2 tsp (7 g) instant yeast · 1 tsp salt · 2 tbsp (28 g) melted unsalted butter · 1 large egg, room temperature
Egg wash: 1 egg + 1 tbsp milk
Topping (optional): 1 tbsp melted butter
Method: Combine warm milk, sugar and yeast (rest 5 minutes if using active dry). Add egg, butter, flour and salt; stir into a sticky, soft dough. Cover and rise 1–1½ hours until doubled. Shape into a loaf, place in a greased pan, cover and rise 30–45 minutes. Brush with egg wash. Bake at 350°F (175°C) for 30–35 minutes until golden. Brush with melted butter, cool in the pan for 10 minutes, then transfer to a wire rack.
Storage: Airtight at room temperature up to 3 days; freeze sliced bread up to 2 months.
Print
Soft & Fluffy No-Knead Milk Bread Recipe
Ingredients
- 3 cups (375 g) all-purpose flour or bread flour
- 1 cup (240 ml) warm milk
- 2 tablespoons (25 g) granulated sugar
- 2 teaspoons (7 g) instant yeast
- 1 teaspoon salt
- 2 tablespoons (28 g) unsalted butter, melted
- 1 large egg, room temperature
For the Egg Wash
- 1 egg
- 1 tablespoon milk
Optional Topping
- 1 tablespoon melted butter for brushing after baking
Ingredient Notes
Flour. All-purpose flour gives a soft, tender loaf, while bread flour has more protein and produces a slightly chewier, taller loaf with more structure. Both work well here. If you can, weigh your flour. Scooping flour straight from the bag packs it down and can add too much, which leads to a dense loaf. If you use cups, spoon the flour into the cup and level it with a knife.
Warm milk. The milk should feel comfortably warm to the touch, roughly 100–110°F (38–43°C). It should never be hot. Milk that is too hot can damage or kill the yeast, and bread will not rise. Whole milk gives the richest flavor and softest texture, but 2% milk works too.
Sugar. A small amount of sugar feeds the yeast, helps the crust brown and adds a very gentle sweetness. This is not a sweet bread, just one with a hint of richness.
Instant yeast. Instant yeast can be mixed directly with the other ingredients. If you only have active dry yeast, you can use the same amount, but let it sit in the warm milk and sugar for about 5 minutes until foamy before continuing. The foam tells you the yeast is alive and active.
Salt. Salt controls the yeast, strengthens the dough and brings out flavor. Do not skip it, or the bread will taste flat.
Melted butter. Butter adds flavor, softness and a tender crumb. Let it cool slightly before adding so it does not warm the dough too much.
Egg. The egg enriches the dough, adds structure and gives a lovely golden color to the crumb. Use it at room temperature so it blends in smoothly and does not chill the dough.
Egg wash. The mixture of egg and milk brushed on top gives the loaf a glossy, deep golden crust that looks like it came from a bakery.
Instructions
In a large mixing bowl, combine the warm milk, sugar and yeast. If you are using active dry yeast, let the mixture sit for about 5 minutes until foamy. With instant yeast you can move on right away.
Add the egg, melted butter, flour and salt to the bowl. Mix with a wooden spoon or sturdy spatula until a sticky, soft dough forms and no dry flour remains. The dough will look shaggy and wet. This is exactly right. No kneading is necessary!
Cover the bowl with a clean kitchen towel or plastic wrap. Let the dough rise in a warm place for 1 to 1½ hours, or until it has doubled in size and looks puffy with visible bubbles. A turned-off oven with the light on, or a spot near a warm (not hot) appliance, is an ideal rising spot.
Lightly grease a standard loaf pan (about 9 × 5 inches). Gently transfer the risen dough to a lightly floured surface. With floured hands, shape it into a loaf by folding the edges toward the center, then pinching the seam closed. Place it seam-side down into the prepared pan. Handle the dough gently to keep the air bubbles that make the bread fluffy.
Cover the pan and let the dough rise for another 30 to 45 minutes, until puffy and nearly doubled, rising to just above the edge of the pan. Do not let it overproof, or it may collapse in the oven.
Whisk the egg and milk together until smooth. Gently brush it over the top of the dough using a soft pastry brush. Be careful not to let the egg wash drip down the sides of the pan, as it can glue the bread to the pan and limit the rise.
Preheat your oven to 350°F (175°C) while the dough finishes its second rise. Bake for 30 to 35 minutes, until the loaf is deep golden brown and fully baked. The bread should sound hollow when tapped on the bottom, and an instant-read thermometer inserted into the center should read about 190–200°F (88–93°C). If the top browns too quickly, loosely cover it with a piece of aluminum foil for the remaining time.
Remove the bread from the oven and brush the top with melted butter if desired. This keeps the crust soft and adds a beautiful sheen. Let the loaf cool in the pan for 10 minutes, then carefully turn it out onto a wire rack to cool.
Let the bread cool for at least 30 minutes before slicing. Cutting too soon can make the crumb gummy because the inside is still setting. Use a serrated bread knife for clean slices. Enjoy with butter, jam, honey or your favorite sandwich fillings! 🍞❤️