
3-Ingredient High-Protein Pinto Bean Bread
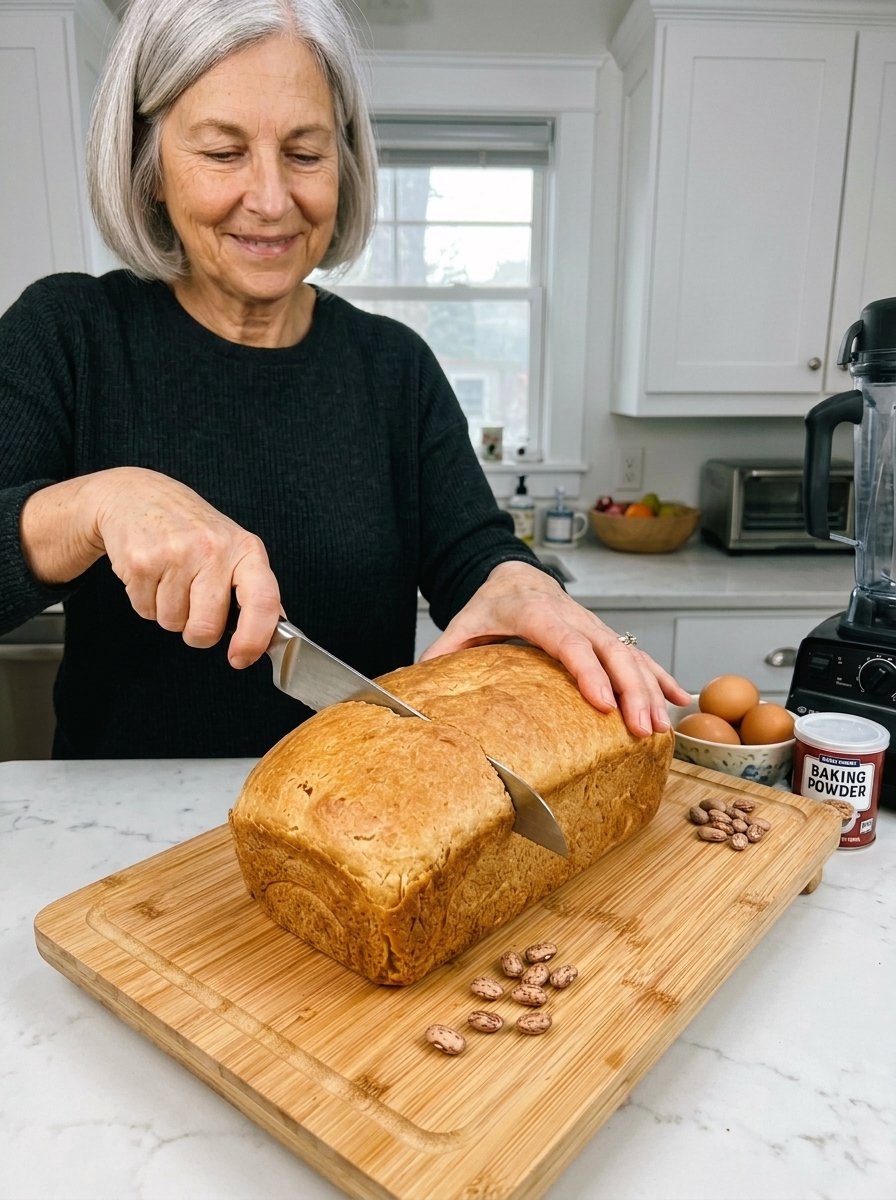
3-Ingredient High-Protein Pinto Bean Bread: The Easiest Blender Loaf for Toast and Sandwiches
If you have ever wished you could make a real, sliceable loaf of bread without flour, yeast, kneading, or a long ingredient list, this 3-Ingredient High-Protein Pinto Bean Bread is the recipe for you. Made with nothing more than cooked pinto beans, eggs, and baking powder, this loaf comes together in a blender in about ten minutes and bakes into a soft, hearty, protein-rich bread that works for toast, sandwiches, or serving alongside savory meals. It is naturally gluten-free, wonderfully simple, and surprisingly satisfying.
Pinto beans are one of the most affordable and nutritious pantry staples, and they happen to blend into a smooth, creamy, mildly earthy base that is perfect for baking. When combined with eggs and a little baking powder, they transform into a tender loaf with a gentle savory flavor that is far more neutral than you might expect. If you are skeptical about bean-based bread, you are in good company, and this recipe is exactly the one that tends to win people over.
Whether you are trying to eat more protein and fiber, avoid gluten, cut down on refined flour, or simply experiment with minimal-ingredient baking, this pinto bean bread deserves a spot in your kitchen. Below, you will find a full breakdown of why the recipe works, detailed step-by-step instructions, ingredient notes, savory variations, storage advice, and answers to the most common questions.
Why This Pinto Bean Bread Recipe Works So Well
At first glance, it can seem almost impossible that three ingredients could turn into something resembling bread. The secret lies in what each ingredient contributes and how they work together.
Cooked pinto beans, once blended until completely smooth, become a thick, creamy puree. This puree replaces the role that flour normally plays in a loaf, providing bulk, body, and a soft interior. Pinto beans are especially well suited to this job because they are naturally creamy when cooked. Their skins are thin and tender, and their flavor is mild and slightly nutty, which means they disappear into the batter more easily than some firmer or more assertive legumes.
Eggs are the structural backbone of this recipe. Because there is no gluten to hold the loaf together, the proteins in the eggs do all the work. As the batter heats in the oven, those proteins set and coagulate, turning the liquid puree into a firm, sliceable loaf. The eggs also add moisture, richness, and a tender crumb, and they help mellow the natural earthiness of the beans.
Baking powder is the only leavening agent, and it is a small but essential player. As the batter bakes, baking powder releases tiny bubbles of carbon dioxide that give the loaf a bit of lift and prevent it from turning into a dense, rubbery brick. There is no yeast, no proofing, and no rising time, so the bread goes straight from blender to oven.
Finally, the method matters. Using very well-drained beans keeps the batter from becoming too wet, and blending until perfectly smooth ensures an even, uniform texture throughout the loaf. A moderate oven temperature of 350°F (175°C) allows the center to set gently without overbrowning the outside. Letting the bread cool completely before slicing gives the egg structure time to firm up, which is the difference between clean slices and a crumbly, gummy middle.
Ingredients You’ll Need
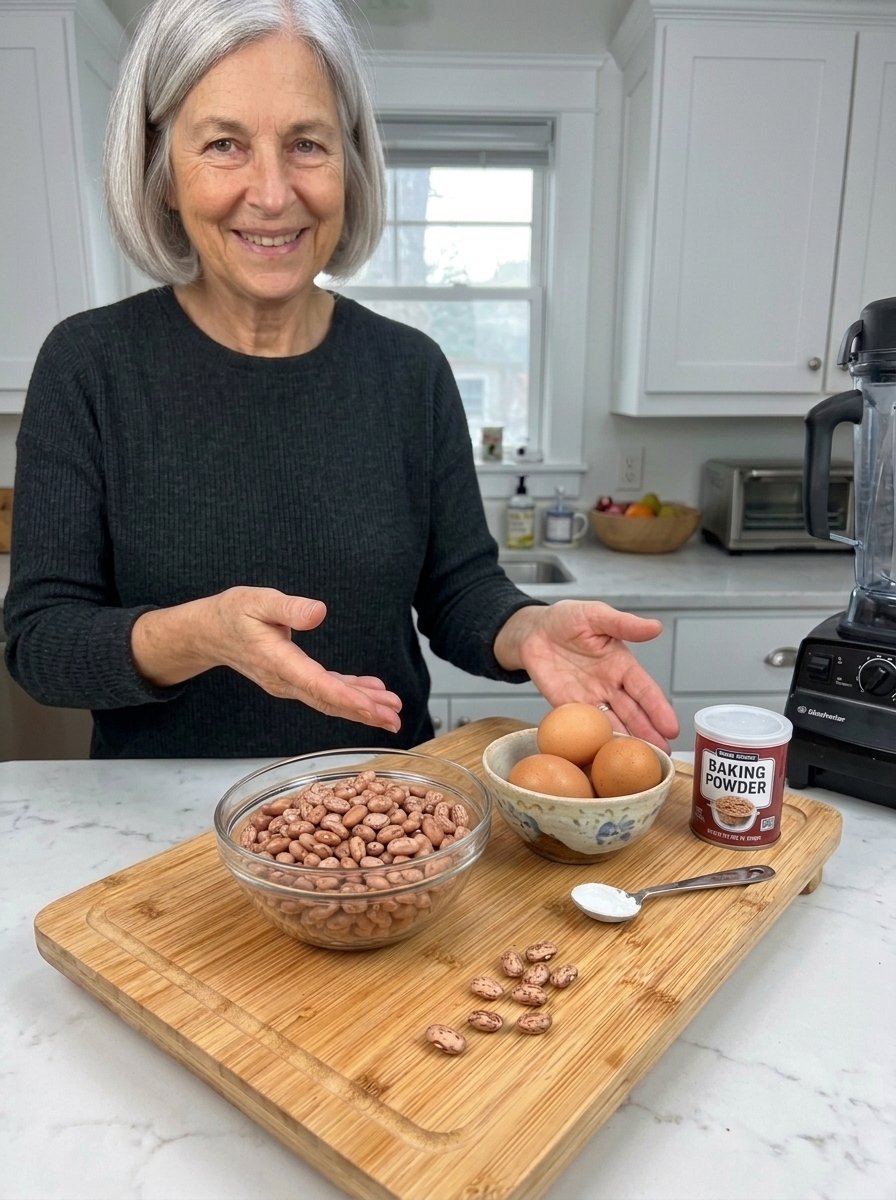
This recipe truly lives up to its name, requiring only three ingredients.
- 1½ cups (about 250 g) cooked pinto beans, well drained and rinsed
- 3 large eggs
- 1 teaspoon baking powder
Optional savory seasonings:
- ½ teaspoon garlic powder
- ½ teaspoon onion powder
- ½ teaspoon smoked paprika
- ¼ teaspoon black pepper
- Sesame seeds or dried herbs for the top
Ingredient Notes and Substitutions
Cooked pinto beans: Canned pinto beans are the most convenient option, and they work beautifully here. Be sure to drain them and rinse them thoroughly under cold water, since the liquid in the can is starchy and salty and can make the batter too wet. If you prefer to cook dried pinto beans from scratch, simmer them until completely tender, then let them cool slightly and drain them very well. About ½ cup of dried beans will yield roughly 1½ cups cooked. Weighing the beans, at about 250 grams, is the most accurate way to measure.
Eggs: Large eggs are essential in this recipe because they provide nearly all of the structure. Room-temperature eggs blend more smoothly into the beans, though cold eggs will still work. Because the loaf depends so heavily on eggs, substitutions such as flax eggs or egg replacers are not recommended if you want the same texture.
Baking powder: Check that your baking powder is fresh. Because it is the only source of lift, old or inactive baking powder will leave you with a flatter, denser loaf. If you are not sure whether yours is still good, stir a small spoonful into hot water. If it fizzes vigorously, it is ready to use.
A note on equipment: A high-speed blender gives the smoothest results, but a food processor can work too. If you use a food processor, you may need to blend a little longer and stop several times to scrape down the sides. Any tiny bits of bean skin left in the batter will be noticeable in the finished loaf, so take your time.
Step-by-Step Instructions
Step 1: Prepare the Beans
Start by rinsing the cooked pinto beans thoroughly in a colander under cold running water. Shake the colander well to remove as much water as possible, then let the beans drain for a minute or two. If the beans still look especially wet, spread them on a clean kitchen towel and gently pat them dry. This may seem like a small step, but excess moisture is one of the main reasons bean breads turn out too soft or gummy in the center.
Step 2: Blend Until Completely Smooth
Add the drained pinto beans, eggs, and baking powder to a high-speed blender. Blend on high until the mixture is completely smooth and creamy, with no visible pieces of bean remaining. This usually takes one to two minutes, depending on your blender. Pause once or twice to scrape down the sides with a spatula so everything is fully incorporated.
The finished batter should look like a thick, pourable puree, similar to a loose pancake batter or a thick smoothie. If you see any flecks of bean skin, keep blending until they are gone.
Step 3: Prepare the Pan
Preheat your oven to 350°F (175°C). Lightly grease a small 8×4-inch loaf pan, then line it with parchment paper, leaving a little overhang on the long sides to act as handles. The parchment makes it much easier to lift the loaf out cleanly once it has cooled, which matters for a flourless bread that is delicate while warm.
Step 4: Pour the Batter
Transfer the smooth batter into the prepared loaf pan. Use a spatula to gently smooth the top so the loaf bakes evenly. If you are using the optional savory variation, you can sprinkle sesame seeds, dried herbs, or a little extra black pepper over the top at this point.
Step 5: Bake Until Set
Bake the loaf for 30 to 35 minutes, until it is firm to the touch, lightly golden on top, and a toothpick inserted into the center comes out clean. Ovens vary, so start checking at around 30 minutes. If the top begins to brown too quickly before the center is set, loosely tent the pan with foil for the remainder of the bake.
Step 6: Cool Completely
Let the bread cool in the pan for about 10 minutes, then use the parchment overhang to lift it onto a wire rack. Allow it to cool completely before slicing. This final step is not optional. The egg structure continues to firm up as the loaf cools, and slicing too early will give you a soft, crumbly, or gummy texture. Patience here is rewarded with neat, sturdy slices.
Making It Savory: The Optional Seasoning Variation
The base recipe is intentionally minimal and mild, but a few pantry spices can turn this loaf into something with much more personality. For a savory version, add the following to the blender along with the beans, eggs, and baking powder:
- ½ teaspoon garlic powder
- ½ teaspoon onion powder
- ½ teaspoon smoked paprika
- ¼ teaspoon black pepper
This simple blend gives the bread a warm, savory, slightly smoky flavor that pairs especially well with eggs, avocado, cheese, and soups. For extra texture and visual appeal, sprinkle sesame seeds, dried oregano, or Italian seasoning on top of the batter before it goes into the oven. A pinch of salt is also a good idea if you plan to eat the bread plain, since the base recipe contains no added salt.
What to Serve with Pinto Bean Bread
Because its flavor is mild and its texture is hearty, this bread is incredibly versatile. Here are some of the best ways to enjoy it.
- Avocado toast: Toast a slice, top it with mashed avocado, a pinch of salt, and a sprinkle of red pepper flakes for a protein-packed breakfast or snack.
- Egg sandwiches: Layer scrambled or fried eggs, cheese, and fresh greens between two slices for a filling, high-protein sandwich.
- Soups and stews: Serve alongside chili, tomato soup, or vegetable soup for dipping. The sturdy texture holds up well to broth.
- Mexican-inspired toppings: Because pinto beans are a staple of Tex-Mex and Mexican cooking, this bread pairs naturally with salsa, guacamole, shredded cheese, and a fried egg.
- Nut butter and fruit: For a lightly sweet option, spread a slice with almond or peanut butter and top with banana slices or berries.
- Savory spreads: Hummus, cream cheese, herbed goat cheese, or ricotta all work beautifully on a toasted slice.
- Salads: Serve a slice alongside a big green salad to turn it into a balanced, satisfying meal.
Tips for the Best Pinto Bean Bread
Drain and dry the beans well. This is the single most important tip. Wet beans create a wet batter, and a wet batter leads to a gummy loaf. Rinse, drain, and pat dry whenever you can.
Blend longer than you think you need to. Smooth batter equals smooth bread. Scrape down the sides and keep blending until you cannot see a single fleck of bean skin.
Use an 8×4-inch pan if you can. A smaller loaf pan gives you a taller, more bread-like slice. A larger pan will produce a flatter, thinner loaf that bakes faster, so check it earlier.
Trust the toothpick test. This bread does not develop a deep golden crust like wheat bread, so color alone is not a reliable sign of doneness. A toothpick that comes out clean from the center tells you the egg structure has fully set.
Cool it completely. Slicing a warm loaf is the fastest route to a crumbly mess. Give it at least an hour on the rack, and if you can, even longer.
Toast the slices. Toasting firms up the exterior, adds a pleasant golden color, and improves the overall texture. It is the best way to turn good bean bread into great bean bread.
Add salt for flavor. The base recipe has no salt. If you find the bread a little bland, a small pinch in the batter makes a noticeable difference.
Slice with a serrated knife. A bread knife and a gentle sawing motion keep the slices intact and prevent squashing the soft crumb.
Recipe Variations to Try
This simple loaf is an excellent canvas for flavor experiments. Here are a few ideas that stay true to the minimal spirit of the recipe.
Southwest Pinto Bean Bread: Add ½ teaspoon of cumin, ½ teaspoon of chili powder, and a pinch of smoked paprika to the blender. Top with a few pumpkin seeds before baking. This version is fantastic with chili or topped with salsa and eggs.
Cheesy Pinto Bean Bread: Blend in two tablespoons of grated Parmesan or fold in a handful of shredded cheddar after blending for a richer, cheesier loaf.
Herb and Garlic Loaf: Add garlic powder, dried oregano, and dried parsley for a savory loaf that tastes great alongside pasta or soup.
Seeded Pinto Bean Bread: Sprinkle sesame seeds, sunflower seeds, or a seed blend over the top before baking for crunch and a bakery-style look.
Jalapeño Version: Fold in a tablespoon or two of finely chopped pickled jalapeños for a gentle kick of heat and tang.
Everything Bagel Style: Finish the top with everything bagel seasoning before baking for a savory, crunchy topping that works well with cream cheese.
How to Store and Reheat Leftovers
Because this bread is made with eggs and beans and contains no flour or preservatives, it should be stored with a little extra care.
Refrigerating: Once the loaf has cooled completely, store it in an airtight container in the refrigerator for up to 4 to 5 days. Placing a sheet of parchment or paper towel between slices can help prevent them from sticking together.
Freezing: This bread freezes very well. Slice the cooled loaf, place parchment between the slices, and store them in a freezer-safe bag with as much air removed as possible. Frozen slices will keep for up to 2 months, and you can toast them straight from the freezer for a quick breakfast.
Reheating: Enjoy slices cold, or toast them in a toaster, toaster oven, or dry skillet until warmed and lightly crisp. Microwaving works in a pinch, but toasting gives you a much better texture.
Meal prep tip: Bake a loaf on the weekend, slice it, and freeze the slices individually. This gives you a ready supply of high-protein toast for busy mornings throughout the week.
Frequently Asked Questions
Does pinto bean bread taste like beans?
The flavor is mild, savory, and slightly earthy rather than strongly bean-like. The eggs help round out the flavor, and the bread is easy to customize with spices and toppings. Many people are surprised at how neutral it tastes, especially when toasted.
Is this bread gluten-free?
Yes, the recipe contains no wheat flour and is naturally gluten-free. If you are avoiding gluten for medical reasons, make sure your baking powder is labeled gluten-free, since some brands may be processed in facilities that handle wheat.
Can I use canned pinto beans?
Absolutely. Canned pinto beans are the easiest option. Just drain and rinse them thoroughly, then drain them again very well before blending.
Can I use a different type of bean?
Yes. Black beans, white beans, and cannellini beans can all be used with the same method, though the flavor and color will change. Pinto beans are especially creamy, which makes them a great choice for a soft, tender crumb.
Why is my bread gummy in the middle?
Gummy bread usually comes from beans that were not drained well enough, a batter that was not blended smooth, underbaking, or slicing before the loaf cooled completely. Make sure the beans are very dry, bake until a toothpick comes out clean, and let the bread cool all the way.
Why didn’t my bread rise much?
This loaf rises only slightly, since it has no gluten to trap air. Fresh baking powder helps, but you should expect a dense, moist, quick-bread-style loaf rather than a tall, fluffy sandwich loaf.
Can I make this bread without eggs?
Eggs are what hold this loaf together, so it is difficult to replace them. Egg substitutes tend to produce a much softer, less sliceable result.
Is pinto bean bread high in protein?
Yes. Between the beans and the eggs, each slice offers a respectable amount of protein and fiber, making it a more filling alternative to many store-bought breads. Exact nutrition varies with your ingredients and slice size.
Can I double the recipe?
You can double it and bake it in a larger pan or in two small pans. If you use a single larger pan, the loaf will be thicker and will need more baking time, so rely on the toothpick test.
Can I add flour to make it more bread-like?
You can experiment with a small amount of oat flour or almond flour, but doing so takes the recipe away from its simple three-ingredient roots and may change the texture and baking time.
Final Thoughts
3-Ingredient High-Protein Pinto Bean Bread is proof that a recipe does not need to be complicated to be useful. With only pinto beans, eggs, and baking powder, you can blend a batter in minutes and bake a hearty, protein-rich loaf that works for breakfast, lunch, snacks, and everything in between. It is budget-friendly, naturally gluten-free, and endlessly adaptable, whether you keep it simple or dress it up with garlic, smoked paprika, seeds, and herbs.
The keys to success are easy to remember: drain the beans very well, blend until perfectly smooth, bake until a toothpick comes out clean, and let the loaf cool completely before slicing. Follow those simple rules and you will end up with a soft, sturdy, delicious bread you can toast, stack with your favorite fillings, or enjoy alongside a warm bowl of soup.
If you have been looking for a simple, nourishing alternative to traditional bread, give this recipe a try. One loaf is all it takes to see why so many home cooks keep coming back to this humble, high-protein favorite.