
Frog Balls (Pickled Brussels Sprouts)
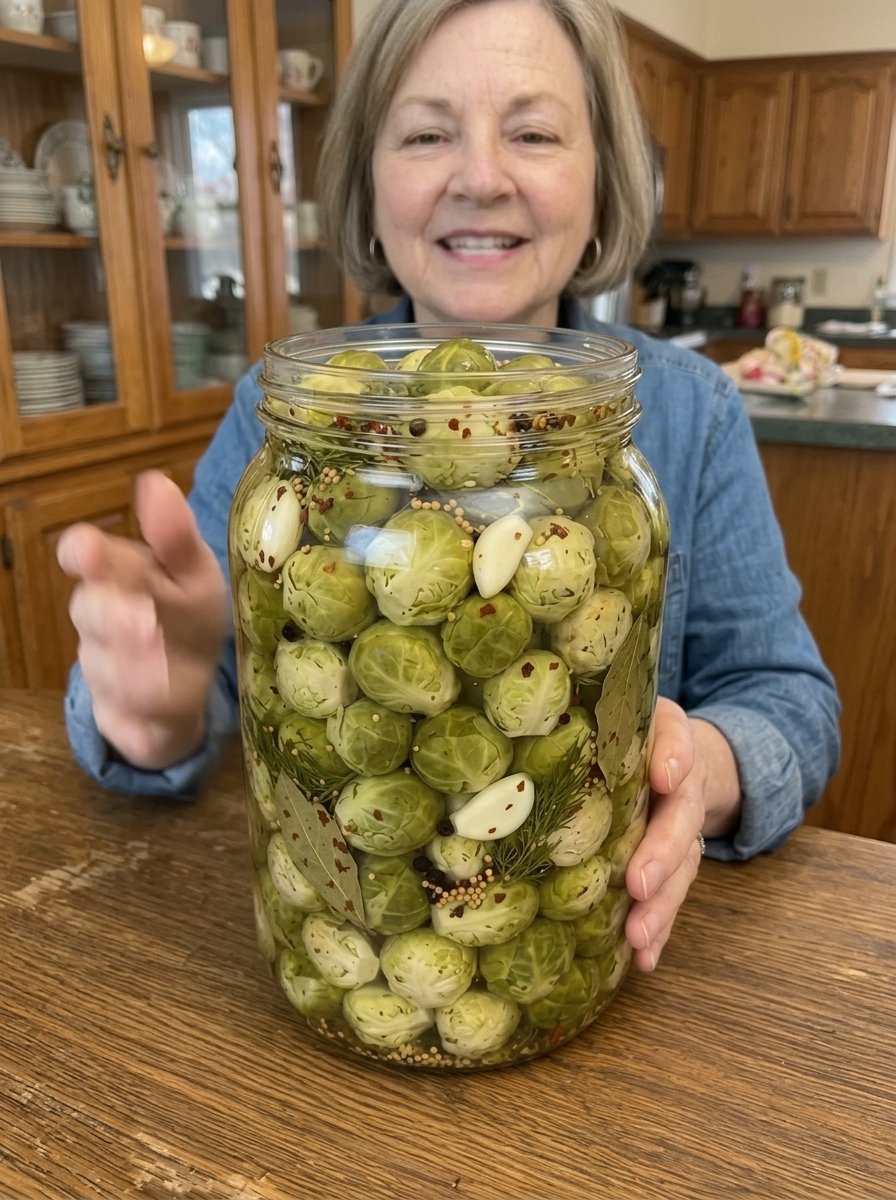
Frog Balls (Pickled Brussels Sprouts) 🥬🌶️
Tangy, crunchy, garlicky and bursting with a delicious spicy kick, Frog Balls transform fresh Brussels sprouts into irresistible whole pickled bites. Zesty vinegar, fresh garlic, red pepper flakes and aromatic pickling spices make a bold brine, and each little sprout soaks it up while keeping a satisfying crunch. 😍🔥
The playful name comes from their round, green, slightly bumpy look, and the flavor lives up to the fun. Serve them on charcuterie boards, drop them into Bloody Marys, tuck them into sandwiches and burgers, add them to BBQ platters and antipasto spreads, or just snack straight from the jar. In this guide you will find the full recipe, ingredient notes, tips for the crunchiest results, serving and cocktail ideas, variations, important food safety guidance, troubleshooting and answers to frequently asked questions.
Why You Will Love Frog Balls
- Crunchy and tangy. Blanching and a hot vinegar brine keep the sprouts crisp while infusing them with flavor.
- Garlicky and spicy. Fresh garlic and red pepper flakes bring savory depth and gentle heat that builds with every bite.
- A new way to enjoy Brussels sprouts. Even people who say they dislike Brussels sprouts often love them pickled.
- Great for entertaining. They look striking in a jar and work on boards, in cocktails and as party snacks.
- No canning required. These are refrigerator pickles, so there is no processing or special equipment.
- Make-ahead friendly. The flavor improves as they sit in the refrigerator.
- Fun to share and gift. A jar of Frog Balls is a conversation starter (kept cold, of course).
What Are Frog Balls?
Frog Balls are whole Brussels sprouts pickled in a seasoned vinegar brine. The name is a playful nickname for these small green spheres, and the idea is simple: take fresh sprouts, blanch them briefly, pack them in a jar with garlic and spices and cover them with a hot, tangy brine. After a week or so in the refrigerator, they become a punchy, crunchy pickle.
Brussels sprouts are a natural for pickling. Their tightly packed leaves soak up the brine, and their slightly bitter, cabbage-like flavor is balanced beautifully by the sharp vinegar, salt, sugar and spices. The result is tangy, savory, a little sweet and very snackable.
Recipe Card at a Glance
- Prep time: About 25 minutes
- Cook time: About 10 minutes (blanching and brine)
- Pickling time: At least 5 to 7 days in the refrigerator
- Yield: 2 to 3 jars, depending on size
- Difficulty: Easy
- Storage: Refrigerator only, enjoy within 2 weeks
- Flavor profile: Tangy, garlicky, savory, crunchy and spicy
Ingredients
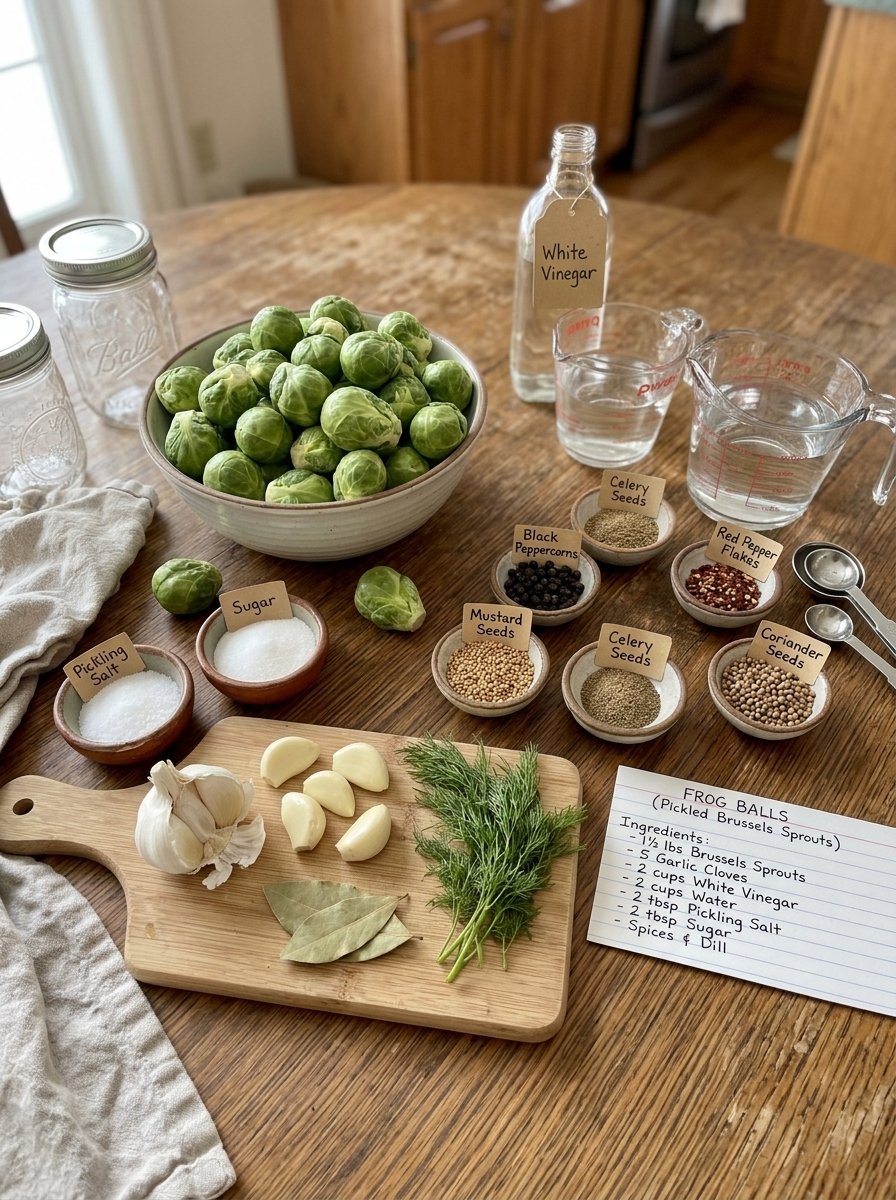
- 1½ lbs fresh Brussels sprouts, trimmed
- 5 garlic cloves, peeled
- 2 cups white vinegar
- 2 cups water
- 2 tablespoons pickling salt
- 2 tablespoons granulated sugar
- 1 teaspoon black peppercorns
- 1 teaspoon mustard seeds
- 1 teaspoon celery seeds
- 1 teaspoon red pepper flakes
- 2 bay leaves
- ½ teaspoon coriander seeds (optional)
- 2 fresh dill sprigs (optional)
Ingredient Notes
Brussels sprouts
Choose small to medium sprouts that are firm, bright green and tightly closed, with no yellowing leaves or black spots. Sprouts of similar size pickle evenly and fit neatly in jars. Very large sprouts can be halved so the brine penetrates.
Garlic
Fresh garlic gives the brine savory depth. Choose firm, plump cloves and discard any that are soft, sprouting or discolored. Lightly crushing the cloves releases their flavor into the brine.
White vinegar
White vinegar supplies the clean, sharp acidity that defines a pickle. Use plain white vinegar with 5% acidity, and do not dilute the brine more than the recipe states.
Pickling salt
Pickling salt has no anti-caking agents or additives, so it dissolves cleanly and keeps the brine clear. If you substitute another salt, measure carefully, since fine and coarse salts differ in volume.
Sugar
Two tablespoons of sugar soften the vinegar’s edge and balance the heat. It will not make the pickles sweet.
Pickling spices
Black peppercorns, mustard seeds, celery seeds, red pepper flakes, bay leaves and optional coriander give the brine its classic pickle flavor. The red pepper flakes add the gentle heat that builds as you eat.
Fresh dill (optional)
Dill sprigs add a bright, herbal aroma that pairs beautifully with the garlic and spices.
Equipment
- 2 to 3 clean glass jars with lids (pint or quart size)
- A large pot for blanching
- A large bowl for the ice bath
- A non-reactive saucepan (stainless steel or enamel) for the brine
- A sharp paring knife
- A slotted spoon or spider
- Measuring spoons and cups
- A ladle or funnel for pouring the brine
Step-by-Step Instructions
Step 1: Prepare the Brussels sprouts
Wash thoroughly, remove damaged outer leaves and trim the tough stem ends. Make a small shallow X in the bottom of each sprout to help the brine penetrate.
Step 2: Blanch the sprouts
Bring a large pot of water to a boil. Add the Brussels sprouts and blanch for 3 to 4 minutes. Drain and immediately transfer them to an ice bath to stop the cooking.
Step 3: Prepare the garlic
Peel the garlic cloves and lightly crush them to release their flavor.
Step 4: Pack the jars
Arrange the Brussels sprouts tightly in clean glass jars. Add the garlic, black peppercorns, mustard seeds, celery seeds, red pepper flakes, bay leaves, coriander seeds and fresh dill.
Step 5: Make the brine
In a saucepan, combine white vinegar, water, pickling salt and sugar.
Step 6: Heat the mixture
Bring the brine to a gentle boil, stirring until the salt and sugar dissolve completely.
Step 7: Pour over the sprouts
Carefully pour the hot brine into the jars until the Brussels sprouts are completely submerged.
Step 8: Cool
Allow the jars to cool to room temperature before sealing.
Step 9: Refrigerate
Place the sealed jars in the refrigerator for at least 5 to 7 days to allow the flavors to develop. For a stronger pickle flavor, wait 1 to 2 weeks.
Step 10: Serve
Enjoy these tangy Frog Balls straight from the jar or add them to Bloody Marys, charcuterie boards, antipasto platters, sandwiches and BBQ spreads.
Important Food Safety Information
These are refrigerator pickles, not shelf-stable canned pickles. A few simple rules keep them safe and delicious:
- Keep them refrigerated at or below 40°F (4°C). Once the jars have cooled to room temperature, move them to the refrigerator promptly, and do not leave them out.
- Enjoy within 2 weeks. Plan to finish the jars within that window for the best quality and safety.
- Do not store at room temperature or treat as shelf-stable. Sealing the lid does not make these pickles safe for the pantry.
- Do not can or water-bath process this recipe. It was not designed or tested for canning. If you want shelf-stable pickled vegetables, use a tested home-canning recipe from a trusted food preservation source.
- Garlic needs care. Garlic is a low-acid vegetable that can carry spores of Clostridium botulinum, the bacterium that causes botulism. Garlic stored in liquid at room temperature can create conditions where harmful bacteria grow, so refrigeration is essential.
- Cool before sealing, then refrigerate. The recipe has you let the jars cool to room temperature before sealing. Do not let them sit out for a long time. Refrigerate them as soon as they have cooled, ideally within about 2 hours.
- Keep the sprouts submerged. Sprouts above the brine can discolor or spoil. Pack them snugly and make sure they are fully covered.
- Use clean jars and utensils. Wash jars, lids, tools and hands in hot, soapy water, and use a clean fork or tongs each time you take sprouts from the jar.
- Do not reduce the vinegar or salt significantly. The acid and salt are part of what keeps the pickles safe and flavorful.
- Discard if there are signs of spoilage. These include a bulging lid, spurting liquid when opened, an off or rotten smell, mold, sliminess, unusual fizzing or a very mushy texture. When in doubt, throw it out without tasting.
- Take extra care when serving vulnerable people. If you are serving someone pregnant, elderly, very young or with a weakened immune system, follow your local food safety guidance.
A note on timing. The recipe suggests waiting 5 to 7 days for the flavor to develop, and up to 1 to 2 weeks for a stronger pickle flavor, while also recommending that you enjoy the pickles within 2 weeks. That means the strongest-flavor window overlaps the end of the recommended storage time. If you like very tangy sprouts, plan to finish them promptly rather than keeping them past the 2-week mark.
Tips for the Crunchiest Frog Balls
1. Choose fresh, firm sprouts
Fresh sprouts are crisper and sweeter. Avoid any that are soft, yellowing or have dark spots.
2. Pick sprouts of similar size
Similar sizes pickle evenly. If some sprouts are much larger than others, halve the big ones.
3. Cut the X in the base
The small X at the stem end helps the brine penetrate the dense core. Make it shallow and neat, not deep enough to make the sprout fall apart.
4. Do not skip the ice bath
Blanching tenderizes the sprouts slightly and sets their green color. The ice bath stops the cooking so they stay crunchy. Leave them in the ice water until fully cool, then drain well.
5. Do not over-blanch
Three to four minutes is enough. Longer blanching makes the sprouts soft and dulls their color.
6. Dry the sprouts well
After the ice bath, drain thoroughly and pat dry so extra water does not dilute the brine.
7. Pack the jars snugly
Tightly packed sprouts stay submerged and do not float. Use a spoon handle or chopstick to nudge sprouts into gaps.
8. Use hot brine
Pouring hot brine helps the flavors penetrate. The hot brine goes over the sprouts in the jar, so do not boil them in the brine.
9. Be patient
Frog Balls improve with time. After 5 to 7 days, they are tangy and balanced. After 1 to 2 weeks, they are stronger and more pickle-like.
10. Adjust the heat
For more spice, add extra red pepper flakes, a few slices of fresh chili or a dried chili. For milder pickles, reduce the flakes.
11. Taste a test sprout
After 5 to 7 days, try one sprout. If it is not tangy enough, wait a few more days within the 2-week window.
12. Wear gloves if handling fresh chilies
If you add fresh hot peppers, gloves protect your skin from capsaicin.
Serving Ideas
Frog Balls bring tang and crunch to nearly everything:
In cocktails
- Bloody Marys. Skewer a few Frog Balls as a garnish, alongside celery, olives and bacon.
- Martinis and gin cocktails. Use a sprout in place of an olive for a savory twist.
- Michelada or beer cocktails. Drop a couple into the glass for a tangy kick.
On boards and platters
- Charcuterie boards with cured meats, cheeses, olives and nuts.
- Antipasto spreads with marinated vegetables, salami and crusty bread.
- BBQ platters alongside ribs, brisket, sausages and pulled pork.
- Relish trays with pickles, peppers and carrots.
In meals
- Sandwiches and burgers. Halve or slice them and layer on for crunch and tang.
- Salads. Slice into green salads, grain bowls or potato salad.
- Tacos and wraps. Chop and add to tacos, wraps or rice bowls.
- Grilled meats. Serve alongside grilled sausages, steak or chicken.
- Cheese plates. Pair with sharp cheddar, creamy brie or smoked gouda.
- Fried foods. Cut through the richness of fried chicken, fish and chips or fried appetizers.
Snacking
- Eat them straight from the jar as a crunchy, low-effort snack.
Best Pairings
- Cold beer, cider or sparkling water with lemon
- Sharp, smoked and creamy cheeses
- Smoked and cured meats
- Rich or fried foods
- Creamy dips and spreads
- Crusty bread and crackers
Delicious Variations
Keep the vinegar, water and salt amounts the same in any variation, and keep refrigerating the jars.
- Extra-hot Frog Balls. Add more red pepper flakes, sliced fresh chilies or a dried chili de árbol.
- Smoky Frog Balls. Add a pinch of smoked paprika or a dried chipotle.
- Lemon and dill. Add strips of lemon zest and extra fresh dill.
- Garlic lover’s version. Add a few more cloves, keeping the jars well refrigerated.
- Sweet-and-spicy. Add an extra tablespoon of sugar or a spoonful of honey for a sweeter edge.
- Everything spice. Add a teaspoon of coriander seeds, fennel seeds or a few allspice berries.
- Apple cider vinegar blend. Replace part of the white vinegar with apple cider vinegar (5% acidity) for a fruitier note, keeping the total amount the same.
- Mixed vegetable jar. Add carrot sticks, cauliflower florets or small onions alongside the sprouts.
- Halved sprouts. Cut sprouts in half for quicker pickling and easier snacking.
- Small-batch jars. Halve the recipe and use a single jar if you will not finish three within the 2-week window.
Troubleshooting Common Problems
My Brussels sprouts are soft
They may have been blanched too long, not chilled promptly or kept too long. Blanch for 3 to 4 minutes, use the ice bath and finish within 2 weeks.
My sprouts are too bitter
Older or larger sprouts can be more bitter. Choose small, fresh sprouts, and let the pickles sit the full week so the flavors mellow.
The brine is cloudy
Spices, garlic and salt can make the brine slightly cloudy, which is normal. If the brine is slimy, smells off or the sprouts are mushy, discard the jar.
The sprouts are floating
Pack the jar more tightly, use a smaller jar or place a clean, non-reactive weight on top so everything stays submerged.
The garlic turned blue or green
This can happen when garlic reacts with acid and trace minerals. It is usually a harmless cosmetic change, but do not rely on color alone. Check for other signs of spoilage and follow the storage guidance.
The pickles are too salty or sour
Check your measurements. A little extra sugar can balance the brine in the next batch. Do not reduce the vinegar significantly.
The pickles are not spicy enough
Add extra red pepper flakes or a sliced chili to the next batch. The heat builds over time, so give them the full week.
The flavor is not strong after a week
Wait a few more days, within the 2-week window, or cut the sprouts in half next time so the brine penetrates faster.
Common Mistakes to Avoid
- Treating them as shelf-stable. They must be refrigerated.
- Leaving jars out too long. Cool, then refrigerate promptly.
- Keeping them beyond 2 weeks. Finish them within the recommended time.
- Skipping the ice bath. The sprouts will be softer and duller.
- Over-blanching. They become mushy.
- Using old or soft sprouts. They will not be crisp.
- Reducing the vinegar. The acid is important for flavor and safety.
- Not submerging the sprouts. Exposed sprouts can spoil.
- Using dirty utensils. Always use clean tools.
- Making too many jars. Make only what you can finish in 2 weeks.
Frequently Asked Questions
Why are they called Frog Balls?
It is a playful nickname for the round, green, bumpy pickled Brussels sprouts, which resemble little frog eggs or green orbs.
How long do Frog Balls last?
Keep them refrigerated at or below 40°F (4°C) and enjoy them within 2 weeks. Discard them if you see signs of spoilage.
Can I leave them on the counter?
No. These are refrigerator pickles, not shelf-stable canned pickles. Cool the jars to room temperature, then refrigerate them promptly.
Can I can them for pantry storage?
This recipe is not designed or tested for canning. If you want shelf-stable pickled Brussels sprouts, follow a tested home-canning recipe from a trusted source.
How long should I wait before eating them?
At least 5 to 7 days for the flavors to develop. For a stronger pickle flavor, wait 1 to 2 weeks, keeping in mind the 2-week storage guidance.
Can I use frozen Brussels sprouts?
Fresh sprouts are best. Frozen sprouts are usually already blanched and become soft in a brine, so they will not be as crunchy.
Do I have to blanch the sprouts?
Blanching tenderizes the sprouts slightly, sets the color and helps the brine absorb. It is recommended for the best texture.
Can I use apple cider vinegar?
Yes, in part. Use apple cider vinegar labeled 5% acidity in place of some of the white vinegar, keeping the total vinegar amount the same.
Can I leave out the garlic?
Yes. The pickles will still taste good, though less savory. Always keep them refrigerated either way.
Can I use table salt?
Pickling salt is recommended. If you use table salt, measure by weight or use slightly less, since fine salt is denser by volume.
Can I freeze them?
Freezing is not recommended. The texture becomes soft and watery after thawing.
Are Frog Balls vegan and gluten-free?
As written, the recipe contains no animal products or gluten-containing ingredients. If sugar choice matters to you, use a vegan-labeled sugar.
How spicy are they?
The heat is mild to moderate from the red pepper flakes, and it builds over time. Add more flakes or fresh chilies for more fire.
Can I use the leftover brine?
It is best not to reuse the brine for a new batch. You can use a spoonful in a dressing, marinade or Bloody Mary while it is fresh, and discard the rest with the jar.
Final Thoughts
Frog Balls turn an everyday vegetable into a bold, tangy, crunchy snack that deserves a spot on any board, in any cocktail and next to any sandwich. They are easy to make, easy to customize and endlessly fun to serve. Just remember that they are refrigerator pickles: keep them cold, use clean utensils, enjoy them within two weeks and toss them if anything seems off. Make a jar, wait patiently and prepare for the first bite of tangy, garlicky, spicy crunch. 🥬🔥
If you make them, leave a comment with your favorite way to serve them, share the recipe with a friend who loves pickles and save it for your next party. Enjoy! 😍
Print
Frog Balls (Pickled Brussels Sprouts)
Ingredients
- 1½ lbs fresh Brussels sprouts, trimmed
- 5 garlic cloves, peeled
- 2 cups white vinegar
- 2 cups water
- 2 tablespoons pickling salt
- 2 tablespoons granulated sugar
- 1 teaspoon black peppercorns
- 1 teaspoon mustard seeds
- 1 teaspoon celery seeds
- 1 teaspoon red pepper flakes
- 2 bay leaves
- ½ teaspoon coriander seeds (optional)
- 2 fresh dill sprigs (optional)
Ingredient Notes
Brussels sprouts
Choose small to medium sprouts that are firm, bright green and tightly closed, with no yellowing leaves or black spots. Sprouts of similar size pickle evenly and fit neatly in jars. Very large sprouts can be halved so the brine penetrates.
Garlic
Fresh garlic gives the brine savory depth. Choose firm, plump cloves and discard any that are soft, sprouting or discolored. Lightly crushing the cloves releases their flavor into the brine.
White vinegar
White vinegar supplies the clean, sharp acidity that defines a pickle. Use plain white vinegar with 5% acidity, and do not dilute the brine more than the recipe states.
Pickling salt
Pickling salt has no anti-caking agents or additives, so it dissolves cleanly and keeps the brine clear. If you substitute another salt, measure carefully, since fine and coarse salts differ in volume.
Sugar
Two tablespoons of sugar soften the vinegar’s edge and balance the heat. It will not make the pickles sweet.
Pickling spices
Black peppercorns, mustard seeds, celery seeds, red pepper flakes, bay leaves and optional coriander give the brine its classic pickle flavor. The red pepper flakes add the gentle heat that builds as you eat.
Fresh dill (optional)
Dill sprigs add a bright, herbal aroma that pairs beautifully with the garlic and spices.
Instructions
Step 1: Prepare the Brussels sprouts
Wash thoroughly, remove damaged outer leaves and trim the tough stem ends. Make a small shallow X in the bottom of each sprout to help the brine penetrate.
Step 2: Blanch the sprouts
Bring a large pot of water to a boil. Add the Brussels sprouts and blanch for 3 to 4 minutes. Drain and immediately transfer them to an ice bath to stop the cooking.
Step 3: Prepare the garlic
Peel the garlic cloves and lightly crush them to release their flavor.
Step 4: Pack the jars
Arrange the Brussels sprouts tightly in clean glass jars. Add the garlic, black peppercorns, mustard seeds, celery seeds, red pepper flakes, bay leaves, coriander seeds and fresh dill.
Step 5: Make the brine
In a saucepan, combine white vinegar, water, pickling salt and sugar.
Step 6: Heat the mixture
Bring the brine to a gentle boil, stirring until the salt and sugar dissolve completely.
Step 7: Pour over the sprouts
Carefully pour the hot brine into the jars until the Brussels sprouts are completely submerged.
Step 8: Cool
Allow the jars to cool to room temperature before sealing.
Step 9: Refrigerate
Place the sealed jars in the refrigerator for at least 5 to 7 days to allow the flavors to develop. For a stronger pickle flavor, wait 1 to 2 weeks.
Step 10: Serve
Enjoy these tangy Frog Balls straight from the jar or add them to Bloody Marys, charcuterie boards, antipasto platters, sandwiches and BBQ spreads.
Important Food Safety Information
These are refrigerator pickles, not shelf-stable canned pickles. A few simple rules keep them safe and delicious:
- Keep them refrigerated at or below 40°F (4°C). Once the jars have cooled to room temperature, move them to the refrigerator promptly, and do not leave them out.
- Enjoy within 2 weeks. Plan to finish the jars within that window for the best quality and safety.
- Do not store at room temperature or treat as shelf-stable. Sealing the lid does not make these pickles safe for the pantry.
- Do not can or water-bath process this recipe. It was not designed or tested for canning. If you want shelf-stable pickled vegetables, use a tested home-canning recipe from a trusted food preservation source.
- Garlic needs care. Garlic is a low-acid vegetable that can carry spores of Clostridium botulinum, the bacterium that causes botulism. Garlic stored in liquid at room temperature can create conditions where harmful bacteria grow, so refrigeration is essential.
- Cool before sealing, then refrigerate. The recipe has you let the jars cool to room temperature before sealing. Do not let them sit out for a long time. Refrigerate them as soon as they have cooled, ideally within about 2 hours.
- Keep the sprouts submerged. Sprouts above the brine can discolor or spoil. Pack them snugly and make sure they are fully covered.
- Use clean jars and utensils. Wash jars, lids, tools and hands in hot, soapy water, and use a clean fork or tongs each time you take sprouts from the jar.
- Do not reduce the vinegar or salt significantly. The acid and salt are part of what keeps the pickles safe and flavorful.
- Discard if there are signs of spoilage. These include a bulging lid, spurting liquid when opened, an off or rotten smell, mold, sliminess, unusual fizzing or a very mushy texture. When in doubt, throw it out without tasting.
- Take extra care when serving vulnerable people. If you are serving someone pregnant, elderly, very young or with a weakened immune system, follow your local food safety guidance.
A note on timing. The recipe suggests waiting 5 to 7 days for the flavor to develop, and up to 1 to 2 weeks for a stronger pickle flavor, while also recommending that you enjoy the pickles within 2 weeks. That means the strongest-flavor window overlaps the end of the recommended storage time. If you like very tangy sprouts, plan to finish them promptly rather than keeping them past the 2-week mark.
Tips for the Crunchiest Frog Balls
1. Choose fresh, firm sprouts
Fresh sprouts are crisper and sweeter. Avoid any that are soft, yellowing or have dark spots.
2. Pick sprouts of similar size
Similar sizes pickle evenly. If some sprouts are much larger than others, halve the big ones.
3. Cut the X in the base
The small X at the stem end helps the brine penetrate the dense core. Make it shallow and neat, not deep enough to make the sprout fall apart.
4. Do not skip the ice bath
Blanching tenderizes the sprouts slightly and sets their green color. The ice bath stops the cooking so they stay crunchy. Leave them in the ice water until fully cool, then drain well.
5. Do not over-blanch
Three to four minutes is enough. Longer blanching makes the sprouts soft and dulls their color.
6. Dry the sprouts well
After the ice bath, drain thoroughly and pat dry so extra water does not dilute the brine.
7. Pack the jars snugly
Tightly packed sprouts stay submerged and do not float. Use a spoon handle or chopstick to nudge sprouts into gaps.
8. Use hot brine
Pouring hot brine helps the flavors penetrate. The hot brine goes over the sprouts in the jar, so do not boil them in the brine.
9. Be patient
Frog Balls improve with time. After 5 to 7 days, they are tangy and balanced. After 1 to 2 weeks, they are stronger and more pickle-like.
10. Adjust the heat
For more spice, add extra red pepper flakes, a few slices of fresh chili or a dried chili. For milder pickles, reduce the flakes.
11. Taste a test sprout
After 5 to 7 days, try one sprout. If it is not tangy enough, wait a few more days within the 2-week window.
12. Wear gloves if handling fresh chilies
If you add fresh hot peppers, gloves protect your skin from capsaicin.
Serving Ideas
Frog Balls bring tang and crunch to nearly everything:
In cocktails
- Bloody Marys. Skewer a few Frog Balls as a garnish, alongside celery, olives and bacon.
- Martinis and gin cocktails. Use a sprout in place of an olive for a savory twist.
- Michelada or beer cocktails. Drop a couple into the glass for a tangy kick.