
Easy Homemade French Loaf Bread
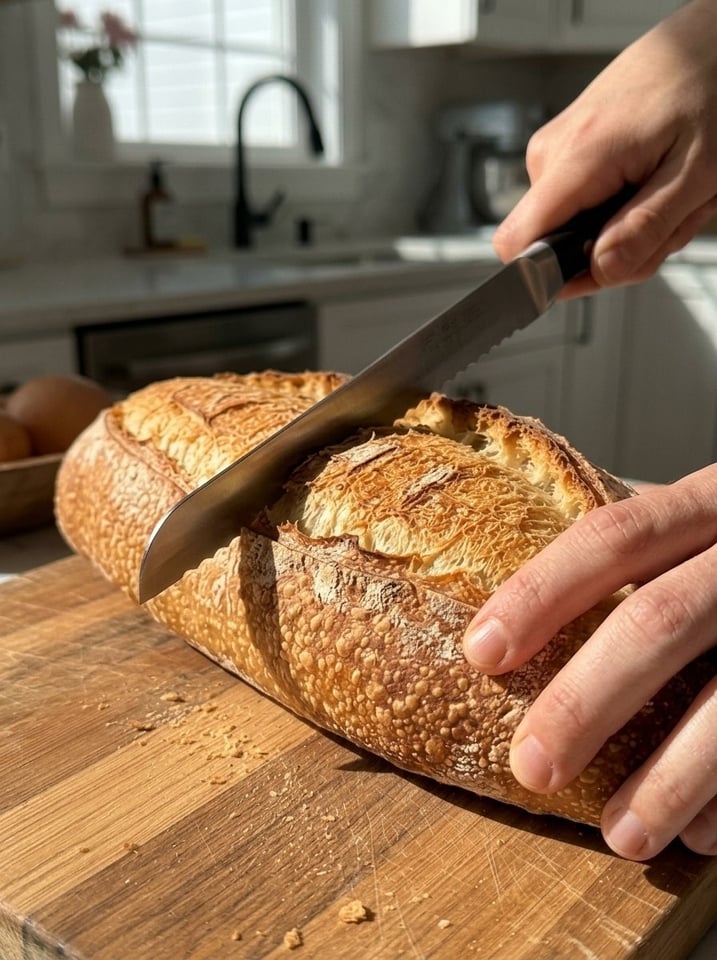
Easy Homemade French Loaf Bread: Golden, Crusty & Chewy Bakery-Style Bread
There’s nothing quite like the sound of a French loaf crackling as it cools on the rack. The crust is golden and crisp, the inside is soft, airy, and gently chewy, and the aroma of fresh-baked bread fills the whole kitchen. This Easy Homemade French Loaf Bread delivers that bakery experience from just five basic ingredients: flour, water, yeast, salt, and a teaspoon of sugar. It makes two small loaves, so you can enjoy one right away and save the other for later, or share it.
It’s the kind of bread that goes with everything: sandwiches, soups, stews, pasta dinners, homemade garlic bread, or simply warm with butter. And it’s far simpler than most people expect. If you can mix, knead, and wait, you can bake a beautiful French loaf at home in about two hours.
In this complete guide, you’ll find the full recipe, a closer look at each ingredient, step-by-step instructions with visual cues, how to shape and score the loaves, how to create steam in a home oven, the optional overnight method for deeper flavor, the science behind a crisp crust and airy crumb, troubleshooting help, variations, serving ideas, storage and freezing instructions, and answers to common questions.
Why You’ll Love This French Loaf Bread ❤️
It uses only a few basic ingredients. Flour, water, instant yeast, salt, and sugar are all you need. Nothing fancy, nothing hard to find.
The crust is golden and crispy. High heat and a bit of steam produce a crackly, deeply colored crust that’s the hallmark of French-style bread.
The center is soft, airy, and chewy. Proper kneading and a full rise give you a light, open crumb with a satisfying chew.
It makes two small loaves. Perfect for freezing one, gifting one, or serving a crowd. The loaves are also easier to handle and bake than a single large loaf.
It’s ready in about 2 hours. Most of that time is hands-off rising, so you can go about your day.
It’s very versatile. Use it for sandwiches, garlic bread, bruschetta, French toast, croutons, or soaking up sauce.
It’s beginner-friendly. The steps are straightforward and the dough is forgiving.
It’s cost-effective. Homemade French bread costs a fraction of bakery prices and contains no preservatives.
You can make it ahead. An optional overnight rise in the refrigerator gives even more flavor and flexibility.
Recipe Overview
- Prep Time: 20 minutes
- Cook Time: 25–30 minutes
- Total Time: About 2 hours
- Servings: 2 small loaves
Ingredients You’ll Need 🛒
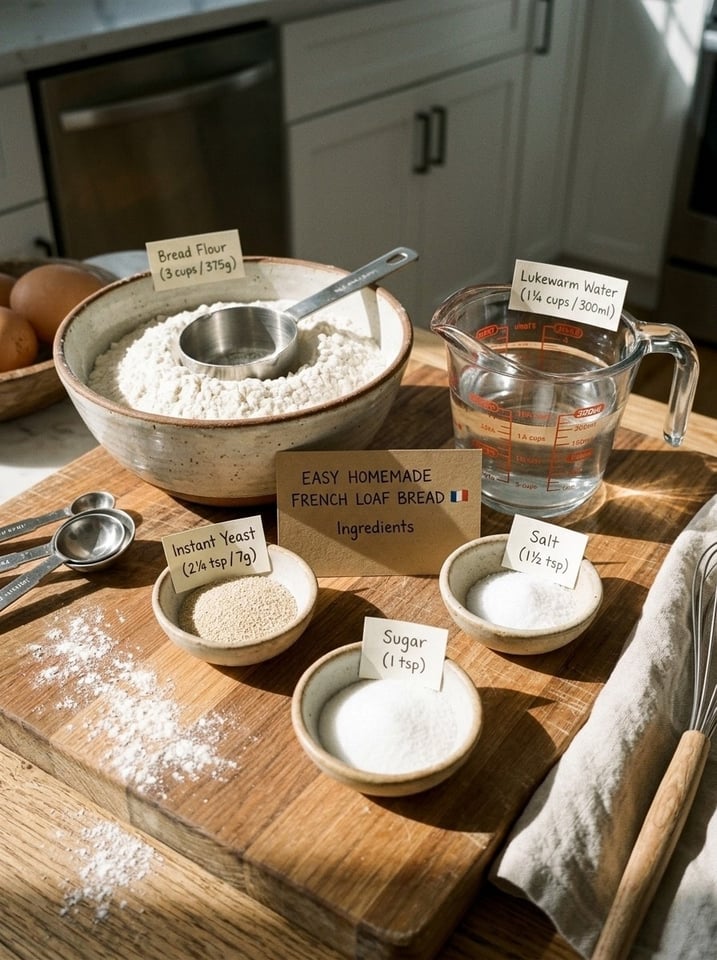
- 3 cups (375 g) bread flour or all-purpose flour
- 1¼ cups (300 ml) lukewarm water
- 2¼ tsp (7 g) instant yeast
- 1½ tsp salt
- 1 tsp sugar
A Closer Look at the Ingredients
Bread flour or all-purpose flour. Bread flour contains more protein, which forms more gluten and gives the loaf a chewier crumb and sturdier crust, closer to what you’d find in a French bakery. All-purpose flour makes a slightly softer, more tender loaf, and still turns out delicious. Weigh the flour at 375 grams if you can. A scooped cup can vary a lot in weight, and too much flour makes a dry, dense loaf.
Lukewarm water. Lukewarm means comfortably warm to the touch, roughly 100°F to 110°F (38°C to 43°C). Water that’s too hot will kill the yeast, while water that’s too cold slows the rise. This dough has moderate hydration, so it’s easy to knead but still produces an airy interior.
Instant yeast. Instant yeast can be mixed directly into the flour. If you only have active dry yeast, use the same amount and dissolve it in the lukewarm water with the sugar for 5 to 10 minutes, until foamy, before adding to the flour. Rise times may run slightly longer.
Salt. Salt is essential for flavor and structure, and it keeps the yeast in check. Bread without salt tastes flat and can rise unevenly. Mix the salt into the flour rather than placing it directly on the yeast.
Sugar. A teaspoon gives the yeast a quick boost and helps the crust brown beautifully. It doesn’t make the bread sweet, and traditional French bread often omits it.
Step-by-Step Instructions 👩🍳
Step 1: Mix the Ingredients
In a large bowl, combine the flour, yeast, sugar, and salt. Whisk briefly so everything is evenly distributed. Add the lukewarm water and stir with a wooden spoon or your hands until a rough, shaggy dough forms and no dry flour remains. It will look messy at this stage, and that’s normal.
Step 2: Knead the Dough
Turn the dough onto a lightly floured surface and knead for 8 to 10 minutes, until it’s smooth and elastic. To knead, push the dough away from you with the heel of your hand, fold it back toward you, rotate it a quarter turn, and repeat. At first, the dough will be sticky. Resist adding too much extra flour. Dust your hands and the surface lightly, and use a bench scraper if needed. The dough is ready when it feels smooth, springs back when you poke it, and passes the windowpane test: a small piece should stretch thin enough to see light through without tearing. A stand mixer with a dough hook on low speed will take about 6 to 8 minutes.
Step 3: Let It Rise
Place the dough in a lightly greased bowl and turn it once to coat. Cover with plastic wrap or a damp towel and let it rise in a warm place for 60 to 75 minutes, or until doubled in size. A turned-off oven with the light on makes a good draft-free spot. The dough is ready when a fingertip pressed lightly into it leaves an indentation that springs back slowly.
Step 4: Shape the Loaves
Turn the dough out onto a lightly floured surface and divide it into two equal portions. A kitchen scale helps make them exactly equal. Gently press each portion into a rectangle, taking care not to deflate it completely. Fold the top third down to the center and press to seal, then fold the bottom third up over it and seal again. Fold the dough in half lengthwise and pinch the seam firmly closed. Then roll each piece gently under your palms, stretching it into a long loaf with tapered ends. Keep the seam on the bottom. Shaping with a bit of tension helps the loaf rise up rather than spread out.
Step 5: Second Rise
Place the loaves on a parchment-lined baking sheet with space between them, seam side down. Cover loosely with a towel or greased plastic wrap and let them rest for 25 to 35 minutes, until puffy but not fully doubled. Meanwhile, position one oven rack in the middle and another on the lowest rung, ready for the steam pan.
Step 6: Preheat and Score
Preheat the oven to 450°F (230°C). Just before baking, make 3 to 4 shallow diagonal slashes across each loaf using a very sharp knife or a bread lame. Hold the blade at about a 30-degree angle and cut roughly ¼ inch deep, with each slash slightly overlapping the next. Quick, confident cuts work better than slow, careful ones. Scoring controls where the loaf expands, producing the classic French loaf look.
Step 7: Bake Until Golden
Bake for 25 to 30 minutes, until the crust is deeply golden and crisp. For a crustier finish, carefully create steam by placing an oven-safe metal tray or pan on the lower rack while the oven preheats, then pouring about 1 cup of hot water into it as you load the bread. Close the oven door quickly to trap the steam. Take care to avoid steam burns. The loaves are done when they’re deep golden brown and sound hollow when tapped on the bottom. The internal temperature should be about 200°F to 210°F (93°C to 99°C).
Step 8: Cool and Enjoy
Transfer the loaves to a wire rack and let them cool for at least 20 minutes before slicing. You may hear them crackle as they cool, which is a sign of a great crust. Cutting too early releases steam and can leave the crumb gummy.
The Overnight Method: More Flavor, More Flexibility 🌙
If you want a deeper, more complex flavor and more flexibility in your schedule, try letting the dough rise slowly in the refrigerator overnight.
How to do it: After kneading, place the dough in a lightly greased, covered bowl and refrigerate it for 8 to 16 hours. The cold slows the yeast and gives enzymes time to develop richer flavor. The next day, let the dough sit at room temperature for 30 to 45 minutes until it’s no longer cold. Then divide, shape, let the loaves rise for 30 to 40 minutes, score, and bake as directed.
Why it works: During a slow, cold fermentation, the yeast produces flavor compounds, such as organic acids and alcohols, that give the bread a more nuanced, slightly tangy, wheaty taste. The result is closer to what you’d find in a good French bakery.
Schedule tip: Knead the dough in the evening, refrigerate overnight, and bake the next afternoon, or knead in the morning and bake after work.
The Science Behind a Crisp Crust and Airy Crumb 🔬
Kneading builds gluten. Working the dough aligns gluten proteins into a stretchy network that traps gas produced by the yeast. This is what gives French bread its chew and its lift.
Rising develops flavor and volume. As the yeast ferments, it produces carbon dioxide, which inflates the dough, and flavor compounds, which give the bread its aroma.
Steam makes the crust. In the early minutes of baking, steam keeps the surface of the dough moist and flexible, allowing the loaf to expand fully, a phenomenon called oven spring. As the steam dissipates, the surface dries and sets into a thin, crisp, glossy crust.
High heat gives color and flavor. At 450°F (230°C), the crust browns through the Maillard reaction and caramelization, producing deep golden color and toasty, complex flavor.
Scoring directs expansion. Shallow cuts give the loaf a controlled place to expand, preventing random tearing and producing an attractive pattern.
Cooling finishes the bread. As the loaf cools, steam escapes and the crumb sets. This is why cutting too early gives a gummy texture.
Expert Tips for Perfect French Loaf Bread 💡
For a crispy crust: Steam during the beginning of baking helps create that classic French-bread texture.
For an airy crumb: Knead well and allow the dough to rise fully.
For extra flavor: Let the dough rise slowly in the refrigerator overnight, then shape and bake the next day.
For the best slices: Cool completely before cutting.
Don’t add too much flour. A slightly tacky dough produces a softer, lighter loaf.
Check your yeast. Old yeast is a common reason loaves fail. If you’re unsure, stir a pinch into lukewarm water with sugar. It should foam within 10 minutes.
Shape with tension. Tight shaping helps the loaf hold its form and rise upward.
Use a very sharp blade. A dull knife drags and deflates the dough. A razor blade or bread lame gives the cleanest cuts.
Score just before baking. If you score too early, the dough can deflate.
Don’t overproof the second rise. Overproofed loaves spread and lose their shape. Bake when the loaves look puffy but still hold their form.
Use a baking stone or steel. If you have one, preheat it for 30 minutes and slide the loaves on parchment onto it for a crisper bottom and better oven spring.
Check your oven temperature. An oven thermometer can reveal whether your oven runs hot or cool, which affects browning and rise.
Bake to a deep golden color. Pale loaves taste bland and have a soft crust. Don’t be afraid of a rich color.
Troubleshooting Common Problems
My loaves are pale. The oven may not be hot enough, or the bread was pulled too early. Preheat fully and bake until deep golden.
The crust is soft, not crisp. There wasn’t enough steam, or the bread was stored in plastic. Use the water pan, and cool the loaves on a rack, uncovered.
The crumb is dense. Too much flour, too little kneading, or an under-risen dough can cause density. Weigh the flour, knead until smooth, and let the dough double.
The loaves spread flat. The dough may have been overproofed or the shaping too loose. Shorten the second rise and shape with more tension.
The scoring didn’t open. The blade may have been dull, the cuts too shallow, or the dough overproofed. Use a sharp blade and score confidently.
The crust is too thick and hard. The loaves may have baked too long, or too much steam was left in too long. Check for doneness at the early end of the baking window.
The inside is gummy. The loaves may need more time in the oven, or they were cut before cooling. Cool for at least 20 minutes.
The bottom is burned. Move the rack up a notch, use a lighter-colored baking sheet, or double up sheet pans.
The dough didn’t rise. Check that the yeast is fresh and the water wasn’t too hot or cold. Move the dough to a warmer place.
The bread tastes too yeasty. Too much yeast or too short a rise can cause this. Try the overnight method for a cleaner, richer flavor.
Delicious Variations to Try 🧄
Garlic herb French loaf. Knead 1 to 2 teaspoons of dried herbs and a teaspoon of garlic powder into the dough.
Cheese-topped loaf. Sprinkle shredded Parmesan or Gruyère over the loaves for the last 5 to 8 minutes of baking.
Seeded French loaf. Brush the shaped loaves with water and sprinkle with sesame, poppy, or sunflower seeds before baking.
Olive French loaf. Fold ½ cup of chopped olives into the dough after the first rise.
Whole wheat French loaf. Replace up to 1 cup of the flour with whole wheat flour, adding a tablespoon or two of extra water.
Rosemary French loaf. Add finely chopped fresh rosemary to the dough or sprinkle on top before baking.
Mini loaves. Divide the dough into four portions for smaller loaves and reduce the baking time by 5 to 8 minutes.
Sandwich rolls. Divide the dough into 8 pieces, shape into rolls, and bake for about 15 to 20 minutes.
Garlic bread. Slice a baked loaf, spread with garlic butter and parsley, and toast under the broiler.
Boule-style loaf. Shape the dough into a round and bake for 30 to 35 minutes for a rustic country loaf.
What to Serve with Homemade French Loaf Bread 🍽️
- Warm with butter: Simple, classic, and unbeatable.
- Soups and stews: Pair with French onion soup, tomato soup, or beef stew.
- Pasta dishes: Serve alongside spaghetti, lasagna, or baked ziti to soak up the sauce.
- Sandwiches: Fill with ham and Swiss, turkey and avocado, or Italian cold cuts.
- Garlic bread: Spread with garlic butter and toast for a side that disappears fast.
- Cheese boards: Slice thinly and serve with brie, cheddar, cured meats, and fruit.
- Bruschetta and crostini: Toast slices and top with tomatoes and basil or whipped ricotta.
- Olive oil and balsamic: Dip torn pieces into a dish of oil and vinegar.
- French toast: Day-old slices soak up custard beautifully.
- Breakfast: Serve with eggs, jam, or honey.
Storage and Freezing Instructions
Fresh is best. French loaves are at their peak within hours of baking, when the crust is at its crispiest.
Room temperature: Store leftovers in a paper bag for up to 2 days. Paper lets the bread breathe, preserving the crust. Avoid plastic bags, which trap moisture and soften the crust.
Freezer: Cool completely, wrap tightly in foil or a freezer bag, and freeze for up to 2 to 3 months. You can also slice before freezing for convenience.
Reheating and refreshing: Warm a loaf in a 375°F (190°C) oven for 5 to 10 minutes to bring back the crispness. If it’s very stale, lightly sprinkle it with water before heating. Frozen loaves can go straight into the oven, adding a few extra minutes.
Using stale bread: Day-old French bread makes wonderful croutons, breadcrumbs, French toast, bread pudding, and panzanella salad.
Frequently Asked Questions
Do I have to knead the dough by hand? You can, and it only takes 8 to 10 minutes. A stand mixer with a dough hook on low speed will do the job in about 6 to 8 minutes.
Can I use all-purpose flour instead of bread flour? Yes. All-purpose flour makes a slightly softer, less chewy loaf, but it still tastes delicious.
Can I use active dry yeast instead of instant yeast? Yes. Use the same amount, dissolve it in the lukewarm water with the sugar for 5 to 10 minutes until foamy, then continue. The rise may take a bit longer.
Do I need a baking stone? No. A parchment-lined baking sheet works well. A baking stone or steel gives a slightly crisper bottom and better rise, but it’s optional.
How do I create steam in a home oven? Place a heatproof metal pan on the lowest rack while the oven preheats. When you load the bread, carefully pour in about 1 cup of hot water and close the door quickly. You can also spritz the oven walls with water.
Do I need a bread lame? No. A very sharp knife or a clean razor blade works fine. Quick, confident, shallow cuts are the key.
Why isn’t my crust crispy? The most common causes are not enough steam, underbaking, or storing the bread in plastic. Use the water pan, bake until deep golden, and cool on a wire rack.
Can I let the dough rise overnight? Yes. Refrigerate the covered dough for 8 to 16 hours for deeper flavor. Let it warm up for 30 to 45 minutes before shaping and baking.
How do I know when the loaves are done? They should be deep golden brown and sound hollow when tapped on the bottom, with an internal temperature of 200°F to 210°F (93°C to 99°C).
Can I freeze the dough? You can freeze the dough after the first rise, thaw it in the refrigerator overnight, then shape and bake. Freezing fully baked loaves tends to give more consistent results.
What’s the difference between a French loaf and a baguette? They’re closely related. A baguette is typically longer and thinner with more crust, while a French loaf is usually shorter and wider, with a bit more soft crumb in the center. The dough is nearly identical.
Can I make this recipe without sugar? Yes. Sugar is optional. Traditional French bread is made without it, though it adds a little extra browning.
Can I double the recipe? Yes. Knead in a larger bowl or a stand mixer, divide into four portions, and bake on two sheets, rotating halfway through.
Why are my loaves flat? Overproofing, overly wet dough, or loose shaping can cause flat loaves. Shape firmly and shorten the second rise if needed.
Final Thoughts 🥖✨
This Easy Homemade French Loaf Bread brings the best of a French bakery into your own kitchen with five simple ingredients and about two hours of mostly hands-off time. The crust is golden and crisp, the center is soft, airy, and chewy, and the aroma alone is worth the effort. It makes two loaves, so you can enjoy one warm with butter and save the other for sandwiches, soup, or garlic bread.
Knead well, let the dough rise fully, add a little steam, and cool the loaves before slicing. Or try the overnight method for an even deeper flavor. Fresh, crusty French bread, made right at home. Bon appétit!
Print
Easy Homemade French Loaf Bread
Ingredients
- 3 cups (375 g) bread flour or all-purpose flour
- 1¼ cups (300 ml) lukewarm water
- 2¼ tsp (7 g) instant yeast
- 1½ tsp salt
- 1 tsp sugar
A Closer Look at the Ingredients
Bread flour or all-purpose flour. Bread flour contains more protein, which forms more gluten and gives the loaf a chewier crumb and sturdier crust, closer to what you’d find in a French bakery. All-purpose flour makes a slightly softer, more tender loaf, and still turns out delicious. Weigh the flour at 375 grams if you can. A scooped cup can vary a lot in weight, and too much flour makes a dry, dense loaf.
Lukewarm water. Lukewarm means comfortably warm to the touch, roughly 100°F to 110°F (38°C to 43°C). Water that’s too hot will kill the yeast, while water that’s too cold slows the rise. This dough has moderate hydration, so it’s easy to knead but still produces an airy interior.
Instant yeast. Instant yeast can be mixed directly into the flour. If you only have active dry yeast, use the same amount and dissolve it in the lukewarm water with the sugar for 5 to 10 minutes, until foamy, before adding to the flour. Rise times may run slightly longer.
Salt. Salt is essential for flavor and structure, and it keeps the yeast in check. Bread without salt tastes flat and can rise unevenly. Mix the salt into the flour rather than placing it directly on the yeast.
Sugar. A teaspoon gives the yeast a quick boost and helps the crust brown beautifully. It doesn’t make the bread sweet, and traditional French bread often omits it.
Instructions
In a large bowl, combine the flour, yeast, sugar, and salt. Whisk briefly so everything is evenly distributed. Add the lukewarm water and stir with a wooden spoon or your hands until a rough, shaggy dough forms and no dry flour remains. It will look messy at this stage, and that’s normal.
Turn the dough onto a lightly floured surface and knead for 8 to 10 minutes, until it’s smooth and elastic. To knead, push the dough away from you with the heel of your hand, fold it back toward you, rotate it a quarter turn, and repeat. At first, the dough will be sticky. Resist adding too much extra flour. Dust your hands and the surface lightly, and use a bench scraper if needed. The dough is ready when it feels smooth, springs back when you poke it, and passes the windowpane test: a small piece should stretch thin enough to see light through without tearing. A stand mixer with a dough hook on low speed will take about 6 to 8 minutes.
Place the dough in a lightly greased bowl and turn it once to coat. Cover with plastic wrap or a damp towel and let it rise in a warm place for 60 to 75 minutes, or until doubled in size. A turned-off oven with the light on makes a good draft-free spot. The dough is ready when a fingertip pressed lightly into it leaves an indentation that springs back slowly.
Turn the dough out onto a lightly floured surface and divide it into two equal portions. A kitchen scale helps make them exactly equal. Gently press each portion into a rectangle, taking care not to deflate it completely. Fold the top third down to the center and press to seal, then fold the bottom third up over it and seal again. Fold the dough in half lengthwise and pinch the seam firmly closed. Then roll each piece gently under your palms, stretching it into a long loaf with tapered ends. Keep the seam on the bottom. Shaping with a bit of tension helps the loaf rise up rather than spread out.
Place the loaves on a parchment-lined baking sheet with space between them, seam side down. Cover loosely with a towel or greased plastic wrap and let them rest for 25 to 35 minutes, until puffy but not fully doubled. Meanwhile, position one oven rack in the middle and another on the lowest rung, ready for the steam pan.
Preheat the oven to 450°F (230°C). Just before baking, make 3 to 4 shallow diagonal slashes across each loaf using a very sharp knife or a bread lame. Hold the blade at about a 30-degree angle and cut roughly ¼ inch deep, with each slash slightly overlapping the next. Quick, confident cuts work better than slow, careful ones. Scoring controls where the loaf expands, producing the classic French loaf look.
Bake for 25 to 30 minutes, until the crust is deeply golden and crisp. For a crustier finish, carefully create steam by placing an oven-safe metal tray or pan on the lower rack while the oven preheats, then pouring about 1 cup of hot water into it as you load the bread. Close the oven door quickly to trap the steam. Take care to avoid steam burns. The loaves are done when they’re deep golden brown and sound hollow when tapped on the bottom. The internal temperature should be about 200°F to 210°F (93°C to 99°C).
Transfer the loaves to a wire rack and let them cool for at least 20 minutes before slicing. You may hear them crackle as they cool, which is a sign of a great crust. Cutting too early releases steam and can leave the crumb gummy.