
Homemade Pita Bread
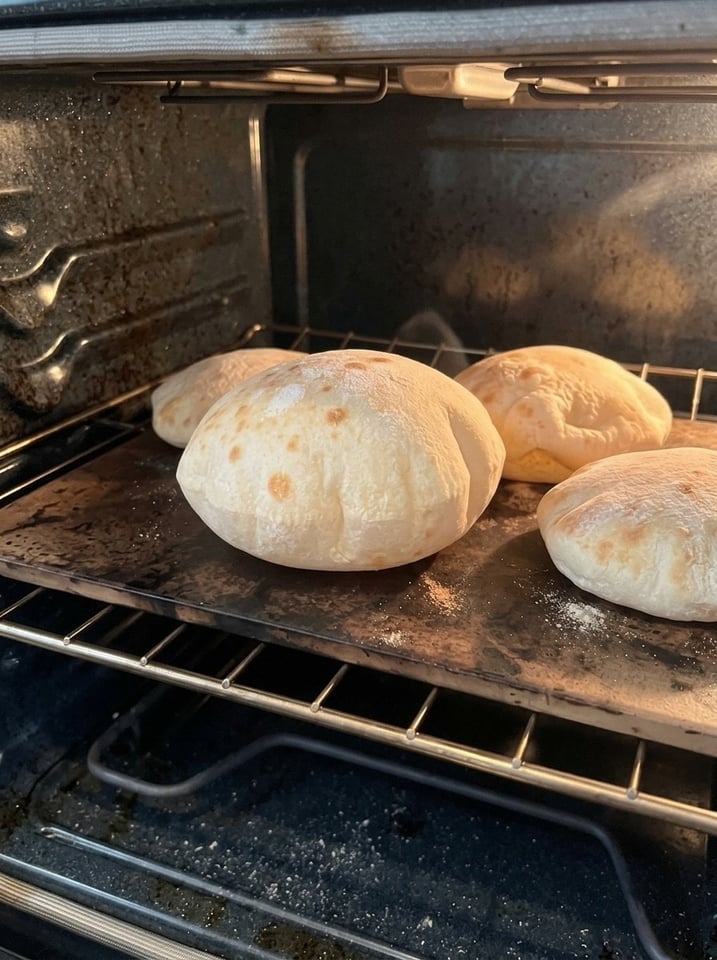
Homemade Pita Bread – Watch It Puff Up in the Oven! 🫓
This homemade pita bread is soft, fluffy and wonderfully chewy, with a beautiful pocket that magically puffs up in the oven. Made with simple pantry ingredients, these homemade flatbreads are perfect for stuffing with grilled chicken, falafel, fresh vegetables or your favorite sandwich fillings. They are also delicious served warm with hummus, creamy dips or a drizzle of olive oil. And the best part? Watching each pita inflate into a golden little pillow as it bakes is a small kitchen miracle that never gets old. 😍🔥
Once you have tasted warm pita fresh from the oven, store-bought versions are hard to go back to. In this guide you will find the complete recipe, the science behind the puff, step-by-step tips, troubleshooting for pitas that refuse to inflate, variations, serving ideas, storage and freezing advice, and answers to frequently asked questions.
Why You Will Love This Pita Bread
- Simple ingredients. Flour, water, yeast, olive oil, sugar and salt are all you need.
- Soft and chewy. Homemade pita has a tender, pillowy texture that store-bought pita rarely matches.
- The fun factor. Watching the dough puff up in the oven is wonderfully satisfying, especially with kids.
- Versatile. Stuff it, dip it, top it, toast it or turn it into mini pizzas.
- Freezer-friendly. Make a batch and freeze extras for quick meals.
- Beginner-friendly. It is a straightforward yeast dough with no special equipment beyond a very hot oven.
- Fast for a yeast bread. About an hour of rising and only 2 to 3 minutes of baking per pita.
Recipe Card at a Glance
- Prep time: 20 minutes
- Rising time: 1 hour
- Cook time: 2 to 3 minutes per pita
- Total time: Approximately 1 hour 35 minutes
- Yield: 8 pita breads
- Course: Bread, side, sandwich base
- Cuisine: Mediterranean, Middle Eastern
- Method: Oven-baked
Ingredients
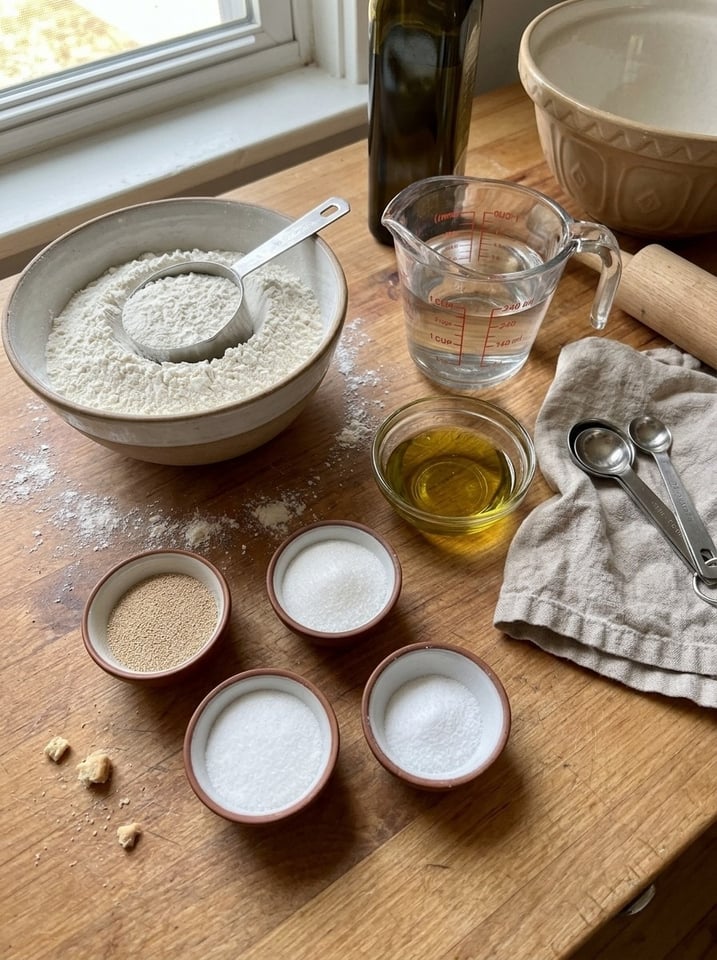
For the pita dough
- 3 cups (375 g) all-purpose flour or bread flour
- 1 cup (240 ml) warm water
- 2 teaspoons instant yeast
- 1 tablespoon olive oil
- 1 teaspoon sugar
- 1 teaspoon salt
For shaping
- A little extra flour for dusting
- Olive oil for serving (optional)
What Makes Pita Puff?
The pocket in pita bread is not a coincidence. It is physics and baking science working together:
- A very hot baking surface. When the thin dough round hits a surface heated to around 475°F (245°C), the bottom of the dough sets quickly.
- Rapid steam formation. The moisture in the dough instantly turns to steam inside the round.
- Expansion. The steam expands and pushes the top and bottom layers of the dough apart.
- Setting the structure. The outer layers firm up quickly, trapping the pocket in place as the bread finishes baking.
For this to work, the dough must be rolled evenly, so the steam inflates the round uniformly instead of escaping through a thin spot. The baking surface must be truly hot, so the heat shock is fast and strong. And the dough must not be dried out or overbaked, so the surface stays flexible enough to stretch.
Step-by-Step Instructions
Step 1: Activate the yeast 🌡️
In a large mixing bowl, combine the warm water, sugar and instant yeast. Stir gently and let stand for 5 minutes. If you are using instant yeast, you can proceed even if the mixture does not become very foamy. The water should be warm, not hot, since water that is too hot can kill the yeast.
Step 2: Make the dough 🥣
Add the flour, salt and olive oil. Mix until a rough dough forms. Transfer the dough to a lightly floured surface and knead for 8 to 10 minutes, until smooth, soft and elastic. The dough should feel slightly tacky but should not stick excessively to your hands.
Step 3: Let the dough rise ⏳
Place the dough in a lightly greased bowl and cover it with a clean kitchen towel or plastic wrap. Let it rise in a warm place for 45 to 60 minutes, or until approximately doubled in size.
Step 4: Divide into equal portions ✨
Gently press the dough to release excess air. Divide it into 8 equal pieces and roll each into a smooth ball. Cover the dough balls with a towel and let them rest for 10 to 15 minutes. This makes them easier to roll without shrinking back.
Step 5: Roll into pita rounds 🫓
Lightly flour your work surface and roll each dough ball into a round approximately 6 to 7 inches (15 to 18 cm) wide and about ⅛ inch (3 to 4 mm) thick. Try to keep the thickness even across the entire round. Avoid making the edges much thinner than the center, as this can prevent the pita from puffing evenly. Cover the rolled rounds with a clean towel while you prepare the oven.
Step 6: Preheat the oven 🔥
Place a heavy baking tray, baking steel or pizza stone on the middle rack. Preheat the oven to 475°F (245°C) for at least 20 to 30 minutes so the baking surface becomes thoroughly hot. A very hot baking surface is the secret to creating the steam inside the dough that makes the pita puff into a pocket.
Step 7: Watch the pita puff up! 😍
Carefully place one or two pita rounds on the hot baking surface, leaving enough room between them. Bake for approximately 2 to 3 minutes. Watch as the dough begins to inflate, forming a beautiful, airy pocket. Once fully puffed and lightly colored, remove the pita carefully with tongs. Avoid overbaking, as this can make the bread dry and crisp rather than soft. Repeat with the remaining rounds.
Step 8: Keep the pita soft 🤍
Immediately place the baked pita breads inside a clean kitchen towel and cover them. Stacking and covering the warm pitas traps a little moisture, helping keep their crusts soft and flexible.
Step 9: Serve and enjoy! 🥙
Serve the pita breads warm while they are soft and fluffy. Carefully open the pocket with a knife and fill it with grilled chicken, falafel, hummus, cucumber, tomatoes, lettuce or your favorite fillings. You can also cut the pitas into wedges and serve with hummus, tzatziki or baba ganoush. 🫓✨
Tips for Perfect Homemade Pita Bread
1. Preheat thoroughly
A very hot oven and baking surface help create the rapid steam expansion needed for a pocket. Do not rush the preheating. Give the oven and the baking surface at least 20 to 30 minutes at full temperature.
2. Roll evenly
Uniform thickness helps the pita inflate properly. Rotate the dough as you roll and check for thick or thin spots. Rolling from the center outward gives the most even results.
3. Do not use too much flour
Excess flour can dry the dough and make it harder to roll. Use just enough to prevent sticking, and brush off any extra flour before baking, since flour on the surface can burn on a hot baking sheet.
4. Let the dough rest
Resting relaxes the gluten, making the rounds easier to shape and keeping them from springing back as you roll.
5. Avoid overbaking
Pitas cook quickly. Remove them once they have puffed and have light color to preserve their softness. Long baking turns them dry and cracker-like.
6. Keep baked pitas covered
A clean towel helps prevent them from drying out while you bake the remaining rounds. The trapped steam softens the crust as the pitas rest.
7. Bake a test pita first
If you are not sure whether your oven and baking surface are hot enough, bake one pita first. If it puffs, you are in good shape. If not, adjust the oven temperature, preheat longer or check the thickness of your rounds.
8. Work with one or two pitas at a time
Overcrowding the baking surface lowers the temperature and makes it harder for pitas to puff. Bake in small batches for the best results.
9. Handle the rolled dough gently
Do not poke, pinch or crease the rounds after rolling, because any damage can allow steam to escape rather than puff the pita.
10. Do not flip unless needed
Pitas typically puff best when baked on one side without moving them. If a pita is lightly colored on the bottom but still pale on top, you can turn it over for 30 seconds, but be careful not to deflate it.
If a Pita Does Not Puff
Do not worry, since even imperfect pitas taste great as flatbread. If a pita does not puff, it may be due to one of these causes:
- Uneven rolling. A thin spot lets steam escape. Roll more evenly next time.
- The baking surface was not hot enough. Preheat longer, and make sure the oven reaches full temperature.
- The dough dried out. Keep rolled rounds covered with a towel while you wait to bake.
- The dough was too thick or too thin. Aim for about ⅛ inch (3 to 4 mm).
- Too much flour on the surface. Brush off excess before baking.
- The dough was torn or creased. Handle gently after rolling.
- The dough was underproofed or overproofed. Let it rise until doubled, but not until it collapses.
Pitas that do not puff can still be served as soft flatbread, brushed with olive oil and sprinkled with herbs, or used as a base for mini pizzas.
Flour Choices: All-Purpose vs. Bread Flour
The recipe works with either all-purpose flour or bread flour. All-purpose flour gives a softer, more tender pita. Bread flour has more protein and gives a chewier, slightly stronger dough that can be easier to puff. You can also replace up to about a third of the flour with whole wheat flour for a heartier flavor. If you do, you may need a little extra water, since whole wheat absorbs more liquid.
Variations to Try
- Whole wheat pita. Replace 1 cup of the flour with whole wheat flour and add a tablespoon of water if the dough feels dry.
- Garlic and herb pita. Brush the warm pitas with olive oil, minced garlic and chopped parsley.
- Za’atar pita. Brush with olive oil and sprinkle with za’atar before or after baking.
- Seeded pita. Press sesame seeds or nigella seeds into the dough before baking.
- Mini pitas. Divide the dough into 16 pieces for small pitas, perfect for dips or bites. Reduce baking time slightly.
- Pita chips. Cut pitas into wedges, brush with olive oil, season and bake until crisp.
- Stovetop pita. Cook the rolled rounds in a hot cast iron skillet, 1 to 2 minutes per side, until they puff and have golden spots.
- Grill pita. Cook on a hot grill for a smoky flavor and charred spots.
- Cheese-stuffed pita. Place a little cheese in the center and fold the dough over, sealing the edges, then roll gently and cook on a skillet.
- Pocketless pita. If you prefer flatbread for wraps, roll the dough slightly thinner and cook it in a skillet for soft, pliable wraps.
Stovetop Method
If you do not want to use the oven, a stovetop method is a convenient alternative:
- Heat a heavy skillet or cast iron pan over medium-high heat.
- Place a rolled pita round in the dry pan.
- Cook for about 1 minute, until bubbles begin to form.
- Flip and cook for another 1 to 2 minutes, until the pita starts to puff.
- Flip again if needed to encourage puffing, then transfer to a towel.
This method may produce more uneven pockets, but the taste is just as good, and the golden-brown spots add flavor.
Delicious Ways to Enjoy Homemade Pita Bread
- Chicken pita pockets: Fill with grilled chicken, lettuce, tomatoes and garlic yogurt sauce.
- Falafel wraps: Add falafel, hummus, cucumber and fresh herbs.
- Mediterranean breakfast: Serve with feta cheese, olives, tomatoes and olive oil.
- Hummus dipping bread: Cut into wedges and serve warm with your favorite dips.
- Mini pita pizzas: Add tomato sauce, mozzarella and your favorite toppings, then bake until bubbly.
- Quick sandwich: Fill with tuna, egg salad, roasted vegetables or grilled halloumi.
- Gyro-style: Stuff with seasoned meat, tomatoes, onions and tzatziki.
- Shawarma night: Fill with sliced chicken or beef, pickles, garlic sauce and salad.
- With soups and stews: Use warm pita for dipping and scooping.
- Pita nachos: Cut into triangles, toast and top with cheese and toppings.
Best Dips to Serve with Pita
- Classic hummus
- Baba ganoush
- Tzatziki
- Labneh with olive oil
- Muhammara (roasted red pepper and walnut dip)
- Tahini sauce
- Olive tapenade
- Whipped feta
- Garlic yogurt sauce
Storage, Make-Ahead and Freezing
Room temperature
Once completely cooled, keep pitas in an airtight bag at room temperature for up to 2 days.
Freezer
Separate the cooled pitas with parchment paper and freeze in a sealed bag for up to 3 months. Reheat in a warm skillet or oven.
Reheating
To refresh a pita, warm it in a dry skillet for 20 to 30 seconds per side, or wrap it in foil and warm it in a 350°F (175°C) oven for a few minutes. A quick sprinkle of water on the surface before warming helps restore softness. A short burst in the microwave, covered with a damp paper towel, also works.
Make-ahead dough
You can refrigerate the dough after the first rise for up to a day. Bring it to room temperature before dividing and rolling. You can also freeze portioned dough balls, thaw them in the refrigerator and let them rest at room temperature before rolling.
Troubleshooting Common Problems
My dough is too sticky
Add a small amount of flour, a tablespoon at a time, while kneading. Keep in mind that the dough should be soft and slightly tacky, so avoid adding too much.
My dough is too dry or stiff
Add a teaspoon of water at a time, and knead until smooth. Stiff dough will be harder to roll and less likely to puff.
My dough is not rising
The water may have been too hot or too cold, the yeast may be old or the room may be too cool. Check the expiration date on your yeast and try a warmer spot, such as an oven with only the light on.
My pitas are dry and crisp
They were probably overbaked or left uncovered after baking. Reduce the baking time and wrap them in a towel as soon as they come off the heat.
My pitas are tough
The dough may have been overworked, the flour may be too high in protein for your preference or the pitas were baked too long. Let the dough rest, and use all-purpose flour for a more tender result.
My pitas are pale
Pitas bake quickly and do not brown deeply. Light color is normal. If you want more color, bake slightly longer, but do not sacrifice softness.
The pitas stuck to the baking surface
Make sure the surface is hot and lightly floured. Avoid using too much flour, but a little prevents sticking.
Common Mistakes to Avoid
- Not preheating long enough. The baking surface must be extremely hot.
- Rolling too thick or too thin. Aim for about ⅛ inch (3 to 4 mm).
- Uneven rolling. Thin edges or thick centers reduce puffing.
- Overbaking. Pitas turn dry and crisp quickly.
- Letting rolled dough dry out. Always cover it with a towel.
- Skipping the rest period. The dough will shrink back when rolled.
- Using water that is too hot. It can kill the yeast.
- Adding too much flour. It makes the dough dry and tough.
- Leaving baked pitas uncovered. They dry out and lose their softness.
Frequently Asked Questions
Can I use active dry yeast instead of instant yeast?
Yes. Use the same amount, but make sure to dissolve it in warm water with the sugar for 5 to 10 minutes until foamy before adding the flour.
Can I make pita bread without sugar?
Yes. The sugar feeds the yeast and helps it activate, but the small amount in this recipe is not essential. You can leave it out or replace it with a little honey.
Can I make the dough in a stand mixer?
Yes. Use the dough hook and knead on medium-low speed for about 6 to 8 minutes, until smooth and elastic.
Can I make it without kneading by hand?
You can use a stand mixer or bread machine on the dough cycle. Kneading develops the gluten, which gives pita its characteristic chew and ability to puff.
Why is my pita not forming a pocket?
Uneven rolling, a baking surface that is not hot enough, dried-out dough or thickness that is off can all prevent a pocket. See the troubleshooting section above.
What if I do not have a baking steel or pizza stone?
Use a heavy, inverted baking sheet preheated in the oven. Placing the sheet upside down makes it easier to slide the rounds on and off. A cast iron pan or a skillet on the stovetop also works.
How thick should I roll the dough?
About ⅛ inch (3 to 4 mm) is ideal. Thinner rounds may bake into crisp, cracker-like flatbreads, while thicker ones may not puff well.
Can I make smaller or larger pitas?
Yes. Divide the dough into 12 to 16 pieces for smaller pitas or 6 for larger ones. Adjust rolling size and baking time accordingly.
Are pitas vegan?
Yes. This recipe contains no animal products, so it is vegan as written.
Can I add whole wheat flour?
Yes. Replace part of the flour with whole wheat flour for a nuttier flavor. Add a little more water if needed.
How do I know when the pita is done?
It will be fully puffed, lightly colored on top and slightly golden on the bottom. It should still feel soft and flexible when removed.
Can I freeze the pitas?
Yes. Freeze cooled pitas in a sealed bag with parchment paper between them for up to 3 months. Reheat in a warm skillet or oven.
Final Thoughts
Homemade pita bread is one of the most rewarding breads you can bake: it takes simple ingredients, a bit of time and a very hot oven, and turns them into soft, fluffy, pocket-filled breads that are perfect for dipping, stuffing and sharing. Once you have watched your first pita puff into a golden pillow, you will be hooked. Make a batch for your next Mediterranean feast, weeknight dinner or hummus night, and enjoy the freshness that only homemade bread can offer.
If you try the recipe, leave a comment with your favorite filling, share it with a friend who loves bread baking and save it for your next kitchen adventure. Enjoy! 🫓🤍
Print
Homemade Pita Bread
Ingredients
For the pita dough
- 3 cups (375 g) all-purpose flour or bread flour
- 1 cup (240 ml) warm water
- 2 teaspoons instant yeast
- 1 tablespoon olive oil
- 1 teaspoon sugar
- 1 teaspoon salt
For shaping
- A little extra flour for dusting
- Olive oil for serving (optional)
What Makes Pita Puff?
The pocket in pita bread is not a coincidence. It is physics and baking science working together:
- A very hot baking surface. When the thin dough round hits a surface heated to around 475°F (245°C), the bottom of the dough sets quickly.
- Rapid steam formation. The moisture in the dough instantly turns to steam inside the round.
- Expansion. The steam expands and pushes the top and bottom layers of the dough apart.
- Setting the structure. The outer layers firm up quickly, trapping the pocket in place as the bread finishes baking.
For this to work, the dough must be rolled evenly, so the steam inflates the round uniformly instead of escaping through a thin spot. The baking surface must be truly hot, so the heat shock is fast and strong. And the dough must not be dried out or overbaked, so the surface stays flexible enough to stretch.
Instructions
In a large mixing bowl, combine the warm water, sugar and instant yeast. Stir gently and let stand for 5 minutes. If you are using instant yeast, you can proceed even if the mixture does not become very foamy. The water should be warm, not hot, since water that is too hot can kill the yeast.
Add the flour, salt and olive oil. Mix until a rough dough forms. Transfer the dough to a lightly floured surface and knead for 8 to 10 minutes, until smooth, soft and elastic. The dough should feel slightly tacky but should not stick excessively to your hands.
Place the dough in a lightly greased bowl and cover it with a clean kitchen towel or plastic wrap. Let it rise in a warm place for 45 to 60 minutes, or until approximately doubled in size.
Gently press the dough to release excess air. Divide it into 8 equal pieces and roll each into a smooth ball. Cover the dough balls with a towel and let them rest for 10 to 15 minutes. This makes them easier to roll without shrinking back.
Lightly flour your work surface and roll each dough ball into a round approximately 6 to 7 inches (15 to 18 cm) wide and about ⅛ inch (3 to 4 mm) thick. Try to keep the thickness even across the entire round. Avoid making the edges much thinner than the center, as this can prevent the pita from puffing evenly. Cover the rolled rounds with a clean towel while you prepare the oven.
Place a heavy baking tray, baking steel or pizza stone on the middle rack. Preheat the oven to 475°F (245°C) for at least 20 to 30 minutes so the baking surface becomes thoroughly hot. A very hot baking surface is the secret to creating the steam inside the dough that makes the pita puff into a pocket.
Carefully place one or two pita rounds on the hot baking surface, leaving enough room between them. Bake for approximately 2 to 3 minutes. Watch as the dough begins to inflate, forming a beautiful, airy pocket. Once fully puffed and lightly colored, remove the pita carefully with tongs. Avoid overbaking, as this can make the bread dry and crisp rather than soft. Repeat with the remaining rounds.
Immediately place the baked pita breads inside a clean kitchen towel and cover them. Stacking and covering the warm pitas traps a little moisture, helping keep their crusts soft and flexible.
Serve the pita breads warm while they are soft and fluffy. Carefully open the pocket with a knife and fill it with grilled chicken, falafel, hummus, cucumber, tomatoes, lettuce or your favorite fillings. You can also cut the pitas into wedges and serve with hummus, tzatziki or baba ganoush. 🫓✨